
 The Marshall Point Lighthouse is located near Port Clyde in the state of Maine. Although the grounds are usually closed at night, I was able to photograph the light while attending a workshop led by Lance Keimig who runs the Night Skye Workshops. The workshop was a part of the highly respected Maine Media Workshops and College, based out of Camden, Maine.
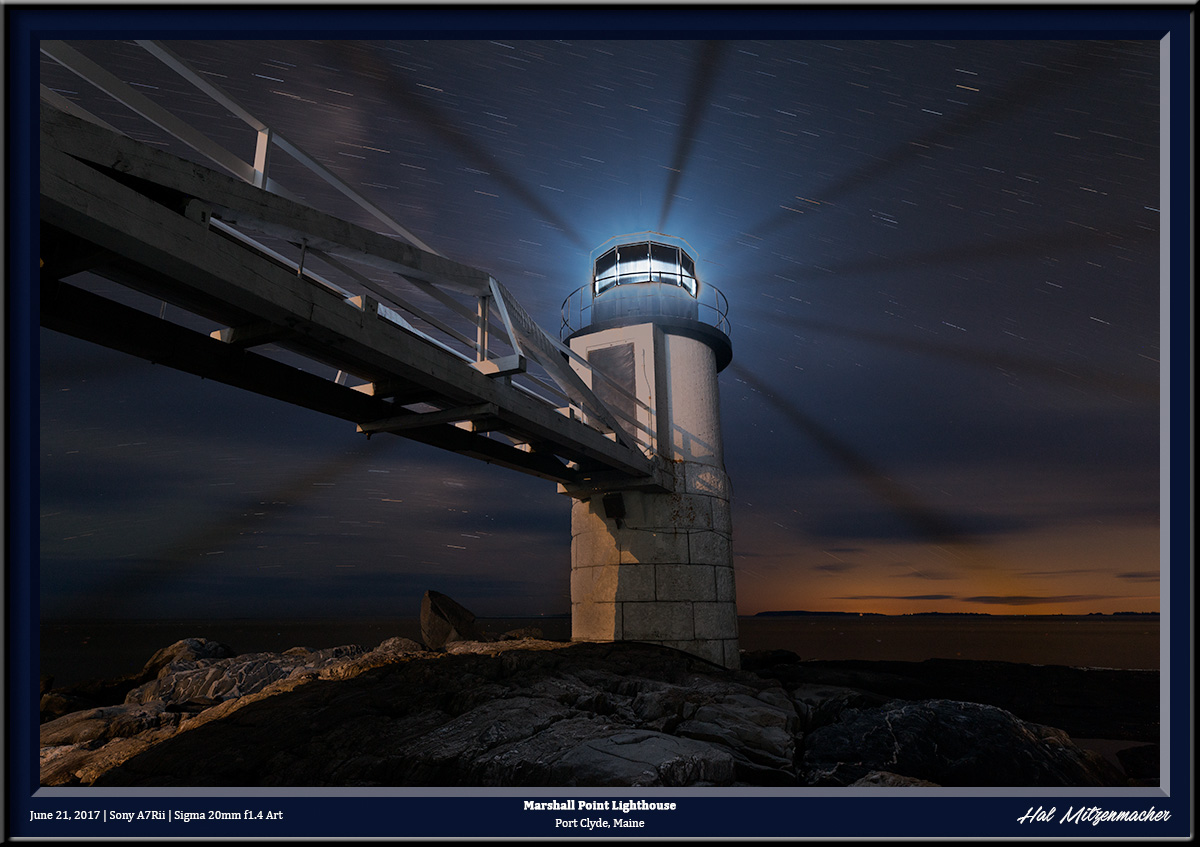
I was recently asked about the techniques used to create this image, so I thought I would post the answer here. This was created using a blend of two exposures. The first was a very long exposure of 8 minutes/f8/ISO 800. This exposure yielded the clean, noise-free overall image that also produced the star trails of a length I find pleasing to the eye.
While an exposure of 8 minutes produced a nice clean image, it also grossly overexposed the actual light at the fresnal itself. To correct this deficiency, I took a series of shorter exposures, this time judging the exposure of the fresnal itself. After several tries, I determined that an exposure of 30 seconds/f8/ISO 100 produced a good likeness of the fresnel portion of the light.
When it came time to construct the final image, I placed both the long, 8 minute exposure and the short, 30 second exposure into layers using Photoshop. From there it was a simple matter to blend the properly exposed fresnel into the overexposed fresnel of the long exposure.
Once the blending was accomplished, I used the power of Lumenzia (a luminosity masking plugin for Photoshop developed by Greg Benz) to do the final editing of the image until I achieved results that I felt was satisfactory.
The equipment used for this image: Sony A7Rii | Sigma 20mm f1.4 Art Series lens | MIOPS Smart Trigger | Benro Tripod | Flare Buster lens shade


“Outstanding”!!!! I see you shot this with the A7RM2, I am a student of yours following Bright Monitoring. I take shots both one regular and one Bright Monitoring (always a higher ISO for the same SS capture). But I find more noise with Bright Monitoring. Do you use the Bright Monitoring image or is it just for framing a capture?
I use the Bright Monitoring feature while composing AND shooting.
As I mention in my post Sony A7Rii Menu and Custom Key Settings for Night Photography – “What exactly is Bright Monitoring? The name might suggest that Bright Monitoring simply boosts the brightness setting of the display, but this is incorrect. Bright Monitoring actually over-samples the usual Live View display, but at a much slower refresh rate. When Bright Monitoring is used in dark conditions (as in night photography), the display builds up the brightness of the image displayed on the screen by accumulating photons over a longer period of time than usual, offering a Live View image that seems to “see in the darkâ€. Bright Monitoring is highly effective for composing the image in a dark environment.”
I would be interested in seeing your results, as I have not seen any difference in actual exposures when using the Bright Monitoring feature as opposed to not using it, but I will test this for myself on my next photographic outing.
I am still playing with post processing. But a final image whether with Bright Monitoring on or off can be had. I like to do Aperture mode but adjusting ISO for my desired SS!! So I get do a shot at regular mode then turn on Bright Monitoring but have to go from say ISO 640 to 1000 to get the same SS which is more noise. I am used to the A7S and having to view a shot and adjust my histogram but it handles noise better. But in your post you also state about ISO invariance. And not going as high as you did, just increasing exposure by a stop I get the same outcome but with less noise to deal with.
Kinda like this, I like to do sunsets/rises with some shrimp boats in the foreground. I used to brush the boats with increased exposure and lowered saturation. But found just increasing exposure to make whites white and the a graduated filter lowering exposure brought back the stunning colors of the sky without using external filters or the in camera app.
But my testing was done on a very foggy night so colors and stars were somewhat not perfect. Also just for grins I did modes night, neutral, landscape, clear (for the fog) in both regular and Bright Monitoring but using the Milky Way Temp of 3800 (for its color). But as time went on the fog got worse so i had to stop. A fine June clear night would be good because the MW shows in the Blue Hour after sunset till the Blue Hour at sunrise (an all nighter).
And staying with the NPF rules for SS for lens and camera. I love the Sony SEL1224G, Yes f/4 BUT most faster lenses require f/4 anyway to get rid of flying saucer stars.
I use the PhotoPills App for the times and figuring the declination of my camera aim.
Also with good study you will find about 15 days a month without the moon up to shoot the MW.