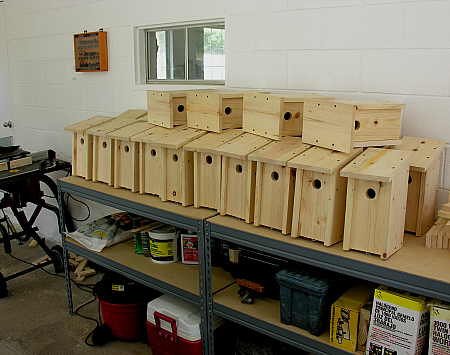
Perhaps you recall from a previous post that I intend to establish a bluebird nesting box trail along some of the trails on our property. Since that posting, I have made substantial progress in my commitment to build 100 bluebird nesting boxes. As you can see from the photograph above, I have completed 25 of the boxes. You can also see that the boxes take up a good deal of room in the shop, which is why I decided to build the boxes 25 at a time.
In all crafts, the rule of thumb is to measure twice, and cut once, thus avoiding errors and material wastage.  In the design of the nesting box that I am using, there are 30 specific measurements that are required in order to build the box. The measure twice rule thus makes 60 measurements per box.   Since I am building 100 boxes, a total of 6000 accurate measurements are required. UNLESS…..
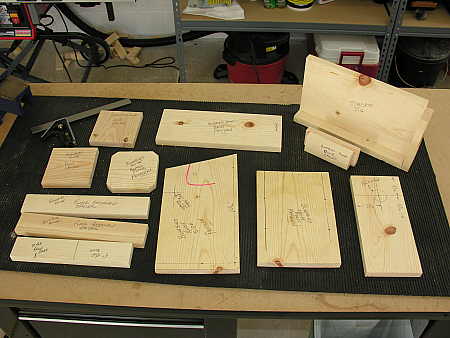
UNLESS I were to spend a little bit of time up front to build an accurate set of templates and jigs for this project, which is what you see in the photograph above. After the initial templates are built, the tape measures and rulers can be put aside, and the parts for the 100 bluebird nesting boxes can be build with complete accuracy and no wastage.
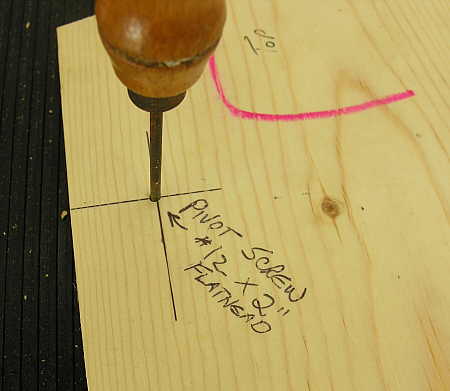
By providing holes in the templates where all the screw pilot holes need to be located, it is a simple matter to use an awl (shown above) to mark accurate drilling locations for each hole.
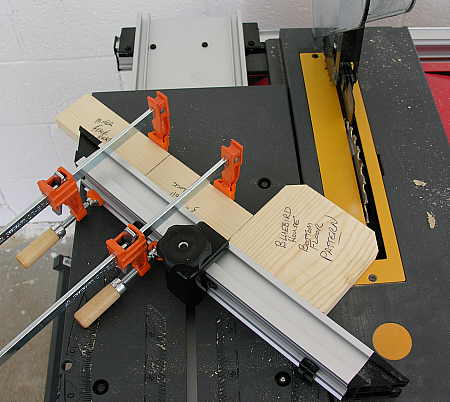
Besides cutting and drilling templates, I made and labeled a complete set of jigs and stop blocks to use on the table saw, one of which is shown in the photograph above. Now, without any measuring at all, I can easily set up the machine to make the accurate and uniform cuts I need for this project.
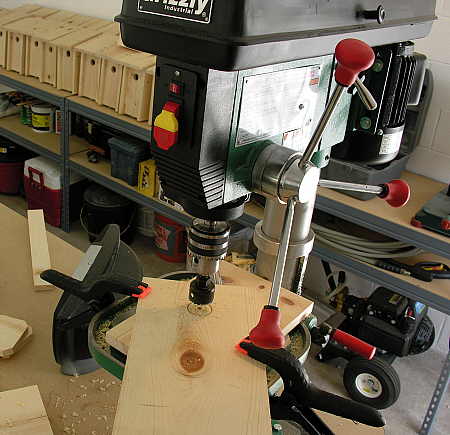
Building the nesting boxes in batches allows me to produce all the parts I require for the project with a minimum of machine set up time. For example, in the photograph above you can see that I am using a 1 1/2″ diameter hole saw to cut the entry hole for the nesting box. Using this hole saw requires the drill press to be set to a slower speed than for the other drilling on the boxes. Instead of changing the machine speed (which involves realigning two drive belts) repeatedly for each nesting box, I can simply set the machine up once and drill all the 1 1/2″ holes at the same time.
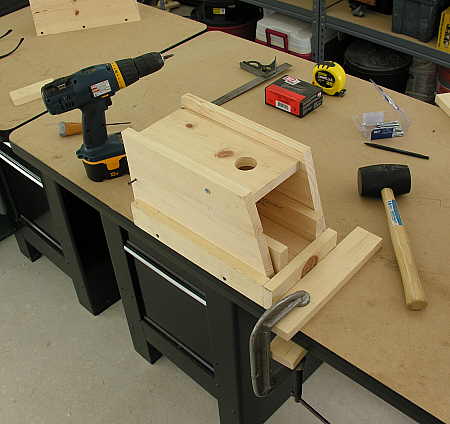
The assembly phase of the project is made simple by the use of a couple of assembly jigs that I fashioned for this project. By building reusable positioning blocks and jigs, I can position parts accurately for fastening with screws, knowing that each screw is located exactly where I want it to be.
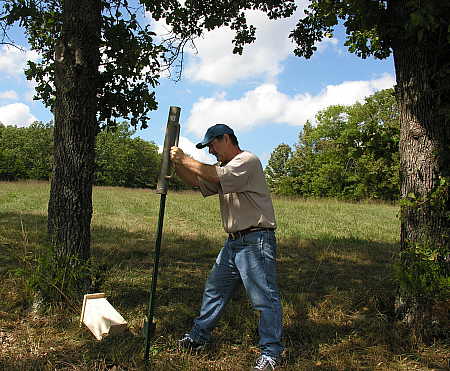
The completed nesting boxes are now ready to be installed in the field. I think steel t-posts are the quickest and most durable method for mounting the nesting boxes. The photo above shows how simple it is to put a t-post into the ground, using a t-post driver made for just this job.
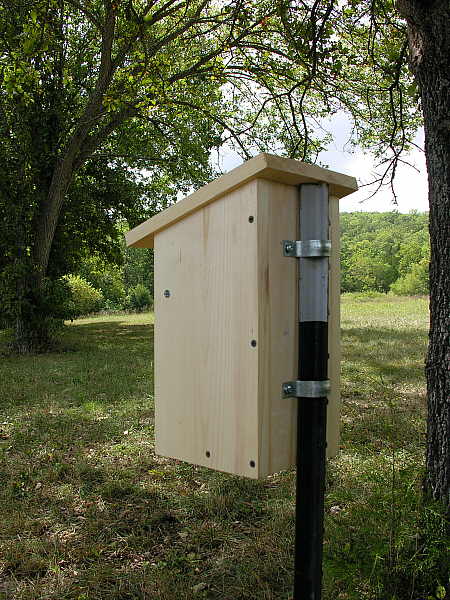
After the t-post is in the ground, it is time to mount the nesting box on top of it. In the photo above you can see that two 1 1/4″ conduit straps work as perfect fasteners for the nesting boxes to be secured to the t-posts.
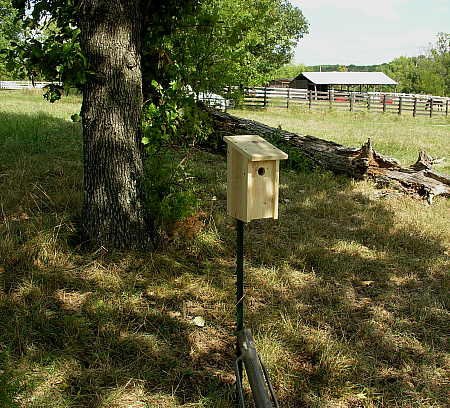
And here is the finished product. Now, just 99 more to go ……

Perhaps you recall from a previous post that I intend to establish a bluebird nesting box trail along some of the trails on our property. Since that posting, I have made substantial progress in my commitment to build 100 bluebird nesting boxes. As you can see from the photograph above, I have completed 25 of the boxes. You can also see that the boxes take up a good deal of room in the shop, which is why I decided to build the boxes 25 at a time.
In all crafts, the rule of thumb is to measure twice, and cut once, thus avoiding errors and material wastage.  In the design of the nesting box that I am using, there are 30 specific measurements that are required in order to build the box. The measure twice rule thus makes 60 measurements per box.   Since I am building 100 boxes, a total of 6000 accurate measurements are required. UNLESS…..
UNLESS I were to spend a little bit of time up front to build an accurate set of templates and jigs for this project, which is what you see in the photograph above. After the initial templates are built, the tape measures and rulers can be put aside, and the parts for the 100 bluebird nesting boxes can be build with complete accuracy and no wastage.
By providing holes in the templates where all the screw pilot holes need to be located, it is a simple matter to use an awl (shown above) to mark accurate drilling locations for each hole.
Besides cutting and drilling templates, I made and labeled a complete set of jigs and stop blocks to use on the table saw, one of which is shown in the photograph above. Now, without any measuring at all, I can easily set up the machine to make the accurate and uniform cuts I need for this project.
Building the nesting boxes in batches allows me to produce all the parts I require for the project with a minimum of machine set up time. For example, in the photograph above you can see that I am using a 1 1/2″ diameter hole saw to cut the entry hole for the nesting box. Using this hole saw requires the drill press to be set to a slower speed than for the other drilling on the boxes. Instead of changing the machine speed (which involves realigning two drive belts) repeatedly for each nesting box, I can simply set the machine up once and drill all the 1 1/2″ holes at the same time.
The assembly phase of the project is made simple by the use of a couple of assembly jigs that I fashioned for this project. By building reusable positioning blocks and jigs, I can position parts accurately for fastening with screws, knowing that each screw is located exactly where I want it to be.
The completed nesting boxes are now ready to be installed in the field. I think steel t-posts are the quickest and most durable method for mounting the nesting boxes. The photo above shows how simple it is to put a t-post into the ground, using a t-post driver made for just this job.
After the t-post is in the ground, it is time to mount the nesting box on top of it. In the photo above you can see that two 1 1/4″ conduit straps work as perfect fasteners for the nesting boxes to be secured to the t-posts.
And here is the finished product. Now, just 99 more to go ……
{"id":1029,"date":"2007-09-23T19:06:51","date_gmt":"2007-09-24T00:06:51","guid":{"rendered":"http:\/\/www.mitzenmacher.net\/blog\/?p=1029"},"modified":"2007-09-23T19:06:51","modified_gmt":"2007-09-24T00:06:51","slug":"bluebird-trail-part-ii","status":"publish","type":"post","link":"https:\/\/www.mitzenmacher.net\/blog\/?p=1029","title":{"rendered":"Bluebird Trail – Part II"},"content":{"rendered":"","protected":false},"excerpt":{"rendered":"","protected":false},"author":1,"featured_media":0,"comment_status":"open","ping_status":"open","sticky":false,"template":"","format":"standard","meta":{"_jetpack_newsletter_access":"","_jetpack_dont_email_post_to_subs":false,"_jetpack_newsletter_tier_id":0,"_jetpack_memberships_contains_paywalled_content":false,"_jetpack_feature_clip_id":0,"_jetpack_memberships_contains_paid_content":false,"footnotes":"","jetpack_publicize_message":"","jetpack_publicize_feature_enabled":true,"jetpack_social_post_already_shared":false,"jetpack_social_options":{"image_generator_settings":{"template":"highway","default_image_id":0,"font":"","enabled":false},"version":2},"jetpack_post_was_ever_published":false},"categories":[5],"tags":[],"class_list":["post-1029","post","type-post","status-publish","format-standard","hentry","category-ranchers-ramblins"],"jetpack_publicize_connections":[],"jetpack_sharing_enabled":true,"jetpack_shortlink":"https:\/\/wp.me\/p8xyVp-gB","jetpack_likes_enabled":true,"jetpack_featured_media_url":"","_links":{"self":[{"href":"https:\/\/www.mitzenmacher.net\/blog\/index.php?rest_route=\/wp\/v2\/posts\/1029","targetHints":{"allow":["GET"]}}],"collection":[{"href":"https:\/\/www.mitzenmacher.net\/blog\/index.php?rest_route=\/wp\/v2\/posts"}],"about":[{"href":"https:\/\/www.mitzenmacher.net\/blog\/index.php?rest_route=\/wp\/v2\/types\/post"}],"author":[{"embeddable":true,"href":"https:\/\/www.mitzenmacher.net\/blog\/index.php?rest_route=\/wp\/v2\/users\/1"}],"replies":[{"embeddable":true,"href":"https:\/\/www.mitzenmacher.net\/blog\/index.php?rest_route=%2Fwp%2Fv2%2Fcomments&post=1029"}],"version-history":[{"count":0,"href":"https:\/\/www.mitzenmacher.net\/blog\/index.php?rest_route=\/wp\/v2\/posts\/1029\/revisions"}],"wp:attachment":[{"href":"https:\/\/www.mitzenmacher.net\/blog\/index.php?rest_route=%2Fwp%2Fv2%2Fmedia&parent=1029"}],"wp:term":[{"taxonomy":"category","embeddable":true,"href":"https:\/\/www.mitzenmacher.net\/blog\/index.php?rest_route=%2Fwp%2Fv2%2Fcategories&post=1029"},{"taxonomy":"post_tag","embeddable":true,"href":"https:\/\/www.mitzenmacher.net\/blog\/index.php?rest_route=%2Fwp%2Fv2%2Ftags&post=1029"}],"curies":[{"name":"wp","href":"https:\/\/api.w.org\/{rel}","templated":true}]}}