Now that the Fall season is rapidly approaching, it is time to get the Bush Hog rotary cutter into shape, as there are many acres to be cut in the upcoming months. After greasing and inspecting the various components of the rotary cutter, the most common maintenance task is to sharpen the blades of the cutter.Â
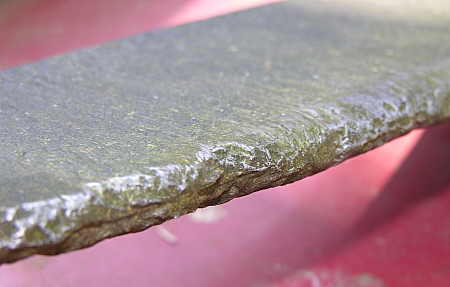
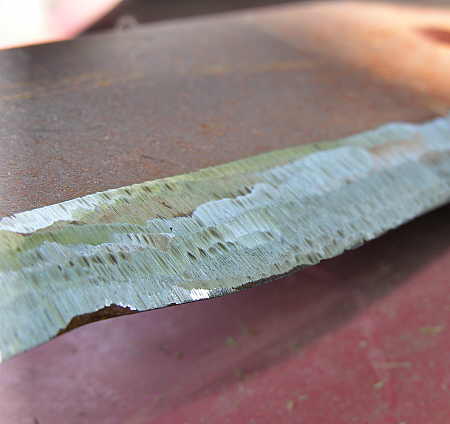
During the course of cutting pastures and fields the blades of the rotary cutter will become worn and dull, primarily from impact with rocks (see previous post entitled Dang Rocks!).   You can see what a worn rotary cutter blade edge looks like in the following photograph.
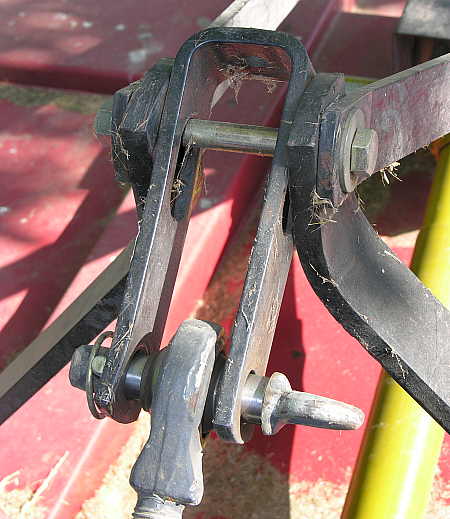
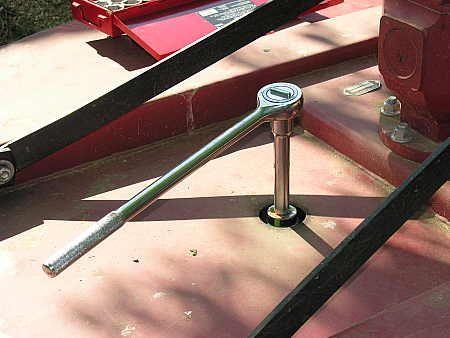
Before working underneath the rotary cutter, I would like you to take a look at the upper link assembly of the three-point hitch, which is the means of attaching the cutter to the tractor. At the top of the link assembly you can see a bolt which acts as a pivot for the upper link arm. This bolt is prone to breakage. When it breaks, the entire rear portion of the rotary cutter comes crashing down to the ground. If you happen to be underneath this rotary cutter (which weighs 1247 pounds) when this bolt snaps, it would certainly ruin your day!
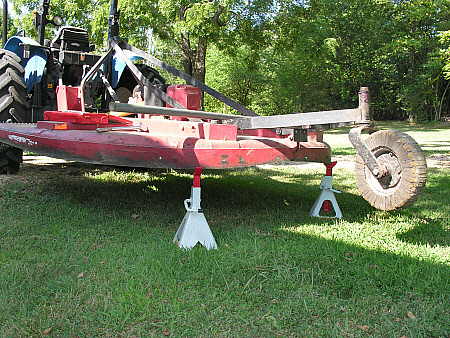
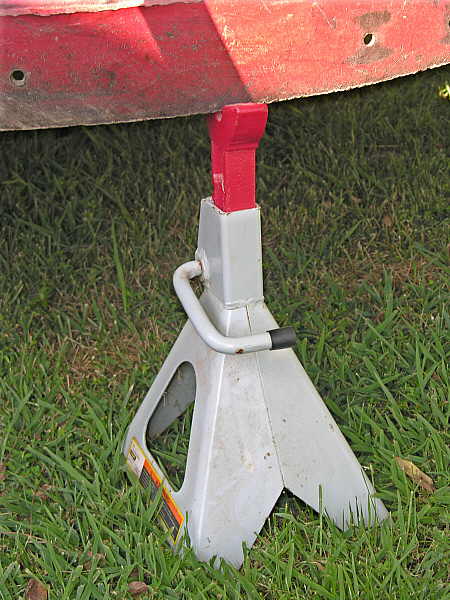
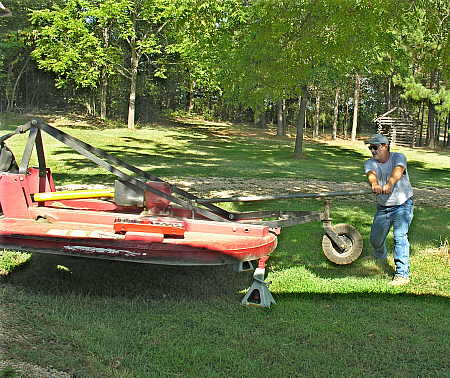
To prevent the possibility of an accident occurring when working under or around the rotary cutter, I use several heavy-duty axle stands to support the implement, as shown in the photograph below.
Once the cutter is properly braced, the next step is to remove the two blades from the flywheel. In the next photograph you can see that the manufacturer has provided an access hole for the blade bolts at the top of the cutter. This is a sturdy and massive 1-3/4″ bolt, which requires the use of a heavy duty socket set.
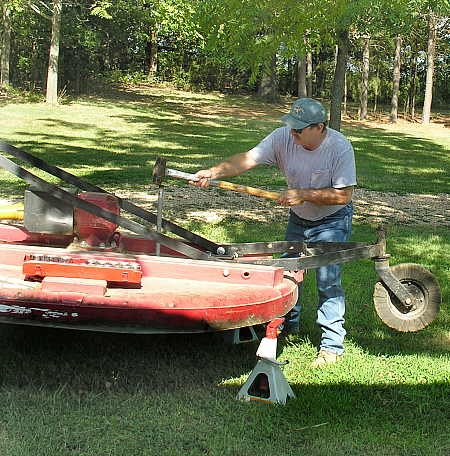
In order to even begin to budge this bolt, brains must take precedence over brawn, and so you see me resort to the use of a “cheater” bar to coax the retainer bolt into submission.
Eventually, the nut for this large retainer bolt will loosen and come off, but the bolt itself will be firmly stuck in the flywheel of the rotary cutter. At this point, a sledge hammer and a length of galvanized pipe can usually persuade the stubborn bolt to part ways with the flywheel.
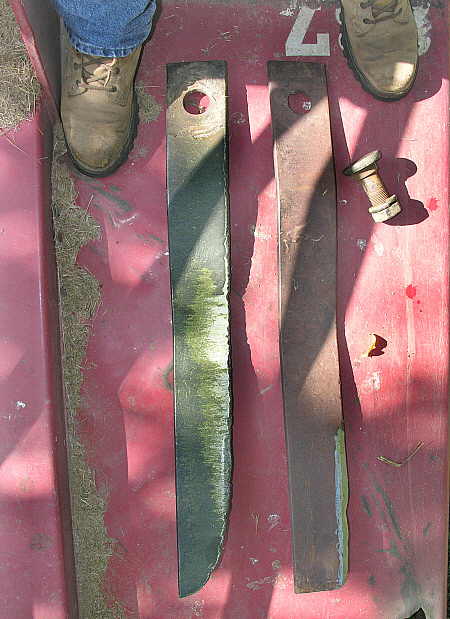
The photograph below gives a good indication of the size of the rotary cutter blades. Each blade is 5/16″ thick and weighs in excess of 20 pounds. The blade on the left is the blade that has just been removed from the cutter, and the blade on the right is a sharpened replacement blade.
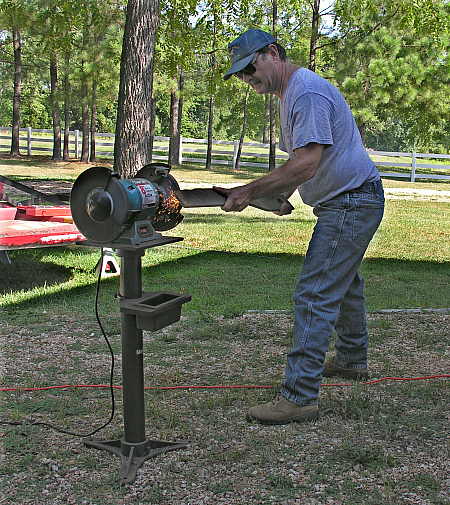
Sharpening the blades is a simple matter of running the cutting edge along the surface of a grinding wheel, as shown below.
While it is not necessary for the two blades on the opposing sides of the flywheel to be exactly equal in weight after sharpening, they must be reasonably close to avoid unnecessary vibration and premature wear to the rotary cutter gearbox. To achieve this result, I use a simple self-devised method. I hang each blade from the end of a bungee cord and measure the amount of stretch that the bungee cord undergoes. When the cord stretches an equal distance for both blades, than I know that they are approximately the same weight.
The photograph above shows the sharp edge that is obtained from grinding the rotary cutter blades. It is not as clean looking and smooth as a kitchen knife, to be sure, but it is now plenty sharp enough to tackle the grasses, weeds and brush in the pastures and fields scattered around our property.
Now that the blades are reasonably sharp and balanced, the only thing left to do is re-assemble the blades onto the flywheel of the rotary cutter. This is a simple task, however it is now that you are required to venture underneath the implement to install the blades. I always double-check the axle stands before sliding underneath the cutter, and as the photo below shows, I make it a point to coat the bolt with a good anti-seize compound before re-assembly.

Now that I have finished sharpening the rotary cutter blades, it’s time to fuel the tractor and go bush-hog some fields. Adios, amigos.

Now that the Fall season is rapidly approaching, it is time to get the Bush Hog rotary cutter into shape, as there are many acres to be cut in the upcoming months. After greasing and inspecting the various components of the rotary cutter, the most common maintenance task is to sharpen the blades of the cutter.Â
During the course of cutting pastures and fields the blades of the rotary cutter will become worn and dull, primarily from impact with rocks (see previous post entitled Dang Rocks!).   You can see what a worn rotary cutter blade edge looks like in the following photograph.
Before working underneath the rotary cutter, I would like you to take a look at the upper link assembly of the three-point hitch, which is the means of attaching the cutter to the tractor. At the top of the link assembly you can see a bolt which acts as a pivot for the upper link arm. This bolt is prone to breakage. When it breaks, the entire rear portion of the rotary cutter comes crashing down to the ground. If you happen to be underneath this rotary cutter (which weighs 1247 pounds) when this bolt snaps, it would certainly ruin your day!
To prevent the possibility of an accident occurring when working under or around the rotary cutter, I use several heavy-duty axle stands to support the implement, as shown in the photograph below.
Once the cutter is properly braced, the next step is to remove the two blades from the flywheel. In the next photograph you can see that the manufacturer has provided an access hole for the blade bolts at the top of the cutter. This is a sturdy and massive 1-3/4″ bolt, which requires the use of a heavy duty socket set.
In order to even begin to budge this bolt, brains must take precedence over brawn, and so you see me resort to the use of a “cheater” bar to coax the retainer bolt into submission.
Eventually, the nut for this large retainer bolt will loosen and come off, but the bolt itself will be firmly stuck in the flywheel of the rotary cutter. At this point, a sledge hammer and a length of galvanized pipe can usually persuade the stubborn bolt to part ways with the flywheel.
The photograph below gives a good indication of the size of the rotary cutter blades. Each blade is 5/16″ thick and weighs in excess of 20 pounds. The blade on the left is the blade that has just been removed from the cutter, and the blade on the right is a sharpened replacement blade.
Sharpening the blades is a simple matter of running the cutting edge along the surface of a grinding wheel, as shown below.
Â
While it is not necessary for the two blades on the opposing sides of the flywheel to be exactly equal in weight after sharpening, they must be reasonably close to avoid unnecessary vibration and premature wear to the rotary cutter gearbox. To achieve this result, I use a simple self-devised method. I hang each blade from the end of a bungee cord and measure the amount of stretch that the bungee cord undergoes. When the cord stretches an equal distance for both blades, than I know that they are approximately the same weight.
The photograph above shows the sharp edge that is obtained from grinding the rotary cutter blades. It is not as clean looking and smooth as a kitchen knife, to be sure, but it is now plenty sharp enough to tackle the grasses, weeds and brush in the pastures and fields scattered around our property.
Now that the blades are reasonably sharp and balanced, the only thing left to do is re-assemble the blades onto the flywheel of the rotary cutter. This is a simple task, however it is now that you are required to venture underneath the implement to install the blades. I always double-check the axle stands before sliding underneath the cutter, and as the photo below shows, I make it a point to coat the bolt with a good anti-seize compound before re-assembly.
Now that I have finished sharpening the rotary cutter blades, it’s time to fuel the tractor and go bush-hog some fields. Adios, amigos.
{"id":504,"date":"2006-08-26T10:45:59","date_gmt":"2006-08-26T15:45:59","guid":{"rendered":"http:\/\/www.mitzenmacher.net\/blog\/?p=504"},"modified":"2006-08-26T10:45:59","modified_gmt":"2006-08-26T15:45:59","slug":"equipment-maintenance-chores","status":"publish","type":"post","link":"https:\/\/www.mitzenmacher.net\/blog\/?p=504","title":{"rendered":"Equipment Maintenance Chores"},"content":{"rendered":"","protected":false},"excerpt":{"rendered":"","protected":false},"author":1,"featured_media":0,"comment_status":"open","ping_status":"open","sticky":false,"template":"","format":"standard","meta":{"_jetpack_newsletter_access":"","_jetpack_dont_email_post_to_subs":false,"_jetpack_newsletter_tier_id":0,"_jetpack_memberships_contains_paywalled_content":false,"_jetpack_feature_clip_id":0,"_jetpack_memberships_contains_paid_content":false,"footnotes":"","jetpack_publicize_message":"","jetpack_publicize_feature_enabled":true,"jetpack_social_post_already_shared":false,"jetpack_social_options":{"image_generator_settings":{"template":"highway","default_image_id":0,"font":"","enabled":false},"version":2},"jetpack_post_was_ever_published":false},"categories":[5],"tags":[],"class_list":["post-504","post","type-post","status-publish","format-standard","hentry","category-ranchers-ramblins"],"jetpack_publicize_connections":[],"jetpack_featured_media_url":"","jetpack_sharing_enabled":true,"jetpack_shortlink":"https:\/\/wp.me\/p8xyVp-88","jetpack_likes_enabled":true,"_links":{"self":[{"href":"https:\/\/www.mitzenmacher.net\/blog\/index.php?rest_route=\/wp\/v2\/posts\/504","targetHints":{"allow":["GET"]}}],"collection":[{"href":"https:\/\/www.mitzenmacher.net\/blog\/index.php?rest_route=\/wp\/v2\/posts"}],"about":[{"href":"https:\/\/www.mitzenmacher.net\/blog\/index.php?rest_route=\/wp\/v2\/types\/post"}],"author":[{"embeddable":true,"href":"https:\/\/www.mitzenmacher.net\/blog\/index.php?rest_route=\/wp\/v2\/users\/1"}],"replies":[{"embeddable":true,"href":"https:\/\/www.mitzenmacher.net\/blog\/index.php?rest_route=%2Fwp%2Fv2%2Fcomments&post=504"}],"version-history":[{"count":0,"href":"https:\/\/www.mitzenmacher.net\/blog\/index.php?rest_route=\/wp\/v2\/posts\/504\/revisions"}],"wp:attachment":[{"href":"https:\/\/www.mitzenmacher.net\/blog\/index.php?rest_route=%2Fwp%2Fv2%2Fmedia&parent=504"}],"wp:term":[{"taxonomy":"category","embeddable":true,"href":"https:\/\/www.mitzenmacher.net\/blog\/index.php?rest_route=%2Fwp%2Fv2%2Fcategories&post=504"},{"taxonomy":"post_tag","embeddable":true,"href":"https:\/\/www.mitzenmacher.net\/blog\/index.php?rest_route=%2Fwp%2Fv2%2Ftags&post=504"}],"curies":[{"name":"wp","href":"https:\/\/api.w.org\/{rel}","templated":true}]}}