
To my knowledge, there is no better way to reduce or eliminate high ISO random noise in a night sky image than to align and stack multiple exposures and apply noise reduction through some form of median stacking.  Having said that, I would like to reduce high ISO sky noise at times when I didn’t take multiple sky exposures, for whatever reason. I have used the noise reduction tools in Photoshop, Lightroom and NIK Dfine, and (in my hands, at least) found the results from each so similar that I would default to Adobe for noise reduction, either in Lightroom or Photoshop.
In re-editing the photo above, I thought it would be fun to experiment with a possible noise reduction technique that had been bouncing around in my head for a few months. Here is the gist of what I wanted to accomplish.
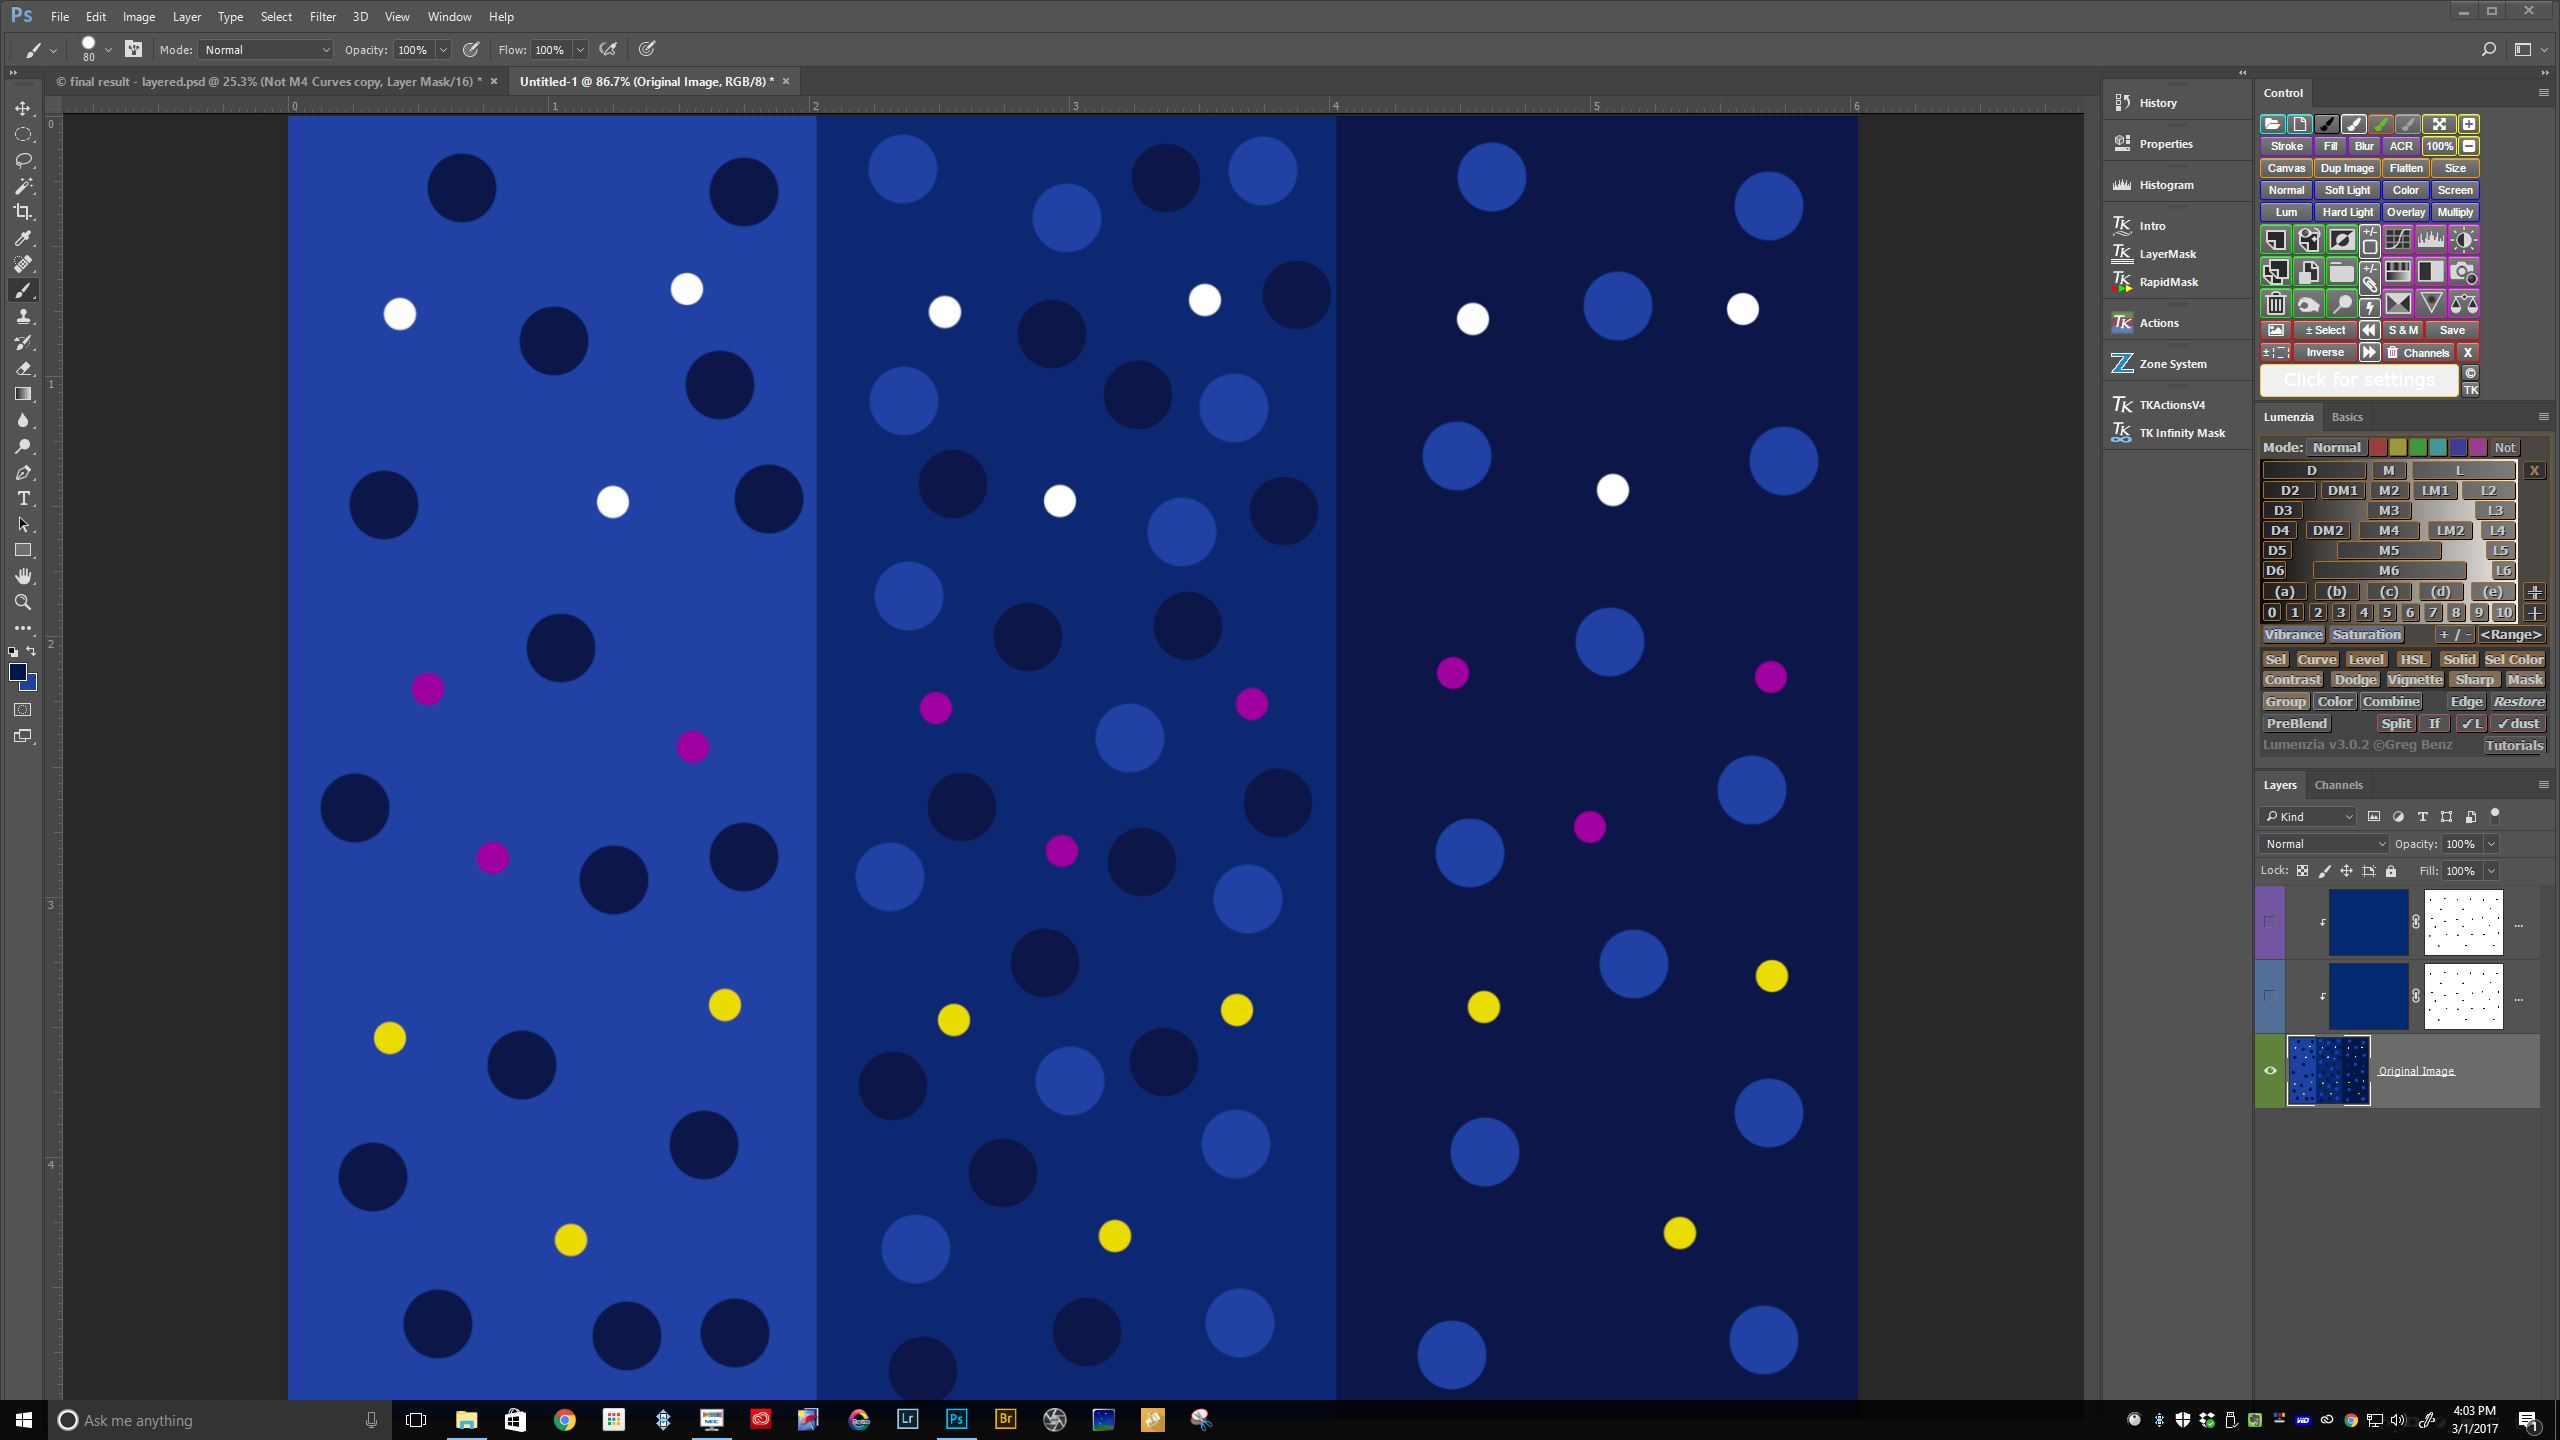
Suppose the small white, yellow and magenta dots represent the stars in the sky. Now imagine that the three vertical bars (light blue, medium blue and dark blue) represent the range of tones comprising the noise.
As the first step I created a luminosity mask to mask out the “stars”.
The second step is to create a solid fill layer (sampled to the medium blue bar), and set the blending mode to lighten. Since I have set this as a clipping mask, the “stars” are unaffected. Notice that the dark blue dots and dark blue vertical bar have disappeared.
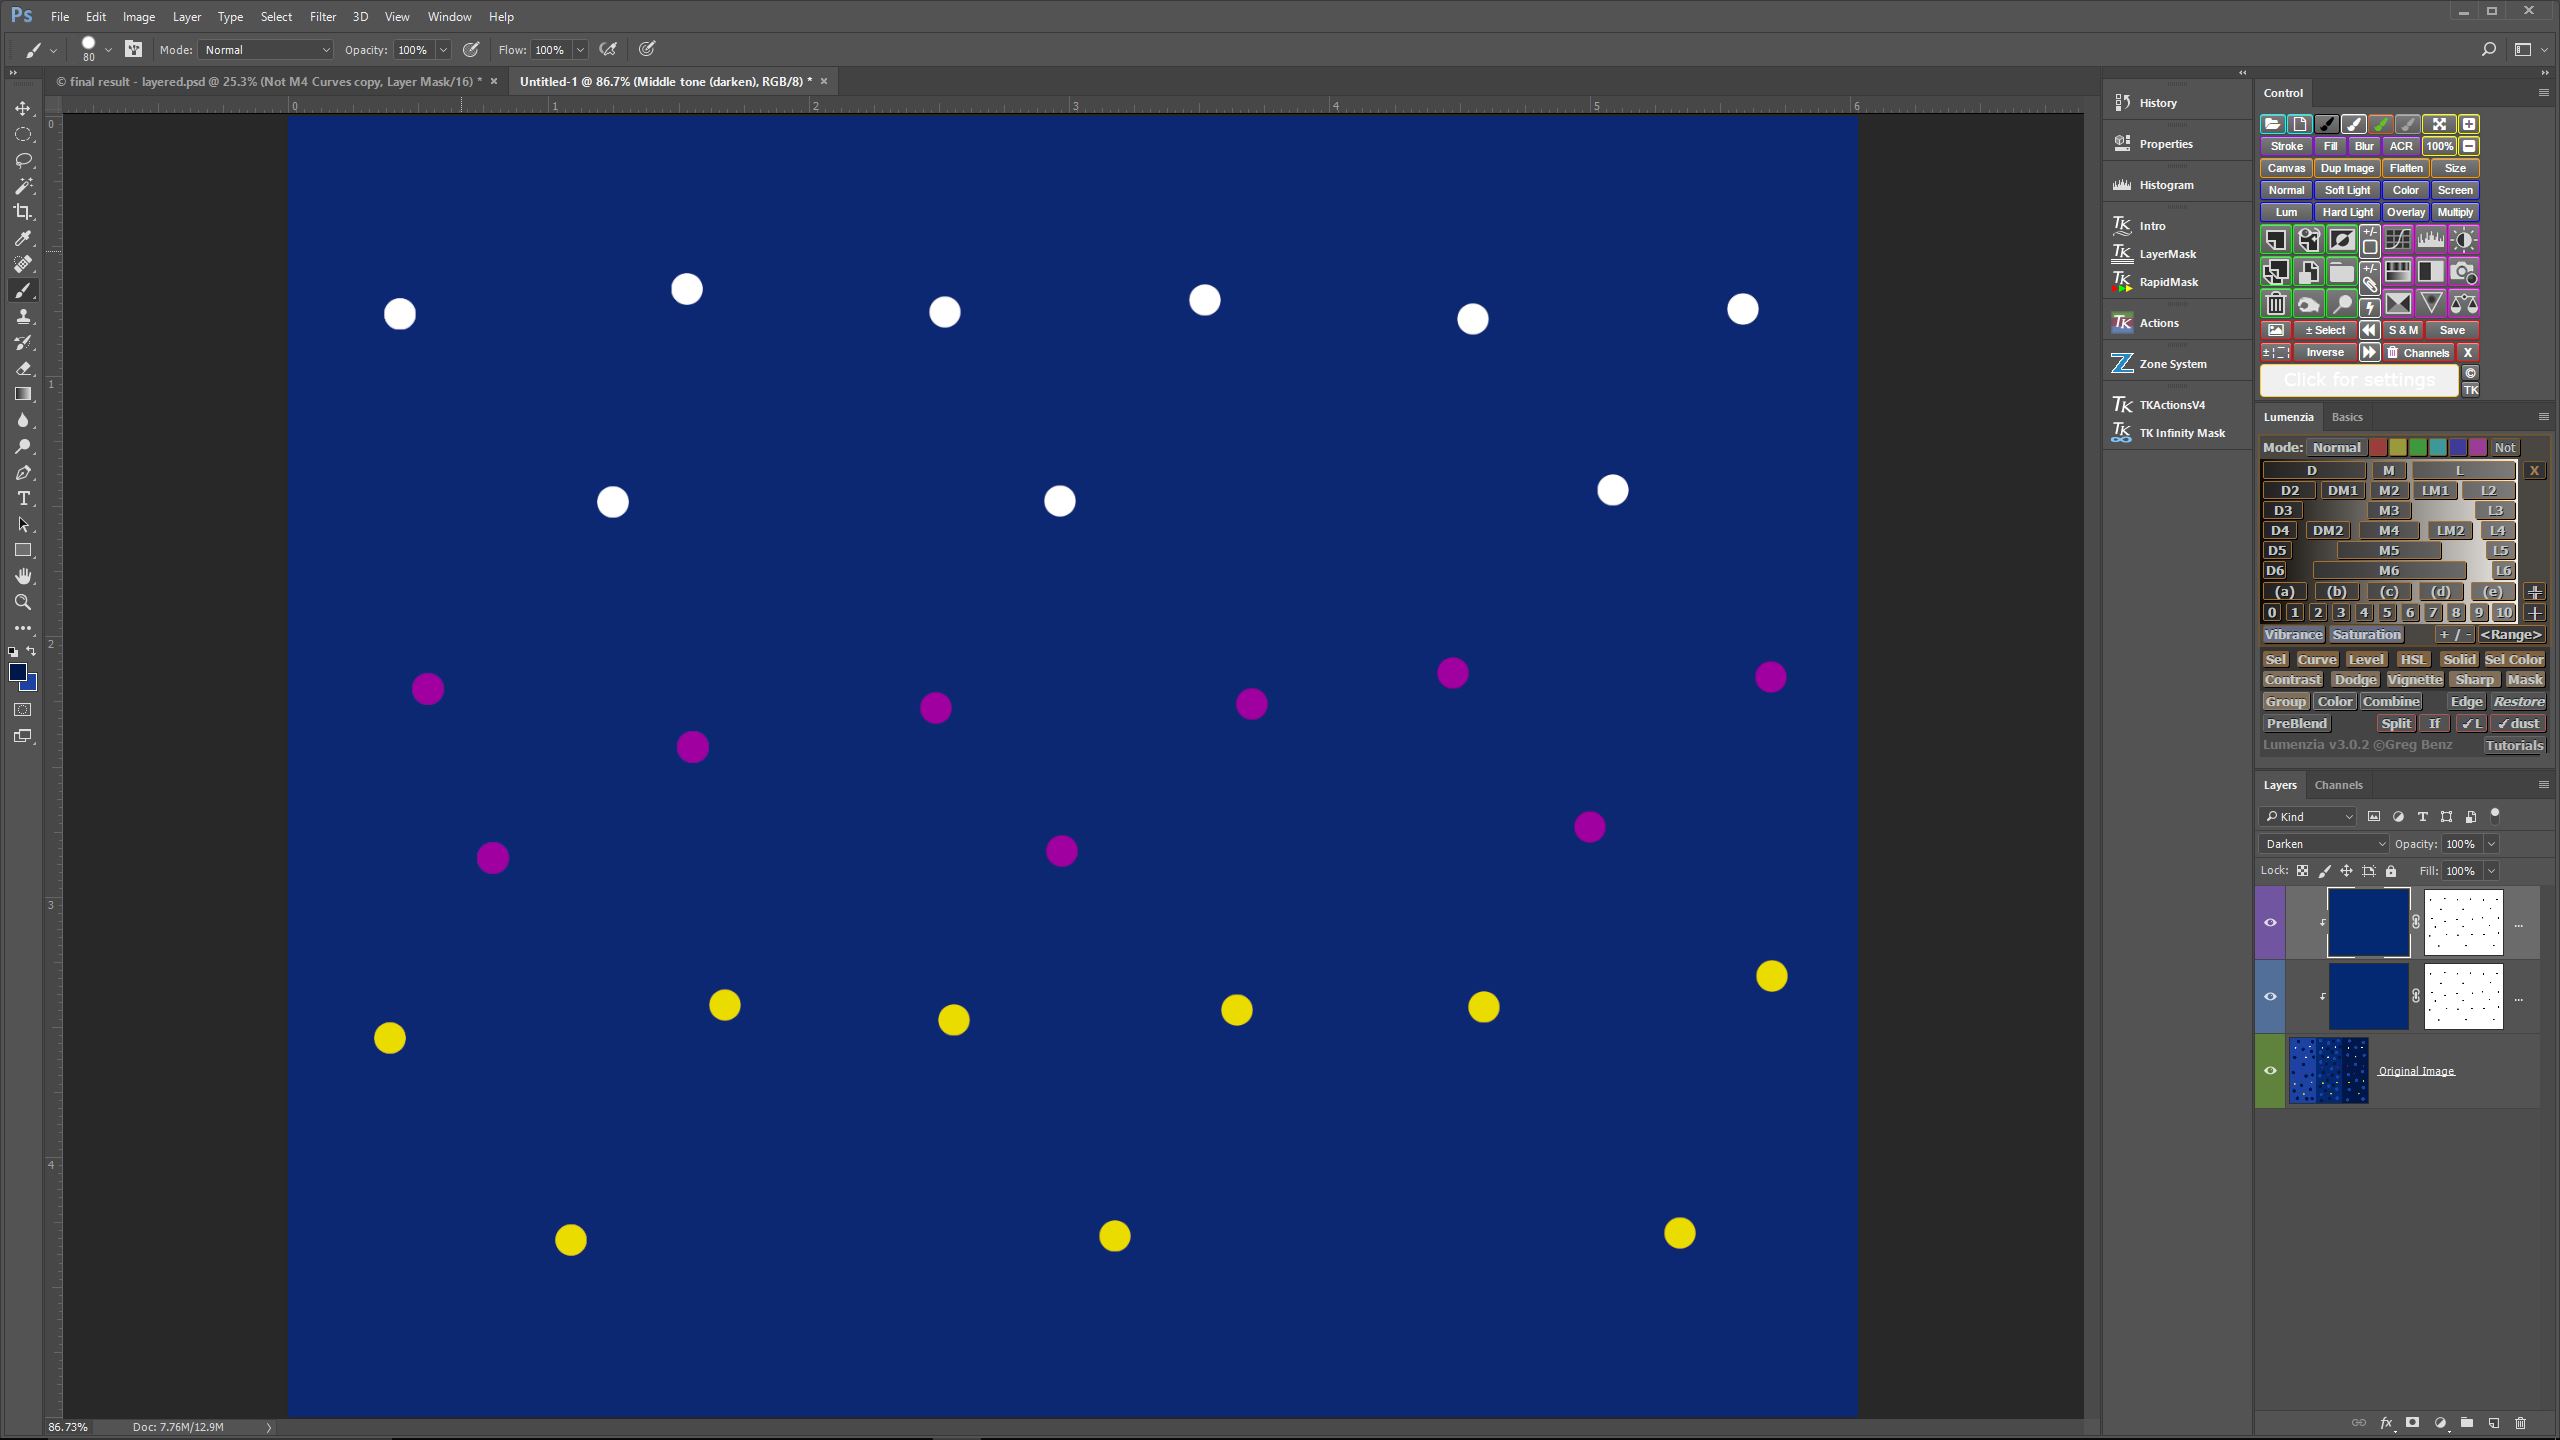
In this third step I have created another fill layer sampled to the same medium blue as before, but set the blending mode to darken. I have also set this as a clipping mask. Notice that the light blue dots and light blue vertical bar have disappeared. Â Notice also, however, how flat the “sky” background has become without the “noise” to provide texture.
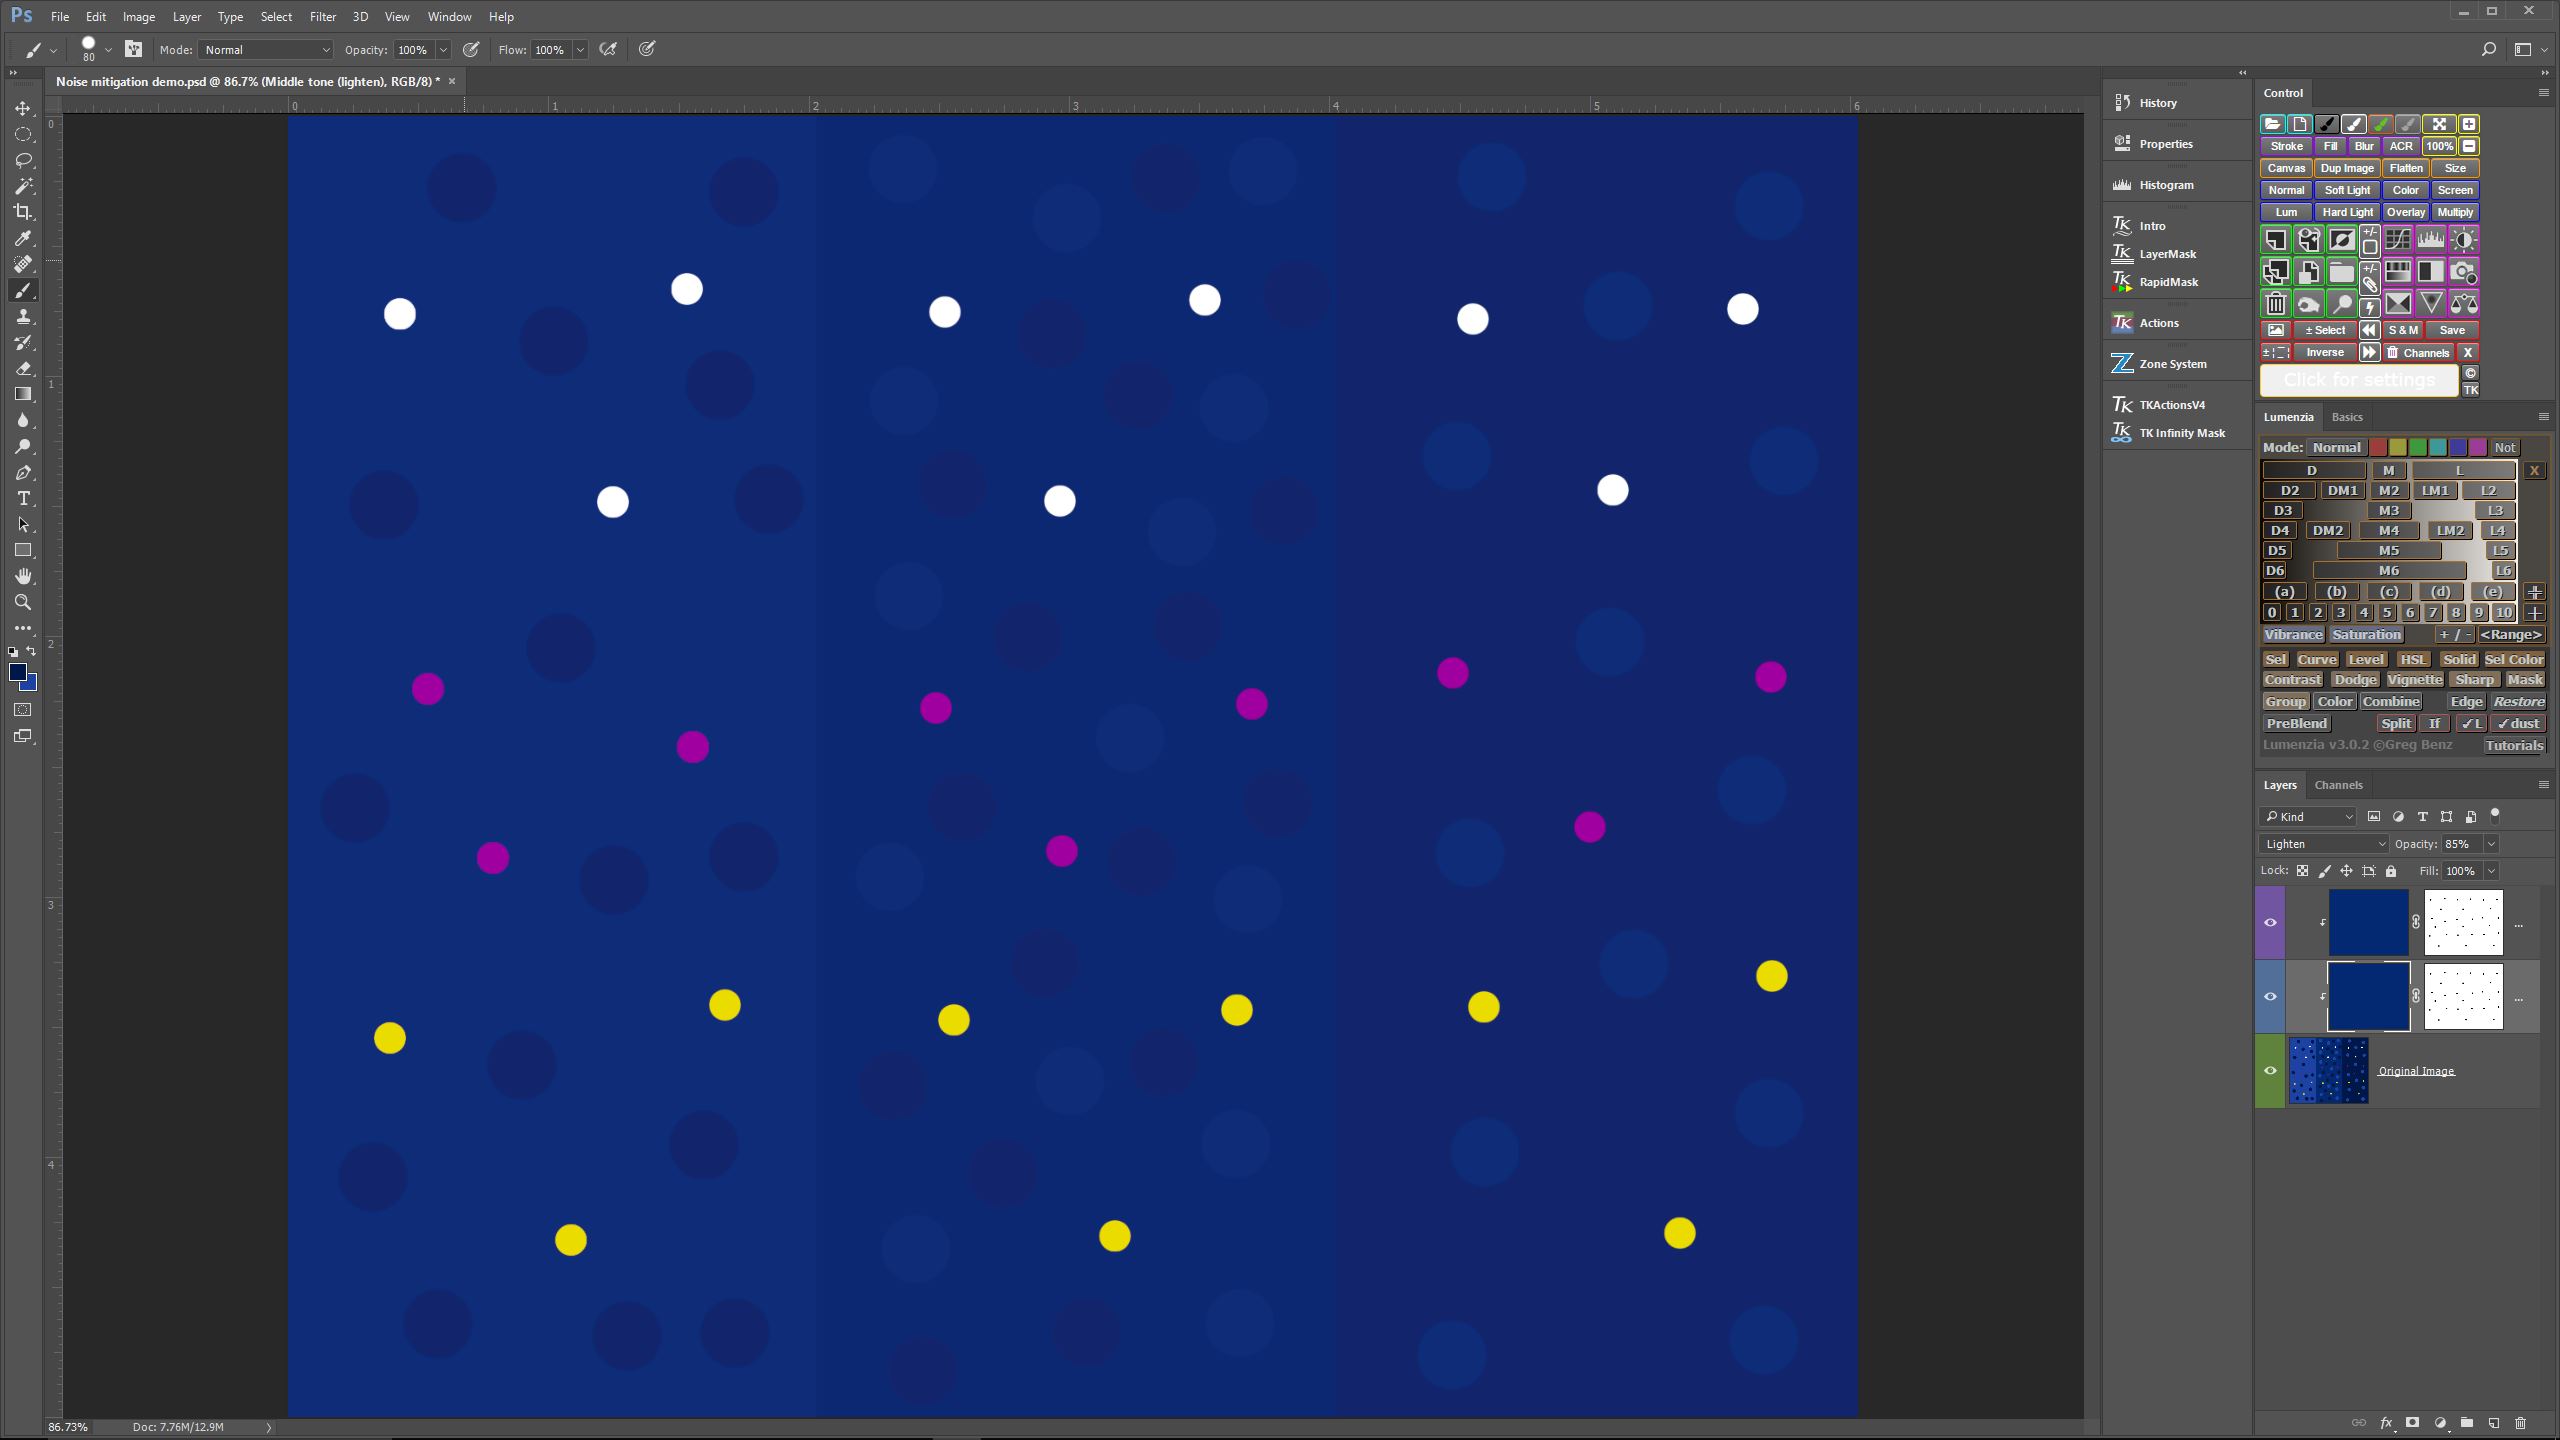
In this fourth step I reduced the opacity of each of the two fill layers to 85%, just enough to allow some of the “noise” tones back into the image, so that it doesn’t look quite so artificial.
Applying this technique to a somewhat noisy image of a pinpoint star field, I came up with results that looked pretty good for a first attempt. I posted this sample on Facebook to see what others might think, and got some positive, but mixed reactions. I decided to prepare a blog post to detail what I was working on for further comment, and it started like this:

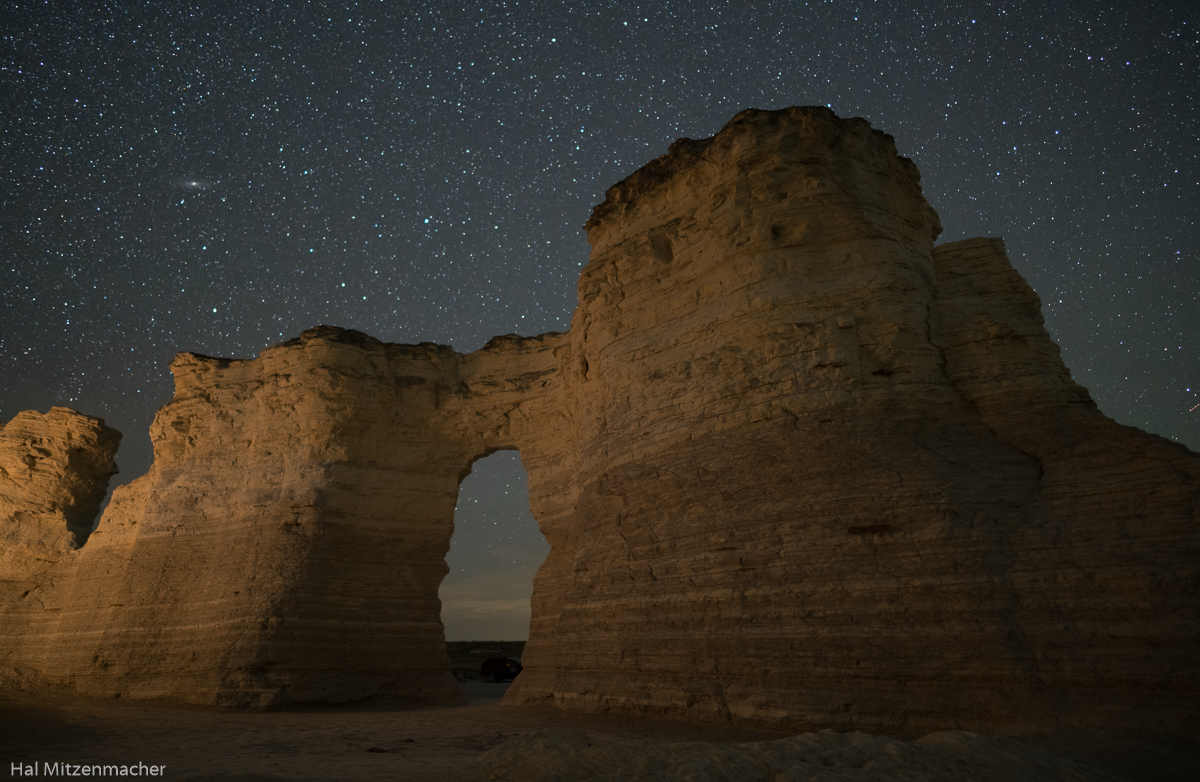
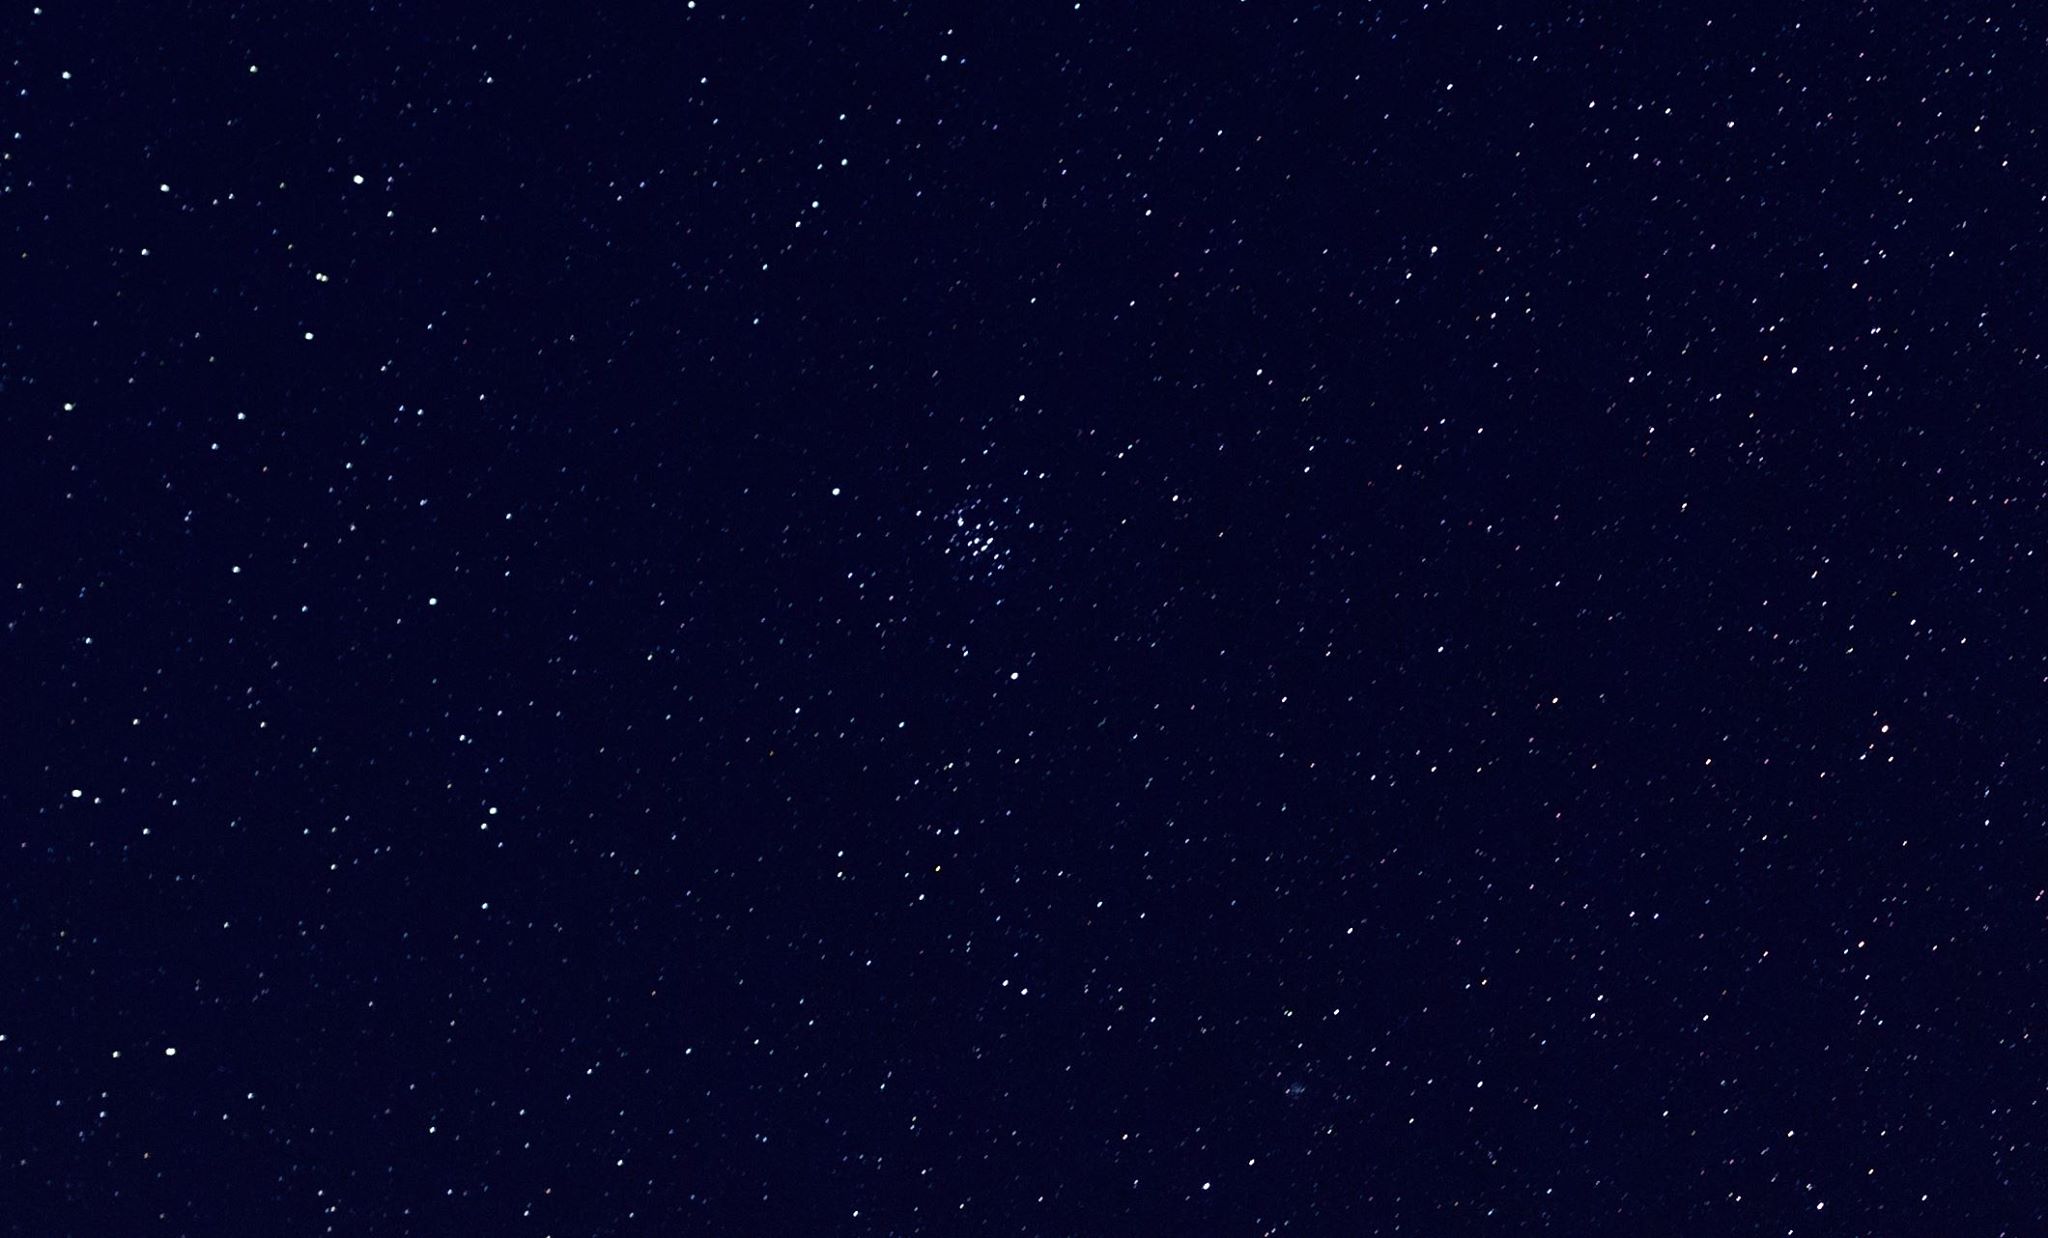
This is a single exposure of a spot near Oakley, Kansas taken at ISO 6400 for a duration of 10 seconds. It is a respectable image for screen viewing, but is not a great candidate to print at any appreciable size due to the amount of noise created at ISO 6400, even shooting with a Sony A7Rii, which performs very well at high ISO settings.
 At 100% viewing the noise problem becomes apparent, both in the sky and in the foreground.
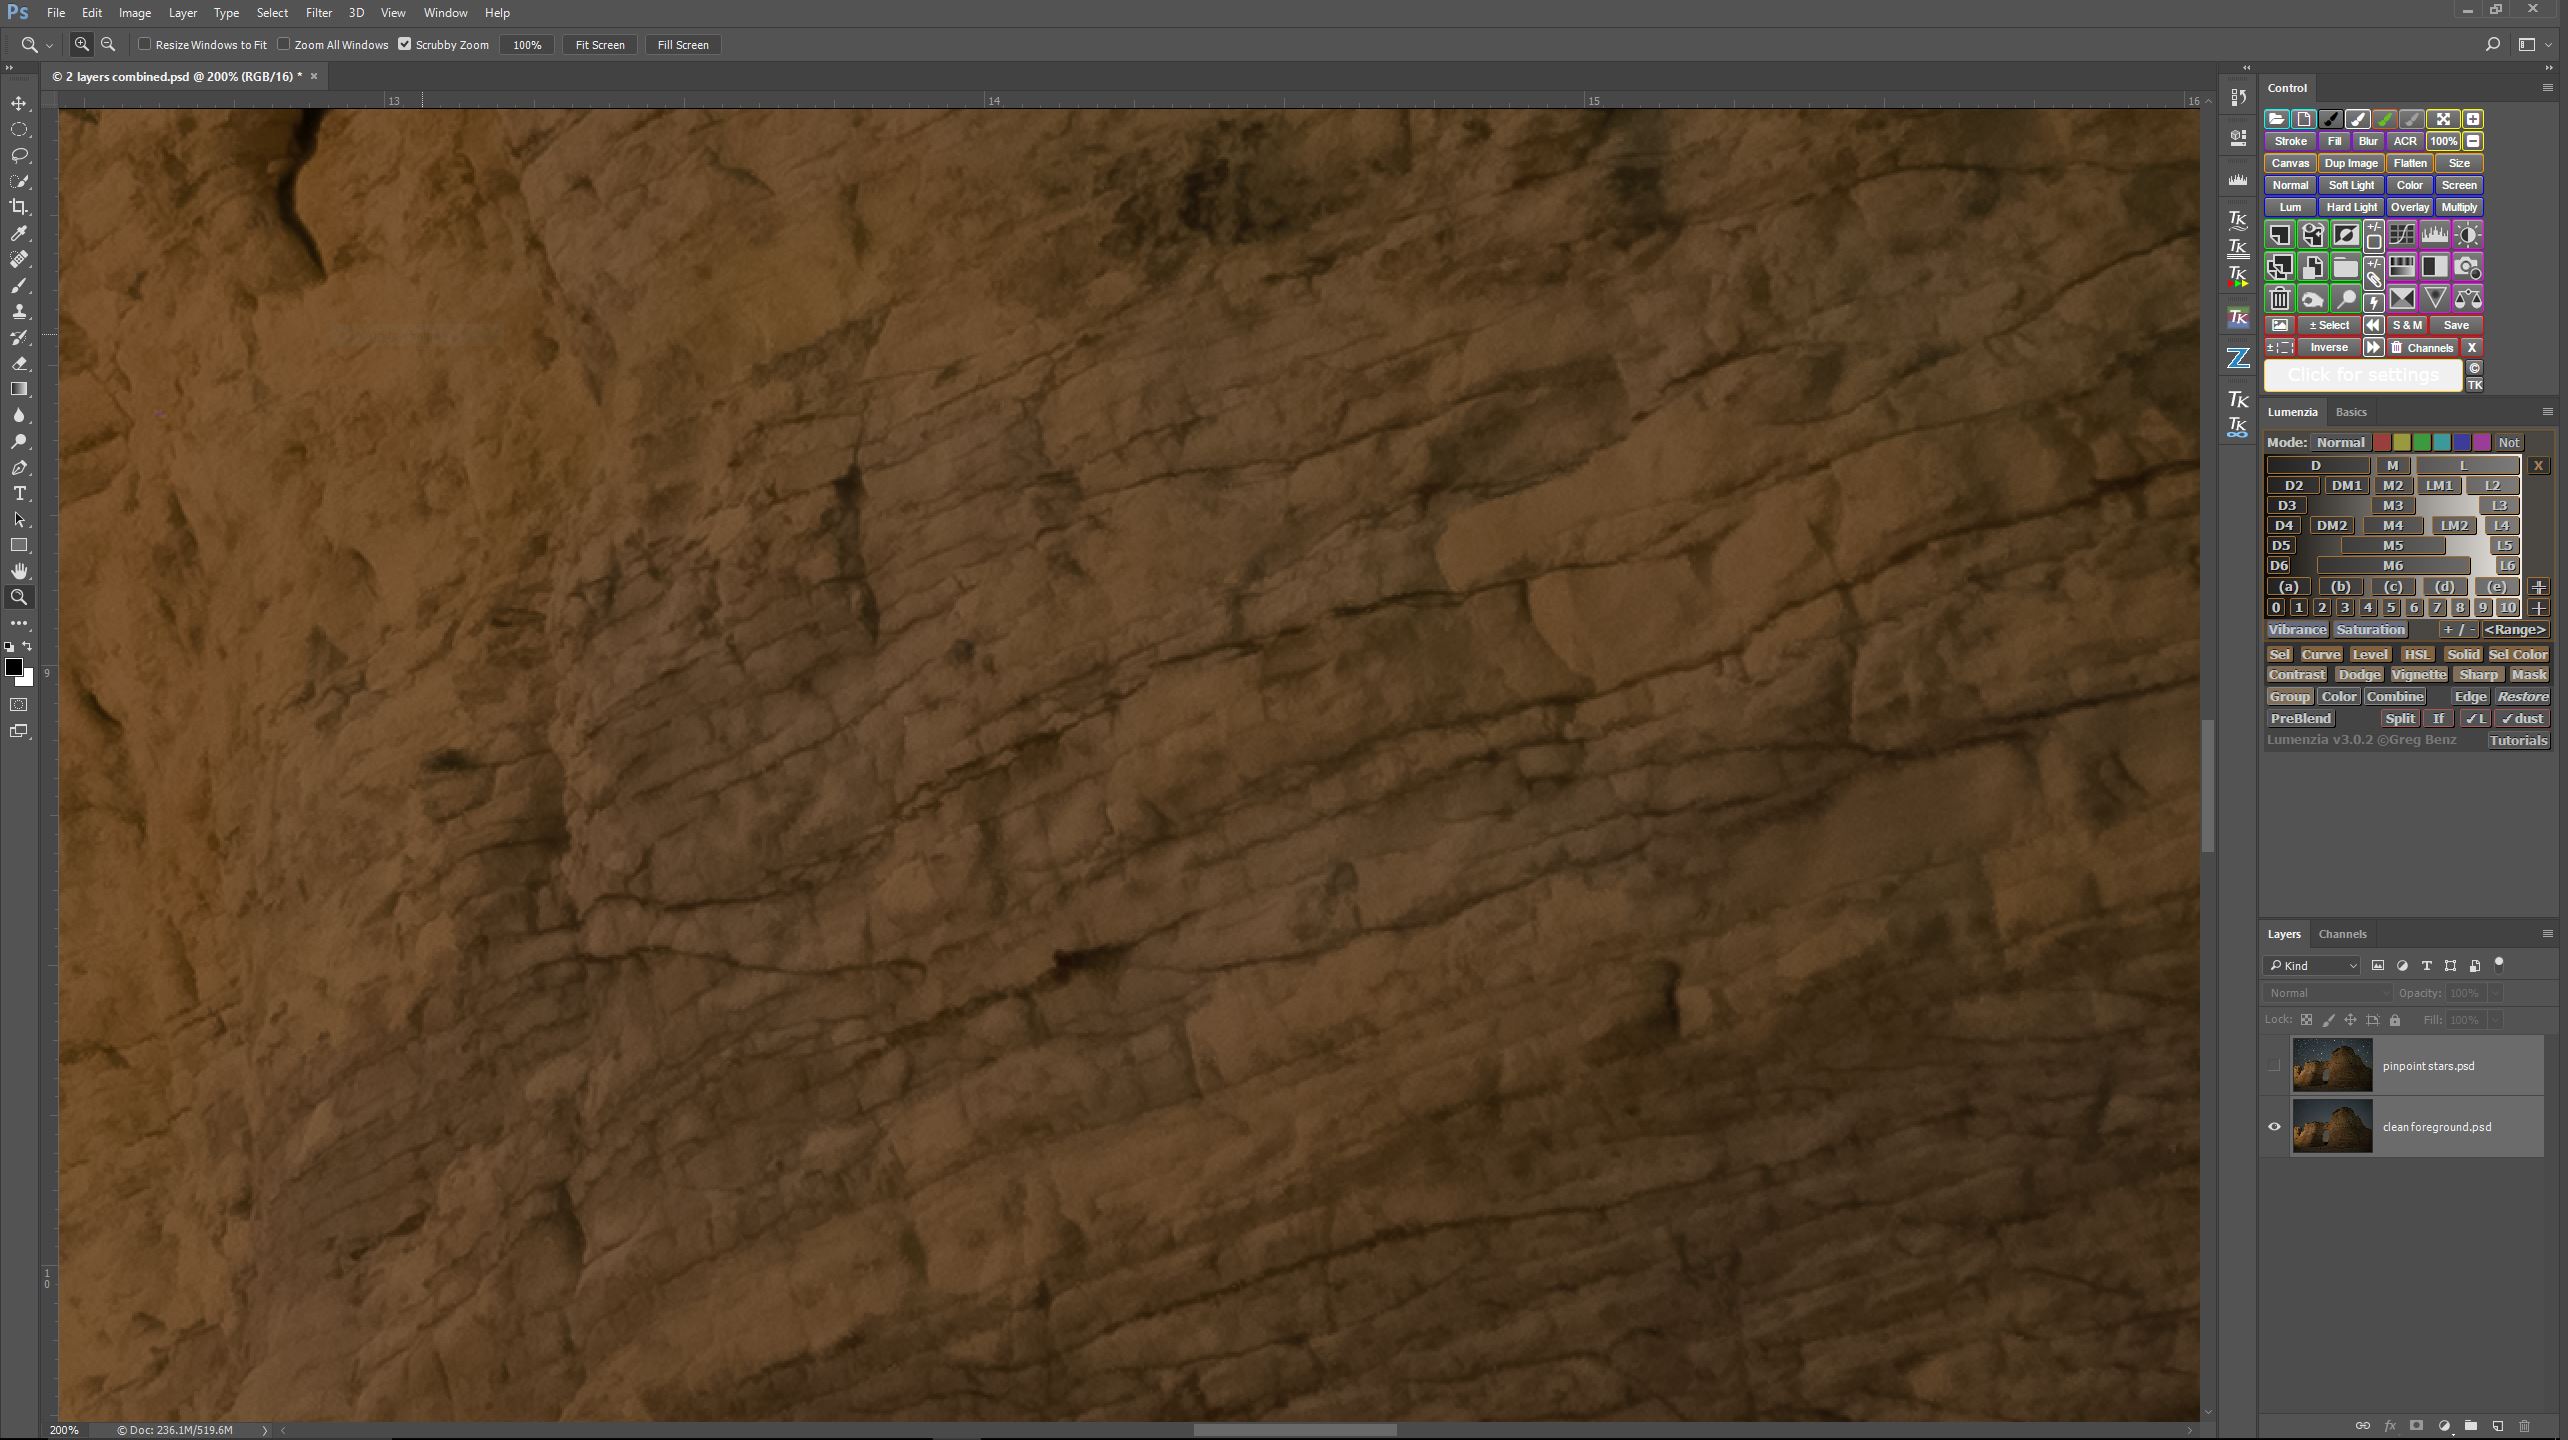
 Here is the foreground in the ISO 6400 exposure magnified to 200%. Note the amount of random noise. If I were to reduce the ISO from 6400 to ISO 200, random noise would be reduced, but I would also have to lengthen the exposure time to compensate. Increasing the exposure time would cause the stars to trail in the sky. The solution to this problem is to blend two separate exposures, one taken to optimize the pinpoint stars (remember, we are not stacking sky exposures for the purposes of this post) and one taken to optimize the foreground.
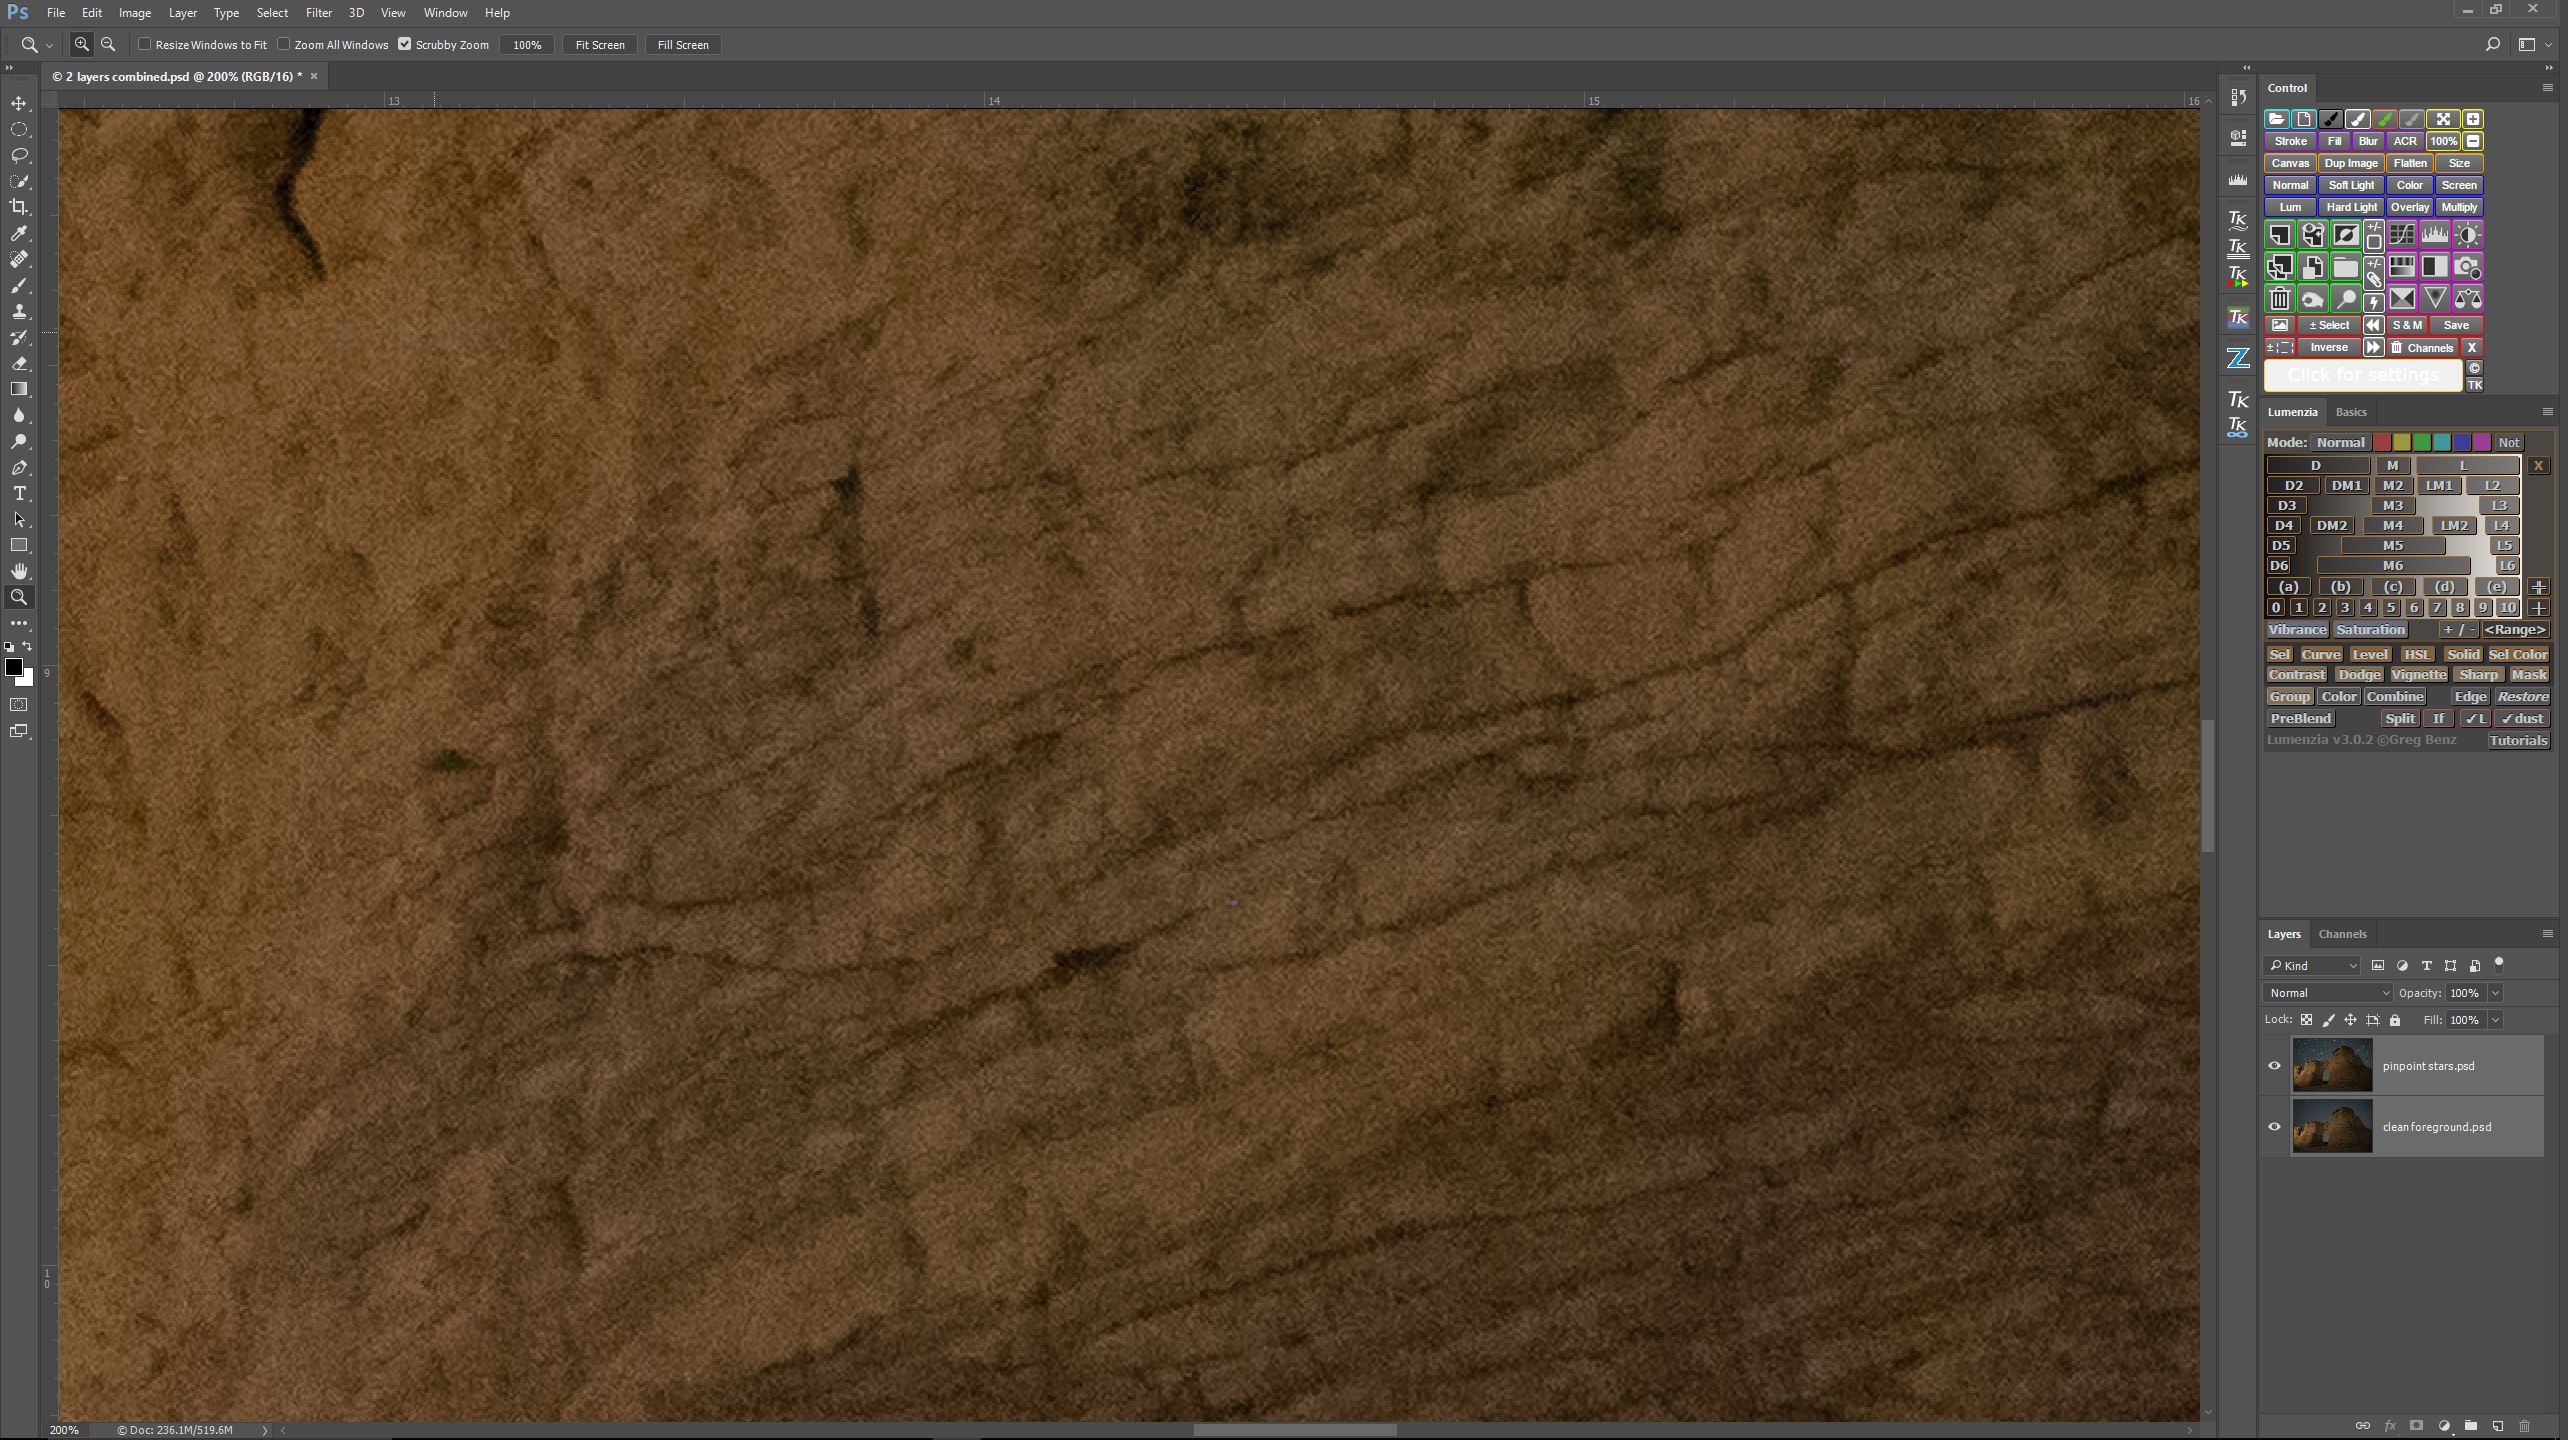
This is a 6 minute ISO 200 exposure magnified to 200%. Notice how clean the rocks appear. But the six minute exposure will not work for pinpoint stars, so I blended this clean ISO 200 foreground exposure with the noisy ISO 6400 sky exposure, in the hope of reducing the random sky noise later on in the process.
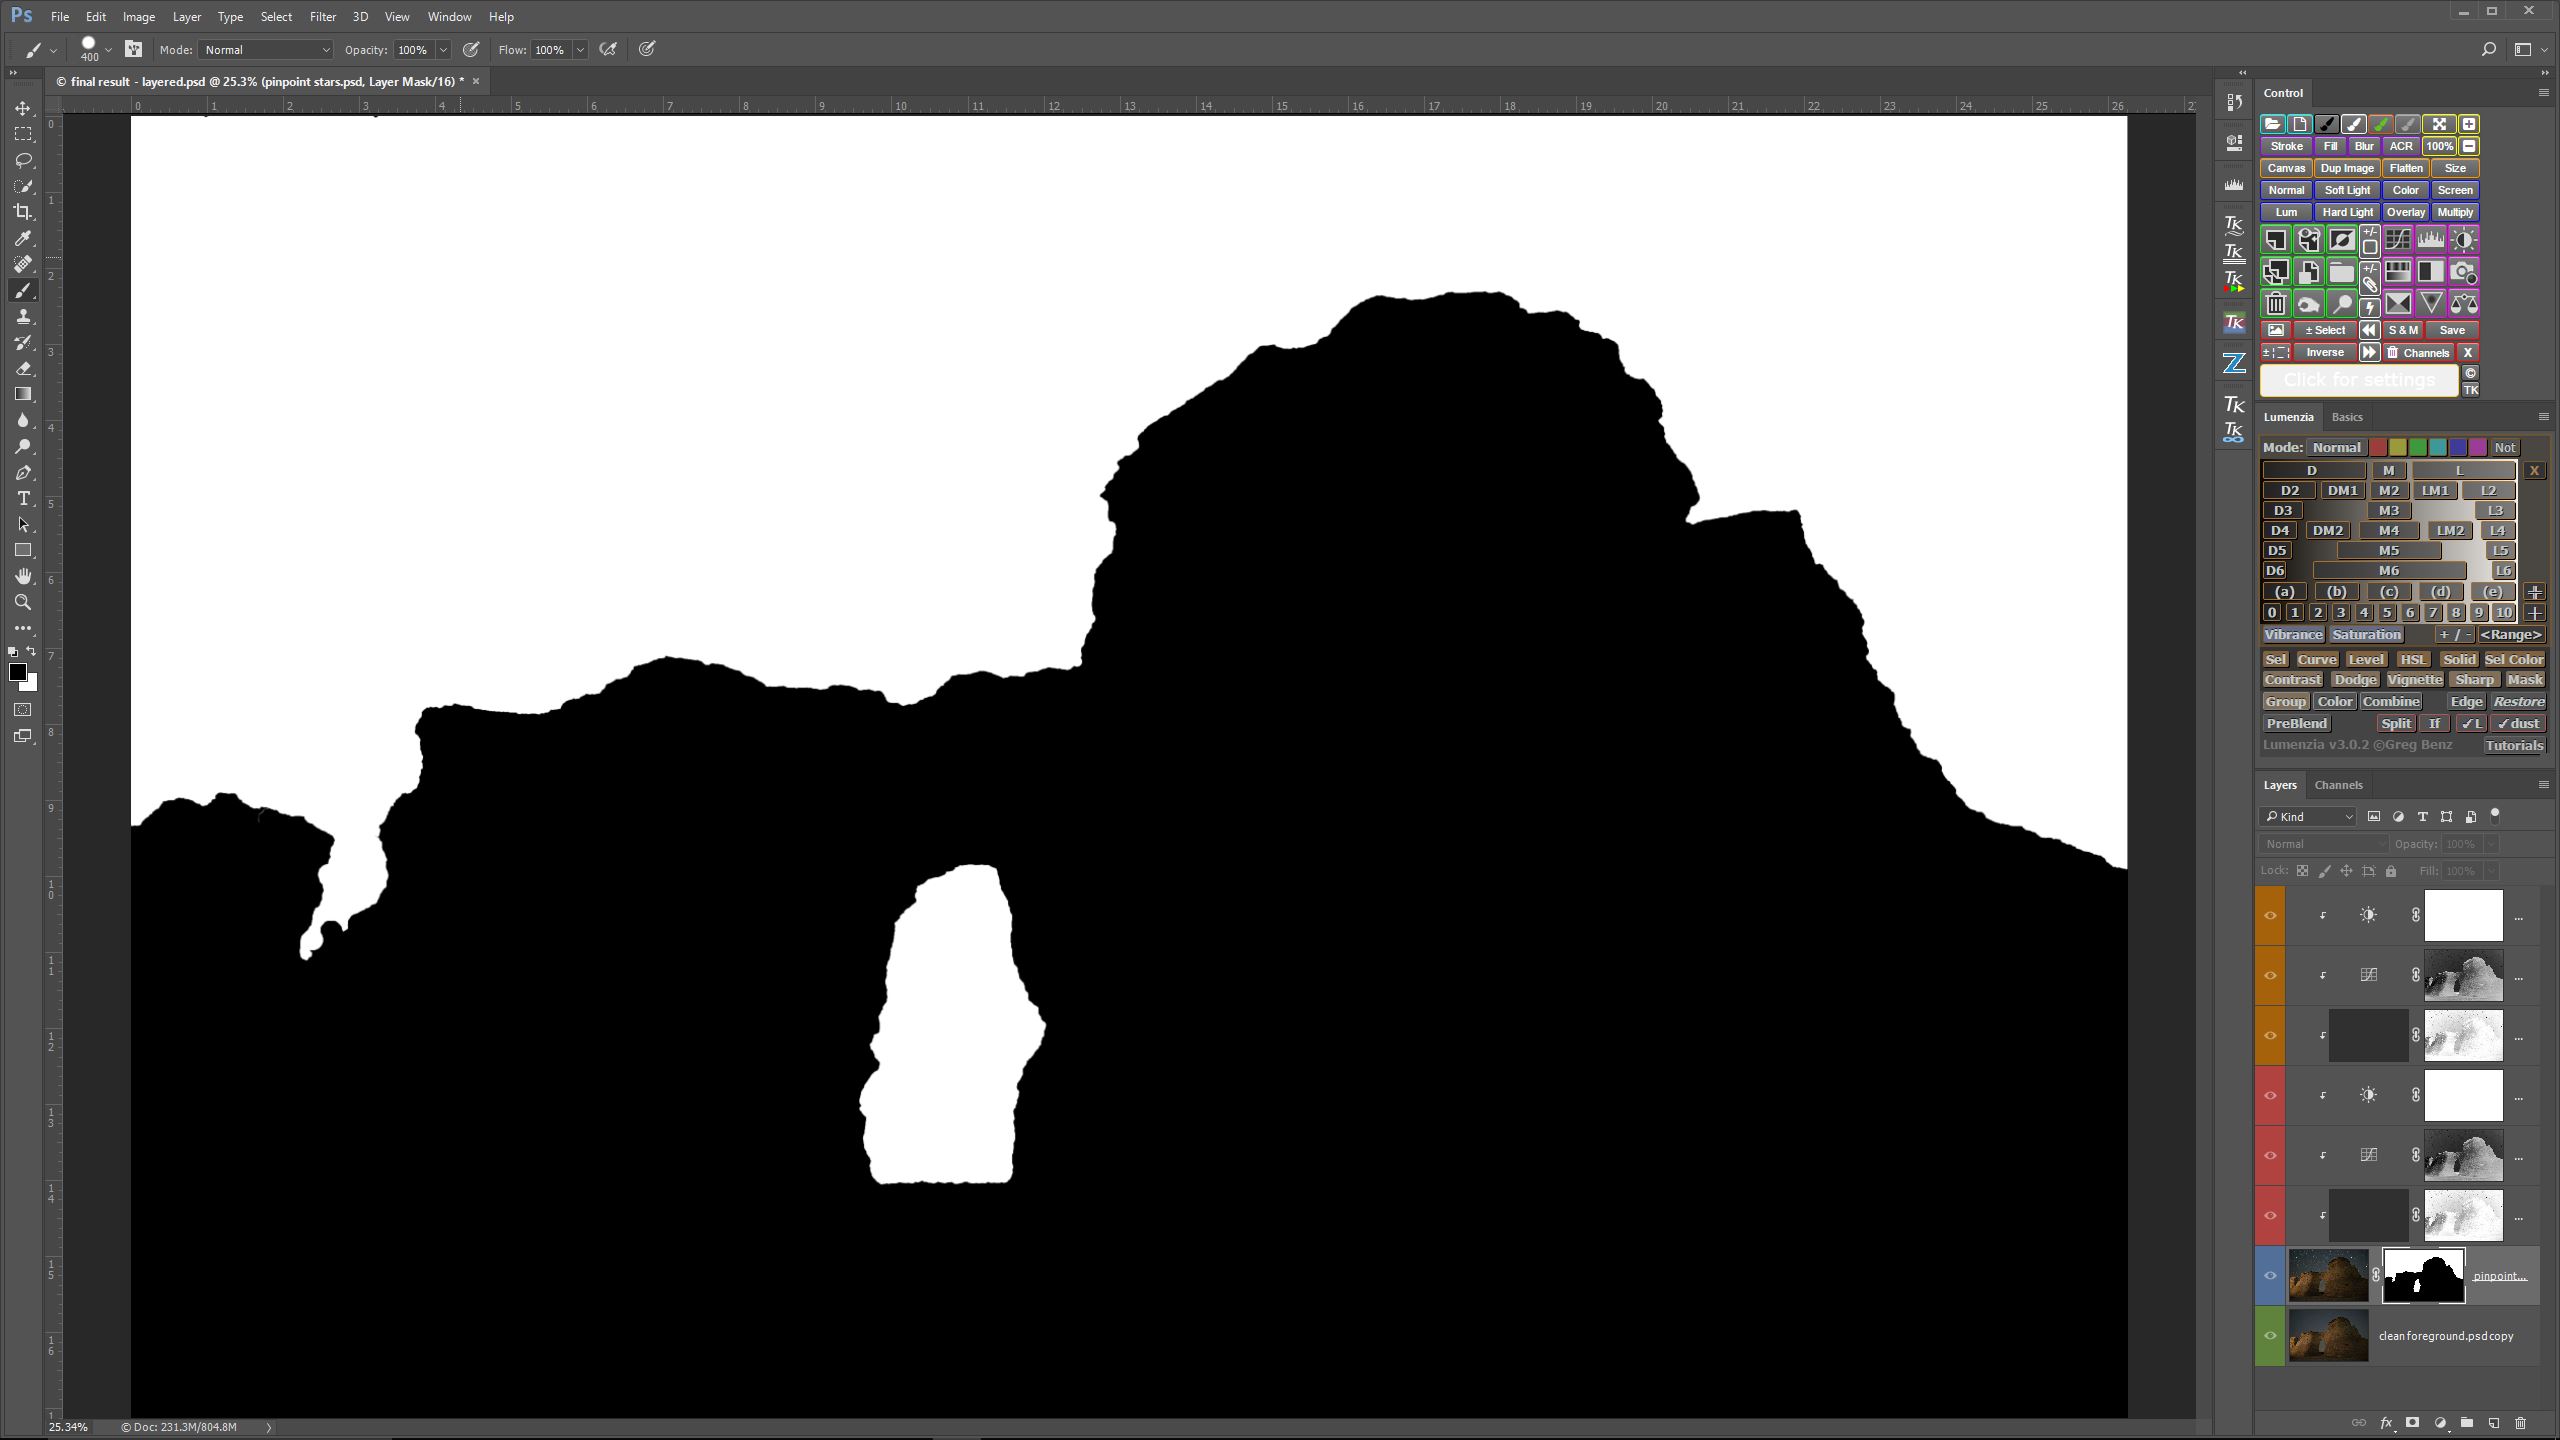
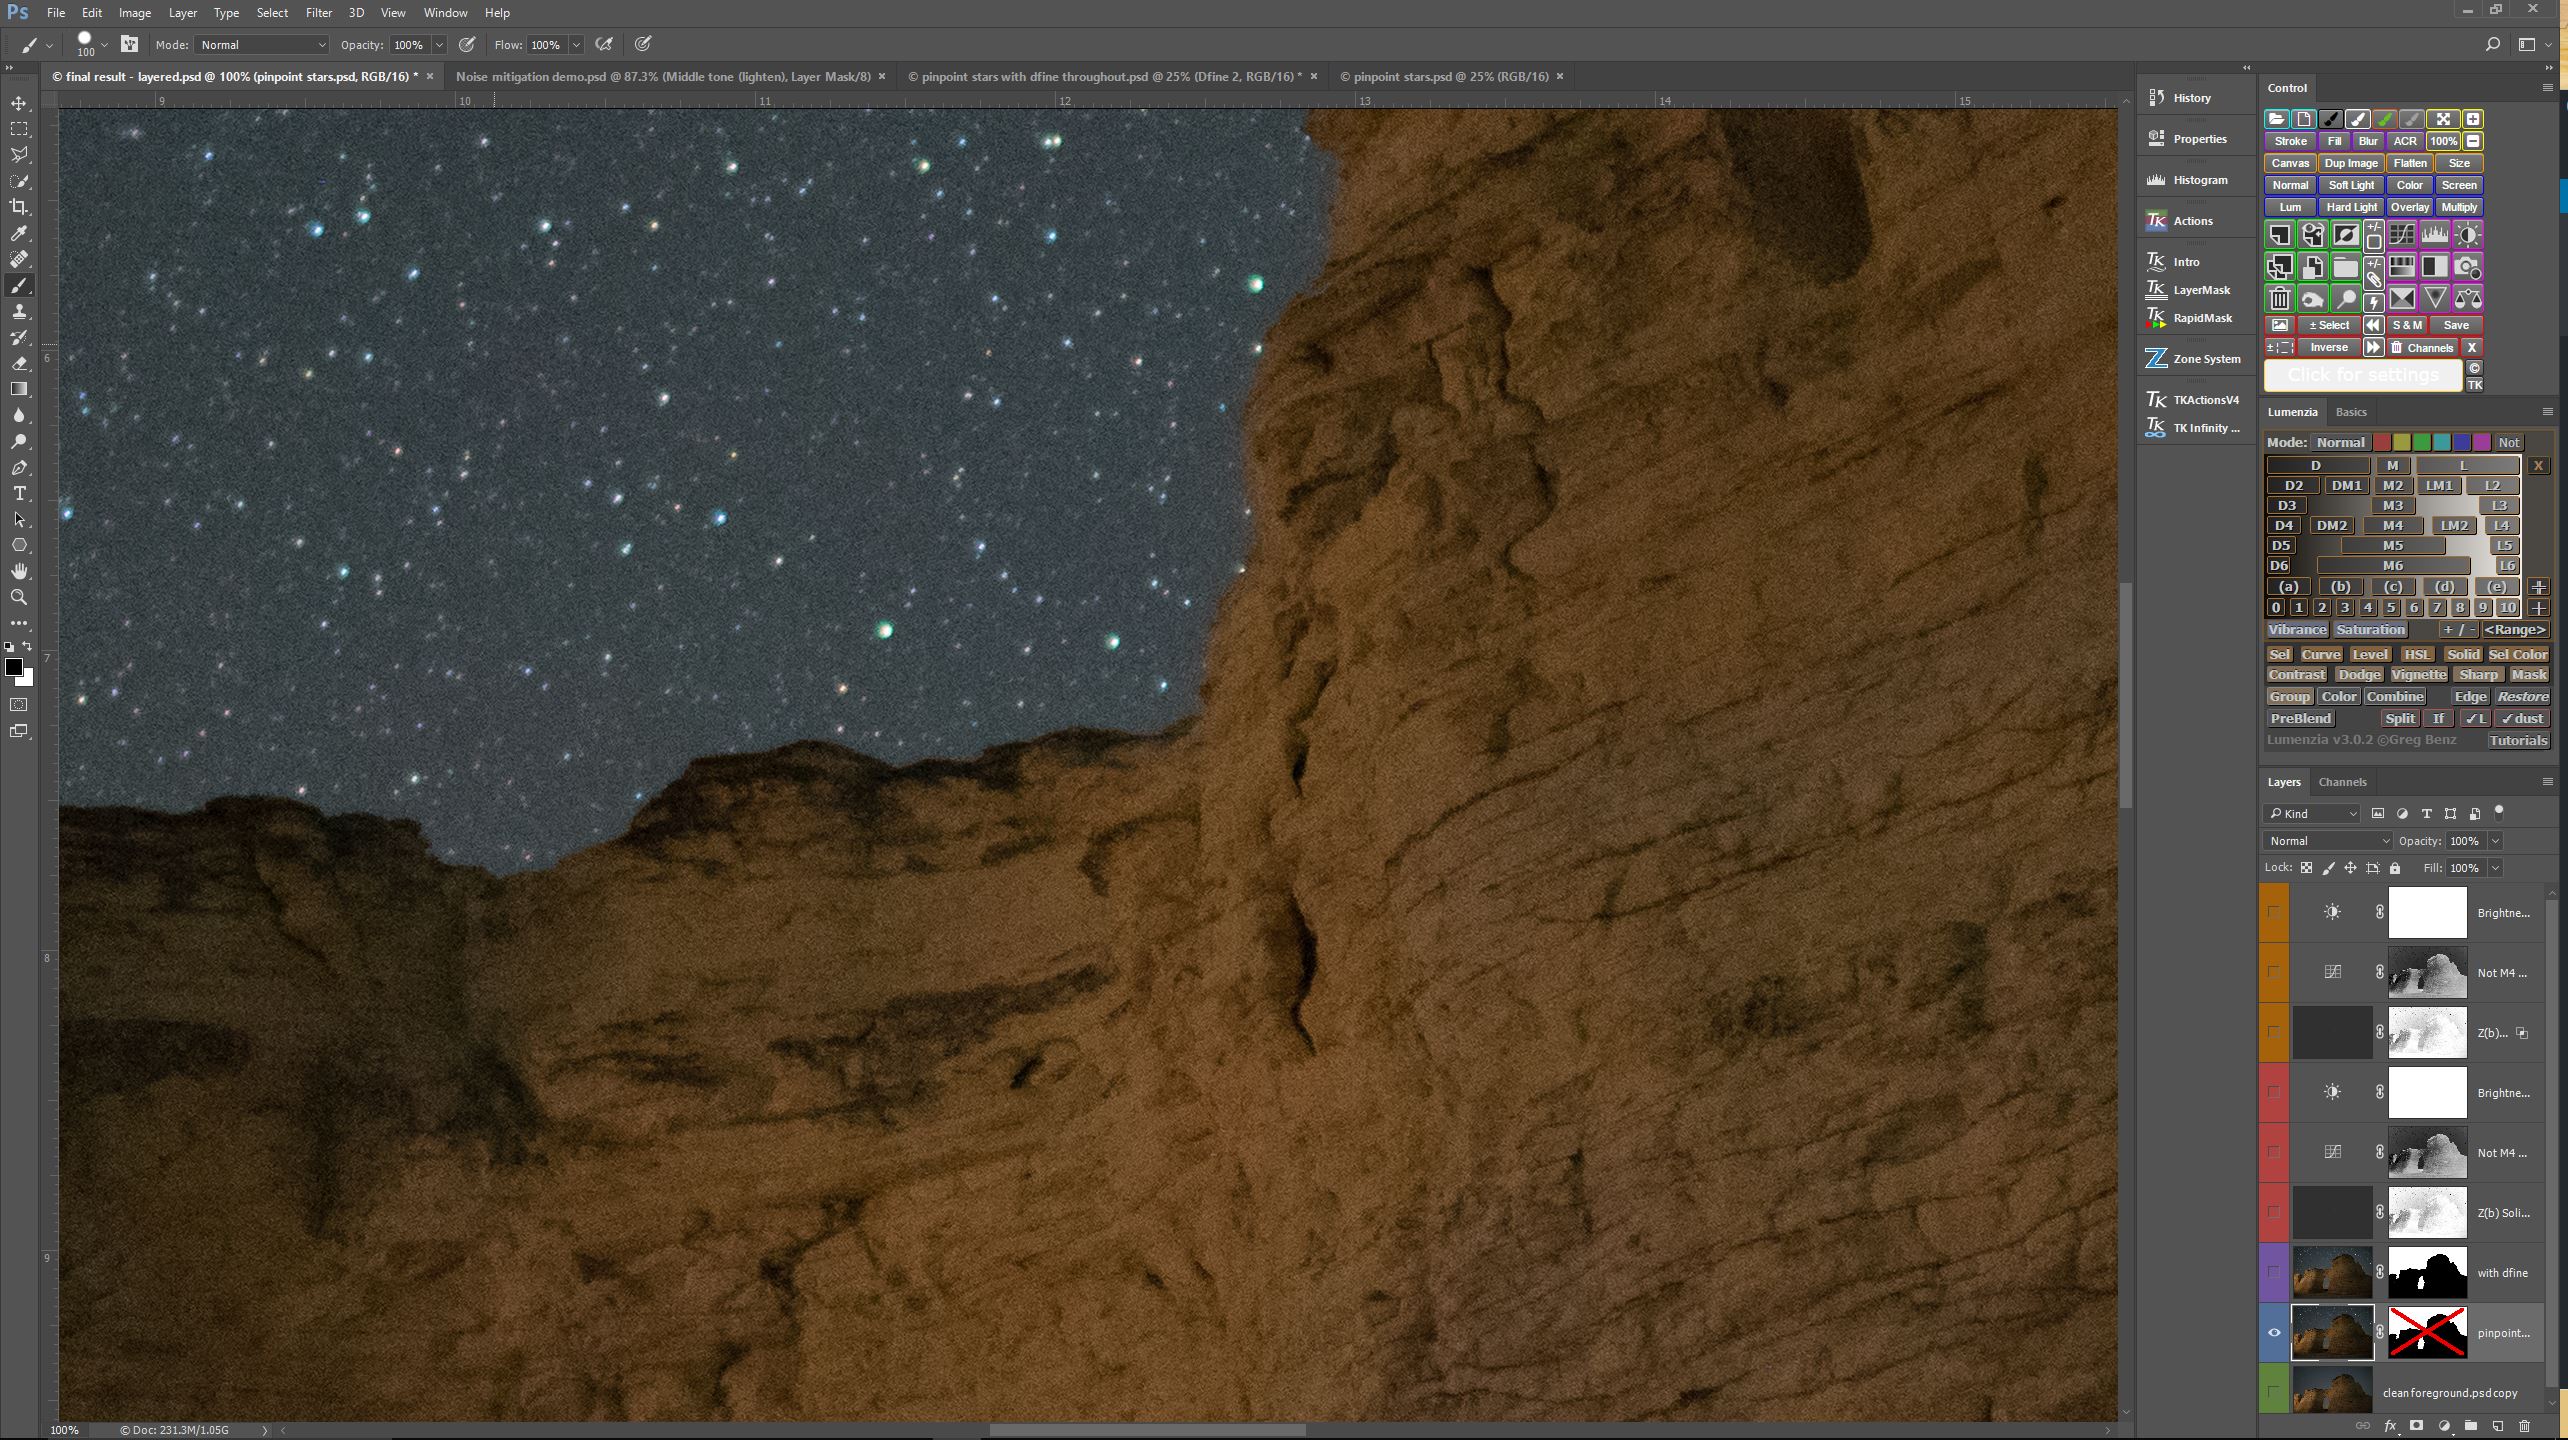
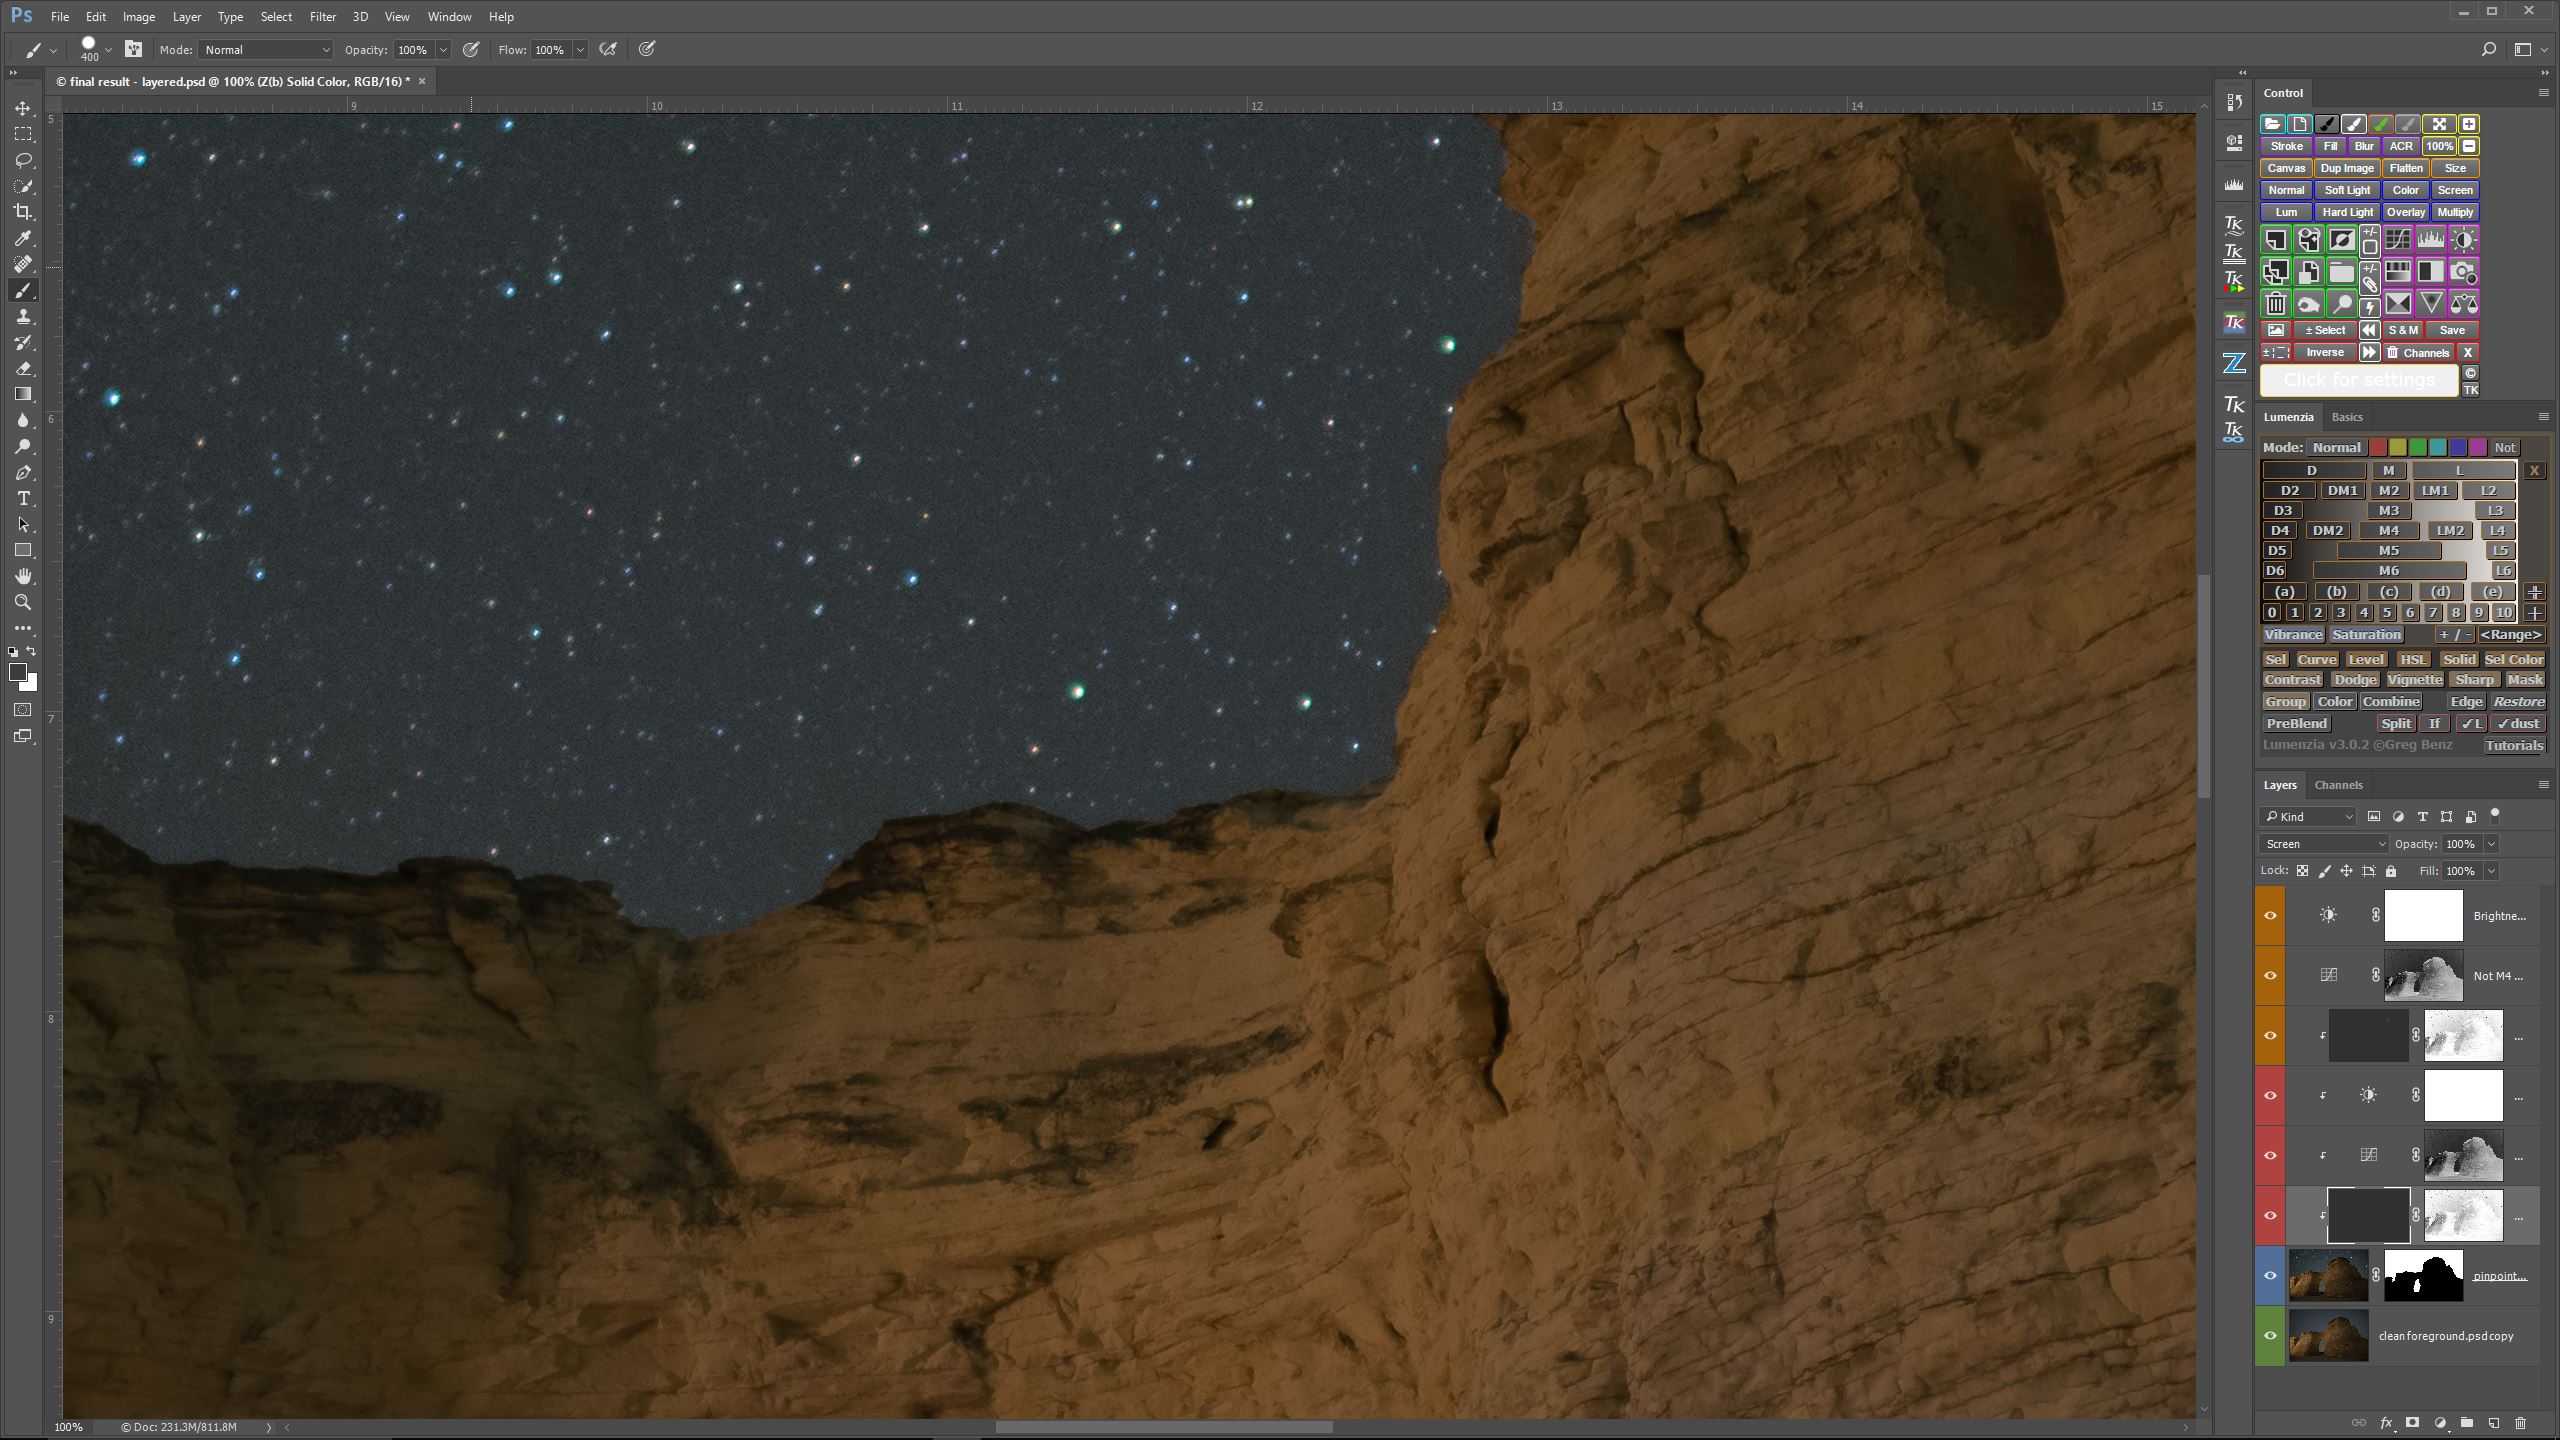
By creating a layer mask in Photoshop I could blend the clean foreground with the noisy sky.
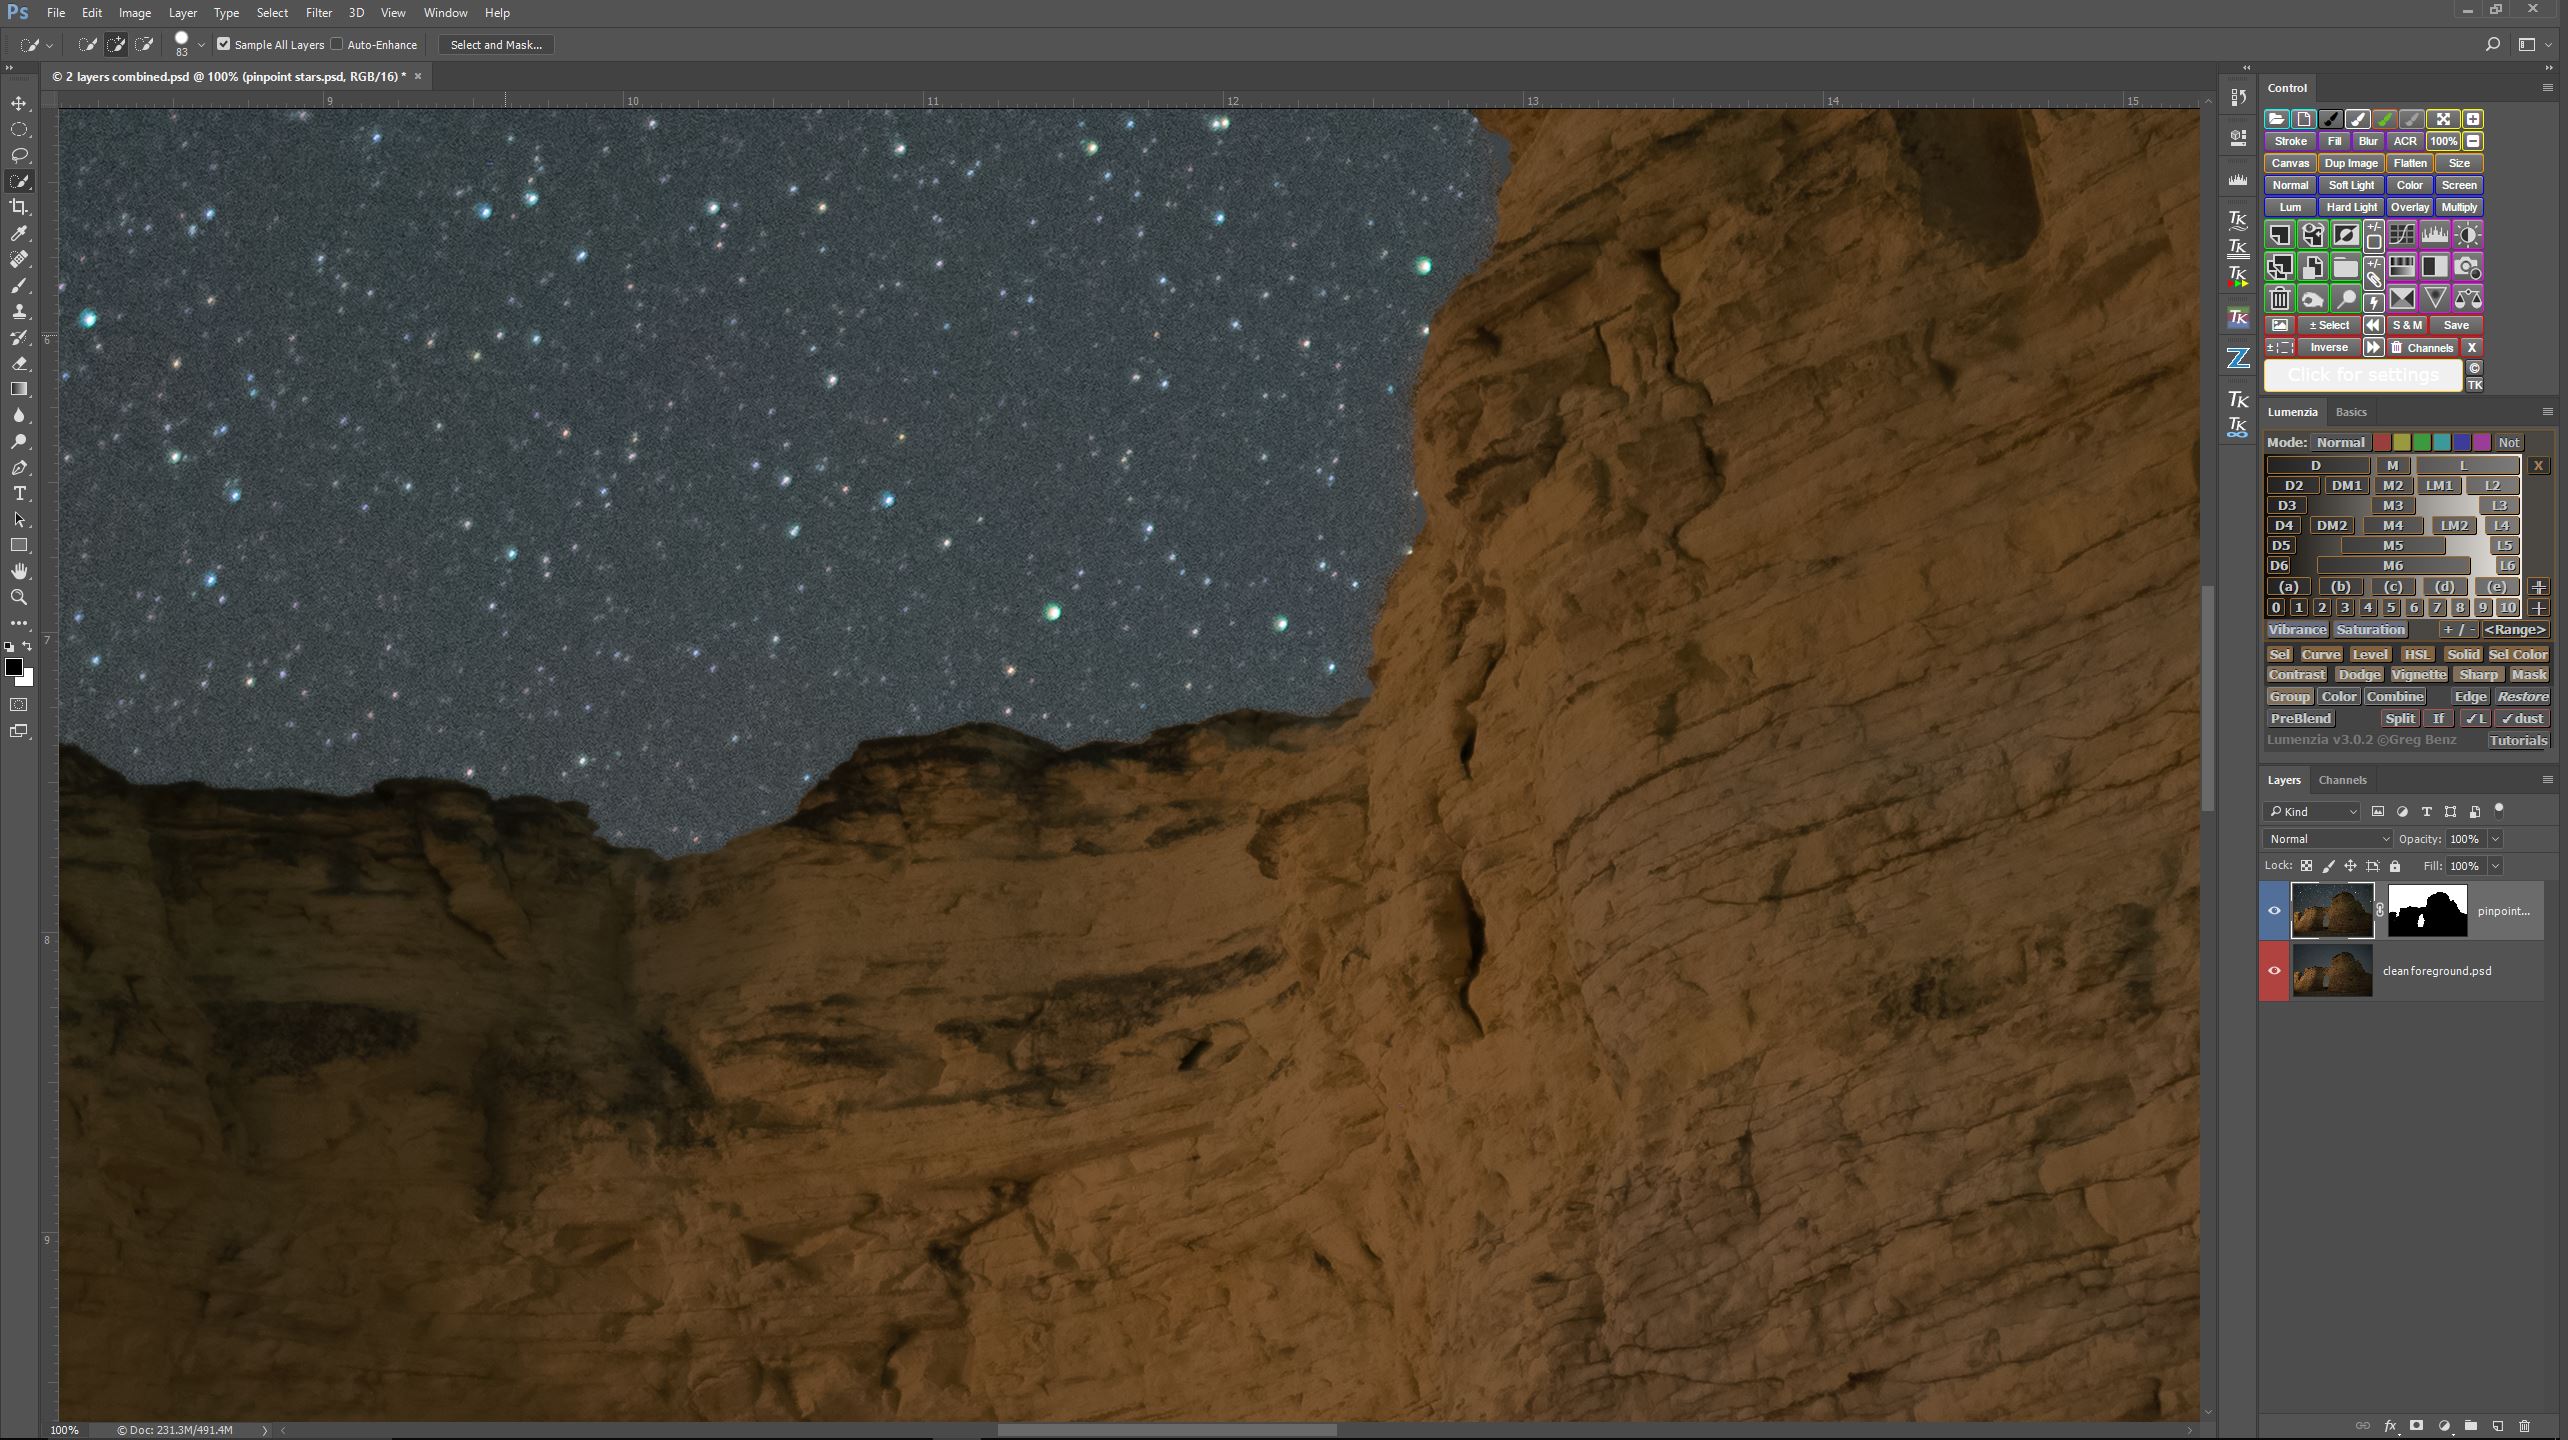
As you can see above, this left me with a very clean foreground, but the sky is still quite noisy. As I was originally writing this post, this is where I was going to demonstrate my experiments with alternative noise “mitigation”.
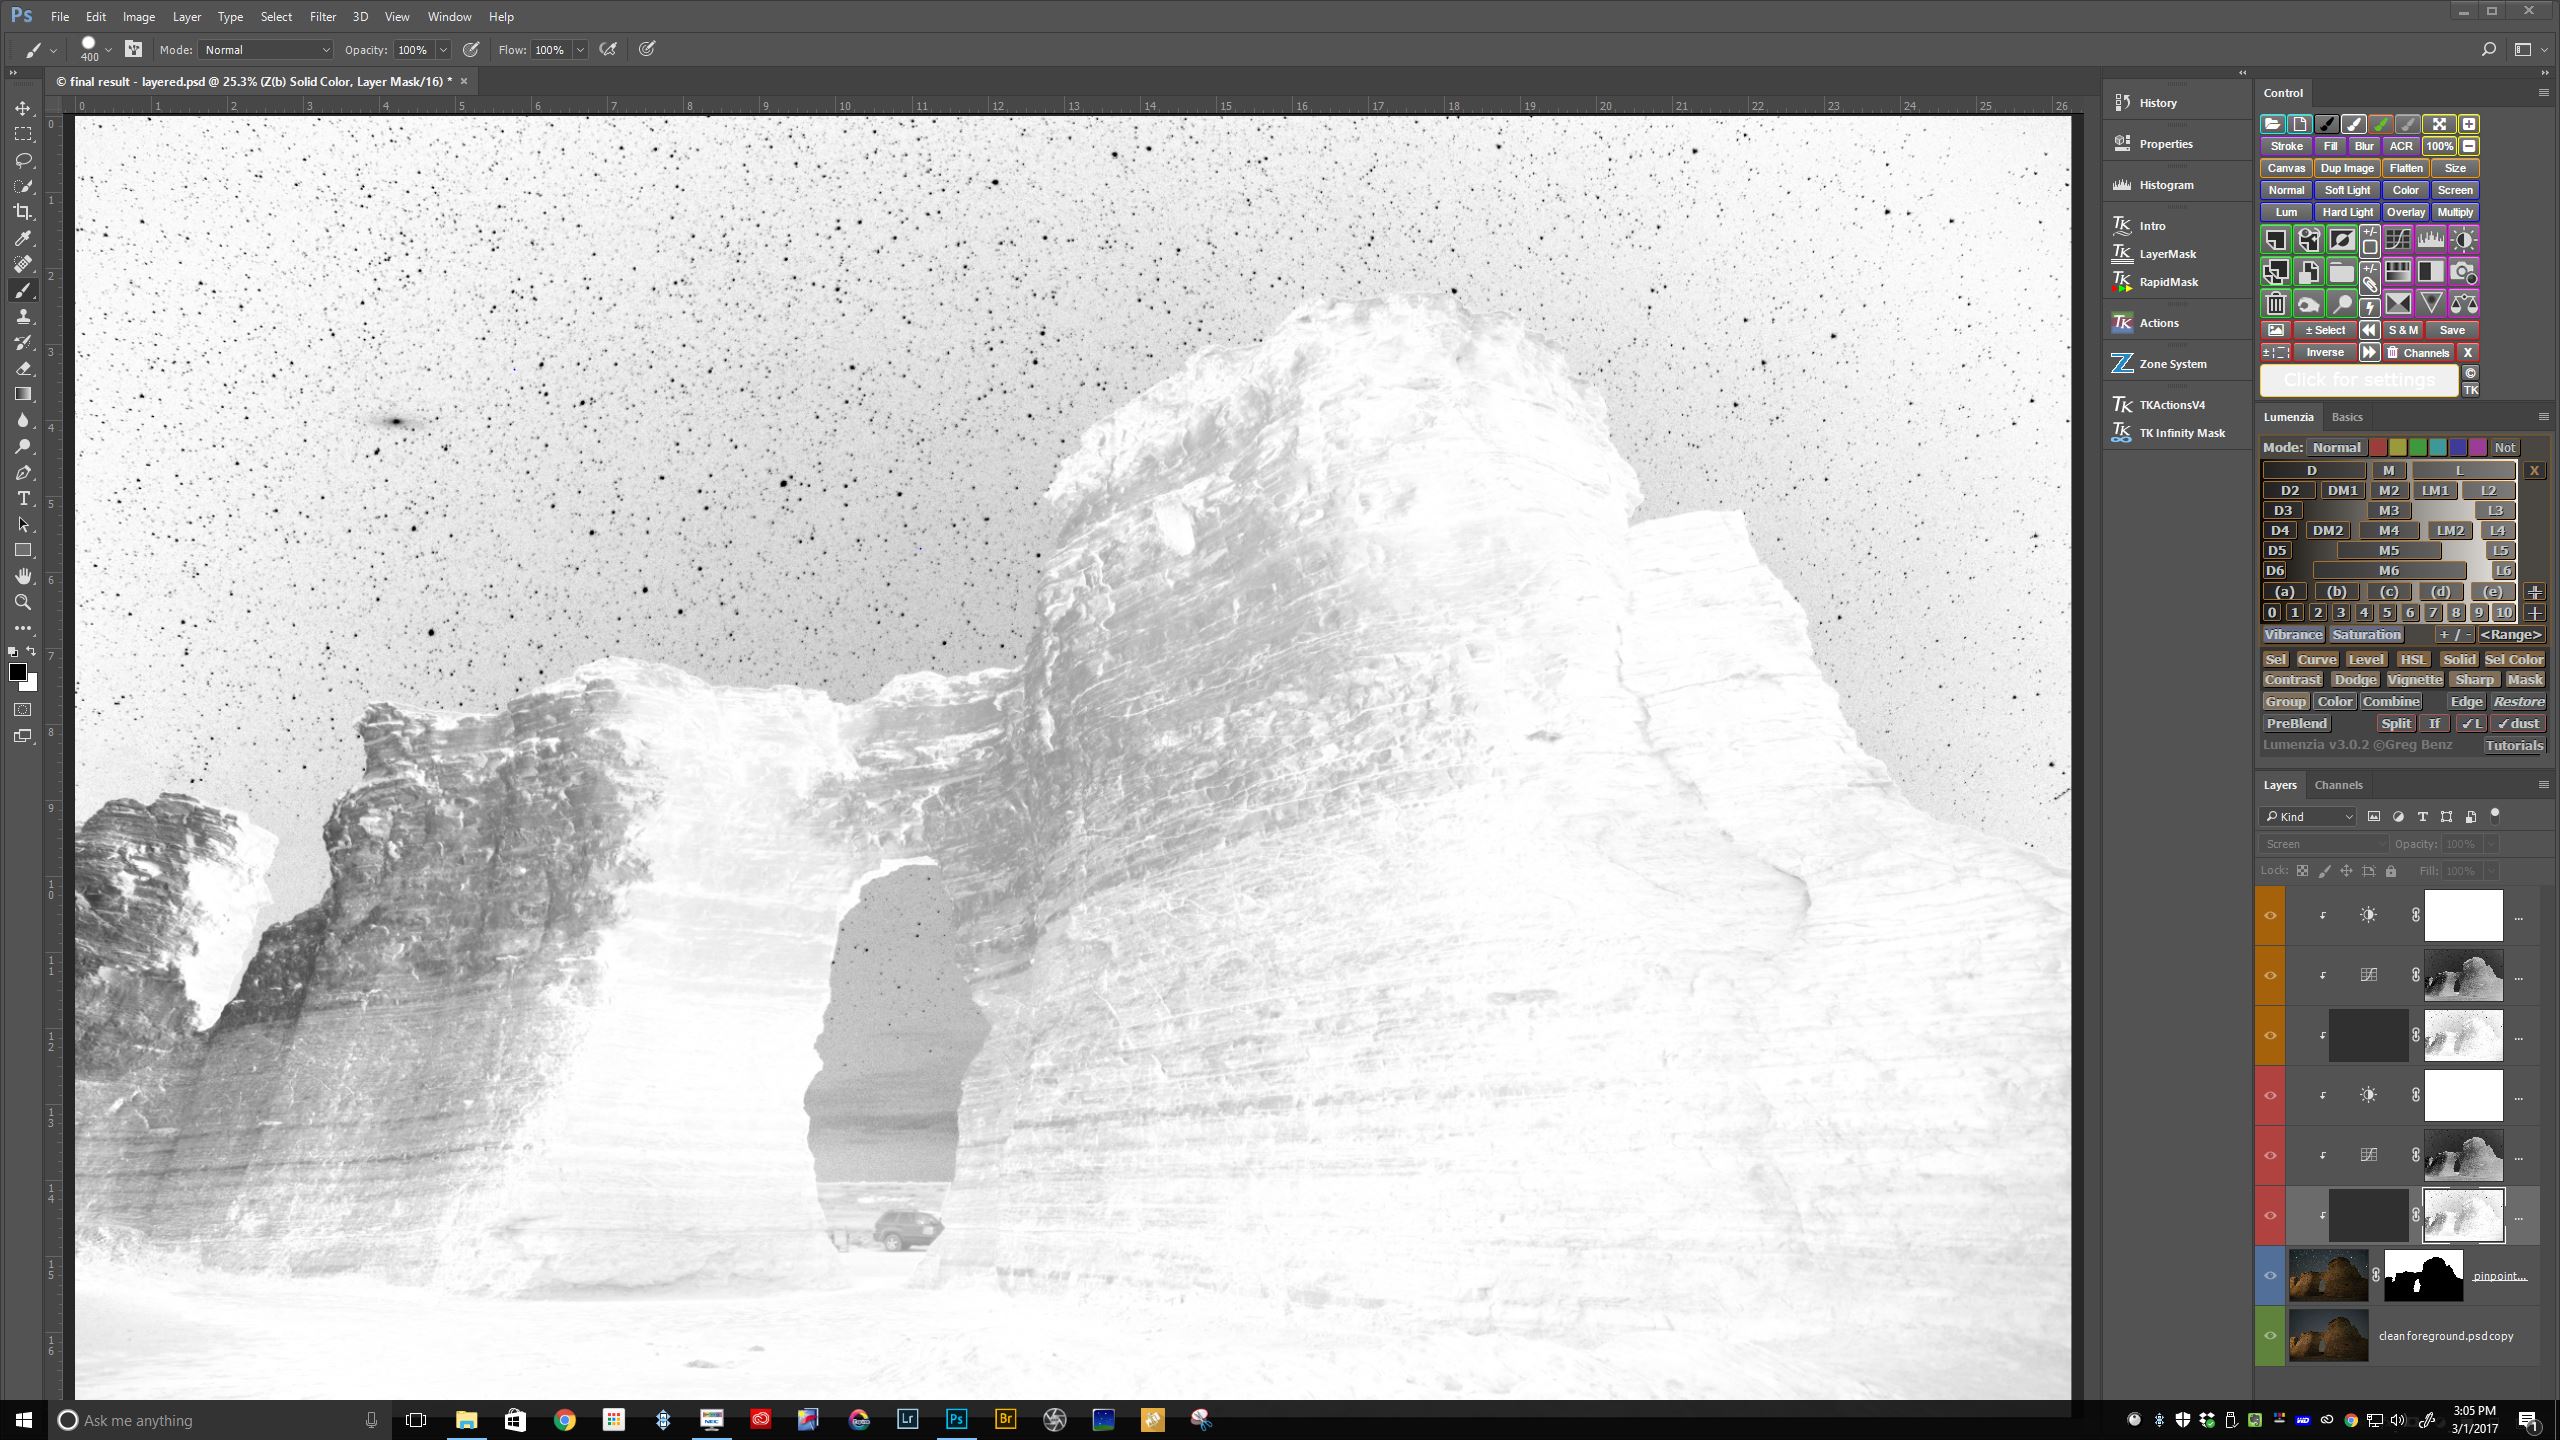
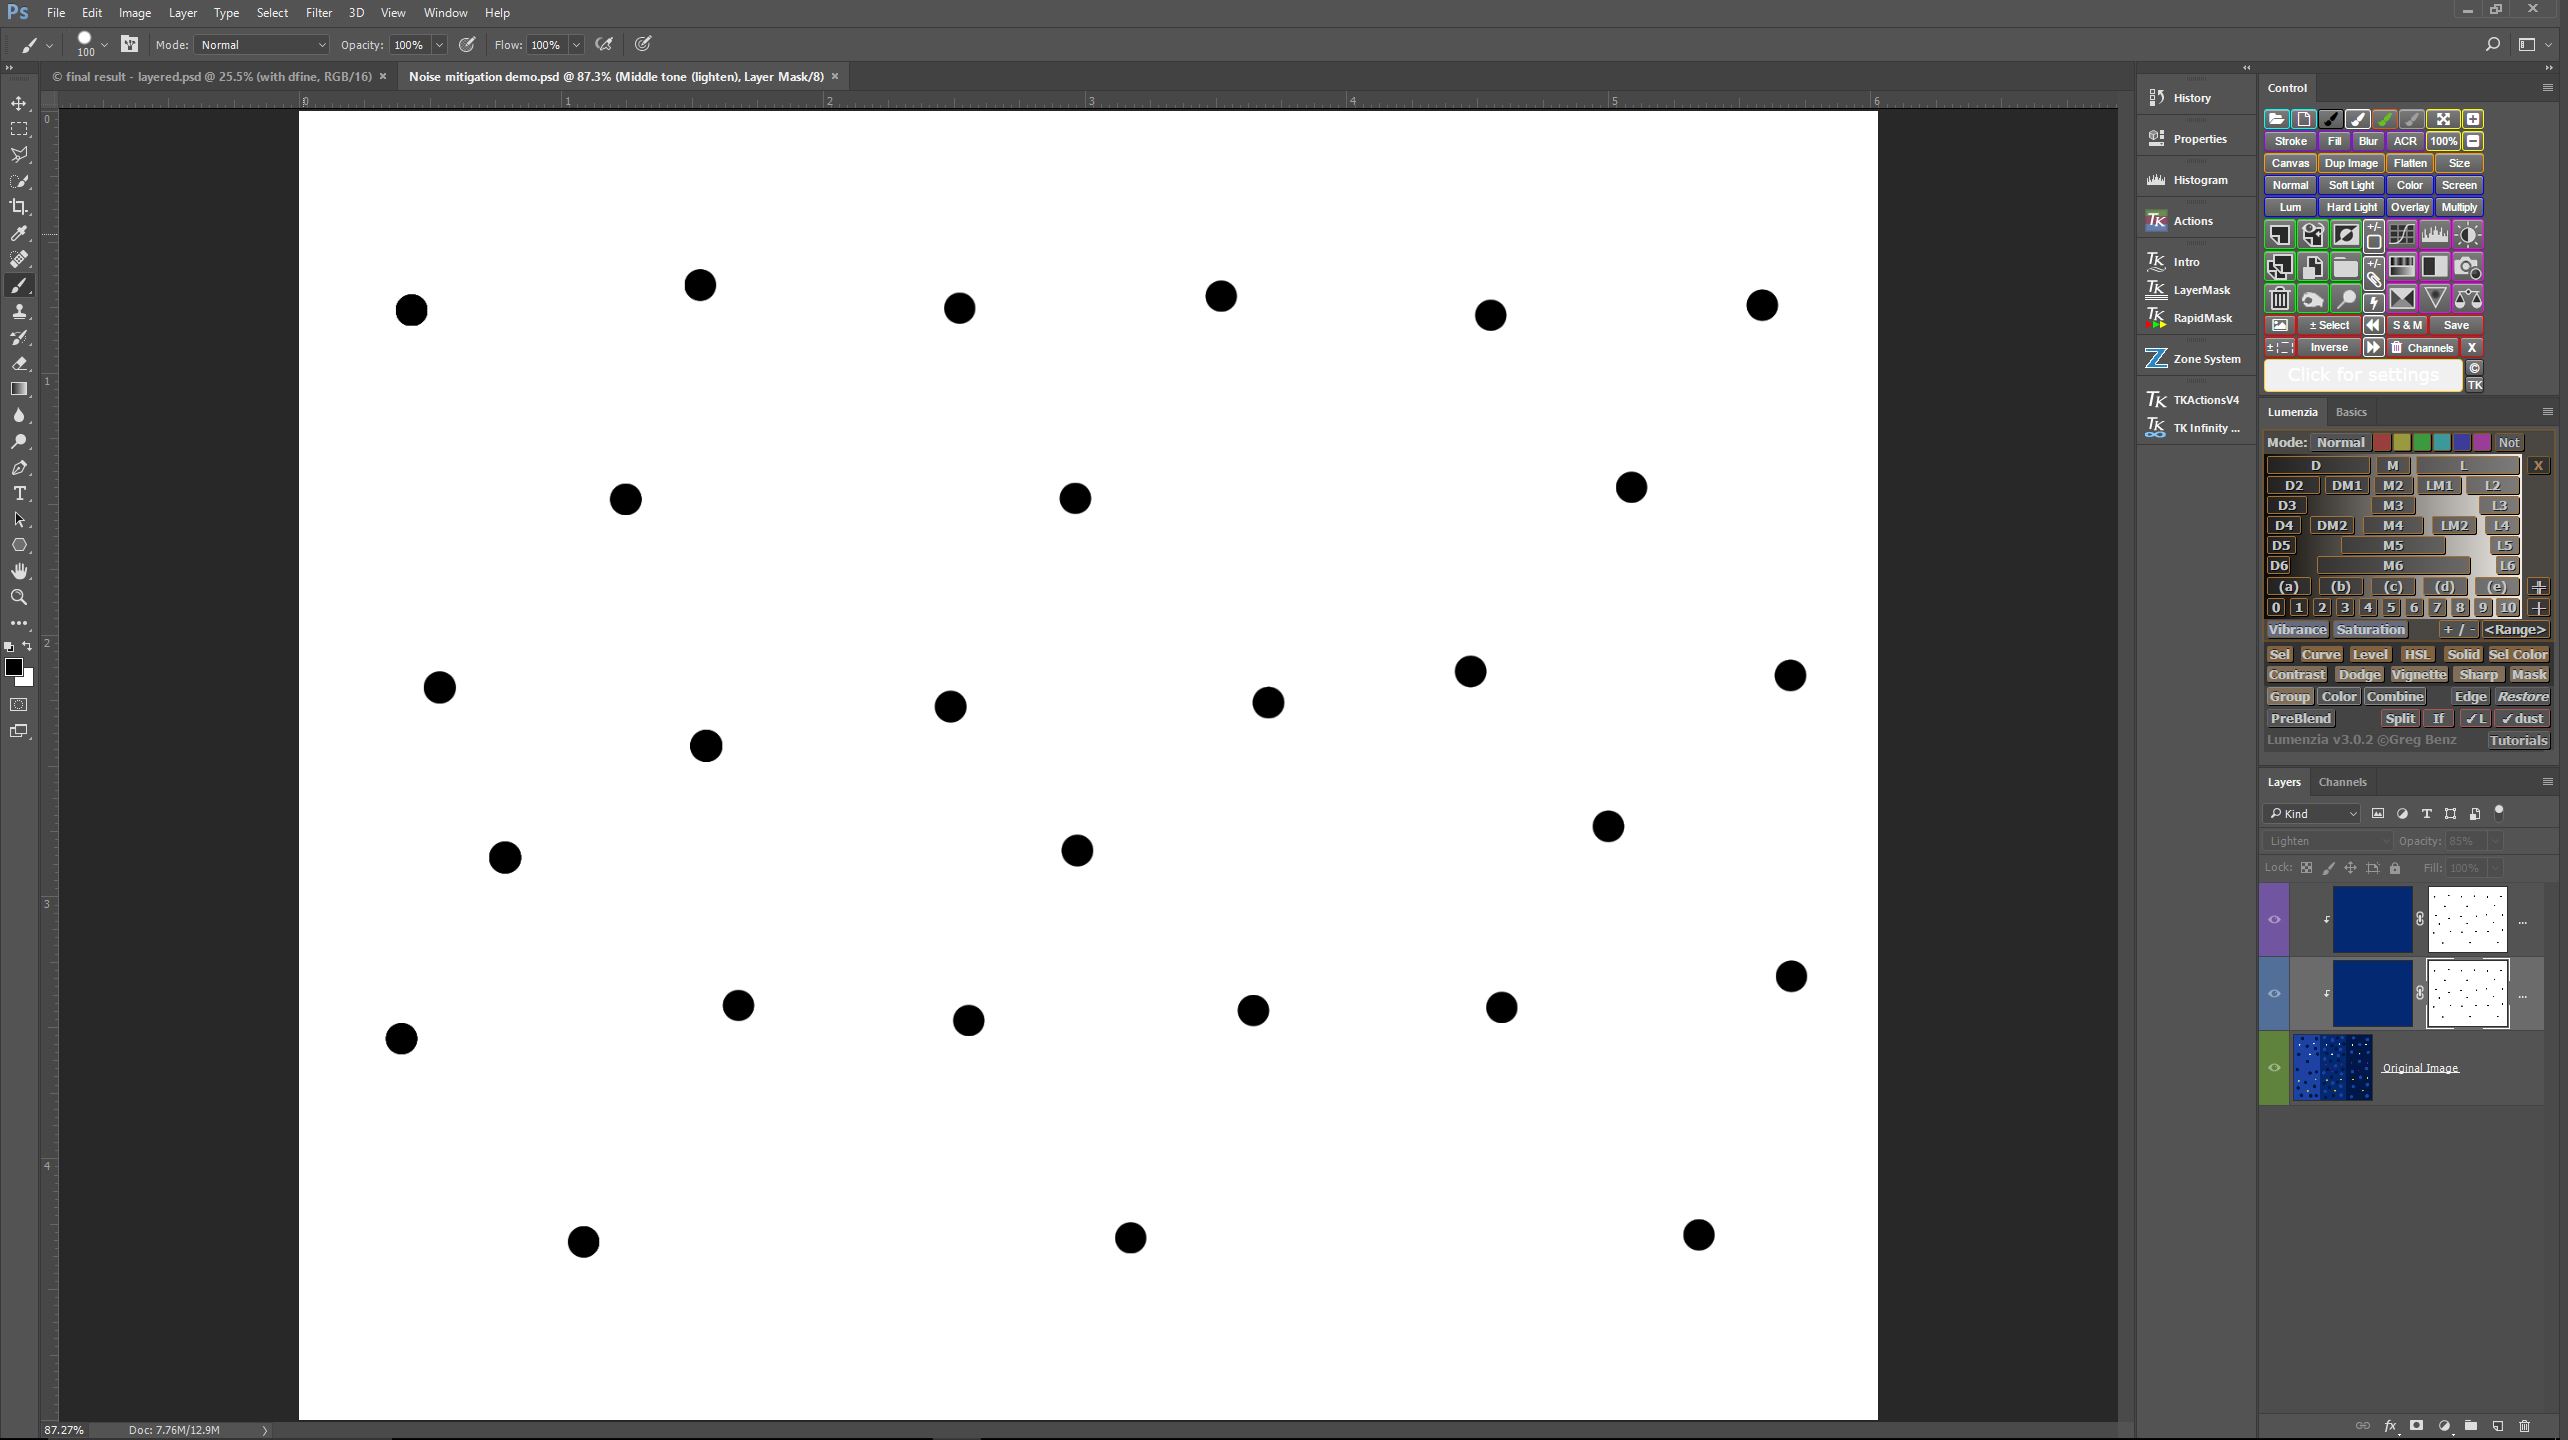
First, I created a luminosity mask to protect the stars from my manipulations.
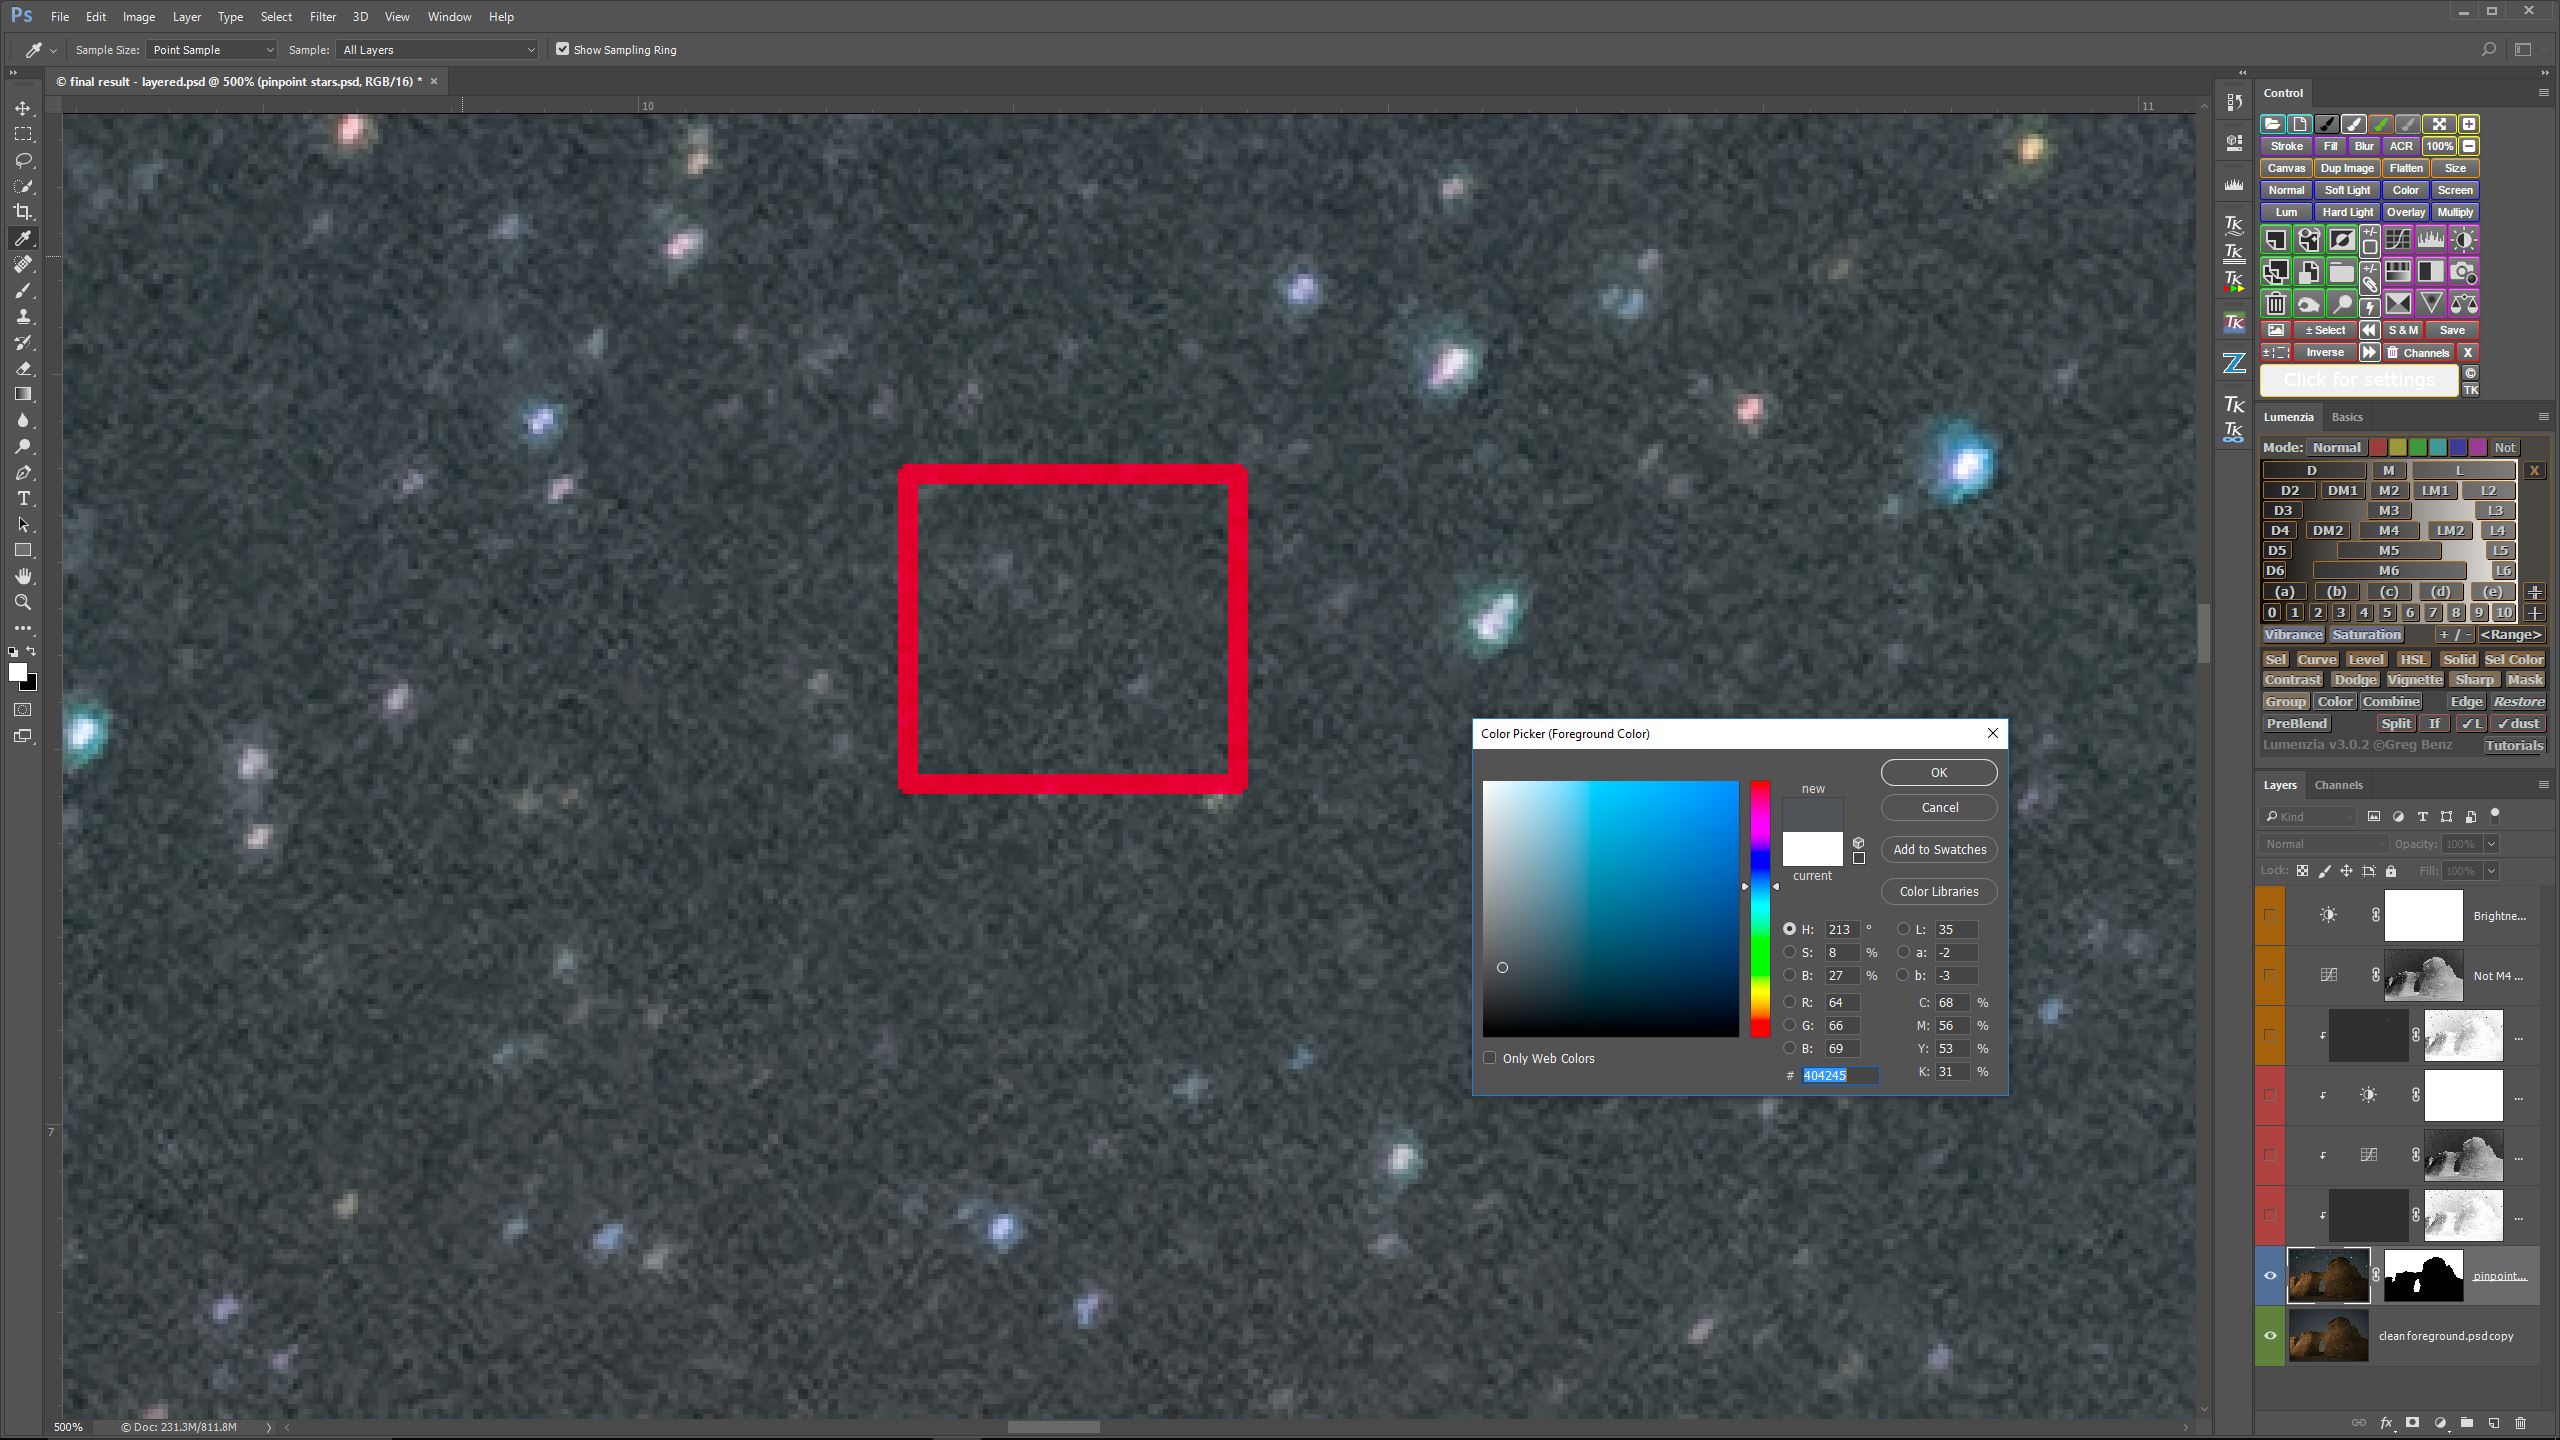
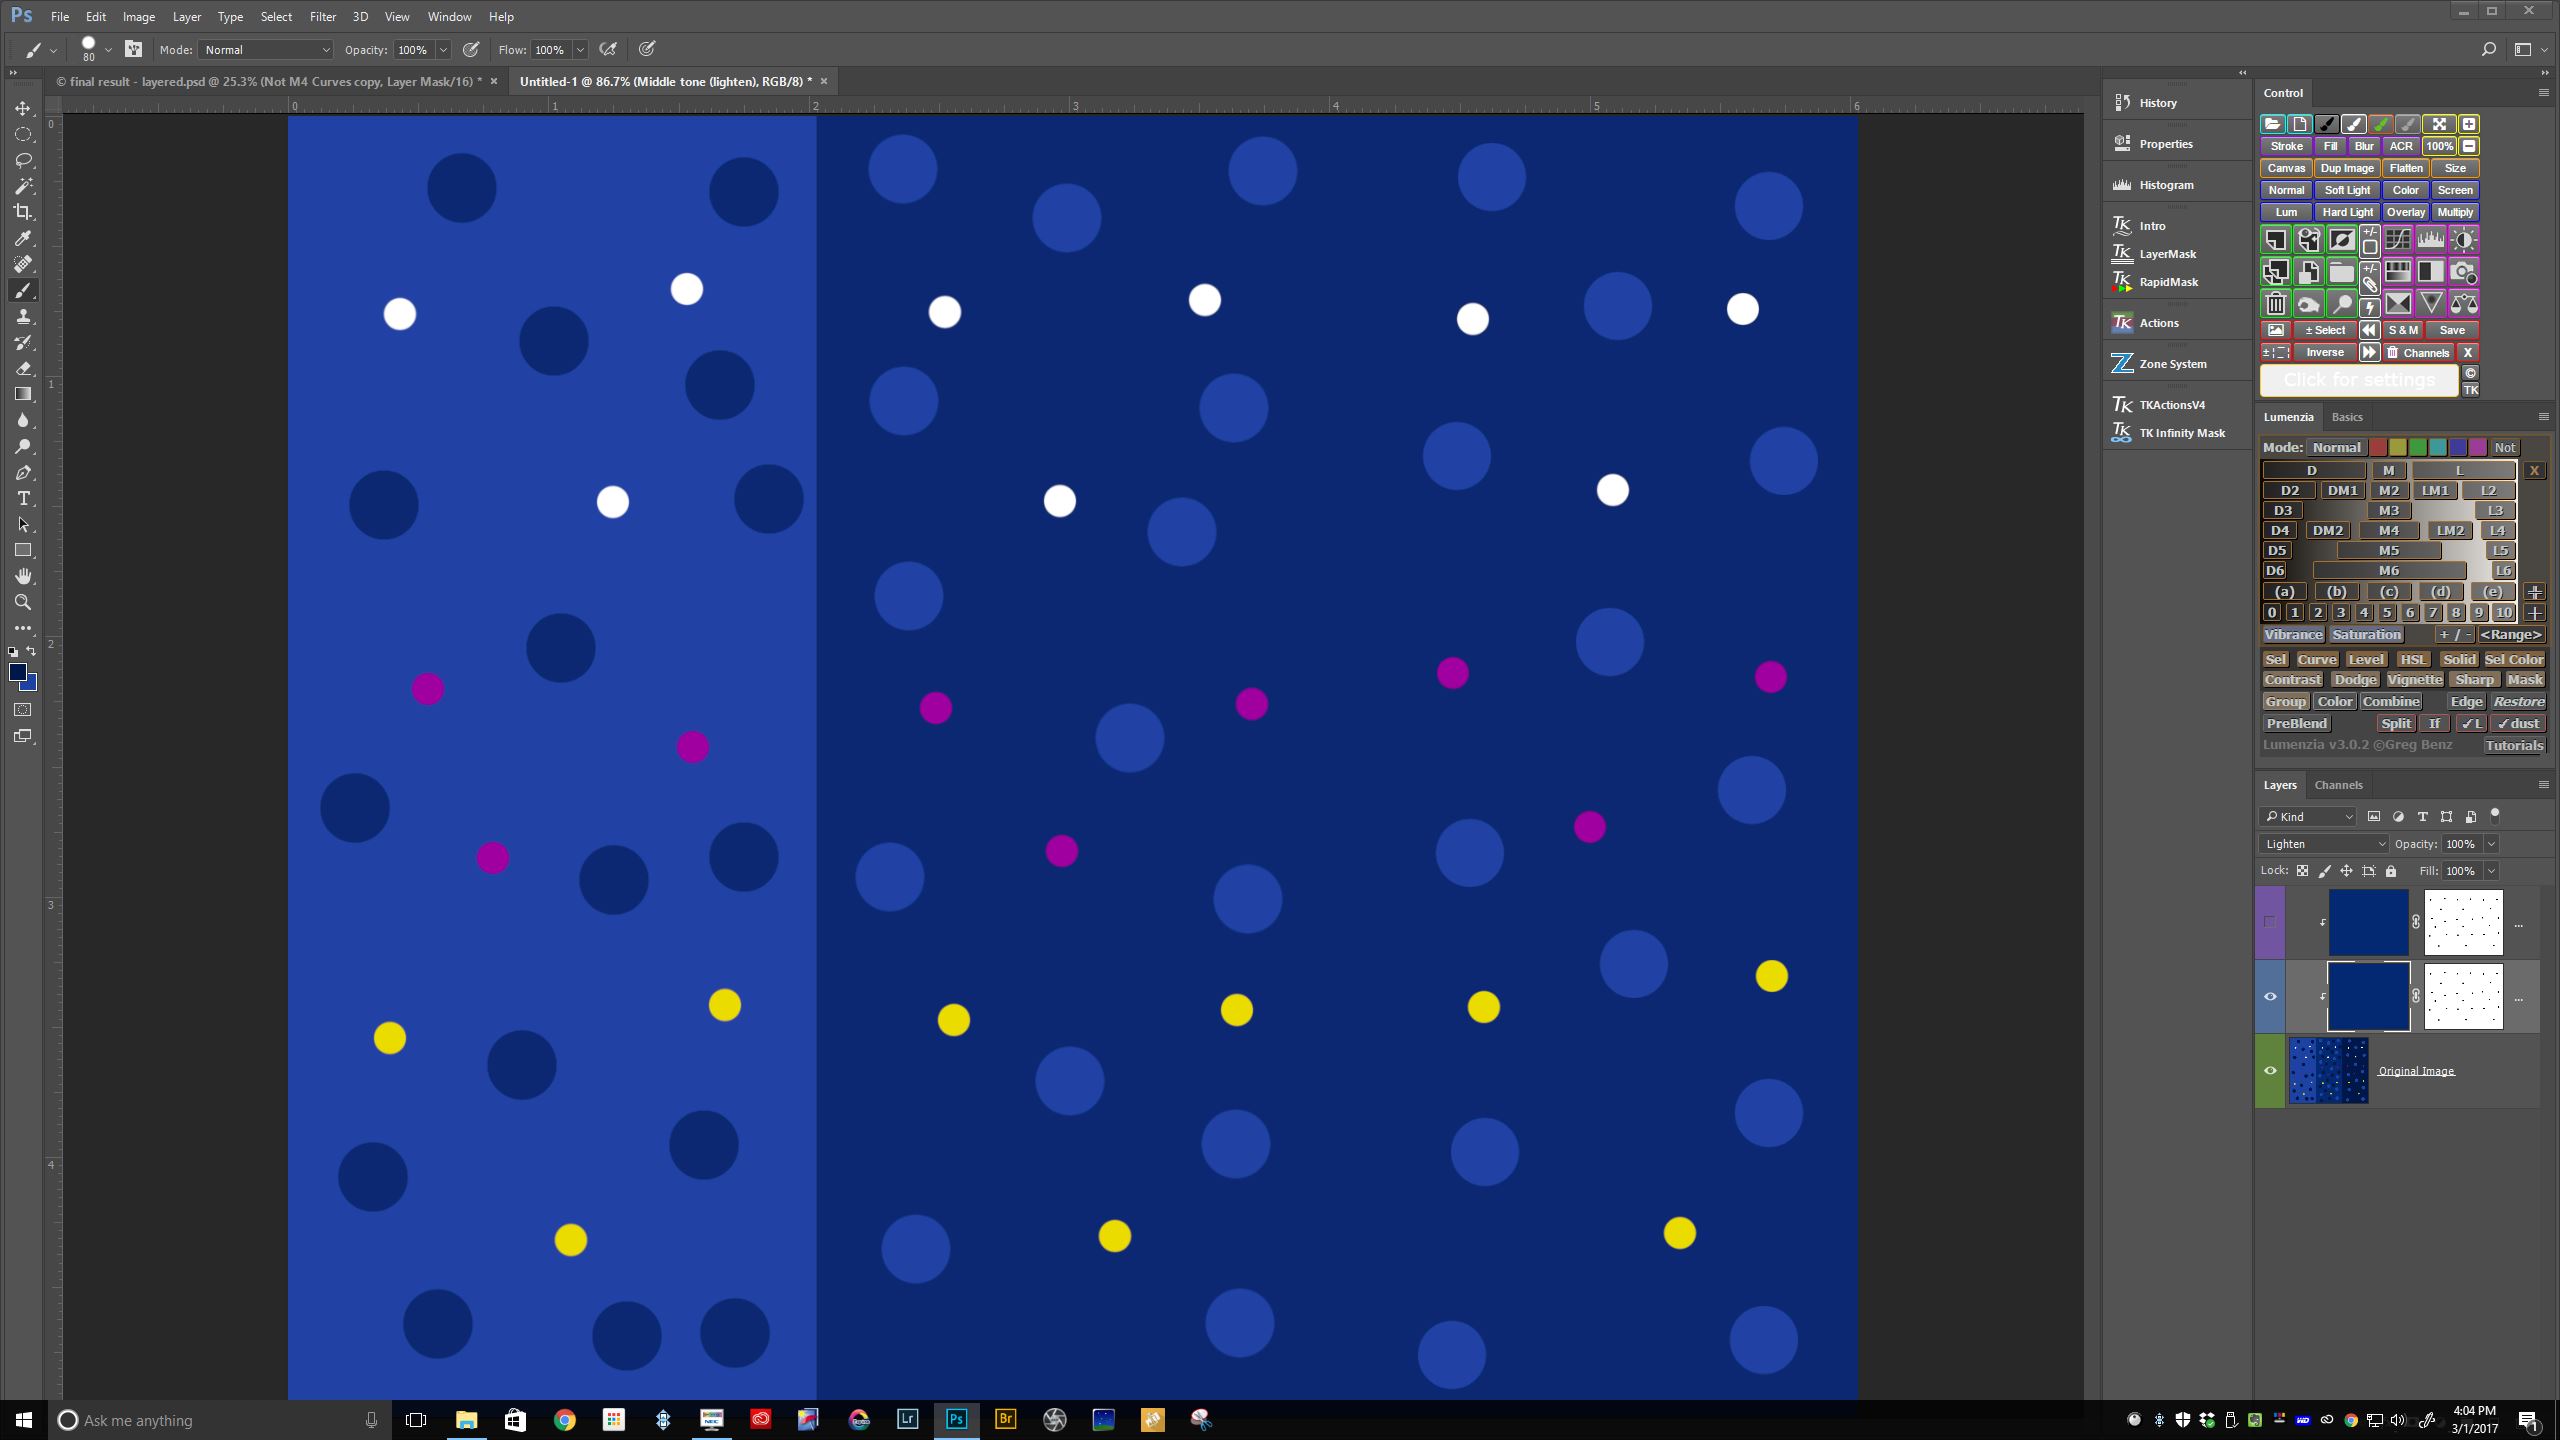
Second, I created two solid fill layers, each one sampled to a middle tone I chose from within the red square above. As in my demonstration with the blue dots and blue vertical bars, I set one layer to lighten blending mode, and one layer to darken blending mode, and set the opacity of both to 85%, to retain some graininess.
This is the result, shown at 100%. I was pleasantly surprised when I saw how well this procedure worked, well beyond anything I had anticipated. The stars are still the same sharpness as before the process, their colors remained steadfast, and the noise significantly reduced.
Before rushing to post the results of my experiment, I decided to try the technique out on a few of my other images, to see what would happen.
OH, the HORROR, the HORROR of it all. I won’t torture you with the results. Let’s just say, any changes in coloration or tonality across the sky renders this process useless. Unless you want to purposely convert the beautiful nuances of the night sky into a uniform, flat, dull, lifeless…..you get the picture.
For this procedure to have any hope of working, I would have to devise a way to apply fill layers though some type of gradient map that takes account of the tonality and coloration throughout the sky. Guess what? My research into creating the kind of gradient map I was looking for somehow led me right back to NIK Dfine.
It came to my attention that NIK Dfine had already tackled this problem in a very elegant way, only I was unaware of this capability, or how to tap into it. Apparently, I was attempting to invent the wheel, except that Google had already invented it, plus provided it with shiny new hubcaps, as well!

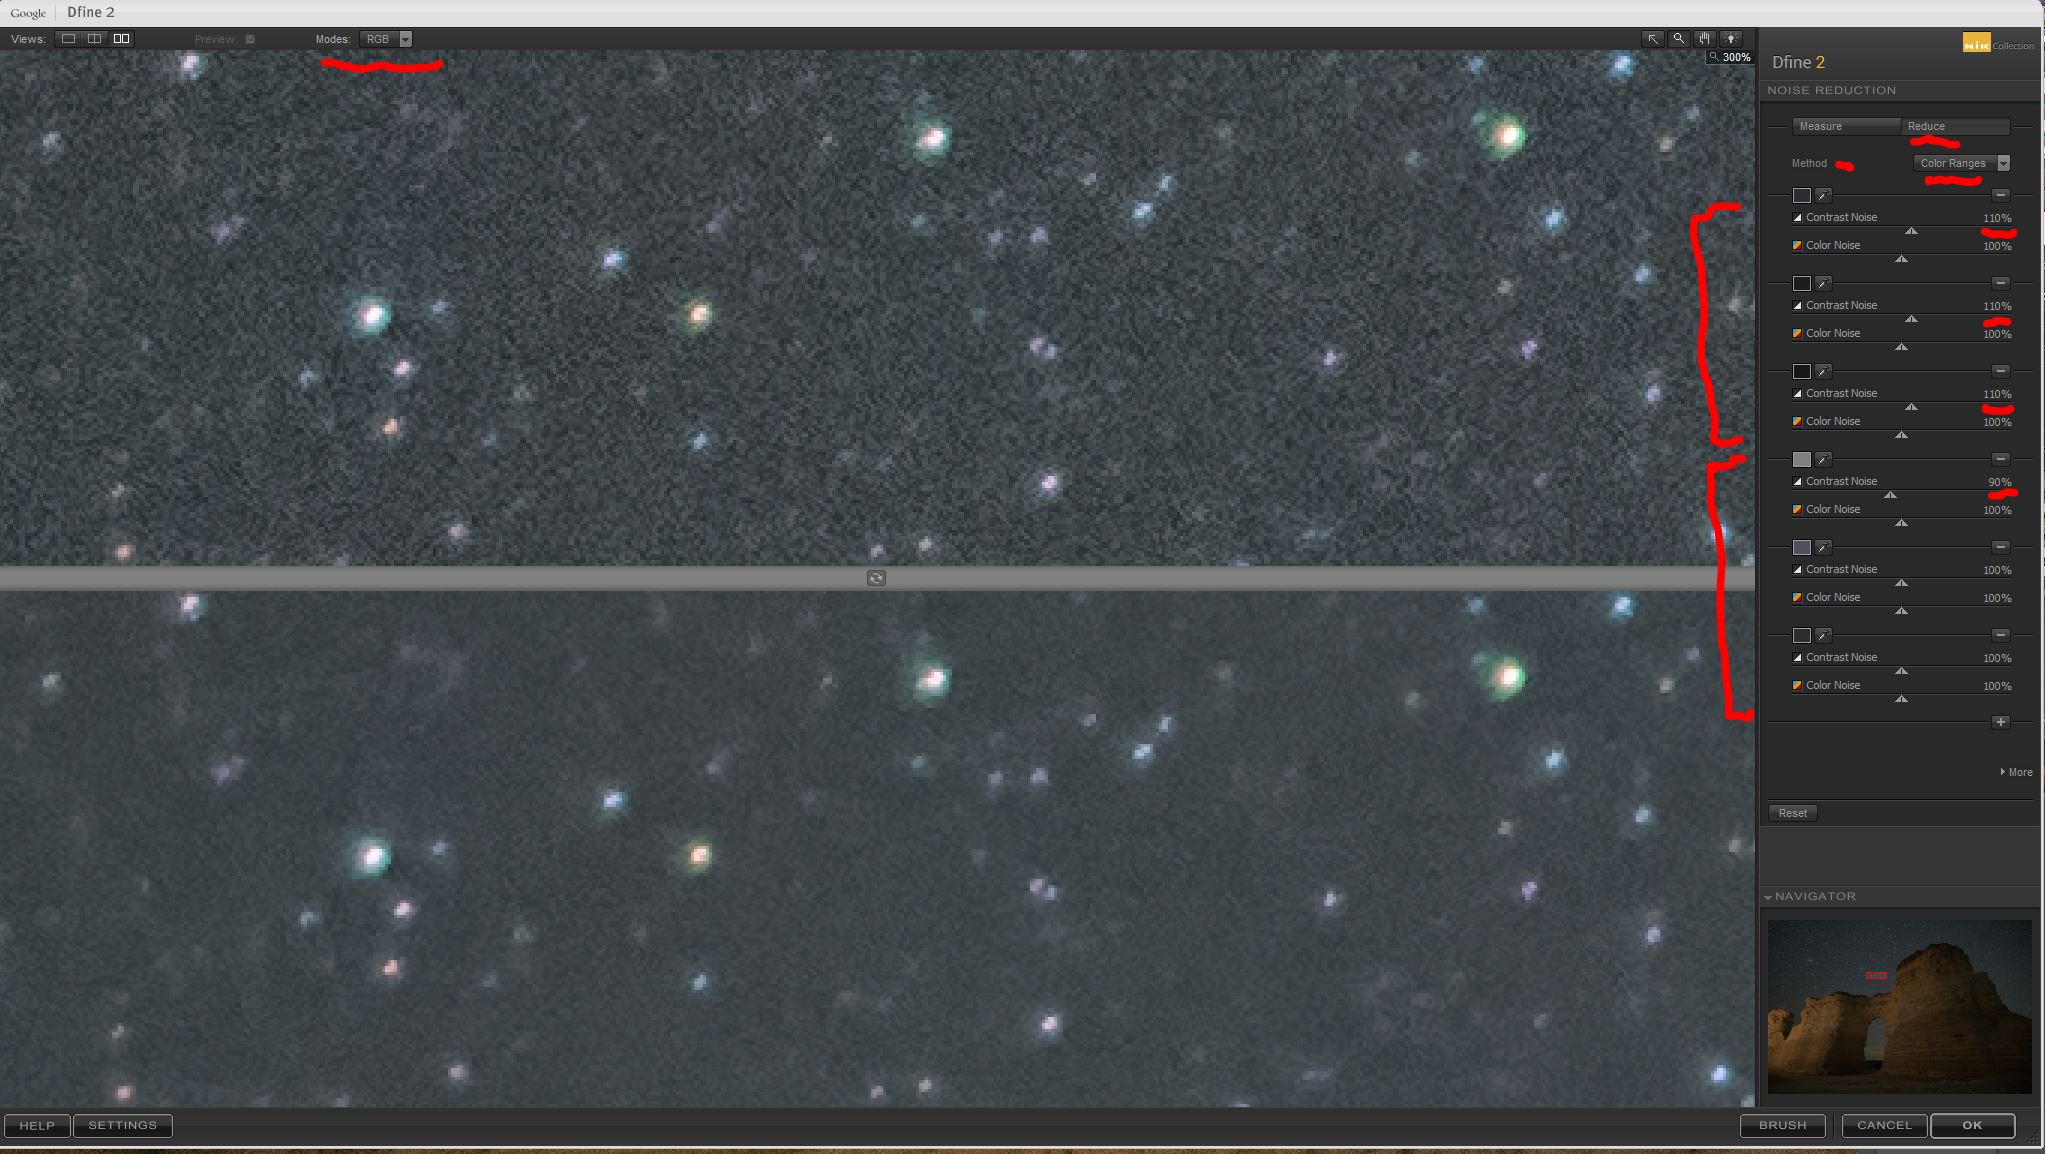
It turns out if you dig into NIK Dfine you can find some powerful functionality that does a far better and more comprehensive job of doing what I was attempting with my layer masking method of noise reduction. By tapping into the Manual mode, rather than the default automatic mode, and then choosing the Color Ranges mode, one can create customized noise control points specific to a particular image. If you examine the screen capture above, you will see two sets of Color Range controls I have created. For the upper three Color Range controls, I have used the eyedropper to sample dark, middle and light tones from the darkest region of the sky. For the lower three Color Range controls, I have created a set of controls to sample dark, middle and light tones from the lightest region of the sky.
Notice that in the upper three Color Range controls, which represent the darkest region of the sky, I have boosted the intensity of the Contrast Noise slider to 110%, under the logic that I can be a little more aggressive with noise suppression in the darker ranges than I can in the lighter ranges.
In the bottom three Color Range controls, which represent the lighter regions in the sky, I have reduced the intensity of the Contrast Noise effect to 90% in the lightest of the controls, under the logic that I want to be highly protective in the detail of the stars.
Using the Contrast Noise Sliders attached to each control range, combined with the Luminance Viewing Mode (found in the upper left), allowed me to visually adjust the noise reduction that was being applied through each Color Range, and I could be as aggressive or conservative in the noise reduction as I wanted.
Switching NIK Dfine back into RGB Viewing Mode (in the upper left) allowed my to verify that my adjustments did not degrade the color within the stars.
This is the finished result using NIK Dfine with 6 custom Color Range controls set for the sky exposure. Discovering that Dfine has the ability to designate Color Range controls at will has allowed me to use it quite effectively to reduce high ISO noise in pinpoint star images.
Stacking multiple exposures is my first choice to reduce noise in high ISO pinpoint star images, but when that is not possible, I will be turning to NIK Dfine frequently in the future. My next step will be to explore using Dfine with custom Color Range controls applied through a luminosity mask created with either TKv5 or Lumenzia. If the stars are protected by a good mask, I think I can be a little more aggressive with noise reduction in Dfine without sacrificing detail in the stars.
So what did I learn from conducting this exercise? First, some experiments are successes, while other fail miserably. This one was a failure. Second, good things can come out of failed experiments. It was only when my experiment failed that I discovered the advanced features NIK Dfine had tucked away behind a user-friendly, simplified interface.

