
UPDATE: The loveseat plans and guidance can be found HERE
You may recall a previous post wherein I declared a goal of erecting 100 bluebird nesting boxes around our property. The progress on that project has been satisfactory. To date, I have built 65 nesting boxes: 50 have been erected along our trails, 3 were given to others, and 12 remain in my shop, awaiting my ambition to pound more t-posts into the ground.
Since then, I have taken a short break from building nesting boxes in order to complete a couple of other quick projects. First, there was the benchtable, the subject of my last post. And now, I have just finished this Adirondack style love seat.
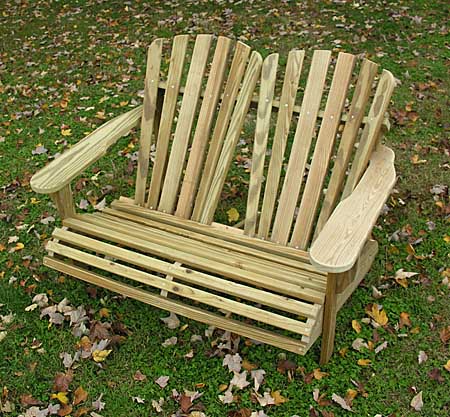
Well, it really isn’t finished, because to truly be called finished, I must apply some kind of finish to the love seat – then it will be, quite literally,  finished. But it’s close enough.
I intended to build this love seat from plans obtained from a book Retta purchased some time ago. After buying the necessary materials for the project, the next step was the preparation of the templates I would use to produce uniform, accurate parts. It turns out the author of the book, or the editor, or both, did not check the construction plans for accuracy and/or completeness. It soon became apparent that many critical dimensions and cutting angles were omitted from the plans.
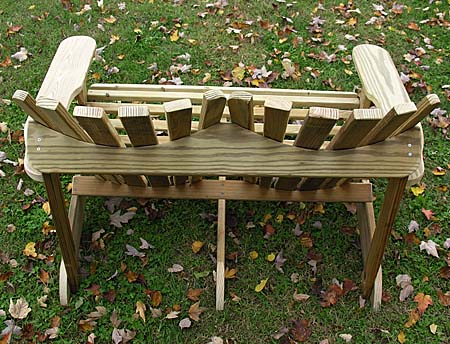
Determined to build this love seat, I pressed forward, figuring (correctly, as it turned out) the worst that could happen would be a little wasted time and lumber. The photograph above shows the contoured seat bottom assembly that had to be built, but because the plans offered little assistance, a lot of guess work (and wasted lumber) went into building this part of the seat.
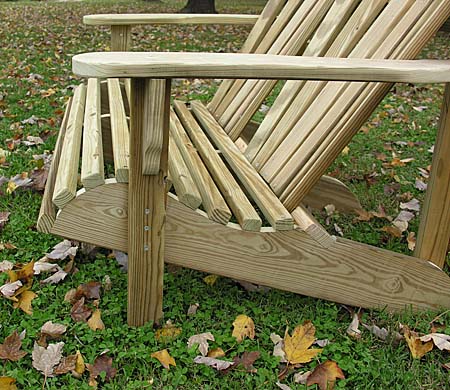
The love seat is made from 1″ stock (5/4 x 6″ pressure treated deck boards), and feels quite sturdy.  It is designed with a series of three seat supports and substantial bracing, as you can see from the picture above.
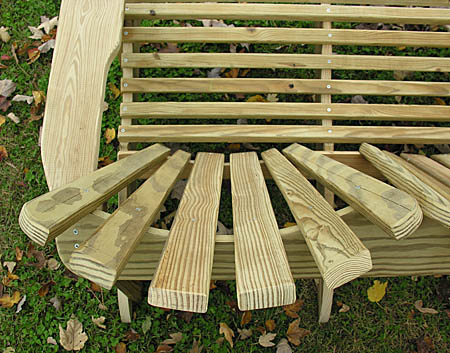
The reason I decided to build this seat, even though the plans were deficient, was that the design promised to be extremely comfortable, with the contoured seat bottom that I mention before, as well as the contoured seat back, which is evident in the photograph above.
Even though I spent a lot of extra time, and wasted some lumber experimenting in order to get the seat angles just right, the project turned out to be well worth the effort. This is one of those pieces that, once seated, you just don’t want to get up out of, due to it’s very comfortable design. Now that I have a working sample in front of me, I will build accurate templates, so that I can build several at a time and scatter them around the property (along with all the bluebird nesting boxes and benchtables ;)
 ___________________________
In commenting on the Benchtable post, Karl suggested that I upload plans for the benchtable, so that they may spread throughout the Ozarks. As it happens, I recently ran across a wonderful little drafting board while at Grizzly Industrial  in Springfield, Missouri.
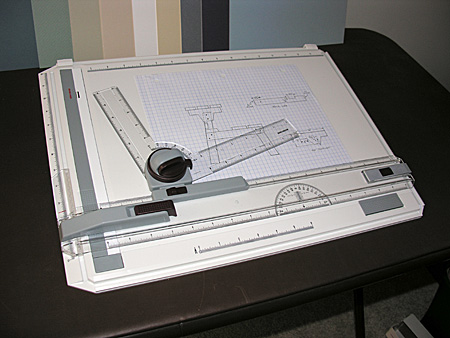
Now, once I brush up on my mechanical drafting skills, I’ll try to figure out how to post the plans on-line for those who may wish to build something in their spare time.


I’m jealous. First of your having spare time, and second, of your drawing board. Although I don’t see any way in which you can reproduce the curves required for the base of the seat!
whoo hoo! i believe that on your way to springfield you pass within 200 yards of my house. if you can’t figure out the web posting of your drawing i’d happily invite you for some tea and a short rest for a plans exchange on your next journey north on 160. we’re very near kissee mills.
btw, at MFA ozark i saw a neat slip cover tube for t-posts that prevent varmints from climbing them.
Hal, You are my idol. If we ever get the new barn built (which will include my dream workshop) I’ll be able to copy your wonderful work. You would make a wonderful teacher with your attention to detail.
Peace
Tjilpi – Retired folk are supposed to have a little spare time on their hands, aren’t they? As for the drafting table, you too, can own one for only $69.95 at the Grizzly link, above. Once you have your drafting table, you can augment it with a french curve
http://en.wikipedia.org/wiki/French_curve
in order to draw the curves on graph paper, which can then be scaled up for creating a cutting template. Or, you can use a flexible curve
http://www.grizzly.com/products/G2537
to create a curve directly on the template, using the “eyeball” technique. Once the template is created, subsequent pieces can be replicated with precision.
Karl – Thanks, I’d like to stop by for a spot of tea on my next trip along 160.
A varmint-proof slip cover tube for t-posts sounds like just what I need for the bluebird nesting box project. The MFA in Ozark is a neat farm store. That’s where we bought the walnut gathering tool that I am so fond of (seen in this post from last year http://www.mitzenmacher.net/blog/?p=575 ).
Woody – If I’m your idol, than I think you set your sights a little too low 😉
The closest I ever got to teaching was as a lecturer/TA during my college years – I never achieved a state of comfort in front of a group of students, but I did enjoy the one-on-one interaction as a mentor/tutor.
With all your free time you could upload a Google Sketchup model for us!
What they said!
Hal, I’m glad you’re onto those French Curves. I went to France a couple or more times, and saw a few curves while there, but that’s a different story.
At present I’m designing a trellis for growing bougainvillea – it’s only 5 uprights of 2″ galv pipe with 7 metres of 2″ galv pipe as a topping. No curves needed.
Still wondering if the trellis partitions should be 1/8″ concrete reo or should I go for wood lattice, as the iron reo can heat up and can kill off the tendrils of a young bougainvillea.
[I’ll translate that into Americanese if you need… :)]
Tjilpi – I’m guessing that the reo you refer to is what I call rebar (reinforcing bar) in Americanese, but I still haven’t translated “metres”. Is that one of those funny metric system doodads?
Hal – you’re right. I have heard it called rebar here too; but we tend to finish things off with an “o” when possible.
Righto?
On the “metres” thing: I thought your knowledge of French Curves would allow you to translate “metres” into “meters”.
And while we’re on things metric, do you know if space and time have an intrinsic metric, or have we made one up?
That is, I wonder if the Universe is really only 1″ across???
I have a quick question for you. I’m designing a version on CAD of your chair based upon your pictures to build over my Christmas vacation and I was curious as to what type of wood you were using and where you buy it at? Around here, the only non-pine dimensional lumber is at Menards where you can get some “one by” (3/4″ thick) lumber in oak and redwood. 1″ nominal is out of the question unless I plane it down and I can’t find ‘two by’ hardwood lumber anywhere.
Ed – Sorry for the delay. Because I intend to build many of these seats, I looked for something relatively inexpensive and durable. I used 5/4″ x 6″ x 8′ treated deck boards, which are 1″ actual thickness. The edges of these boards are usually milled with a 1/4″ roundover, which did not present any problems for this particular project (in fact, I used a 1/4″ roundover bit in my router table to ease the edges of all the ripped parts).
The 8′ lengths of deckboard cost about $5.00 each at Home Depot or most any lumber yard.
Pingback: Ranch Ramblins » Blog Archive » Loveseat Plans
I am going to build this chair and i need the spaces between the back slates and the set slates so i can get the gap right
thanks for your help
For seat covers, i prefer to use cotton or polyester woven fabric because i like its feel.~-.
I would like to get a set of plans for the loveseat to downlaod. I have vacation homes in south of France and would love to have them scattered around for guests.
Do you have them available?
Larry,
Loveseat plans are located here:
http://www.mitzenmacher.net/blog/?p=1072
I entirely agree with your information and facts. 🙂 There’s absolutely nothing more enjoyable than relaxing in a hot summer time sun with pals.
Pingback: Fall Colors 2011 | Ranch Ramblins