
Although my last blog post indicated that this current post was to be on the topic of barbed wire, that will have to wait, as I would rather show you my new benchtable (rhymes with vegetable), the latest project to emerge from my shop.
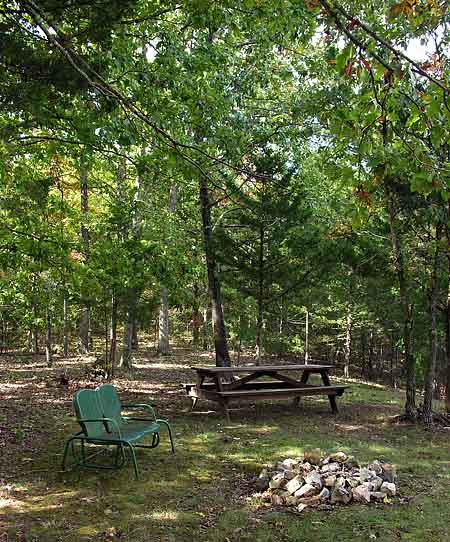
There are many locations around the property where Retta and I like to picnic, such as the woods behind the catfish pond. Because we use this area to picnic regularly, we have “furnished” it with a fire ring, a rehabilitated glider, and a picnic table.
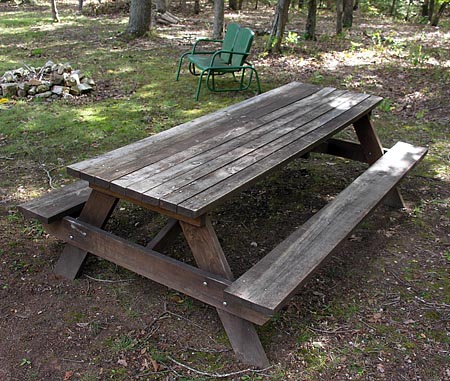
This is the heavy, full-sized (8′ long) picnic table that I built a few years ago (note to self – picnic table needs a new coat of stain). It is a sturdy table, and works just fine for a picnic, but as you surely know, picnic tables are not comfortable for sitting any length of time. Hence the steel glider, which provides comfy seating for extended periods of leisurely reflection and conversation. As Pablo, at Roundrock would surely agree, nice, comfy seating is a necessity for peace-of-mind and happiness here in the Ozarks.
Now, there are many locations (perhaps 20 or so) around the property where Retta and I like to stop and rest while on a hike, to simply sit and watch the grass growing under our feet, or the birds flying overhead. But where to sit?  One needs a comfy seat to sit in (unless one likes to sit in the sometimes damp, sometimes tick-laden grass).
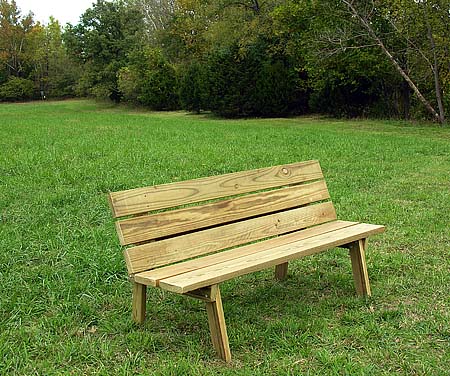
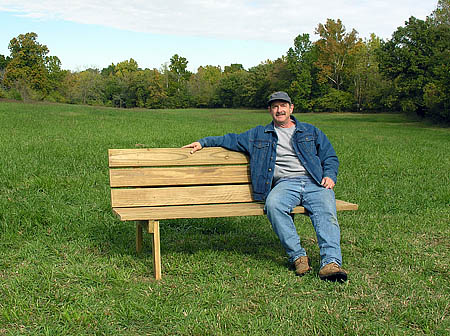
To provide comfy-seating around the property, I found construction plans for a wooden bench in a home-project book, and after altering some dimensions and angles to suit my tastes, built a prototype, which is pictured above.
The bench is made from treated “2 by” lumber, is six feet long, and is heavy enough that it will “stay put” in the winds that sometimes scream down the hollers of the Ozarks. Most important, the dimensions and angle of the bench combine to create a very comfortable seat.
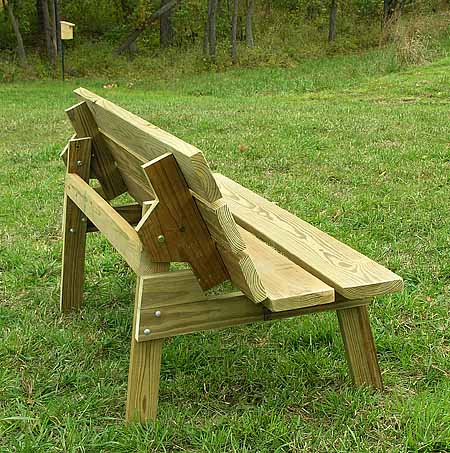
In this rear-view of the bench, you can see the stout (and rather unorthodox) supporting structure that forms the back of the bench. Besides adding heft to the bench, this assembly allows the back of the bench to swivel up and lock in a horizontal position, which converts the bench to a picnic table. And that is the real beauty of this bench design. It is a bench, but it is also a table. And so, I call it a “benchtable”.
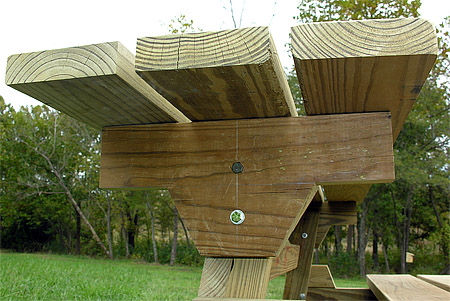
This photograph shows one of the bench back/table top support brackets. The back/top pivots on the lower, fixed hex-bolt. The upper bolt (without a nut) locks the top into position. To restore the picnic table to it’s bench form, simply pull out the upper bolt and lower the back/top assembly.
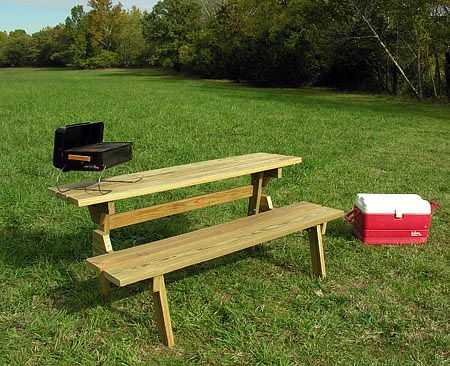
Even though this opens to only what amounts to a picnic “half-table”, it is sturdy and still provides room for a portable BBQ and a couple of hungry picnickers.
Now that I have built one prototype, I have identified a few little details that I want to change, and I will then get to work producing templates, so that I can easily duplicate the parts. My goal is to build enough benchtables to place at strategic spots on the property so that Retta and I will have no excuse not to sit back and watch the grass grow.
:) As I am doing here :)


I Love it!
Never seen anything like it but like Duane said, “I love it!”
Very nice design. Just the right size for you and your honey.
When I grow up, I want to be like you!
Cool beans Hal!! That is just right for fishing or sighting in a rifle or having a picnic with people you don’t like..lol
brilliant, you’ll have to up load your plans. i’ll build at least one. that way we can have these little guys litter the ozarks. it seems that two shoved together would make a standard picnic table. much handier having two of these than a single picnic table.
i couldn’t identify the horizontal locking mechanism. please divulge.
top bolt, right..
Pingback: Ranch Ramblins » Blog Archive » Adirondack Love Seat Project
Dear Frined,
Your bench is very-very good.
I wont build one for me yard too.
Can you send me your plan and dimentions?
Thank you in advance.
Kostas
Kavala-Greece
Are your “tweaked” benchtable plans available yet?
Great photos, beautiful country.
Thank you.
Pingback: Ranch Ramblins » Blog Archive » Convertible Bench/Table Construction Plans
great looking benchtable, what a nice design. I’d like to build mine in sets of two to put around my place so that when you converted them to tables you could put them up next to each other and make a full size picnic table… nice blog!
great looking bench, any plans available yet?
Curtis – Construction plans are located here:
http://www.mitzenmacher.net/blog/?p=1111
thanks a million Hal
I love it. Great design.
Hello, I was wanting to find out if you could send me the plans and dementions for the picnic table. The one that is 8 ft. long. I would so appreciate it. Thanks Christie Harvey
Great idea!! Can you send me a copy of the plans for the benchtable?
JoAnn– Construction plans are located here:
http://www.mitzenmacher.net/blog/?p=1111
Could you send me the plans for the 1/2 table? My son is looking for an Egle project for the liabary these would be great around theiir pond
Pam –
Construction plans are located here (as noted in the previous comment):
http://www.mitzenmacher.net/blog/?p=1111
Hal,
I am a life scout and love these plans. For my eagle project I would like to make four of these benches for a neighboring school. My only concern is there a way that once the top part is up can it be locked somehow so it doesn’t hurt a small child? I am very excited about this plan and will also show the principal how you could place them together and make a picnic table!
Thanks for any advice,
Connor
Life Scout
What an awesome bench – just perfect for what i have in mind, shame though that it doesn’t also fold into a flat bed – he he.
Connor,
The table locks into place with the insertion of two eyebolts, as per the plans located here:
http://www.mitzenmacher.net/blog/?p=1111
To make the table even more secure, it would be simple to use nuts on the ends of the eyebolts, so that children would be unable to easily remove them.
Hal,
Just wanted you to know that I finished my eagle project. I ended up making 8 of the tables for a nearby elementary school that is in desperate need of benches as well as tables. The project went fabulous and the school is very happy with the benches. Thank you so much for sharing the plans on the web.
Connor Leisz
soon to be eagle scout!
I just built two of these table in 5 hours. I took a bunch of photos for a step by step tutorial. If you would like these pictures to put them on your website I will be more than happy to send them to you. I was curious also on why you didn’t use any carriage bolts on the red bench but you did on the other one. Your instructions still calls for carriage bolts. Also what type of wood did you use for the red bench. Thank you for this great plan. The two I built are for my grandmothers lake house and I just used pressure treated wood so I didn’t have to stain them but I like the look of the red ones and will be building four more for my house.
Jerry Kiley
Jerry,
I’m glad you found these plans useful. Regarding the carriage bolts, both benches use them – they just seem to blend in on the red bench after it was stained, so they are not apparant in these low resolution photographs.
I considered using pressure treated lumber for this project, but I have read in several places that one should wash one’s hands after handling and working with pressure treated wood. Knowing this, I thought it might not be a good idea to use pressure treated wood for this application. Instead, I have been using untreated pine or douglas fir, and finishing the benches with a tinted sealer/stain.
I love it when I find something cool. Hats off to you, sir.
I came across this looking for a bench to build. Great Job! I’m thinking of attempting something similar. Thanks for the inspiration.
Excellent work!
Do you have plans for this bench??
Plans available here:
http://www.mitzenmacher.net/blog/?p=1111
Hey can you send me plans so i can build this in shop class
Wonderful! How difficult to build?
Where can i get a copy of the plans to make the bench table?
The plans can be found in the following post:
http://www.mitzenmacher.net/blog/?p=1111