How I Learned To Love NIK Dfine

To my knowledge, there is no better way to reduce or eliminate high ISO random noise in a night sky image than to align and stack multiple exposures and apply noise reduction through some form of median stacking.  Having said that, I would like to reduce high ISO sky noise at times when I didn’t take multiple sky exposures, for whatever reason. I have used the noise reduction tools in Photoshop, Lightroom and NIK Dfine, and (in my hands, at least) found the results from each so similar that I would default to Adobe for noise reduction, either in Lightroom or Photoshop.

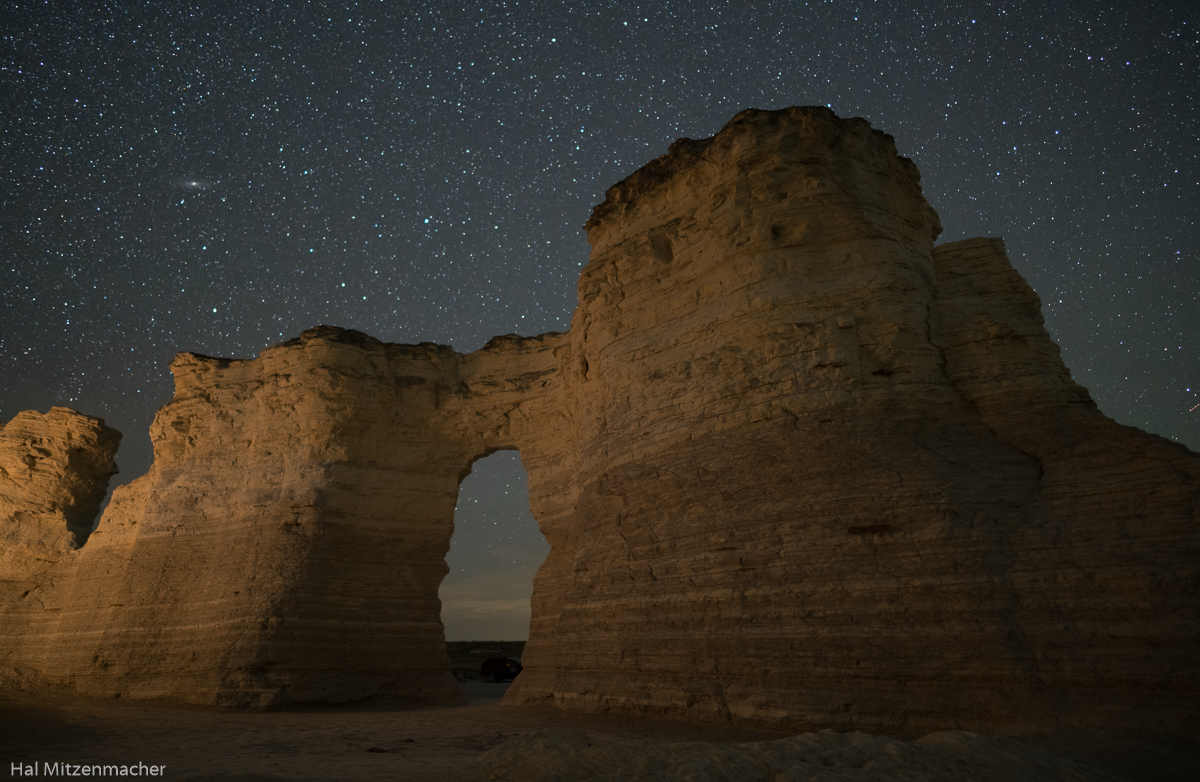
In re-editing the photo above, I thought it would be fun to experiment with a possible noise reduction technique that had been bouncing around in my head for a few months. Here is the gist of what I wanted to accomplish.

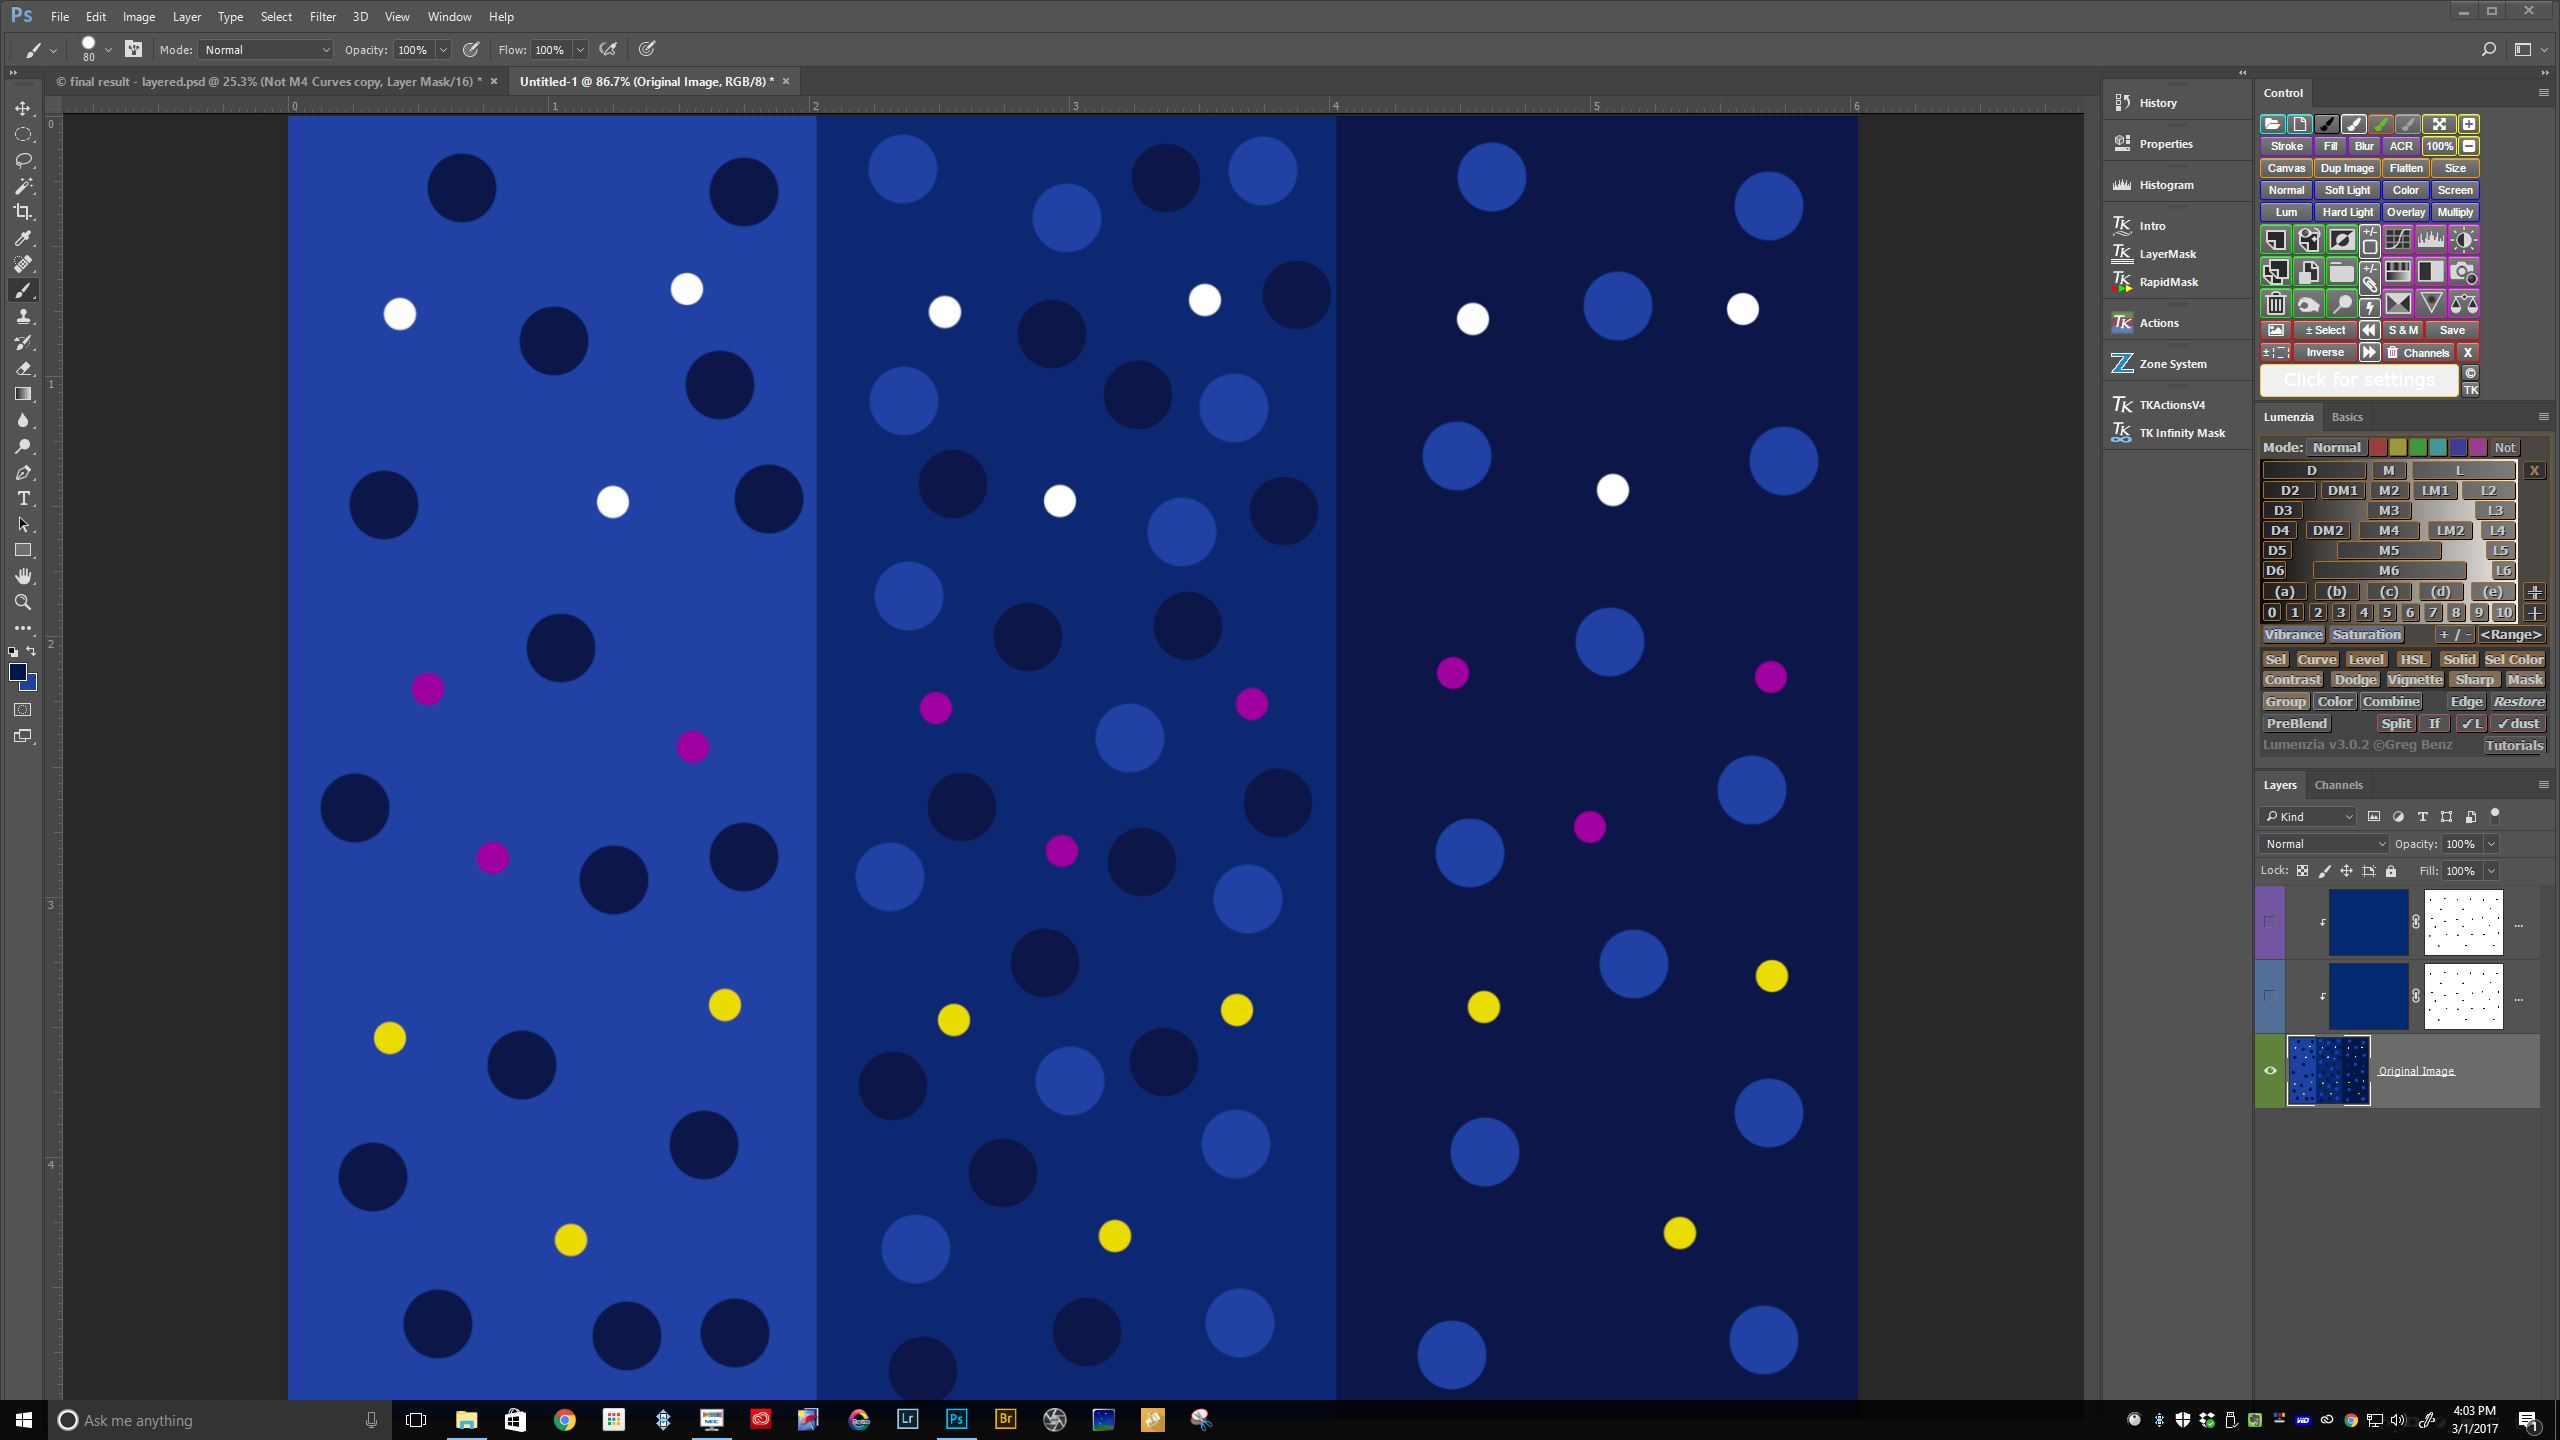
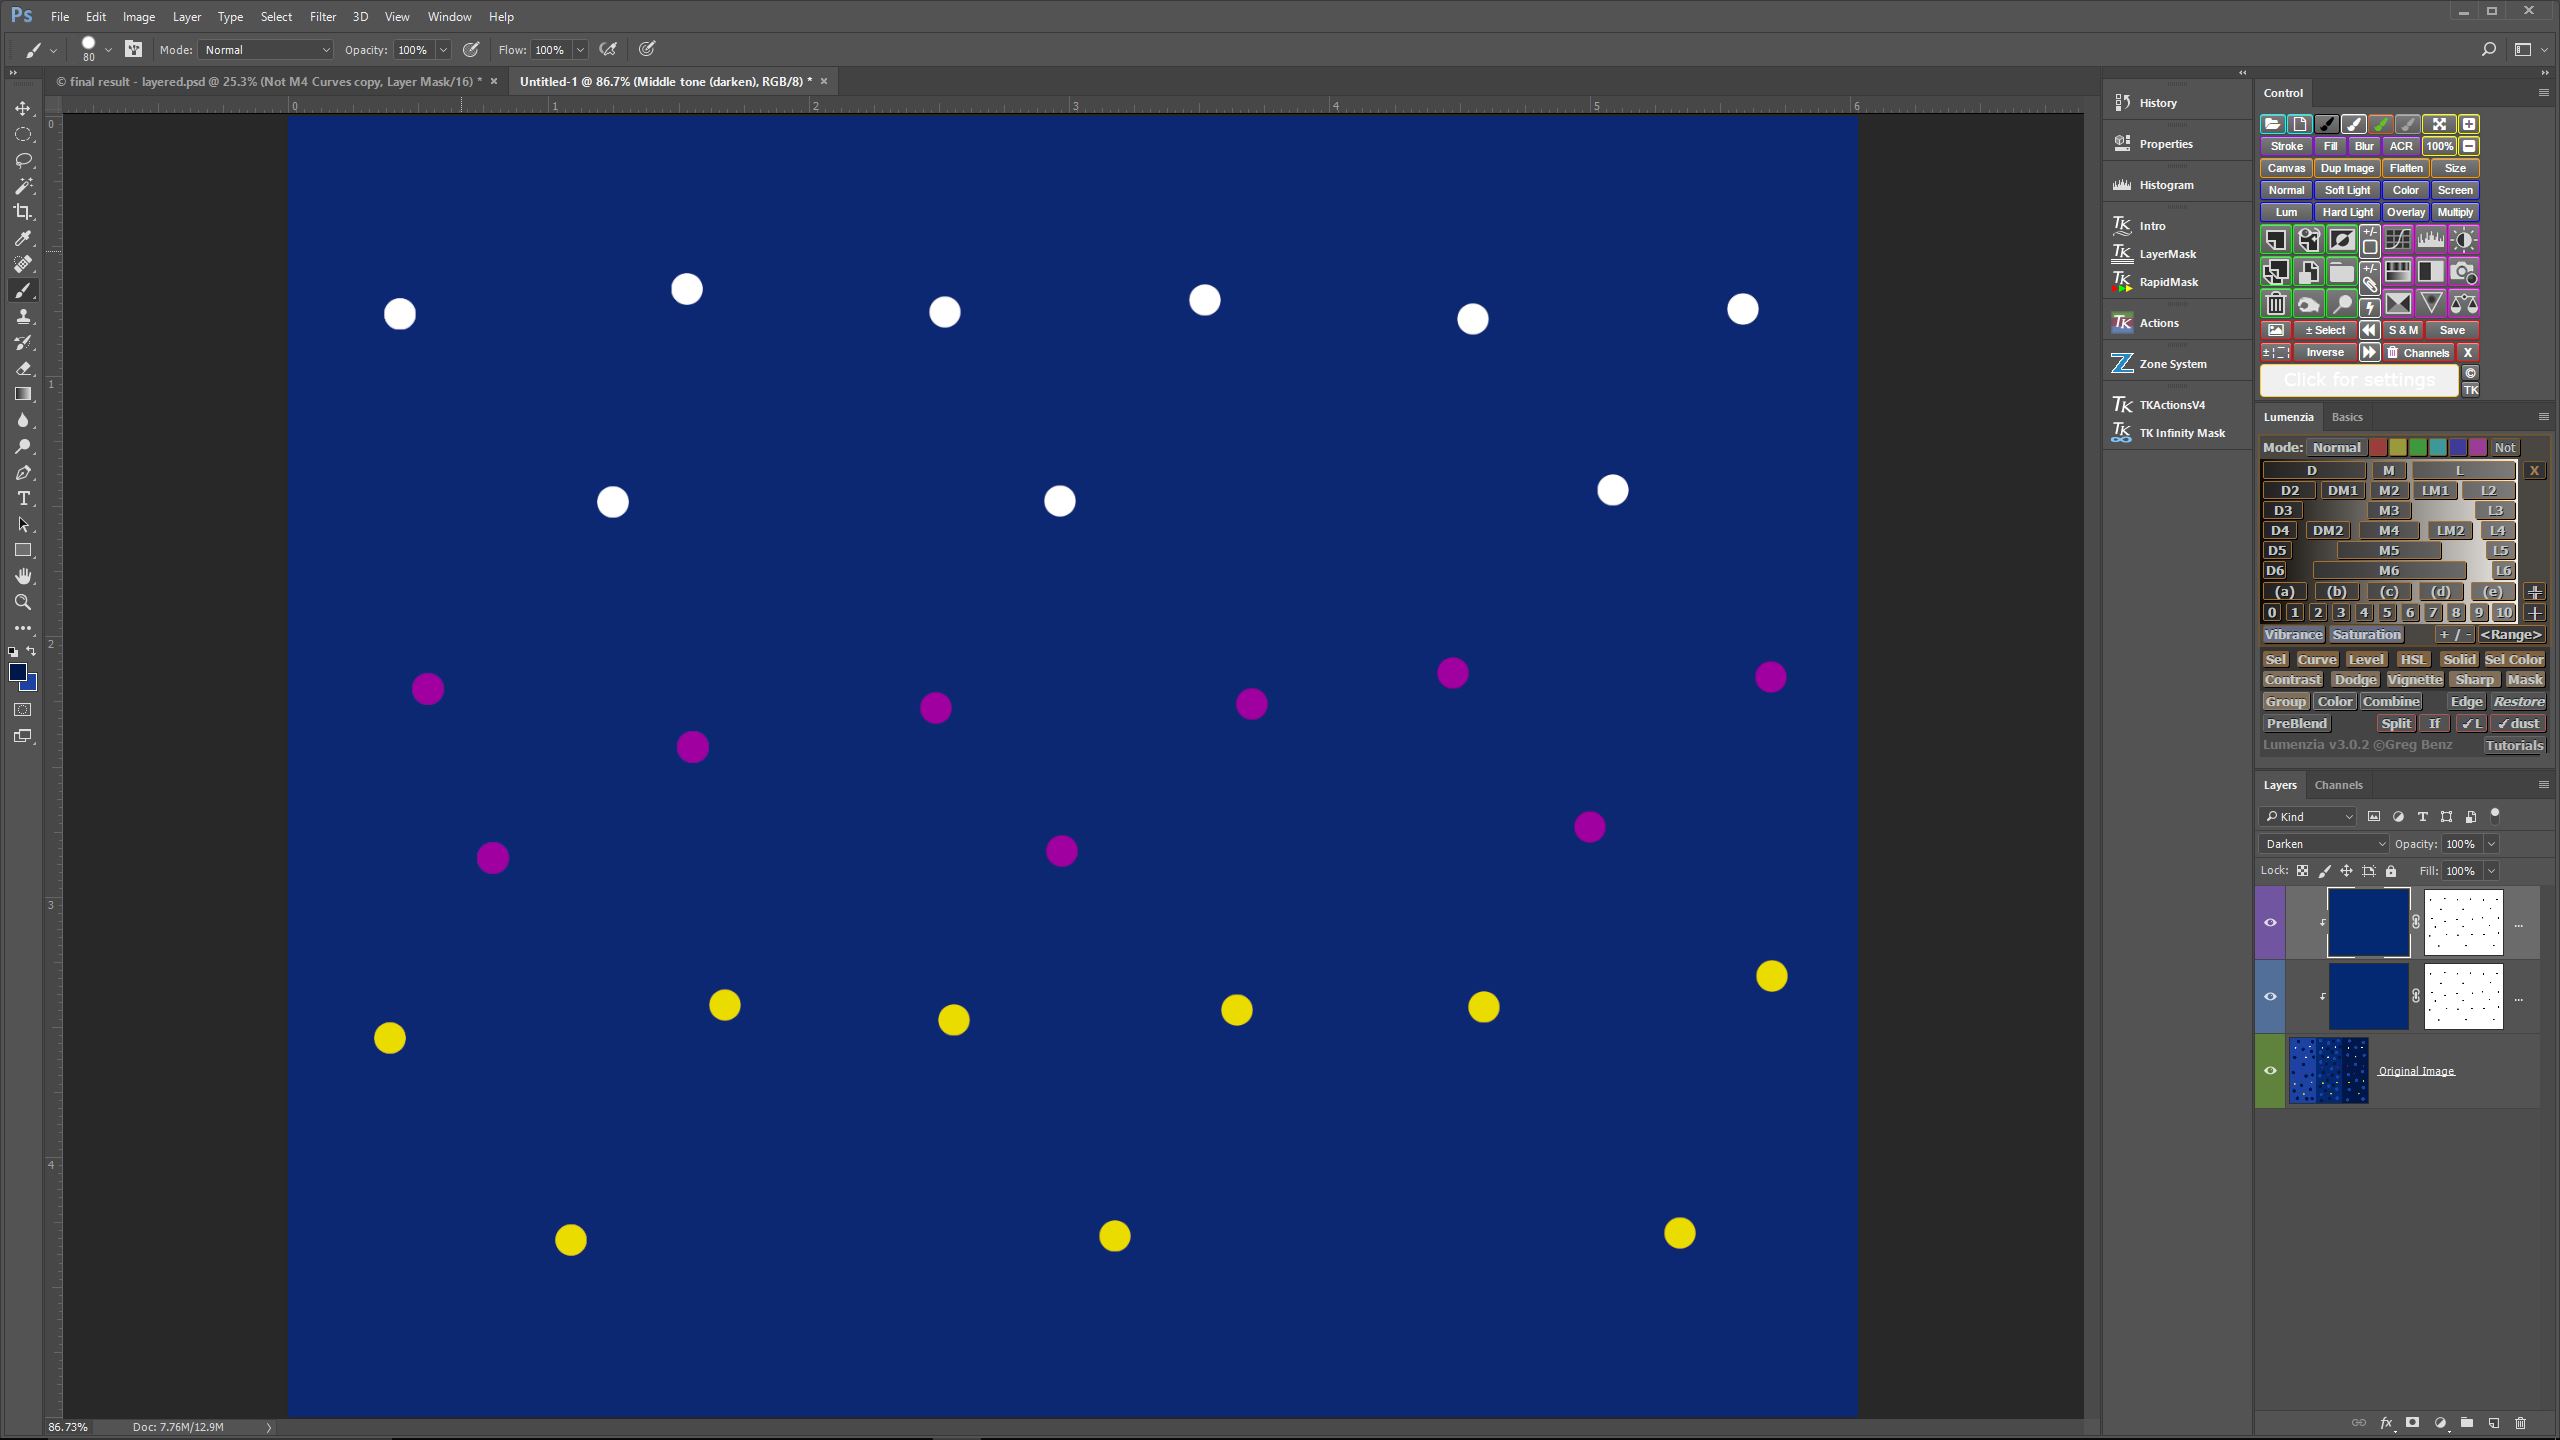
Suppose the small white, yellow and magenta dots represent the stars in the sky. Now imagine that the three vertical bars (light blue, medium blue and dark blue) represent the range of tones comprising the noise.

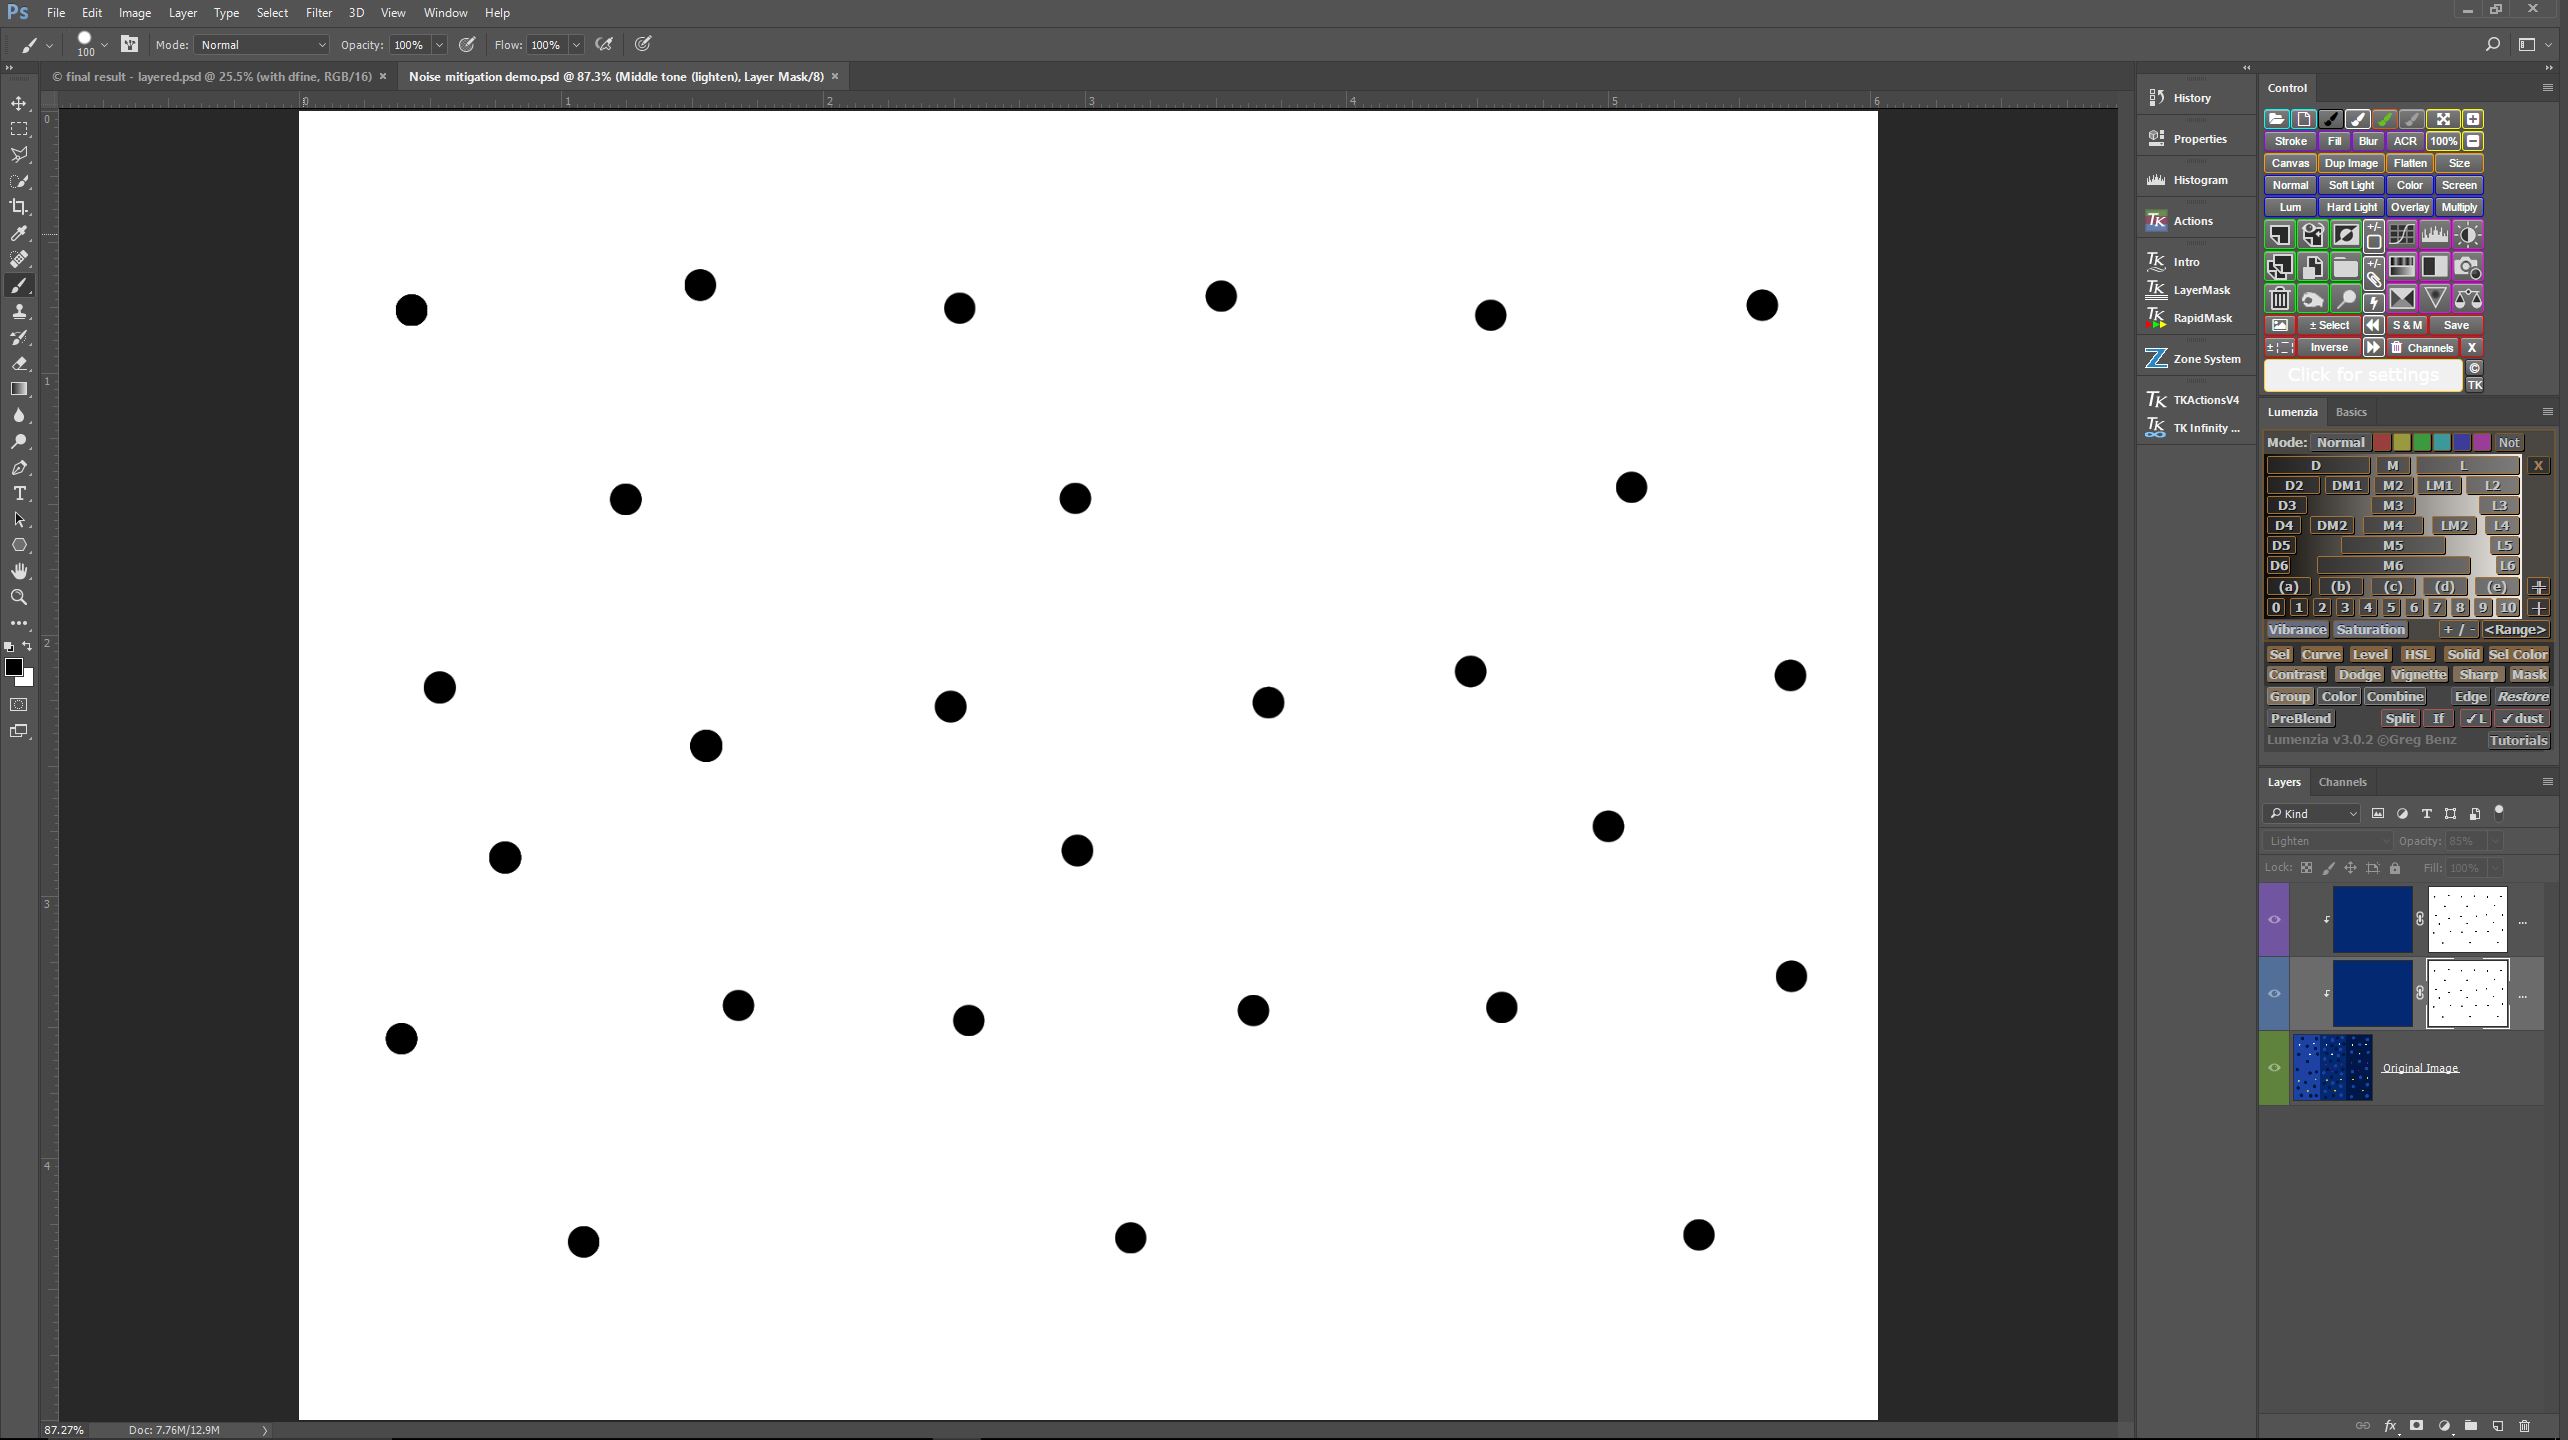
As the first step I created a luminosity mask to mask out the “stars”.

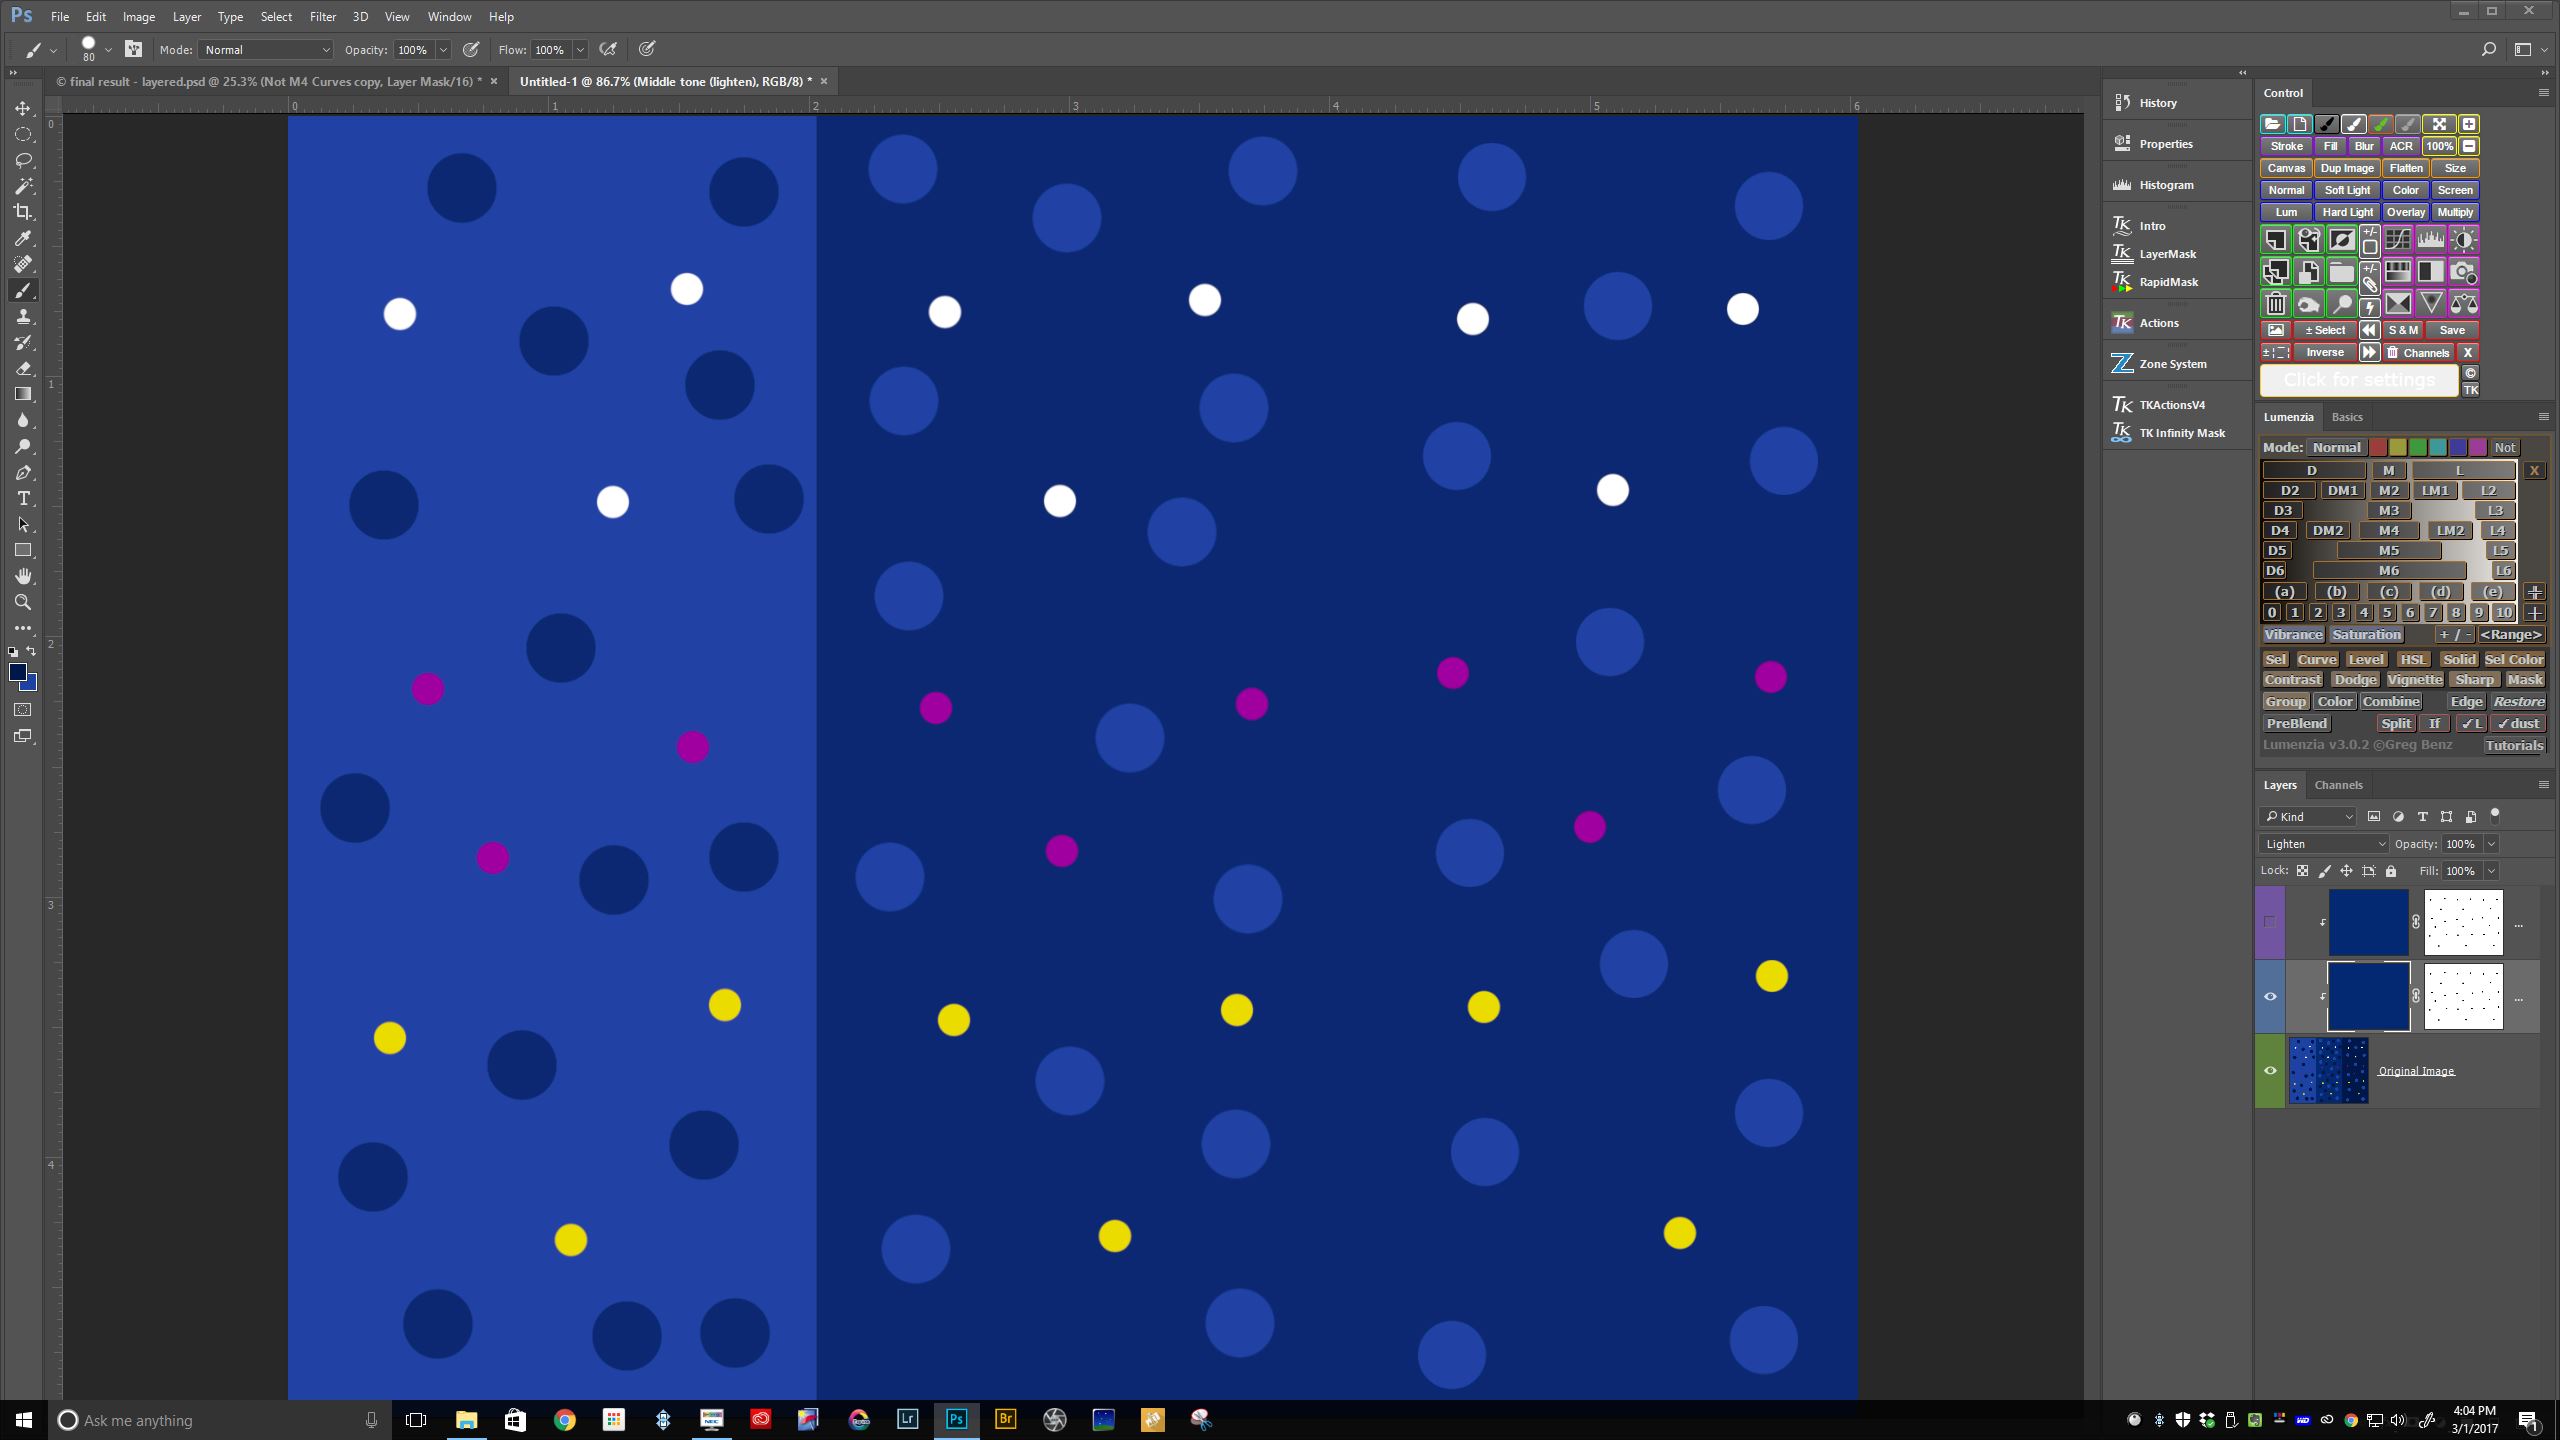
The second step is to create a solid fill layer (sampled to the medium blue bar), and set the blending mode to lighten. Since I have set this as a clipping mask, the “stars” are unaffected. Notice that the dark blue dots and dark blue vertical bar have disappeared.

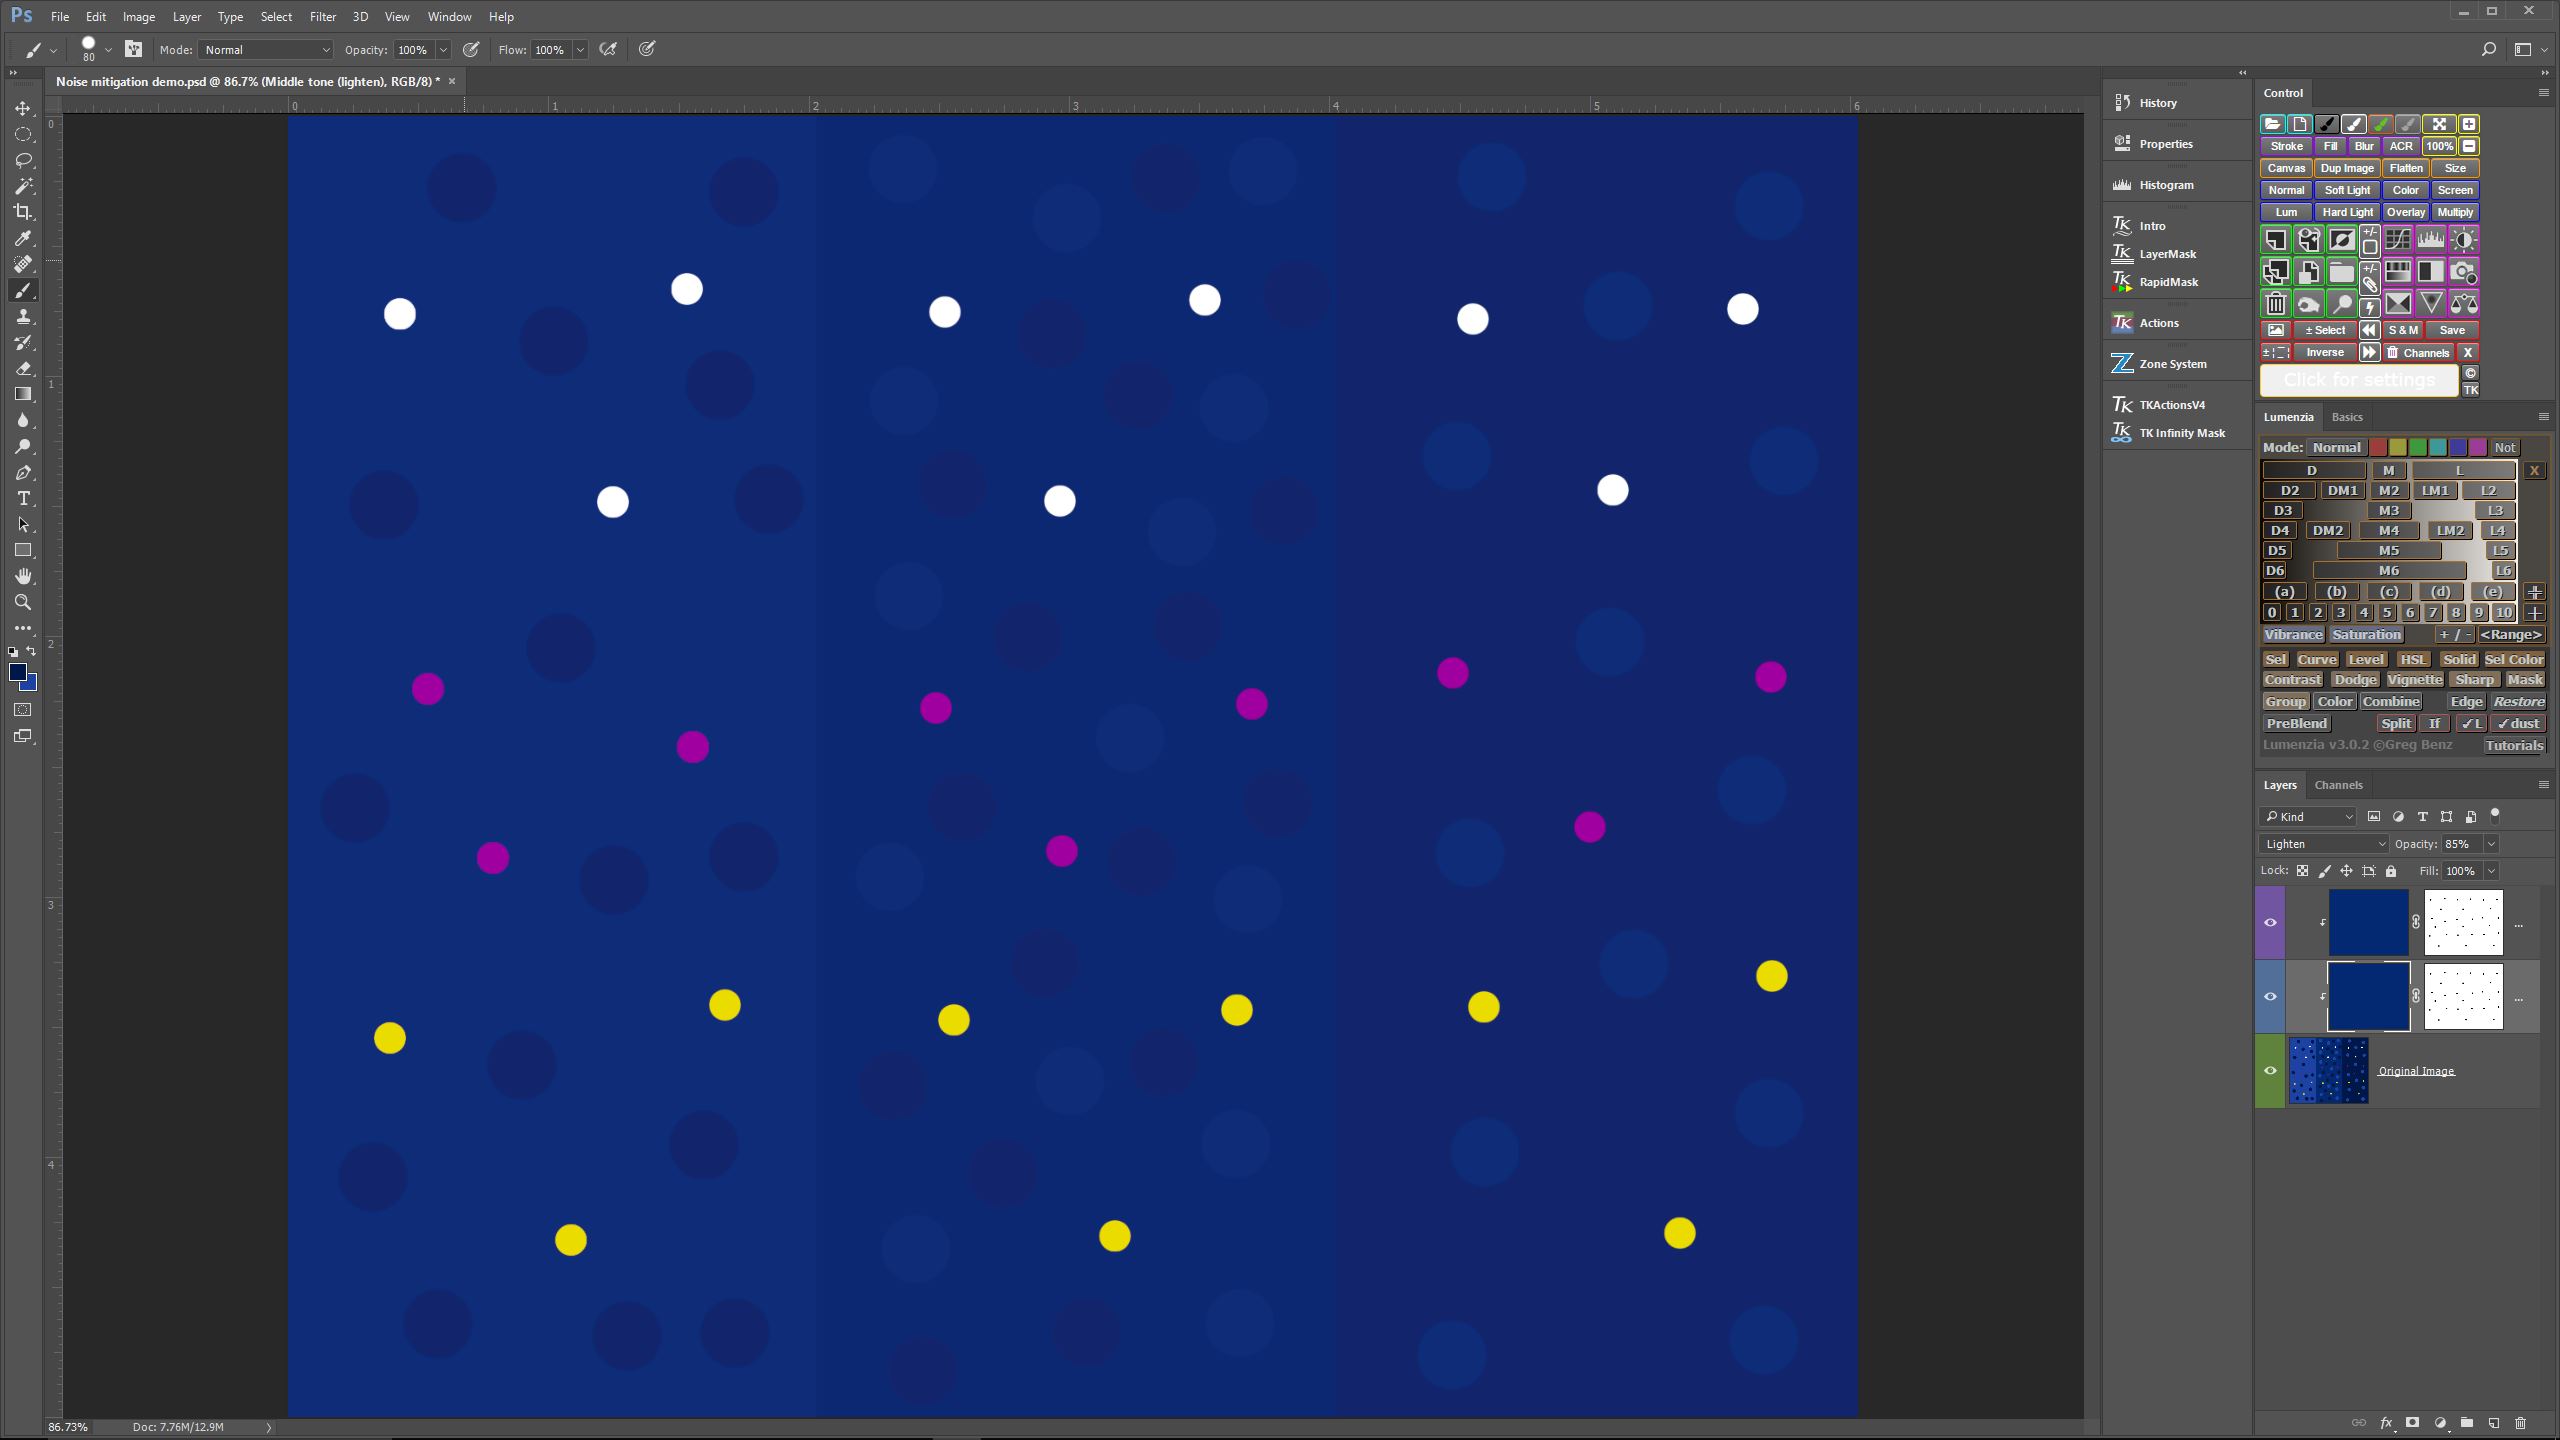
In this third step I have created another fill layer sampled to the same medium blue as before, but set the blending mode to darken. I have also set this as a clipping mask. Notice that the light blue dots and light blue vertical bar have disappeared.  Notice also, however, how flat the “sky” background has become without the “noise” to provide texture.

In this fourth step I reduced the opacity of each of the two fill layers to 85%, just enough to allow some of the “noise” tones back into the image, so that it doesn’t look quite so artificial.

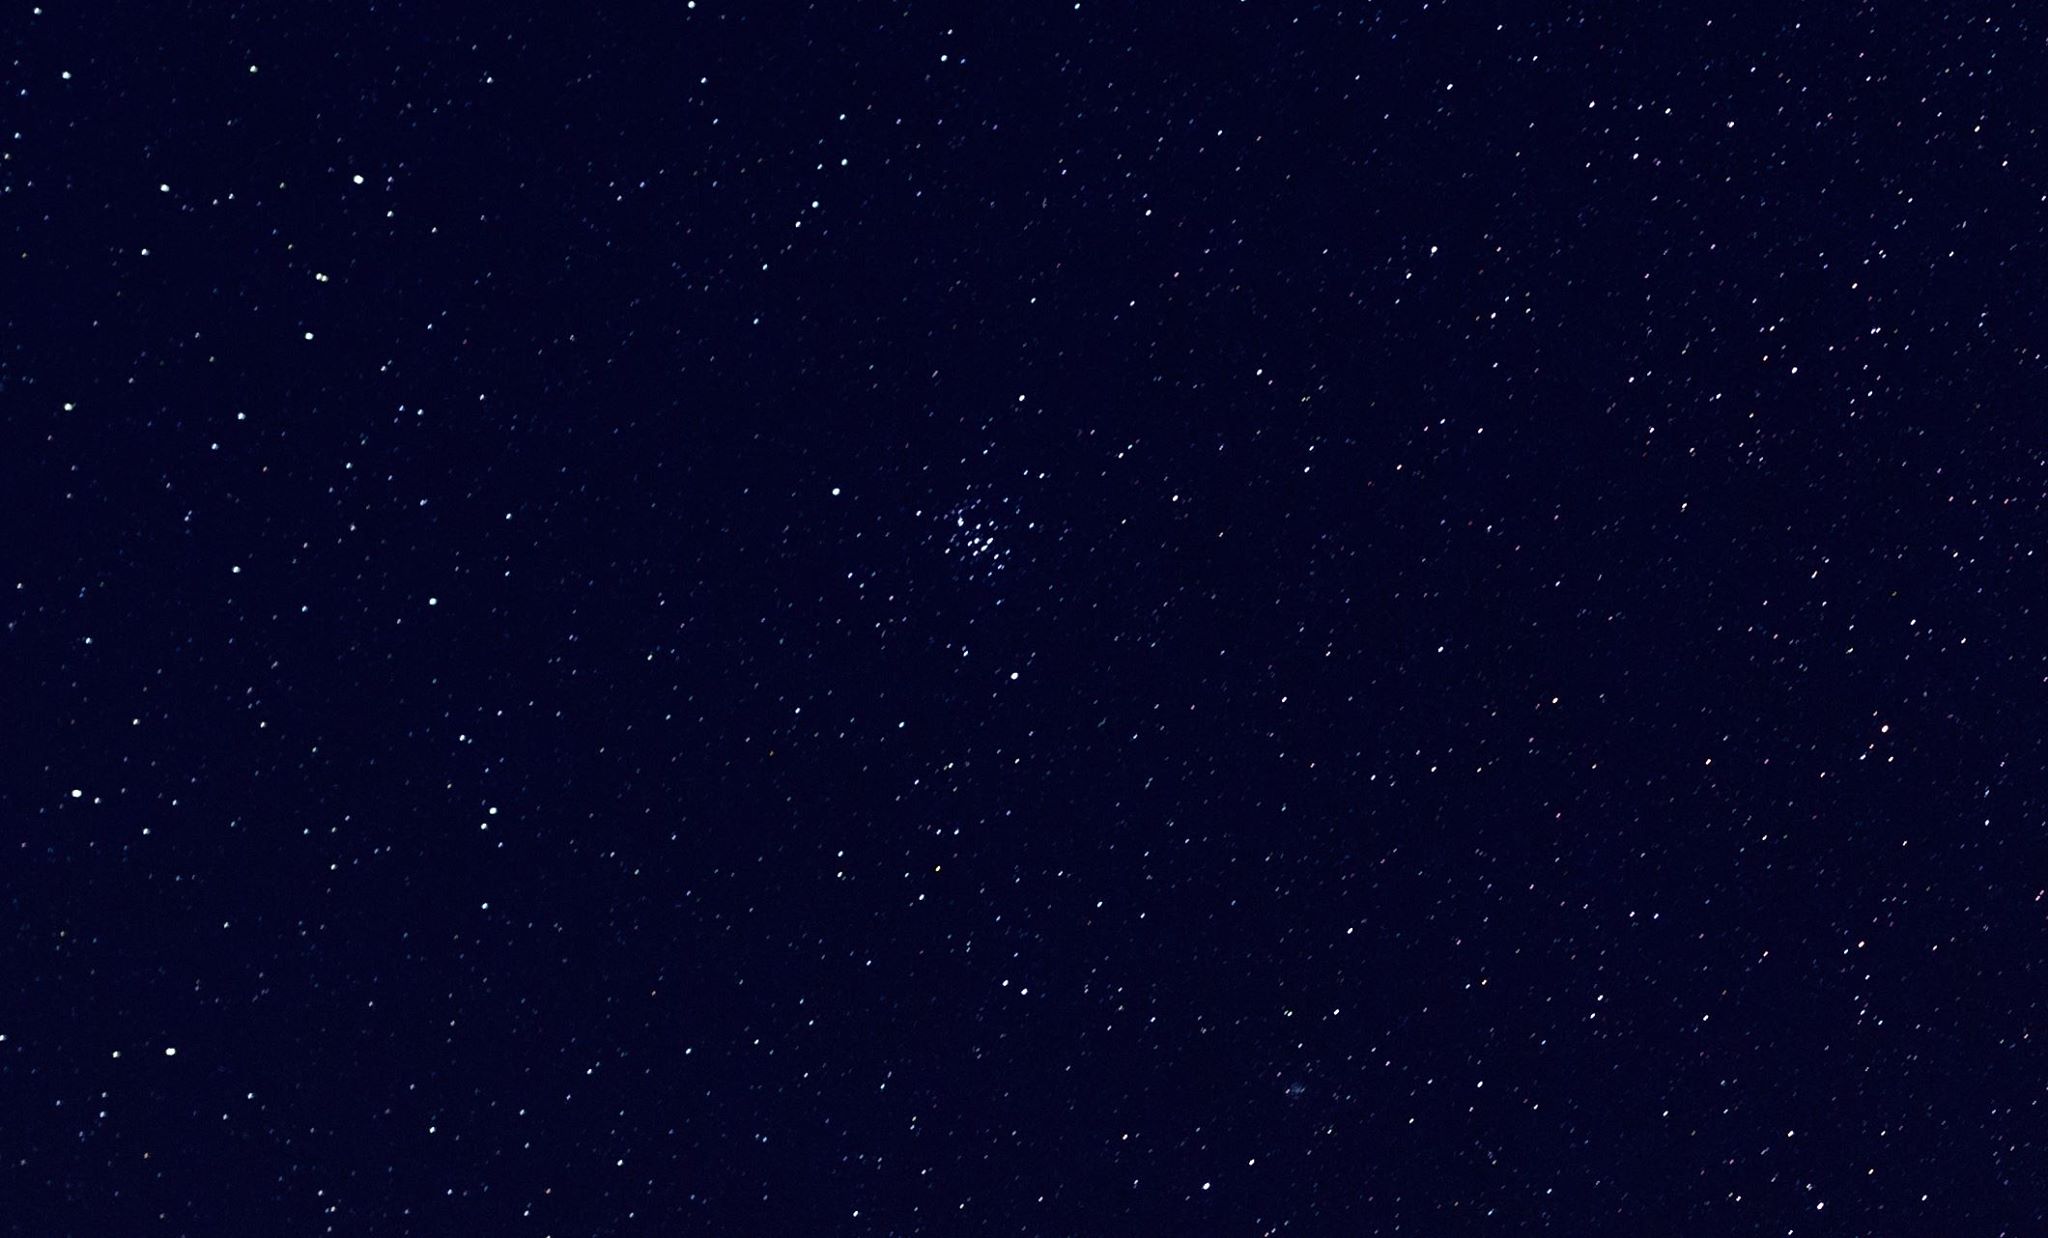
Applying this technique to a somewhat noisy image of a pinpoint star field, I came up with results that looked pretty good for a first attempt. I posted this sample on Facebook to see what others might think, and got some positive, but mixed reactions. I decided to prepare a blog post to detail what I was working on for further comment, and it started like this:

This is a single exposure of a spot near Oakley, Kansas taken at ISO 6400 for a duration of 10 seconds. It is a respectable image for screen viewing, but is not a great candidate to print at any appreciable size due to the amount of noise created at ISO 6400, even shooting with a Sony A7Rii, which performs very well at high ISO settings.
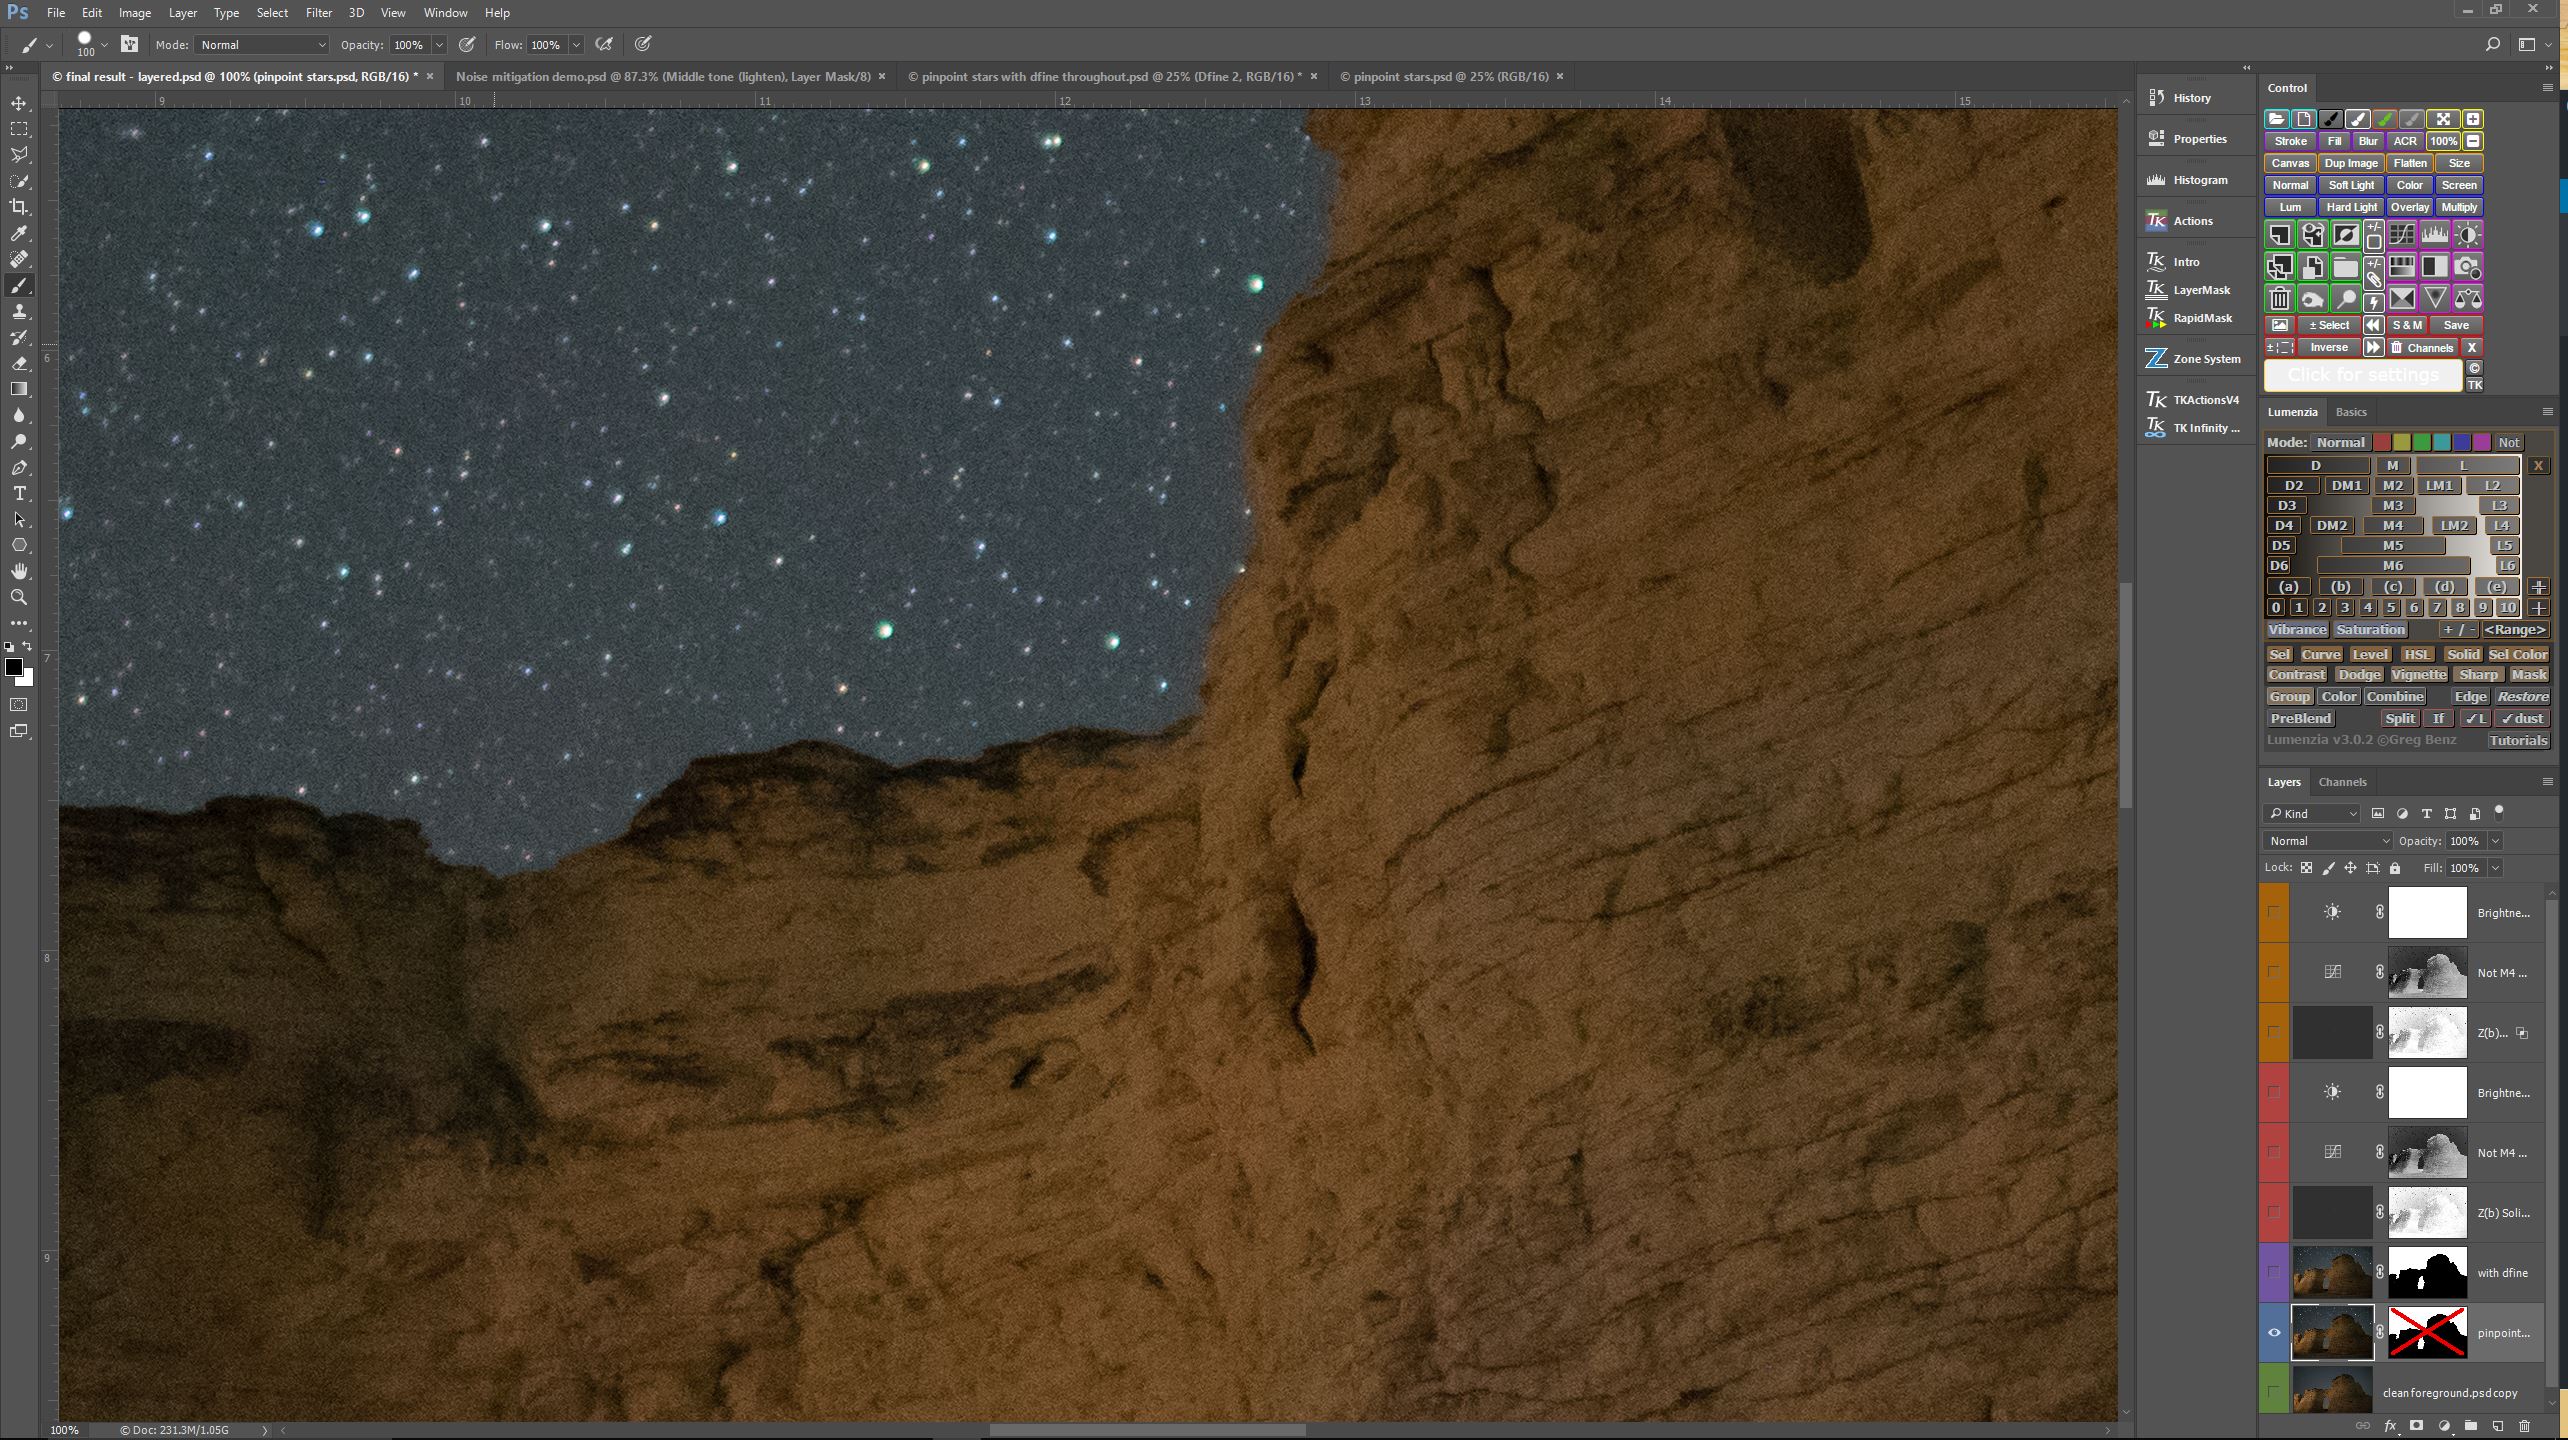
At 100% viewing the noise problem becomes apparent, both in the sky and in the foreground.
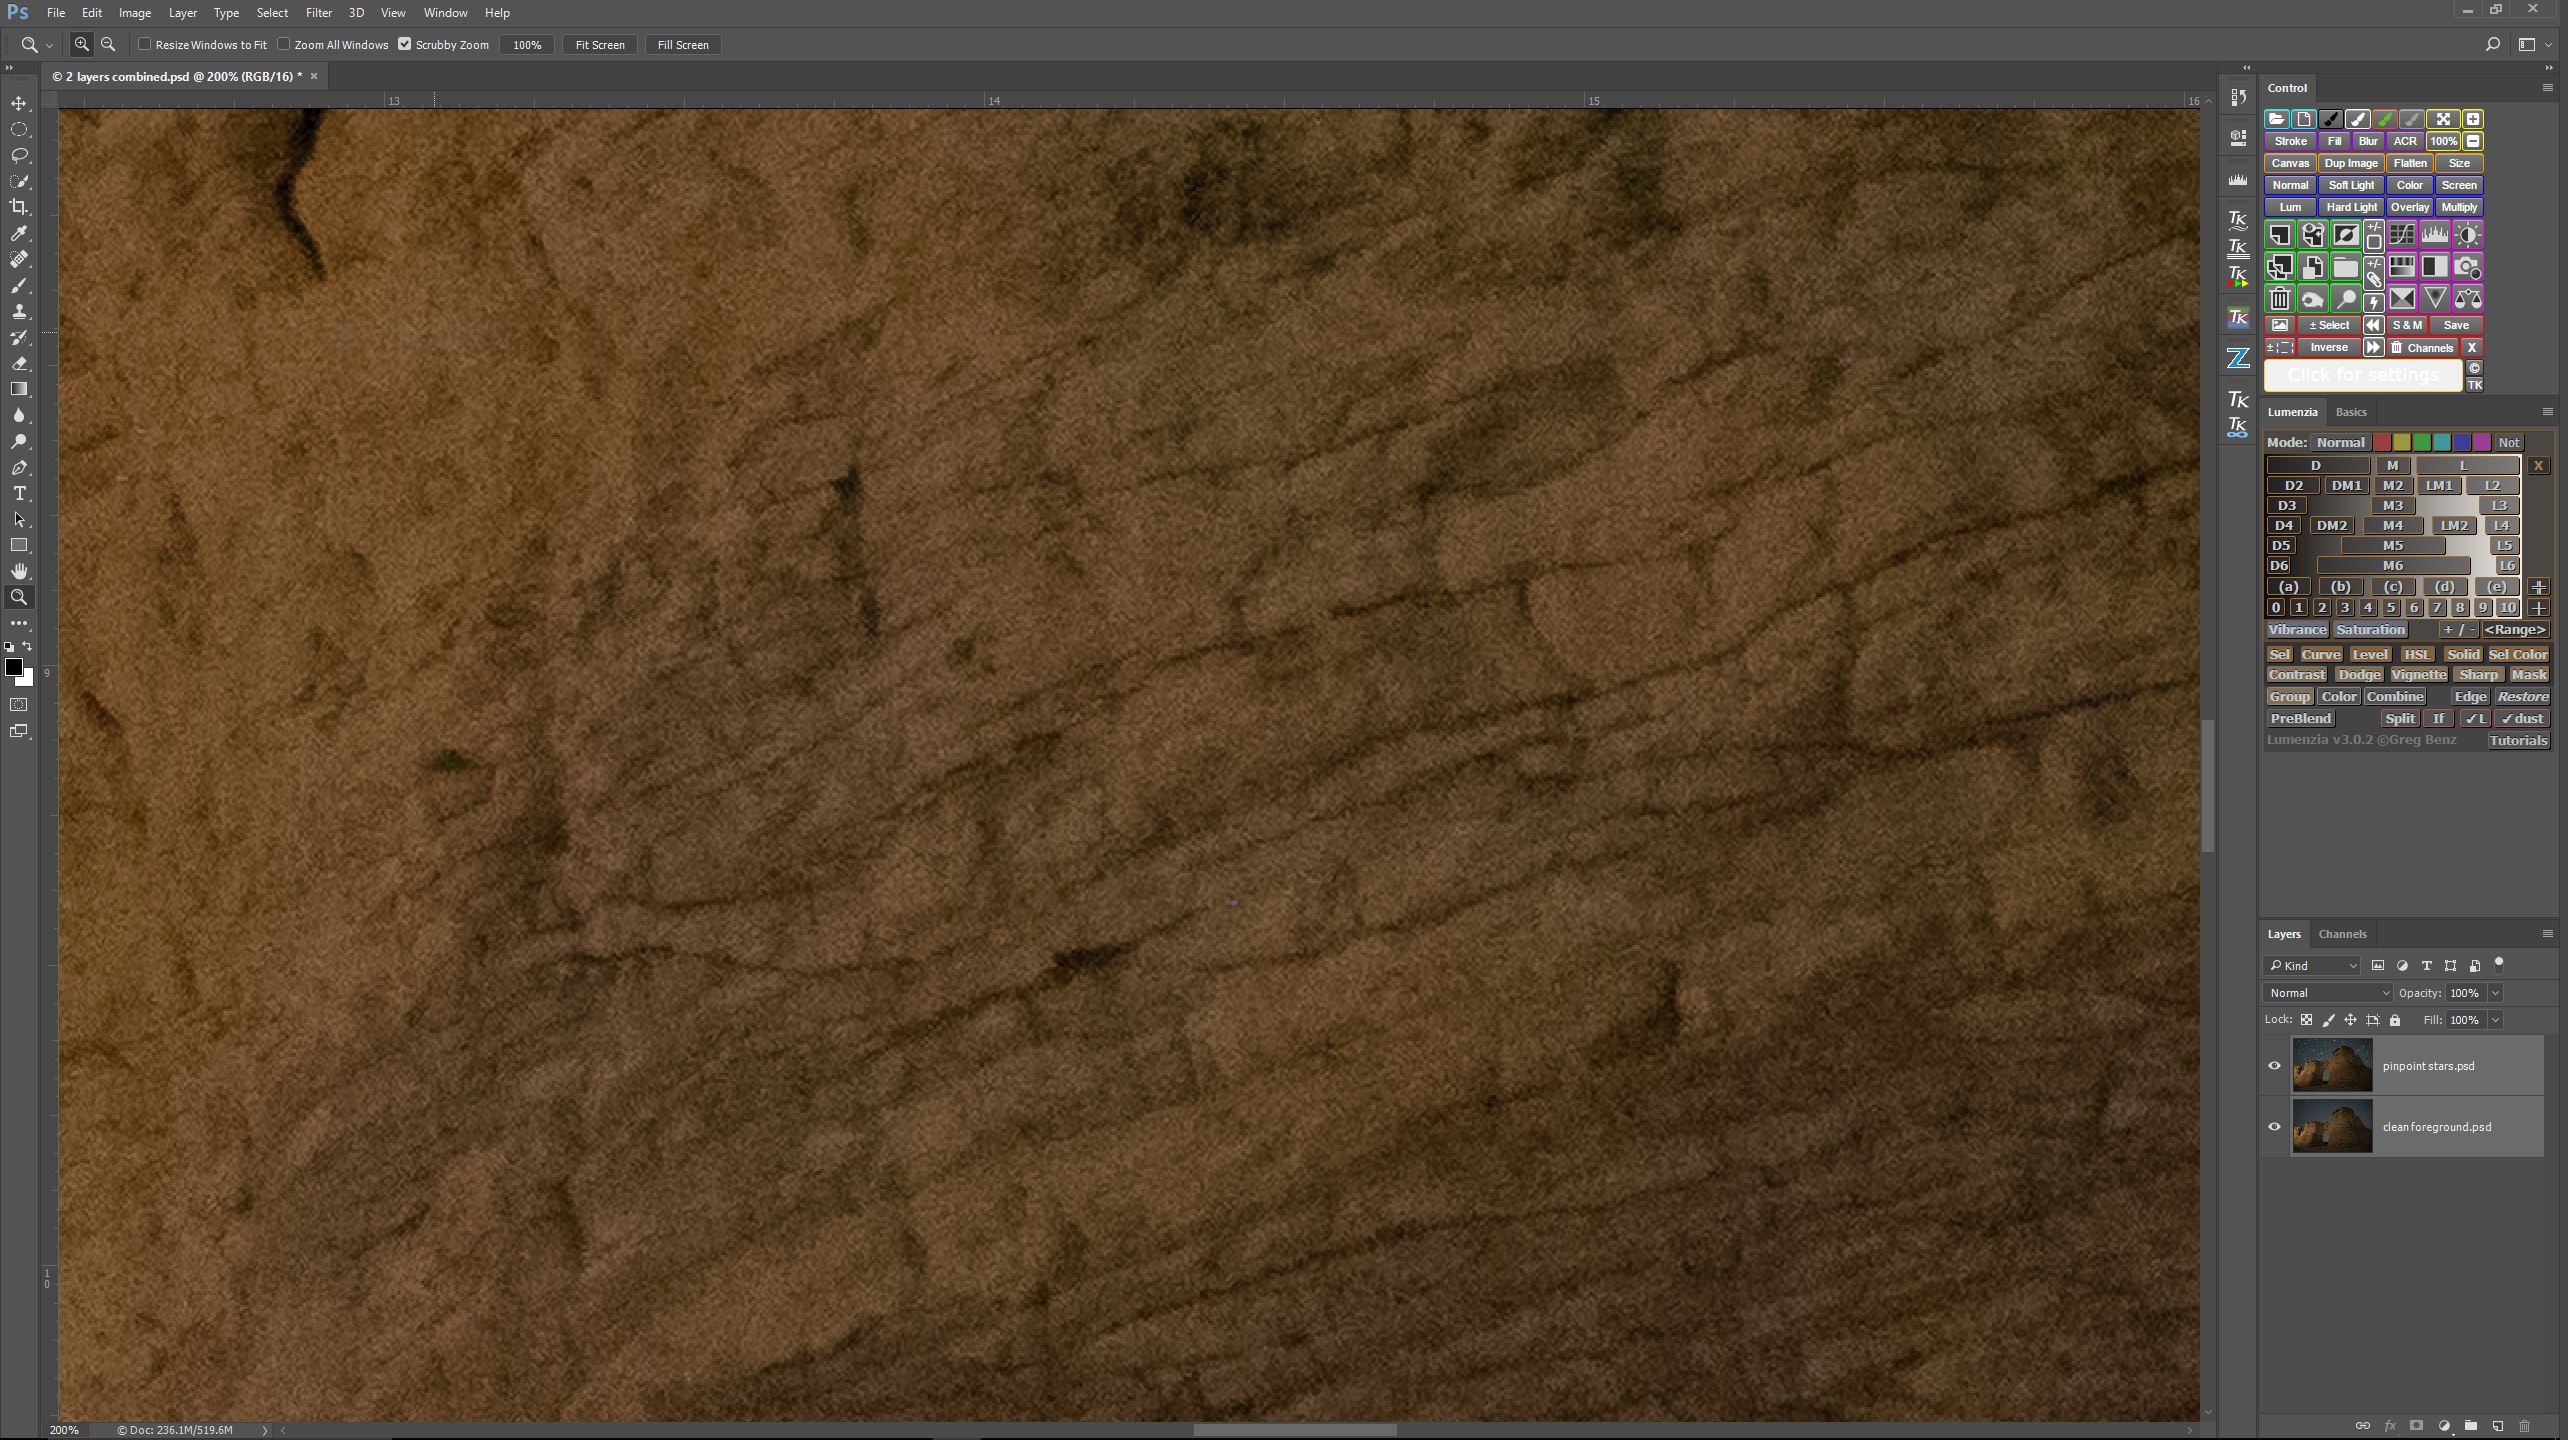
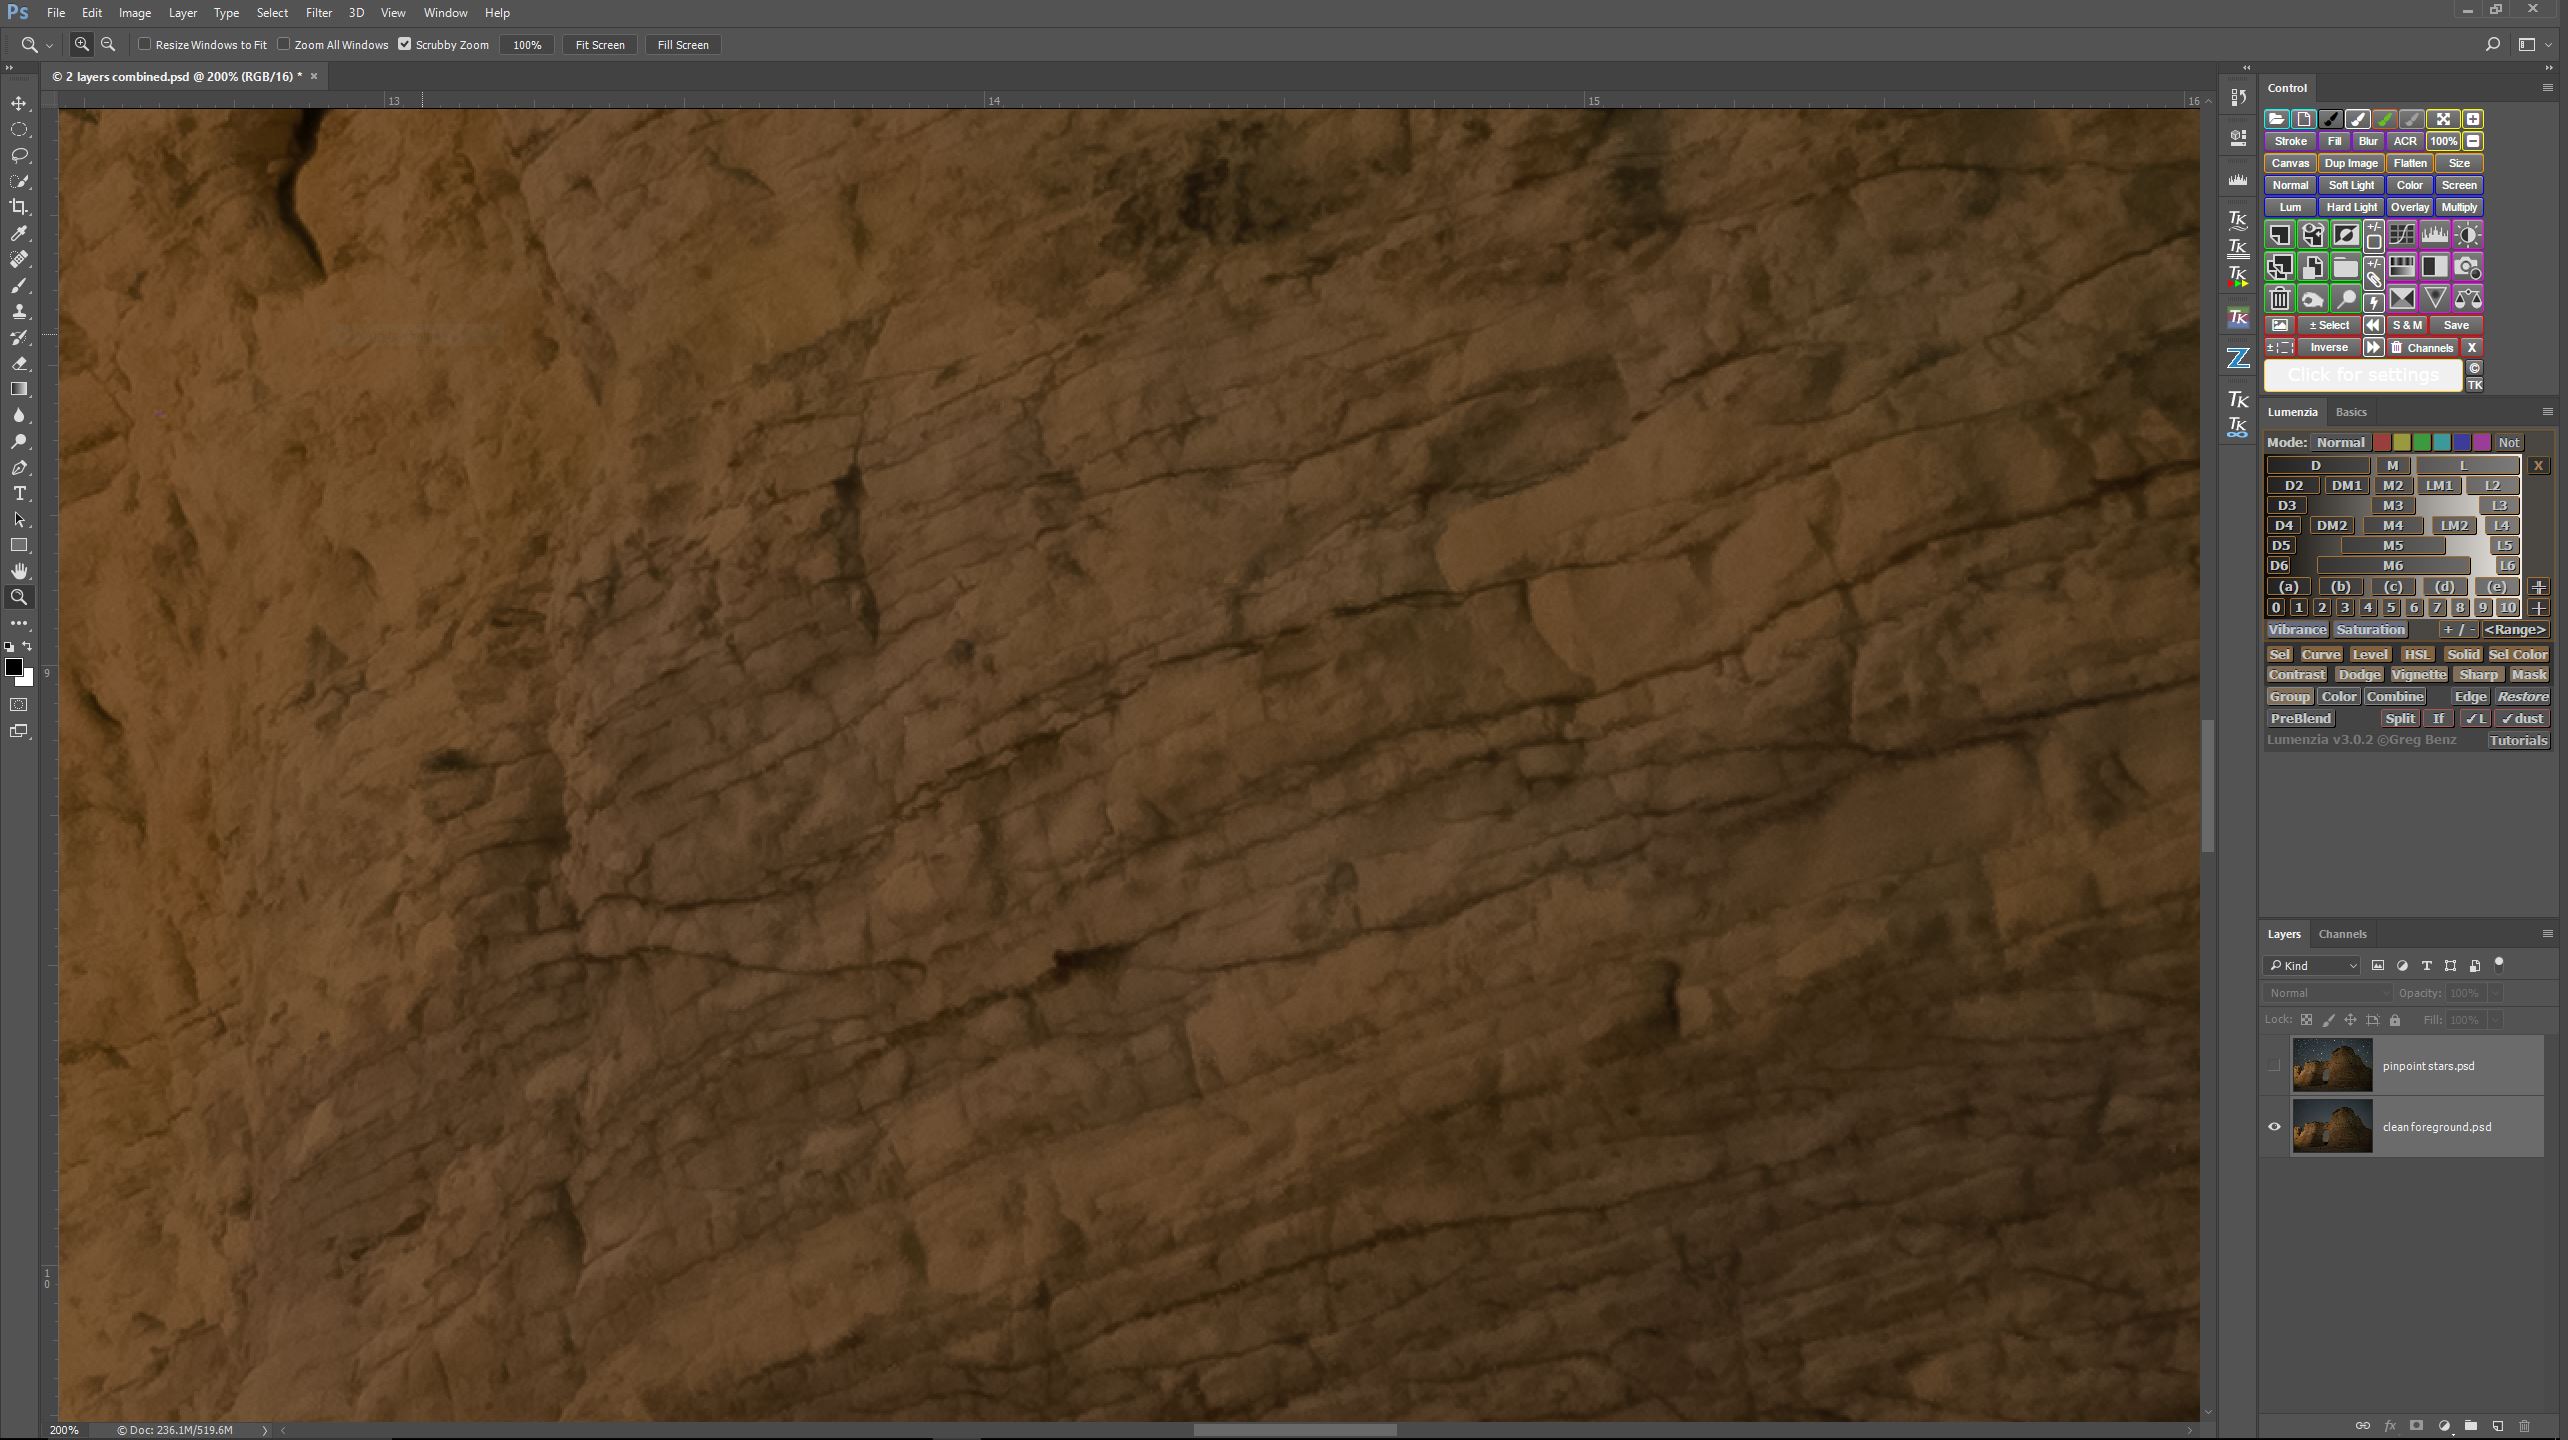
Here is the foreground in the ISO 6400 exposure magnified to 200%. Note the amount of random noise. If I were to reduce the ISO from 6400 to ISO 200, random noise would be reduced, but I would also have to lengthen the exposure time to compensate. Increasing the exposure time would cause the stars to trail in the sky. The solution to this problem is to blend two separate exposures, one taken to optimize the pinpoint stars (remember, we are not stacking sky exposures for the purposes of this post) and one taken to optimize the foreground.

This is a 6 minute ISO 200 exposure magnified to 200%. Notice how clean the rocks appear. But the six minute exposure will not work for pinpoint stars, so I blended this clean ISO 200 foreground exposure with the noisy ISO 6400 sky exposure, in the hope of reducing the random sky noise later on in the process.

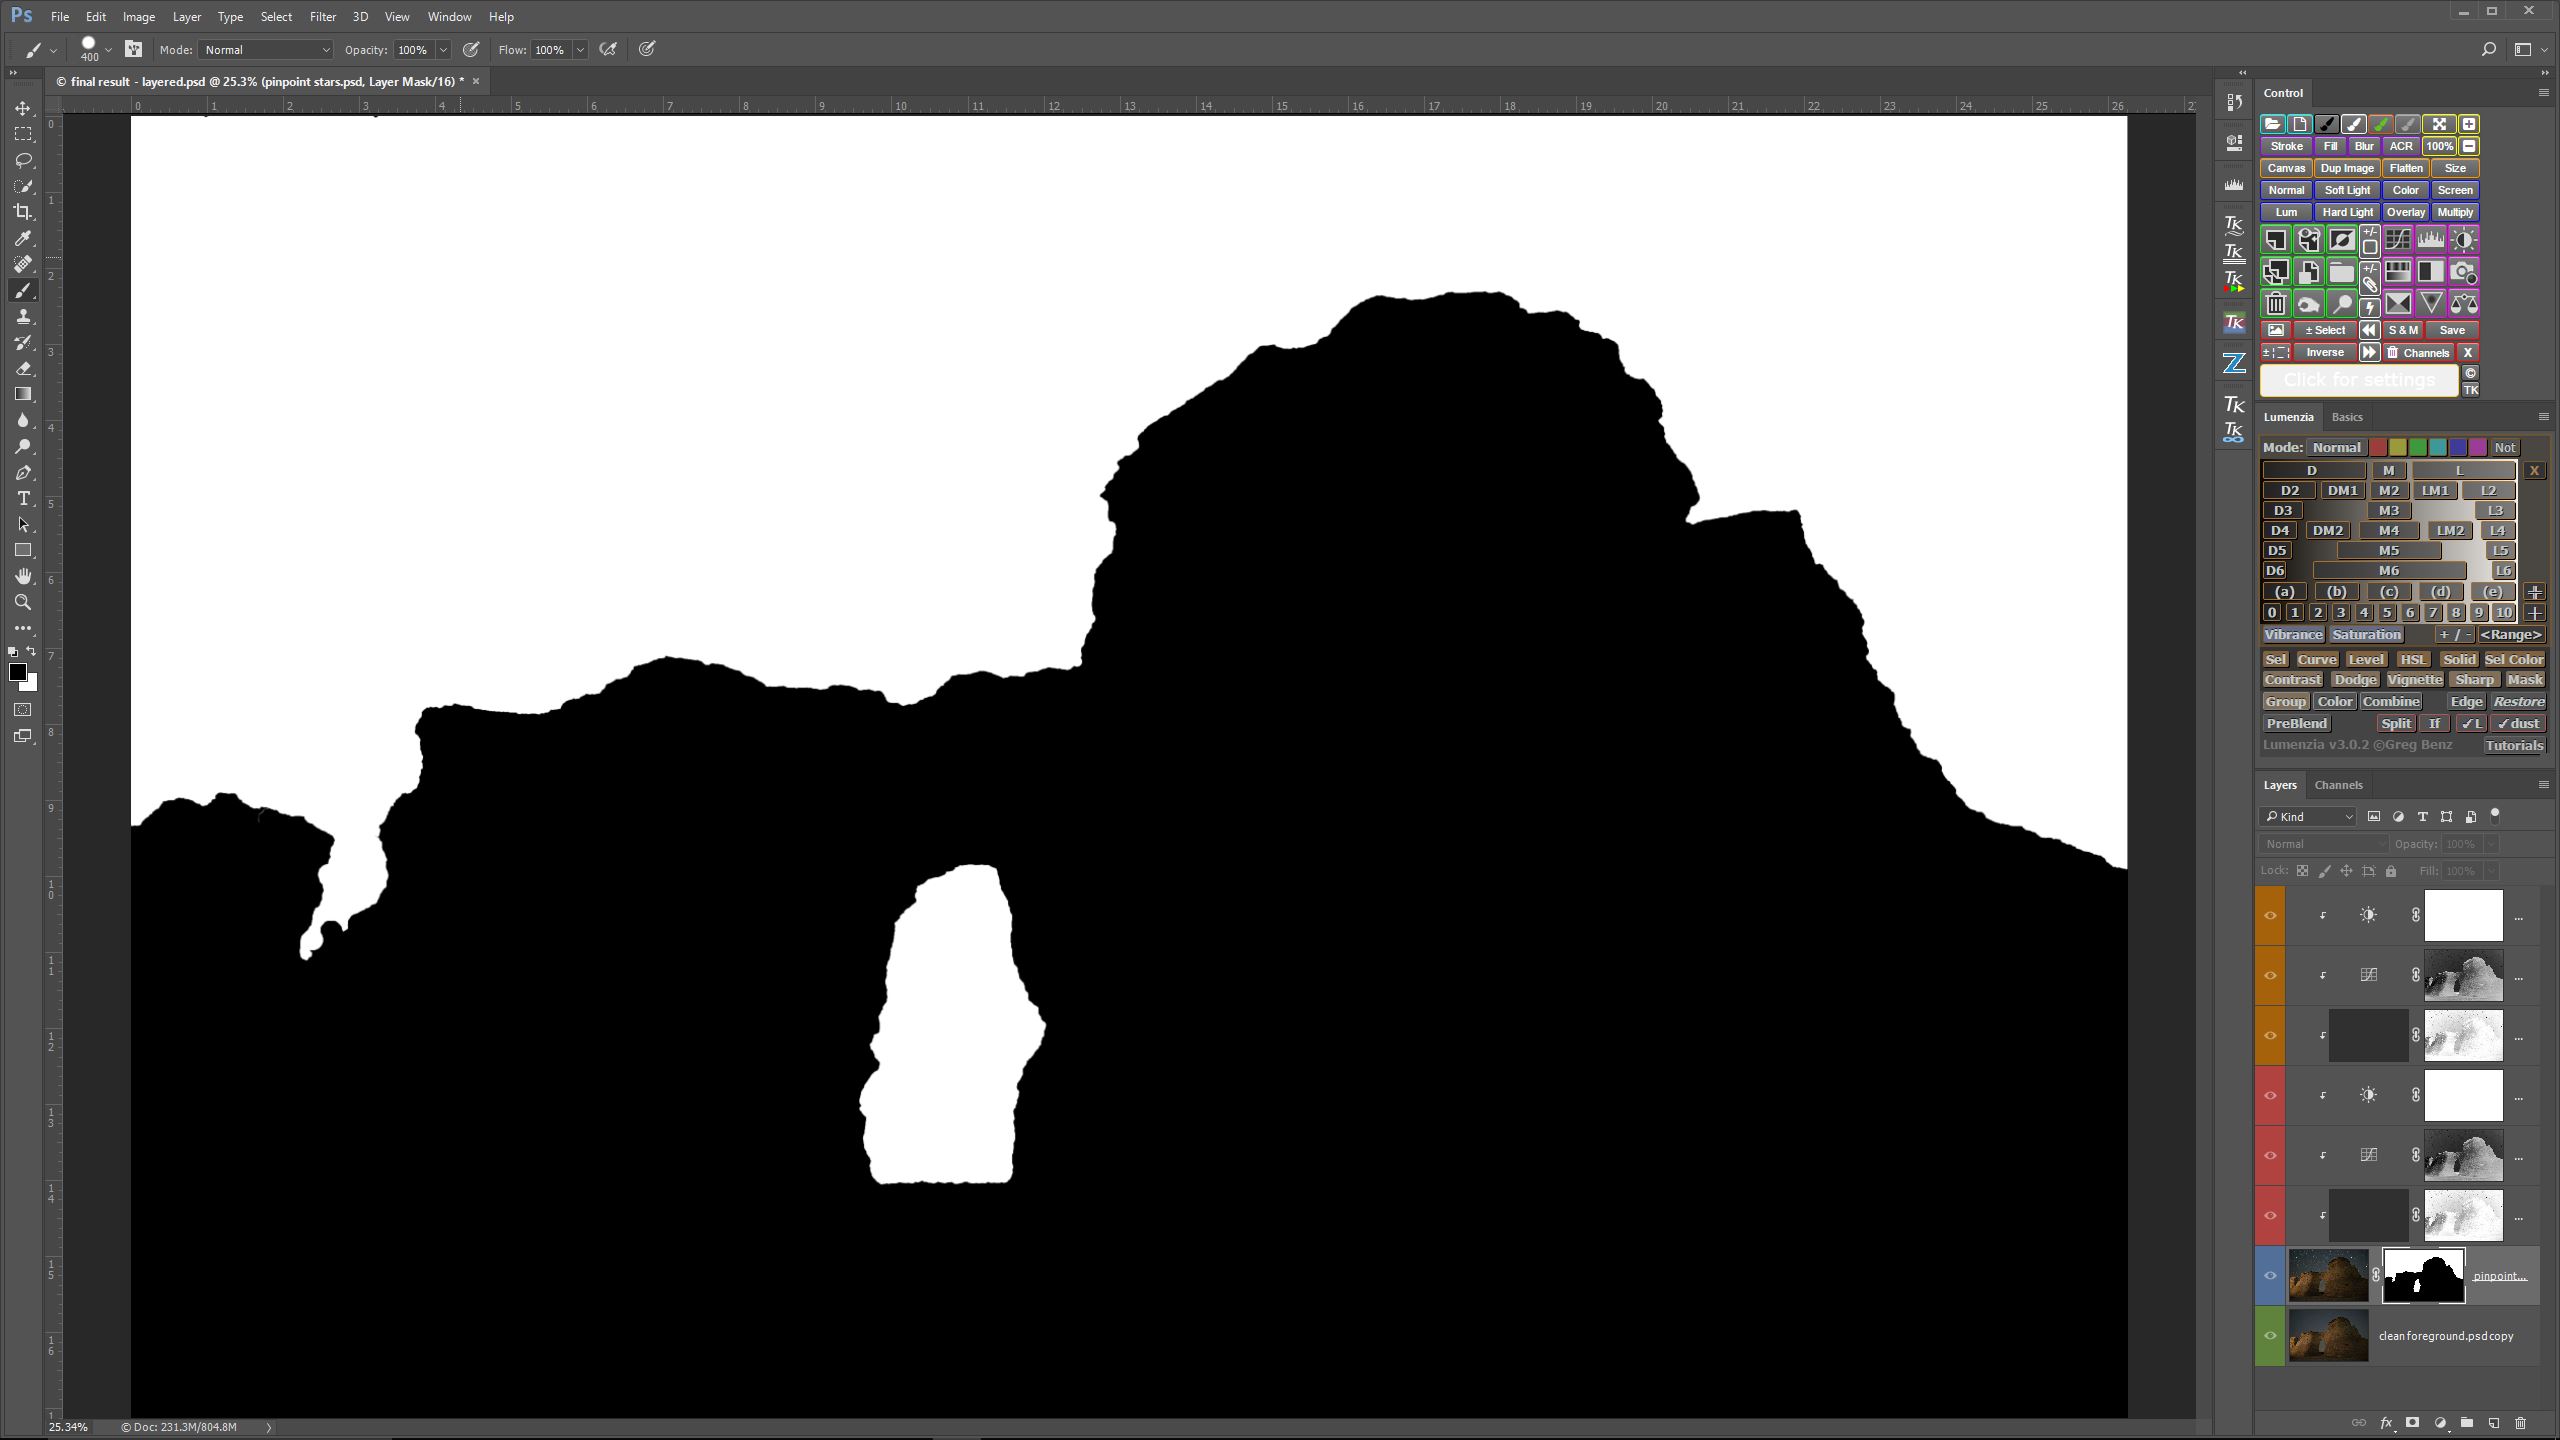
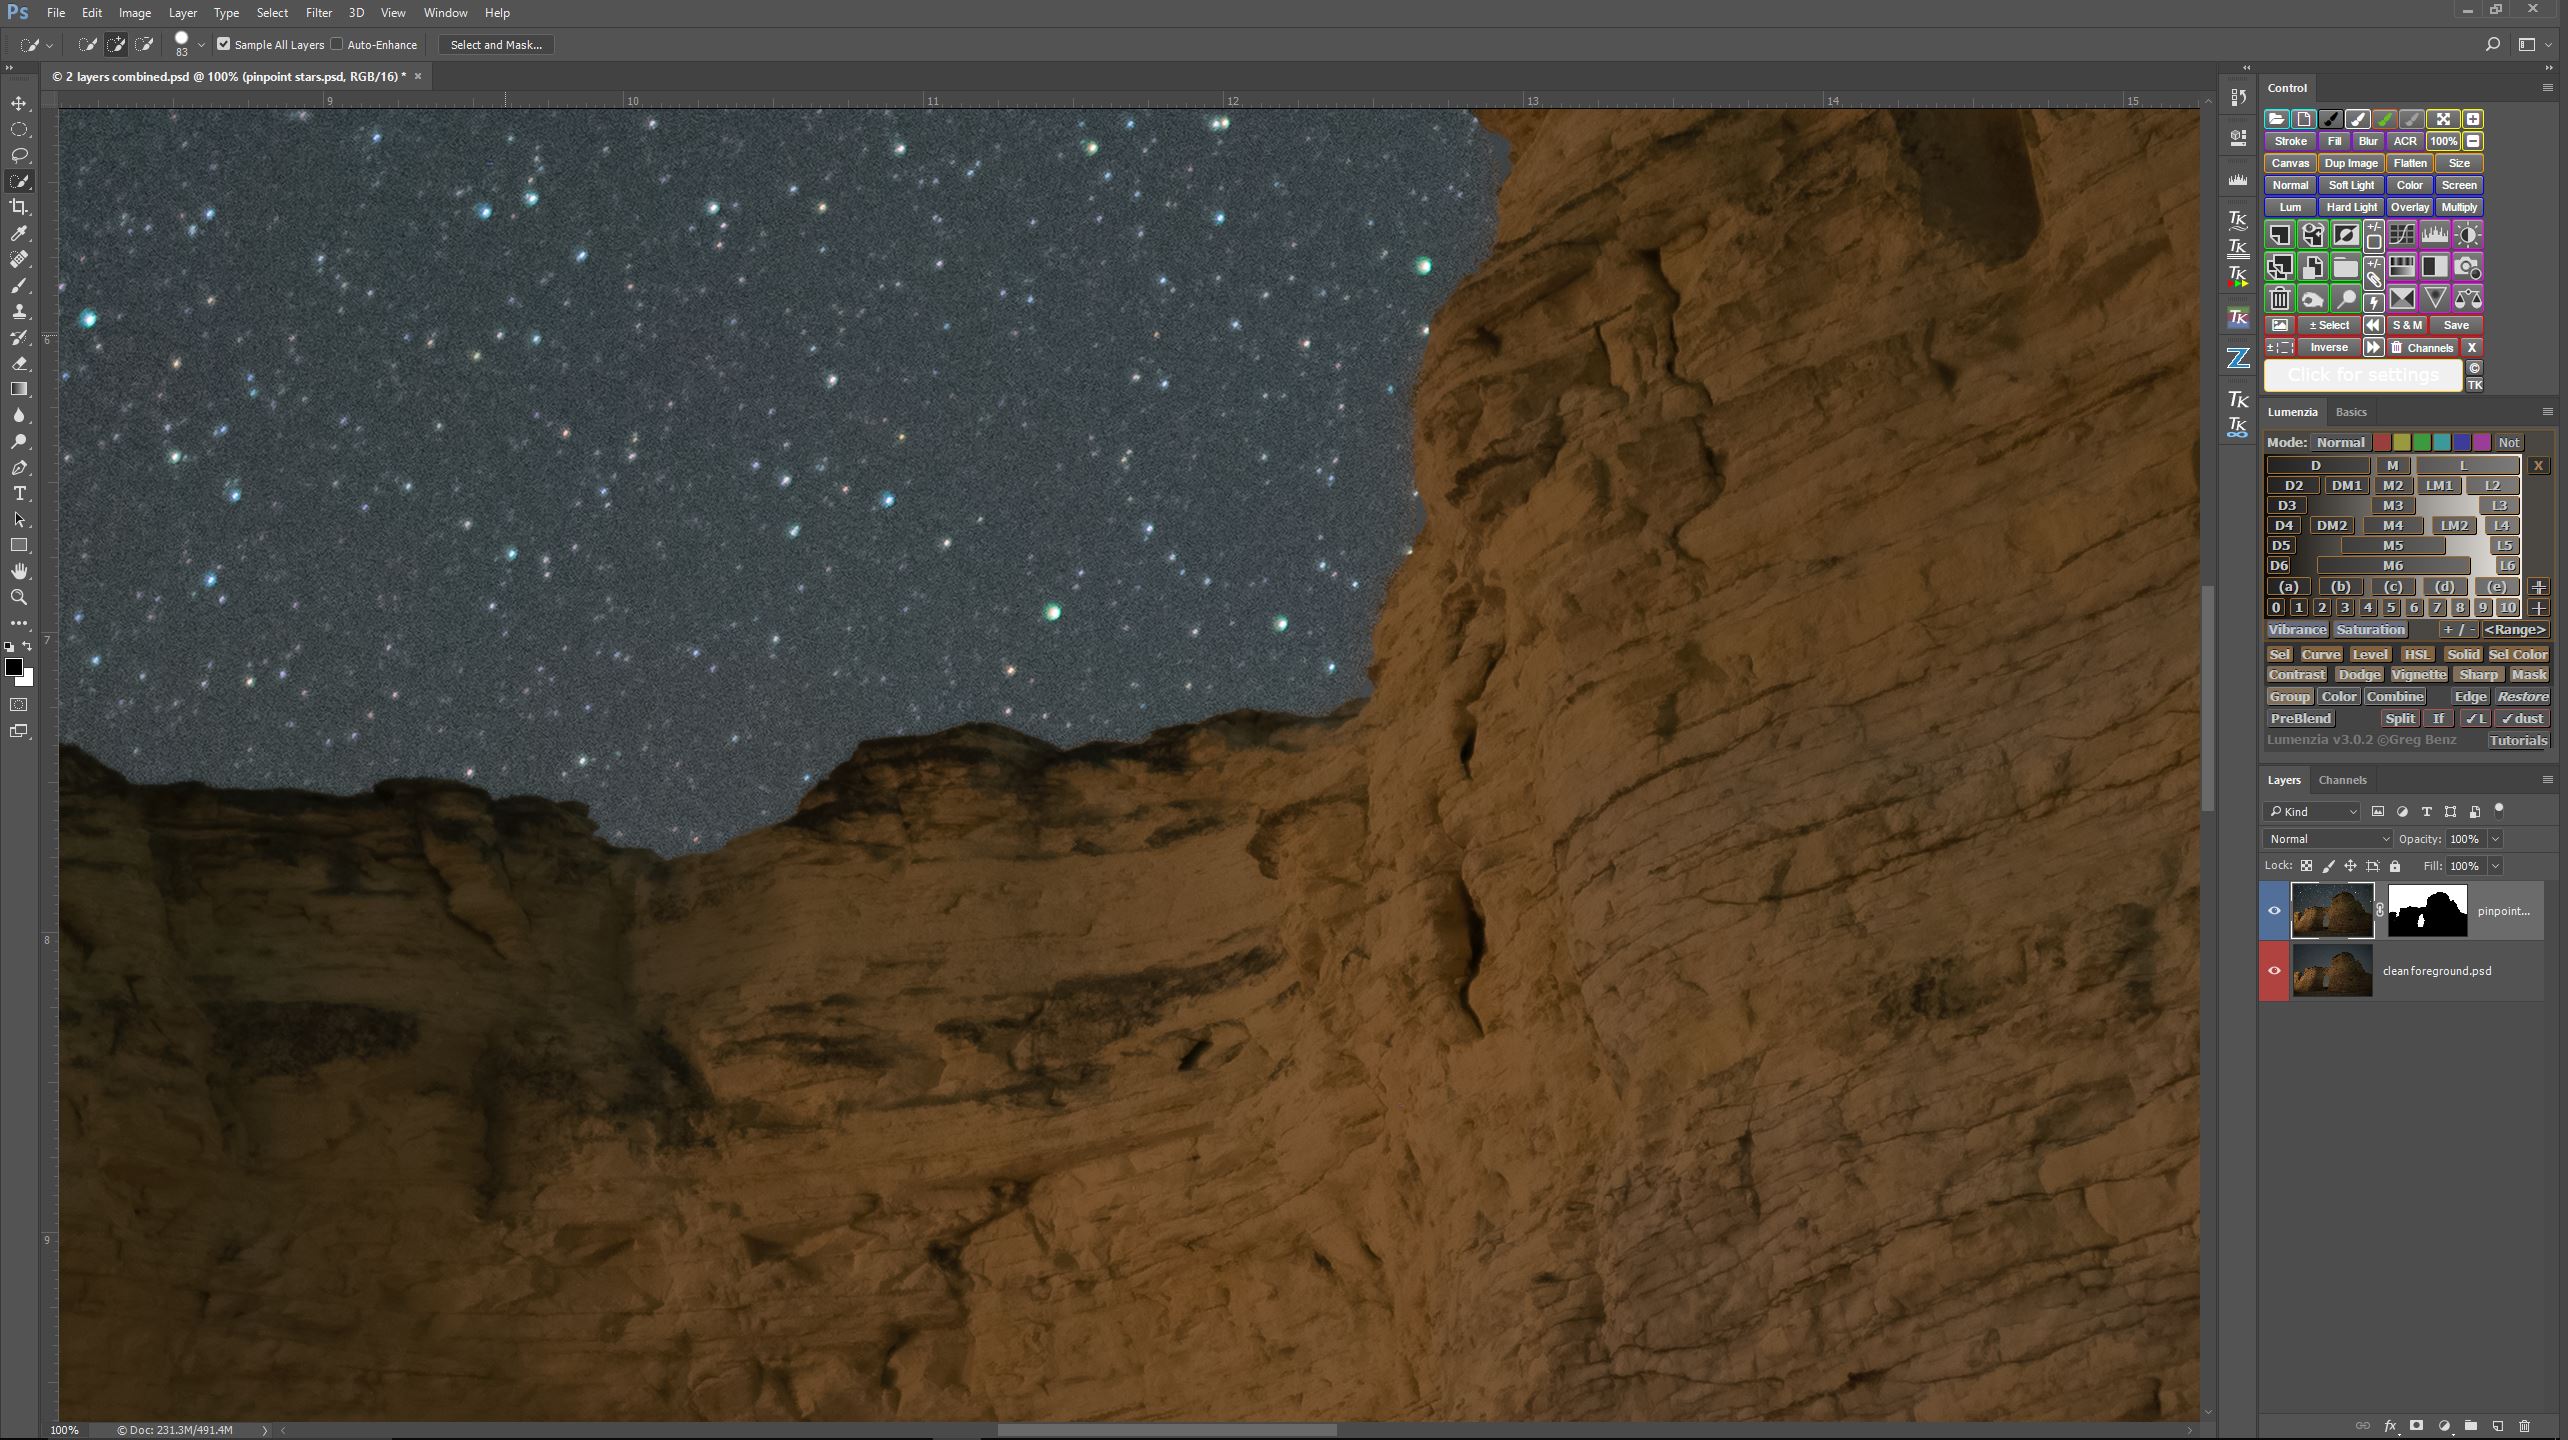
By creating a layer mask in Photoshop I could blend the clean foreground with the noisy sky.

As you can see above, this left me with a very clean foreground, but the sky is still quite noisy. As I was originally writing this post, this is where I was going to demonstrate my experiments with alternative noise “mitigation”.

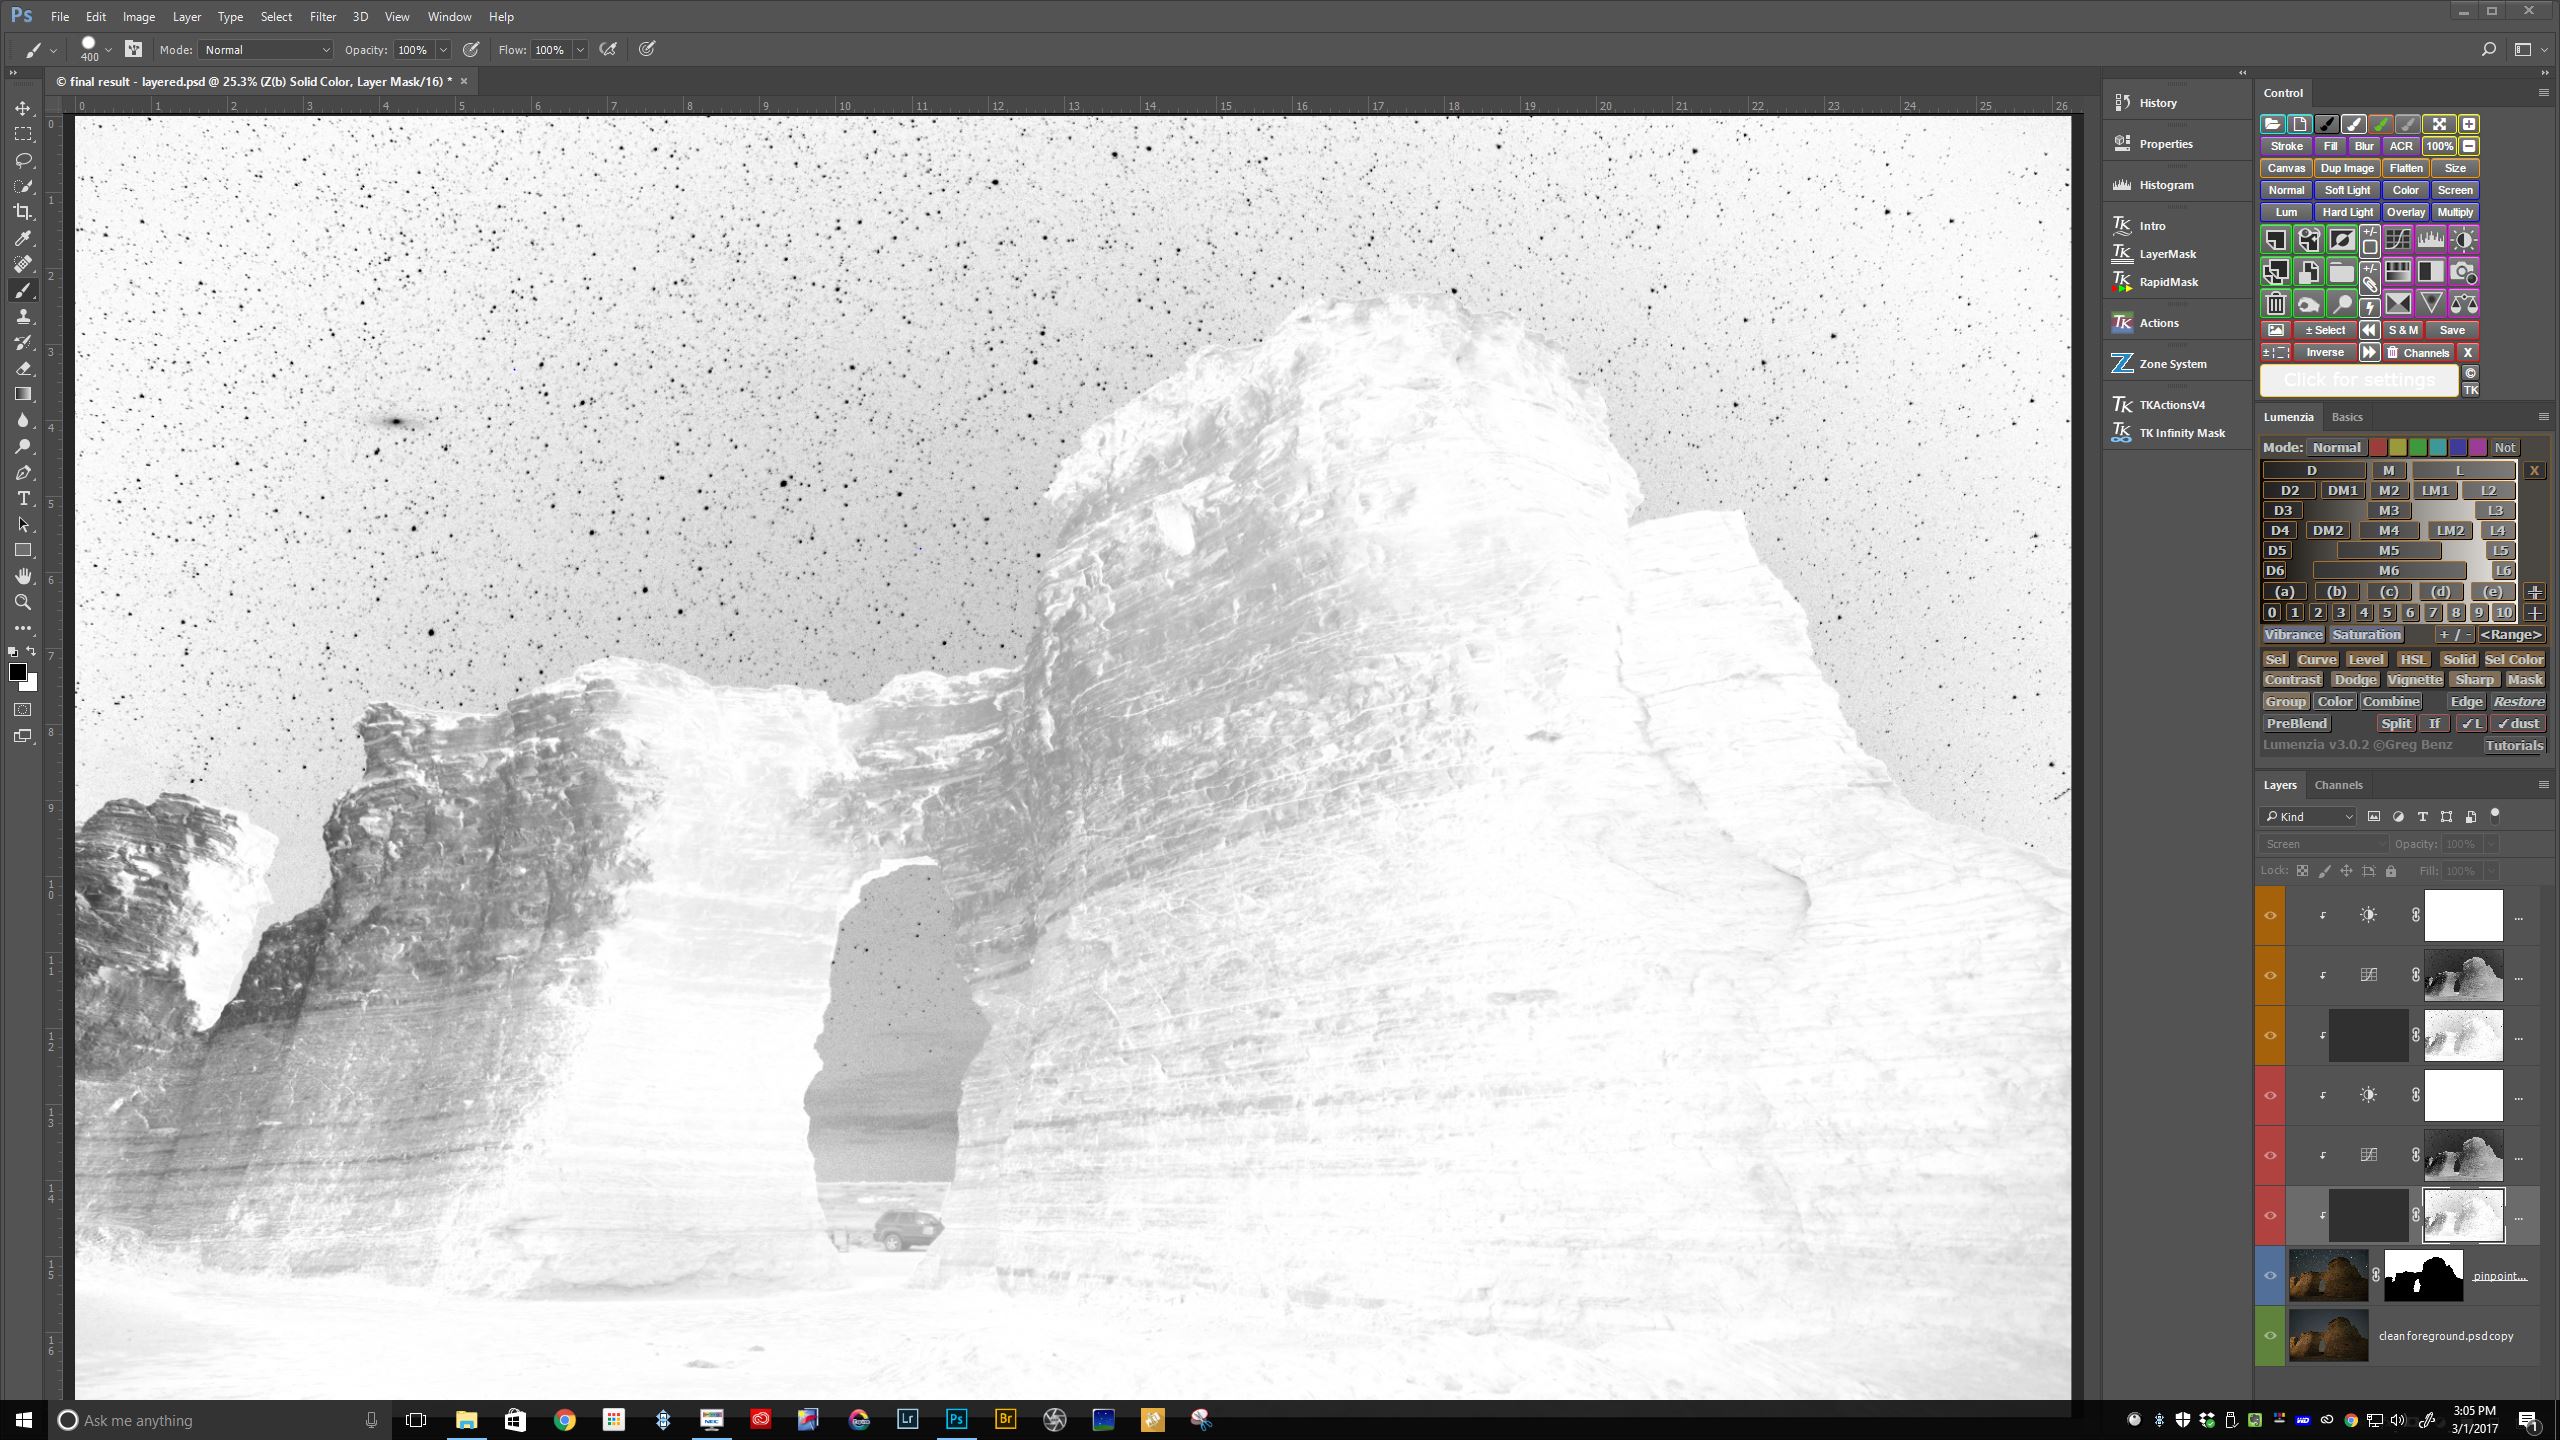
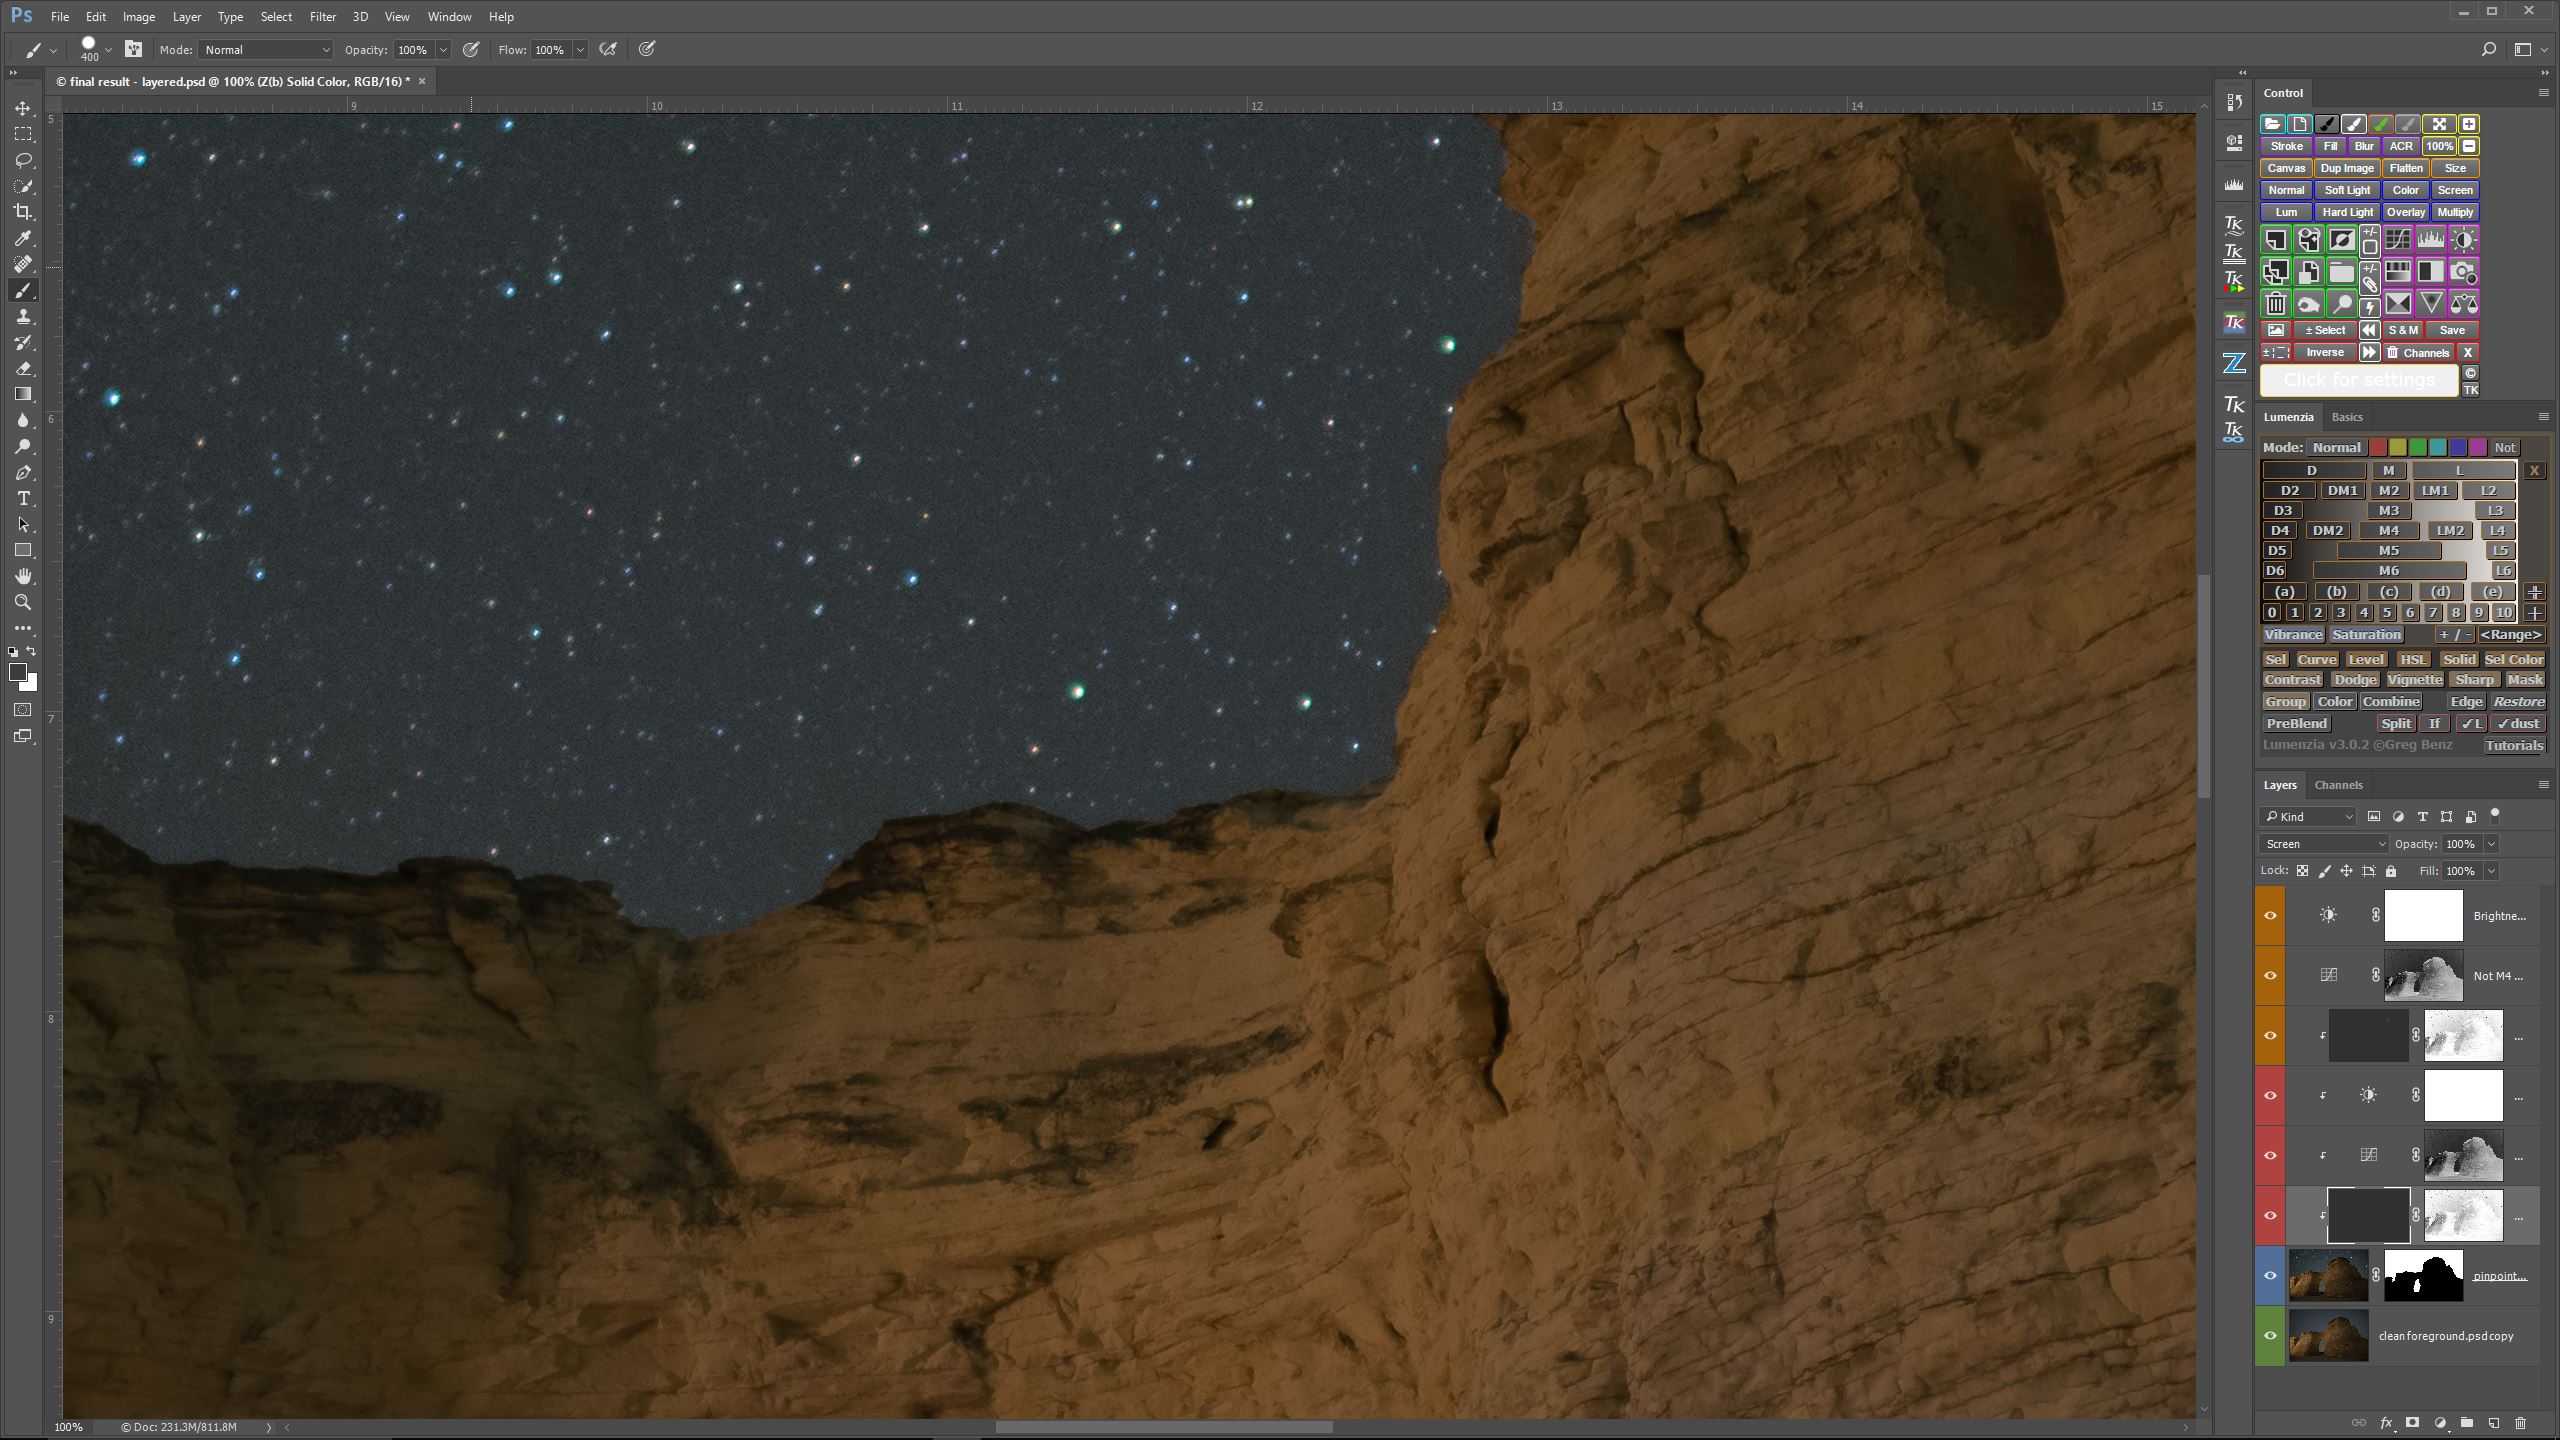
First, I created a luminosity mask to protect the stars from my manipulations.

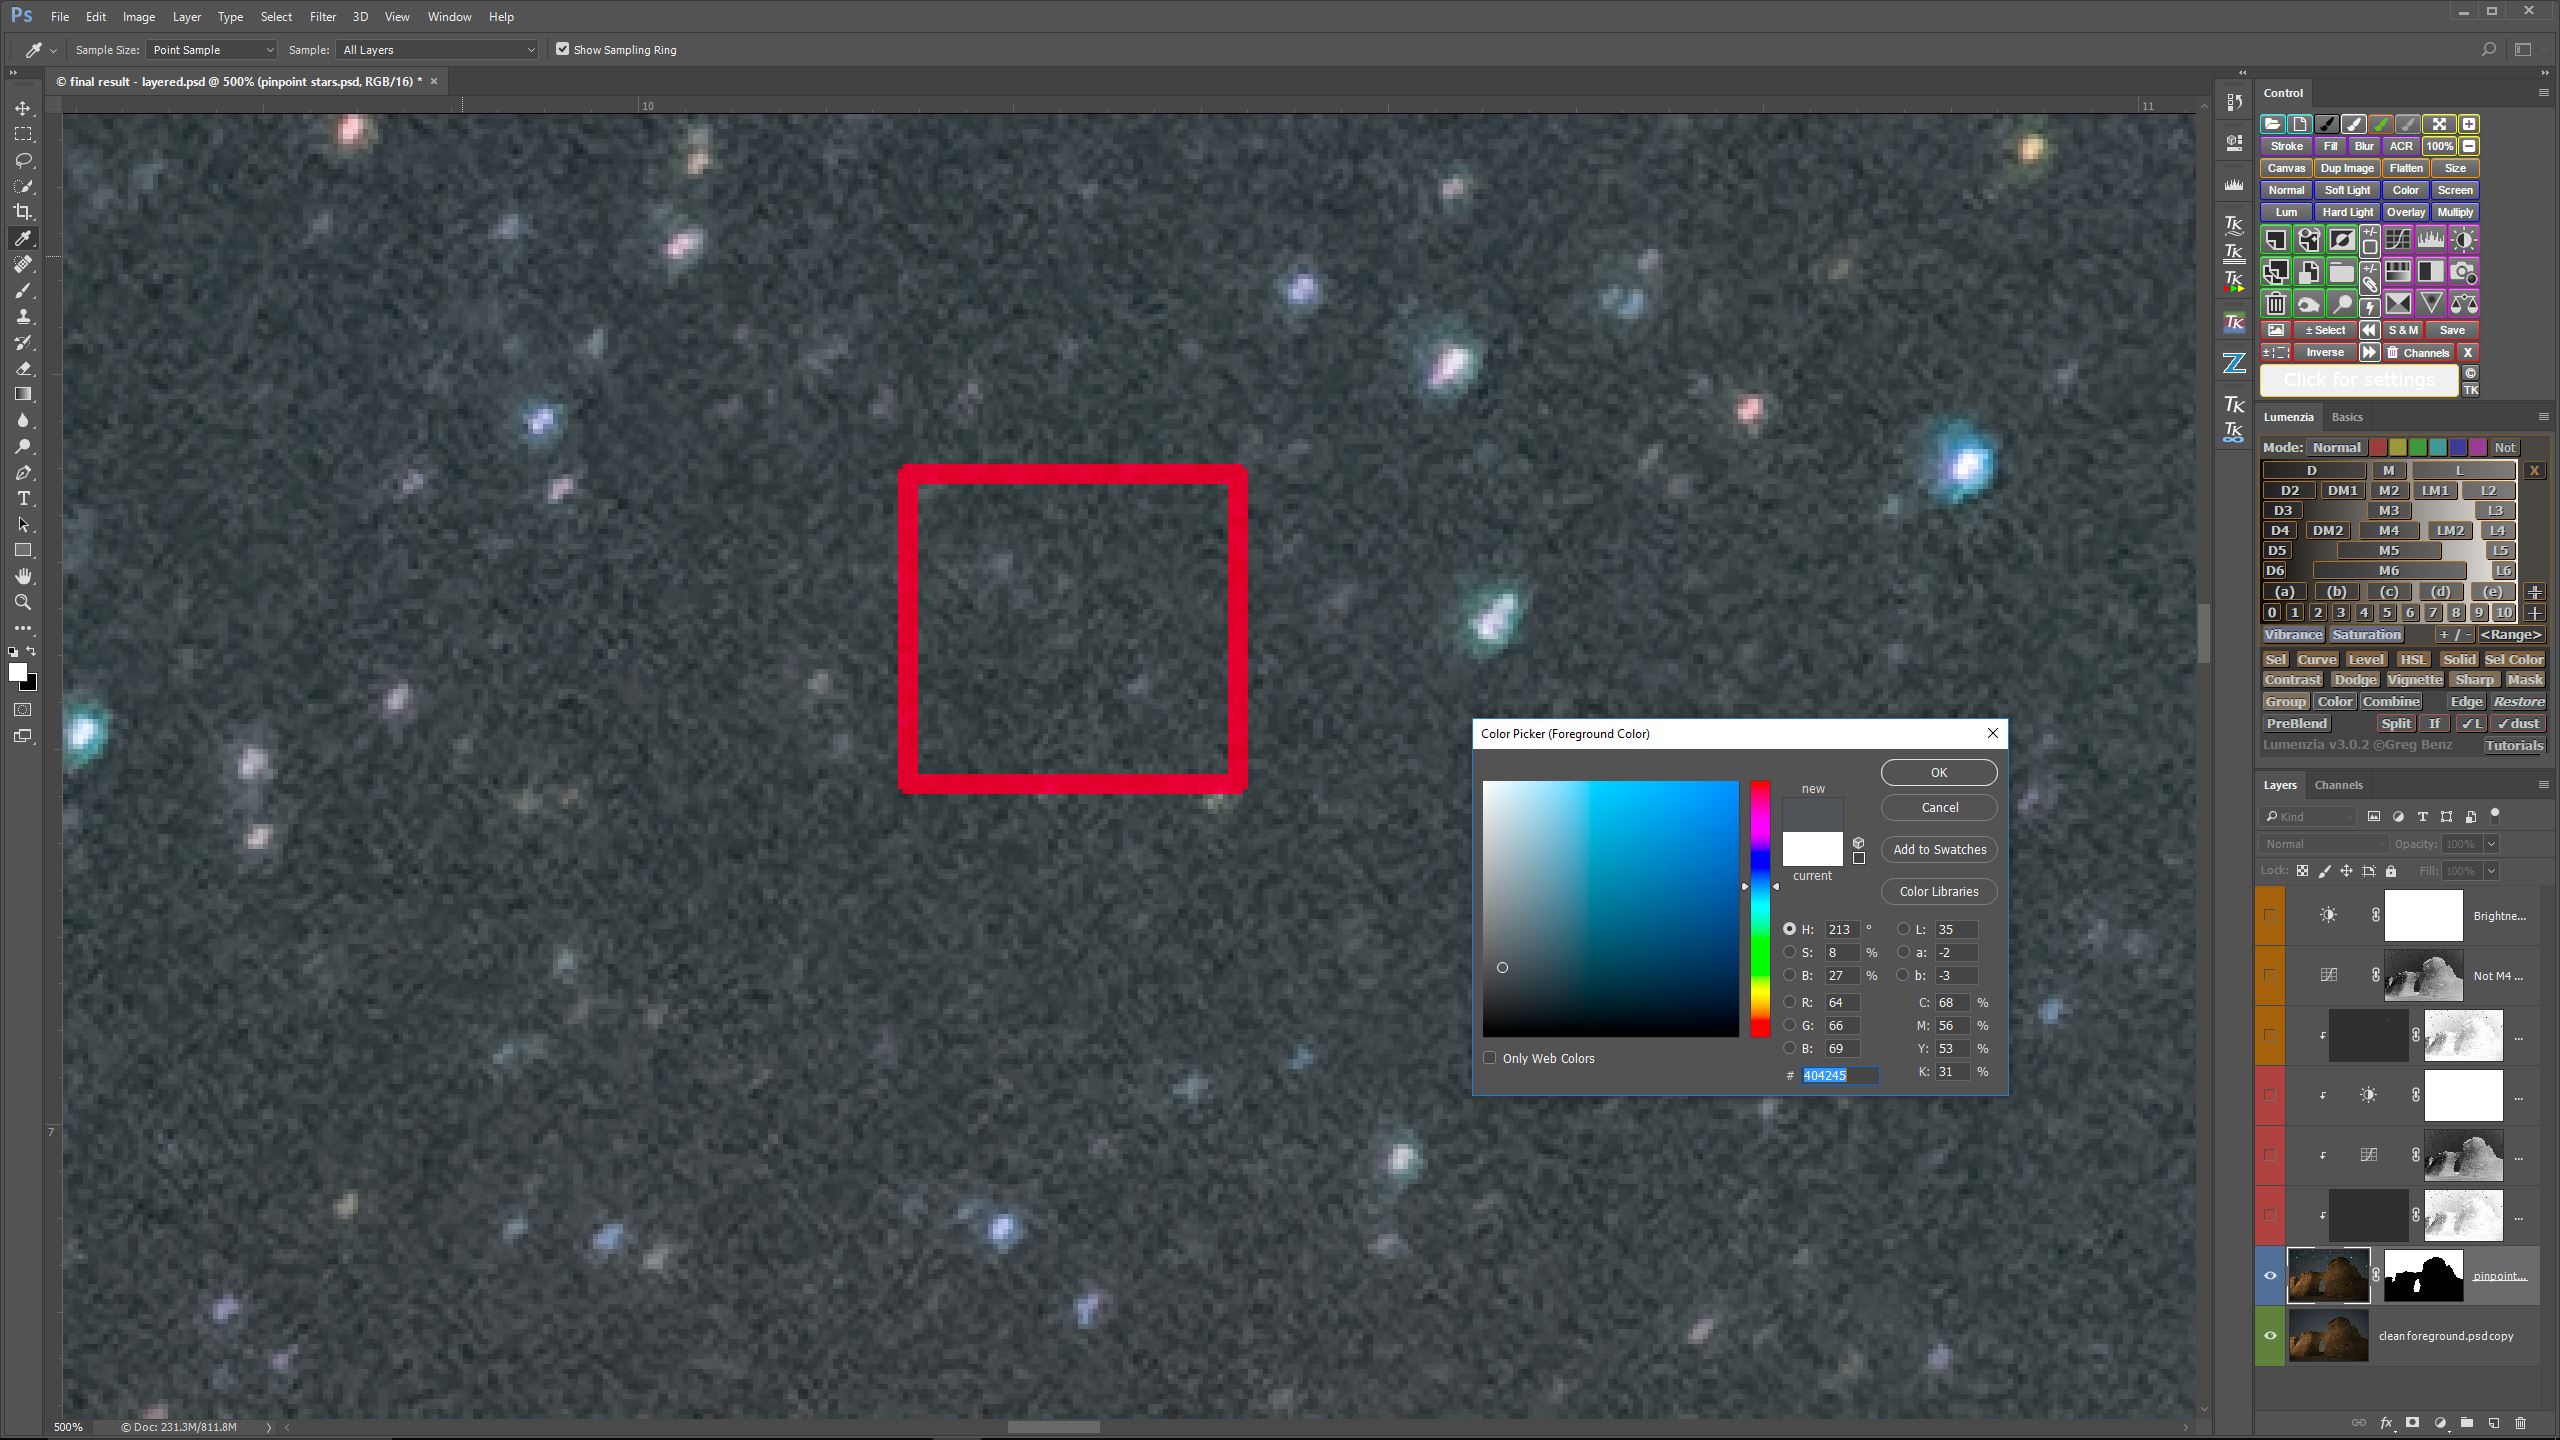
Second, I created two solid fill layers, each one sampled to a middle tone I chose from within the red square above. As in my demonstration with the blue dots and blue vertical bars, I set one layer to lighten blending mode, and one layer to darken blending mode, and set the opacity of both to 85%, to retain some graininess.

This is the result, shown at 100%. I was pleasantly surprised when I saw how well this procedure worked, well beyond anything I had anticipated. The stars are still the same sharpness as before the process, their colors remained steadfast, and the noise significantly reduced.

Before rushing to post the results of my experiment, I decided to try the technique out on a few of my other images, to see what would happen.

OH, the HORROR, the HORROR of it all. I won’t torture you with the results. Let’s just say, any changes in coloration or tonality across the sky renders this process useless. Unless you want to purposely convert the beautiful nuances of the night sky into a uniform, flat, dull, lifeless…..you get the picture.

For this procedure to have any hope of working, I would have to devise a way to apply fill layers though some type of gradient map that takes account of the tonality and coloration throughout the sky. Guess what? My research into creating the kind of gradient map I was looking for somehow led me right back to NIK Dfine.

It came to my attention that NIK Dfine had already tackled this problem in a very elegant way, only I was unaware of this capability, or how to tap into it. Apparently, I was attempting to invent the wheel, except that Google had already invented it, plus provided it with shiny new hubcaps, as well!

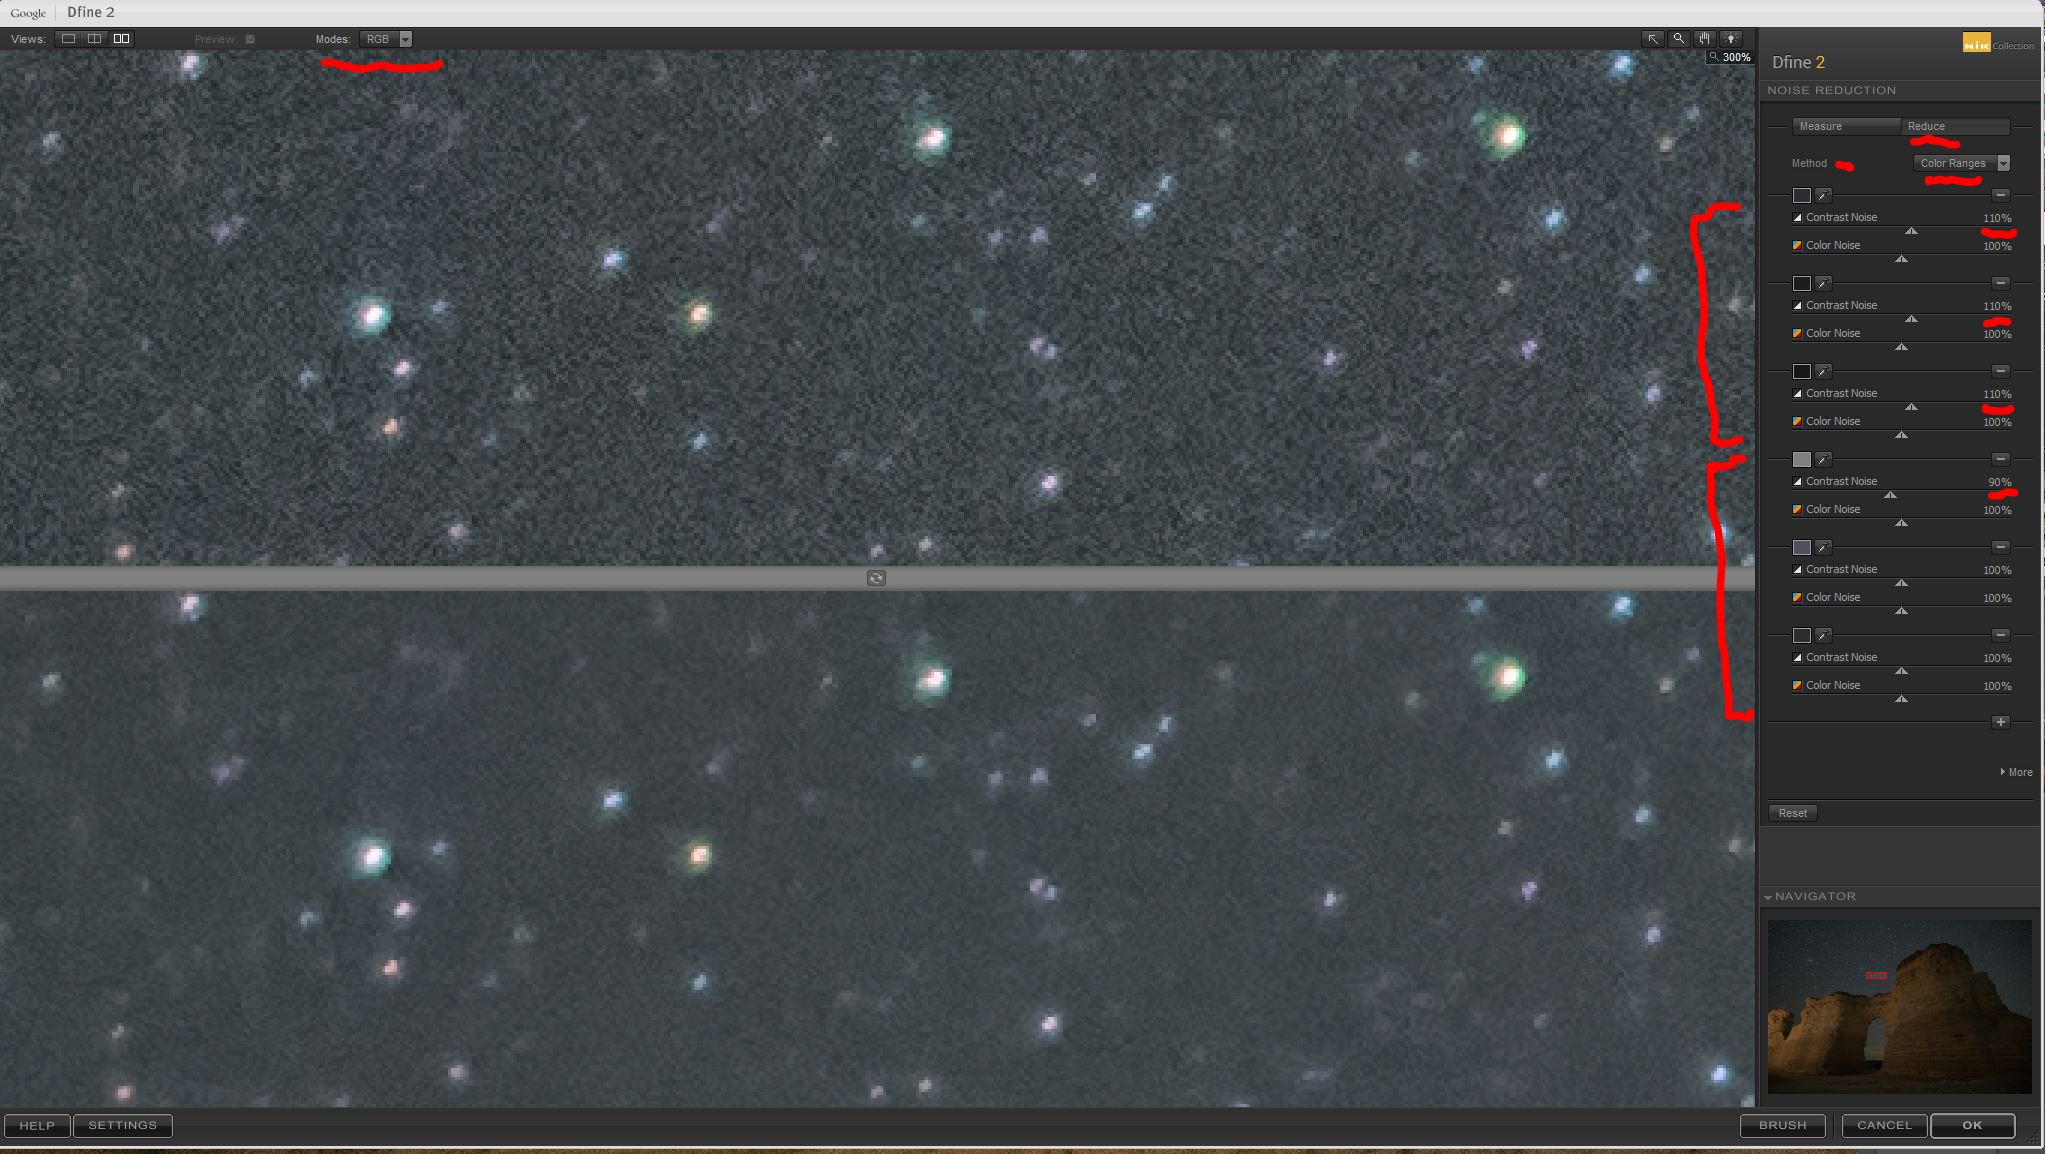
It turns out if you dig into NIK Dfine you can find some powerful functionality that does a far better and more comprehensive job of doing what I was attempting with my layer masking method of noise reduction. By tapping into the Manual mode, rather than the default automatic mode, and then choosing the Color Ranges mode, one can create customized noise control points specific to a particular image. If you examine the screen capture above, you will see two sets of Color Range controls I have created. For the upper three Color Range controls, I have used the eyedropper to sample dark, middle and light tones from the darkest region of the sky. For the lower three Color Range controls, I have created a set of controls to sample dark, middle and light tones from the lightest region of the sky.

Notice that in the upper three Color Range controls, which represent the darkest region of the sky, I have boosted the intensity of the Contrast Noise slider to 110%, under the logic that I can be a little more aggressive with noise suppression in the darker ranges than I can in the lighter ranges.

In the bottom three Color Range controls, which represent the lighter regions in the sky, I have reduced the intensity of the Contrast Noise effect to 90% in the lightest of the controls, under the logic that I want to be highly protective in the detail of the stars.

Using the Contrast Noise Sliders attached to each control range, combined with the Luminance Viewing Mode (found in the upper left), allowed me to visually adjust the noise reduction that was being applied through each Color Range, and I could be as aggressive or conservative in the noise reduction as I wanted.

Switching NIK Dfine back into RGB Viewing Mode (in the upper left) allowed my to verify that my adjustments did not degrade the color within the stars.

This is the finished result using NIK Dfine with 6 custom Color Range controls set for the sky exposure. Discovering that Dfine has the ability to designate Color Range controls at will has allowed me to use it quite effectively to reduce high ISO noise in pinpoint star images.

Stacking multiple exposures is my first choice to reduce noise in high ISO pinpoint star images, but when that is not possible, I will be turning to NIK Dfine frequently in the future. My next step will be to explore using Dfine with custom Color Range controls applied through a luminosity mask created with either TKv5 or Lumenzia. If the stars are protected by a good mask, I think I can be a little more aggressive with noise reduction in Dfine without sacrificing detail in the stars.

So what did I learn from conducting this exercise? First, some experiments are successes, while other fail miserably. This one was a failure. Second, good things can come out of failed experiments. It was only when my experiment failed that I discovered the advanced features NIK Dfine had tucked away behind a user-friendly, simplified interface.

Creating Elliptical Star Paths in Adobe Lightroom – Part 2

In the post Creating Elliptical Star Paths in Adobe Lightroom – Part 1, I demonstrated a technique for creating elliptical star paths using Lens Profiles in Lightroom. Here is a similar way to accomplish the same outcome using the Transform Panel in Lightroom.

This technique uses perspective transformation controls within Lightroom to warp a circular shape into an ellipse. The Transform Panel in Lightroom is an equal opportunity transformer, in that it transforms, or distorts, every element contained within an image. Knowing this, we can set up a shot where the the effects of the distortion work to our advantage.

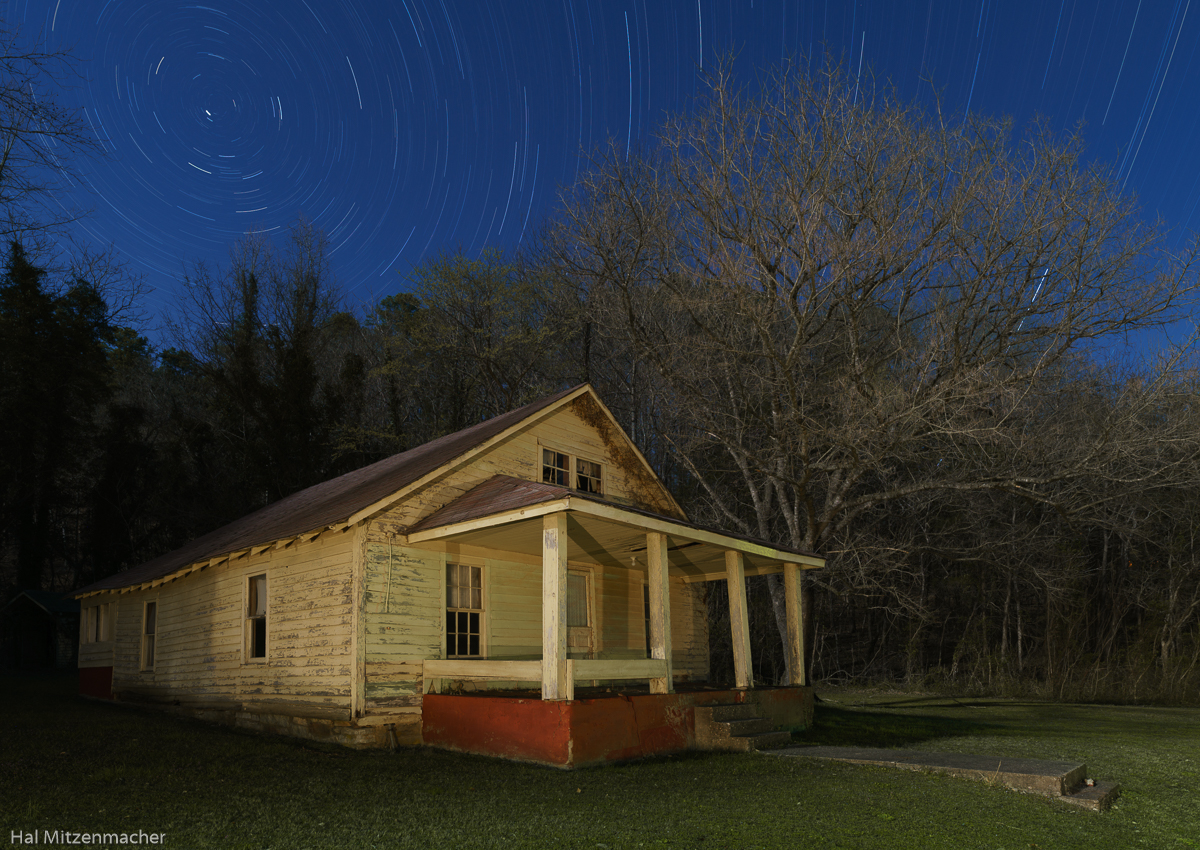
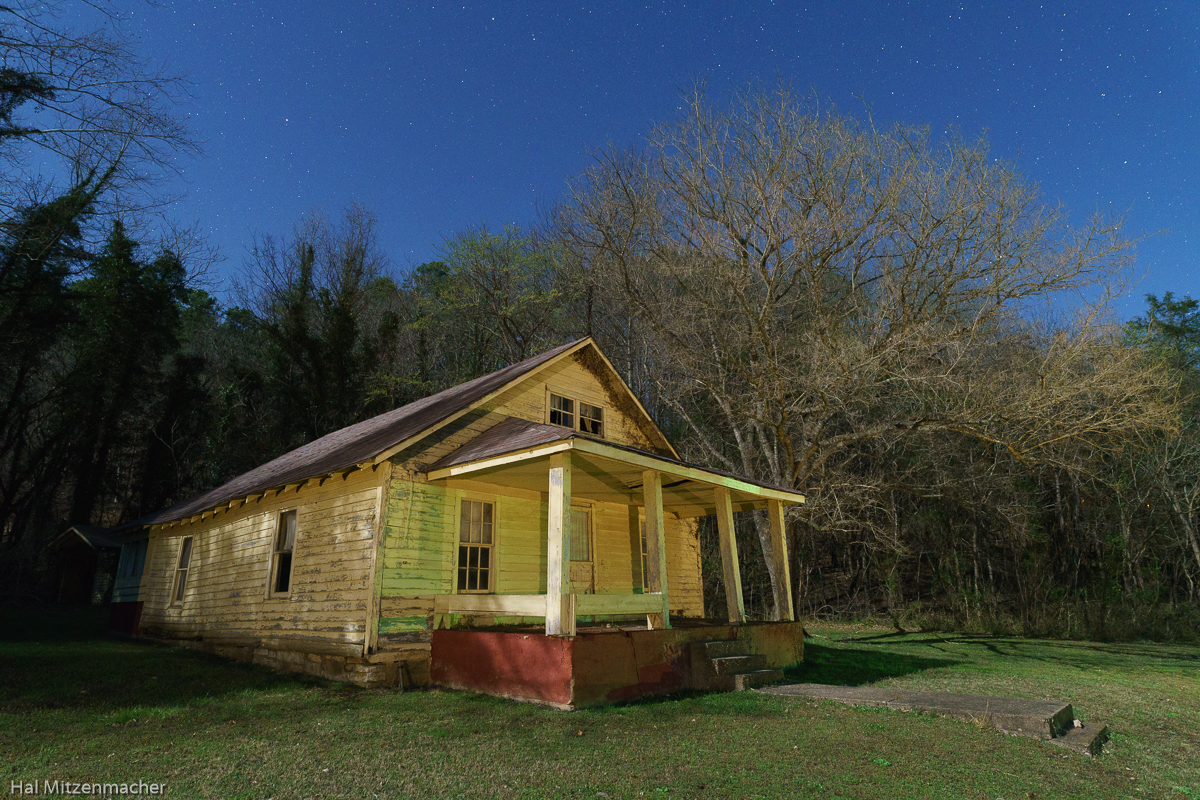
This old abandoned farmhouse in Boxley Valley, Arkansas was a perfect candidate for the use of this technique. To photograph this structure I would usually shoot with at least a 35mm lens, to put enough distance between the camera and the house to minimize the effects of distortion. I would also try to shoot with the camera nearly level and on a high tripod, again, to help minimize distortion. If I were really exacting, I might try a tilt-shift lens to deal with the distortion. But for this technique to work effectively, I actually want to create a controlled amount of distortion on the house. Let’s take a moment to see exactly what I am trying to achieve here.

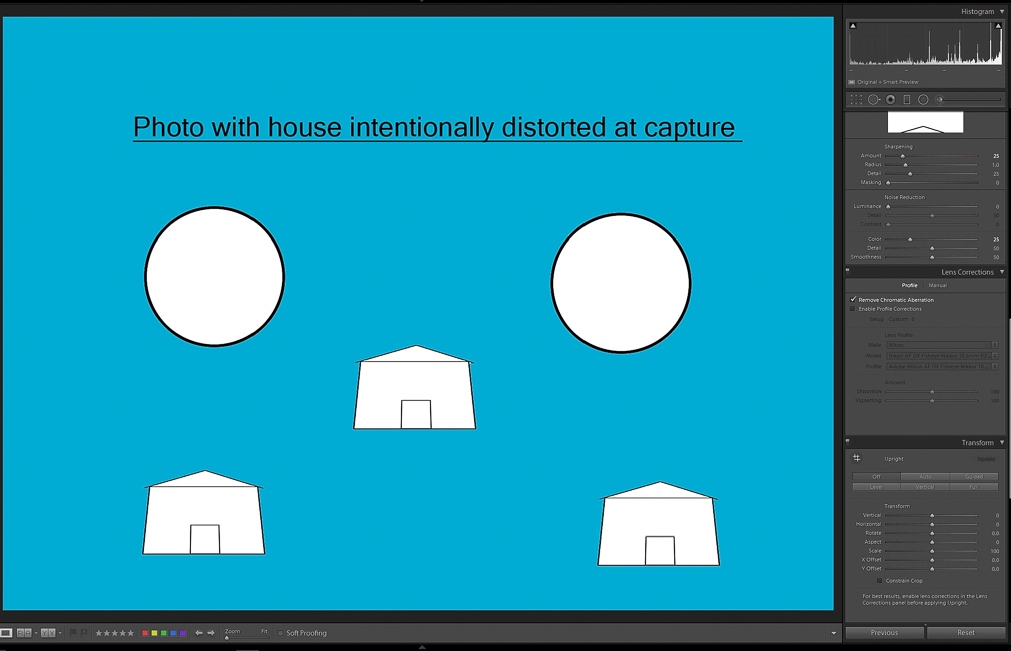
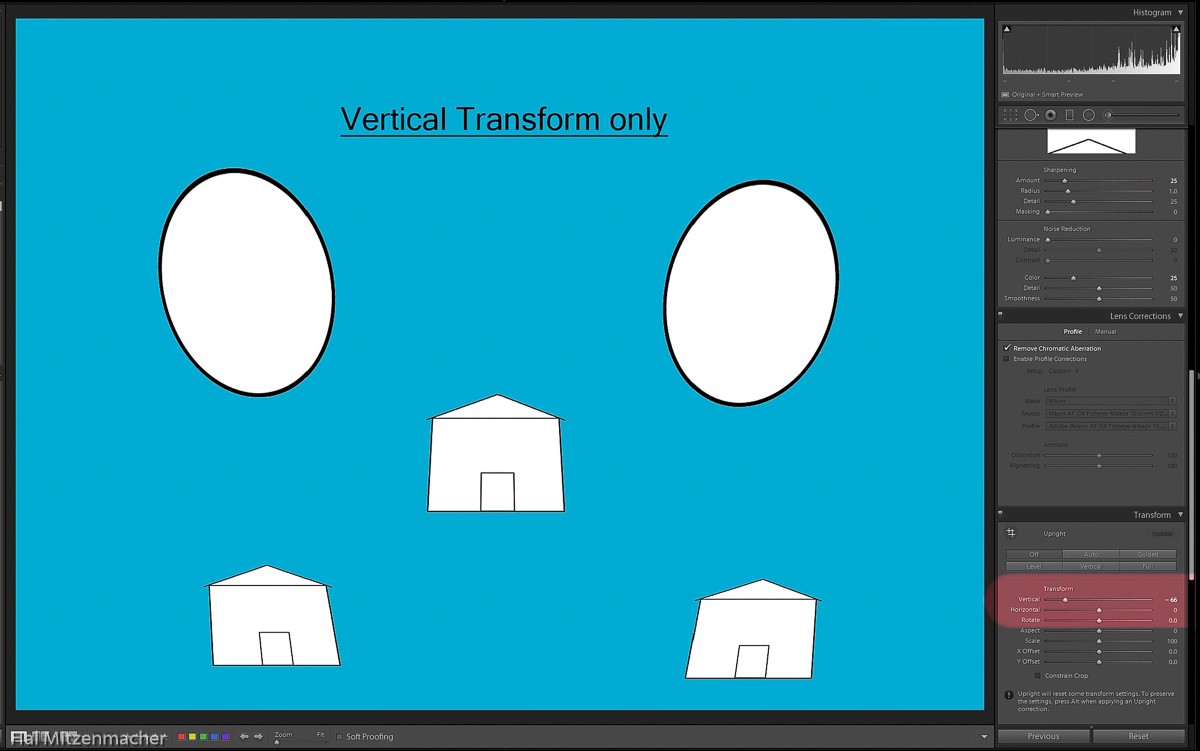
This diagram depicts a distorted figure of a house in several locations within the frame, along with circles in the upper part of the frame.

Now look at what happens when we go to the Transform Panel in Lightroom and adjust the Vertical Slider until the center house is nearly distortion free. The circles have now been transformed into ellipses. Notice, however, that the other house figures at the bottom also get distorted, along with the circles at the top.

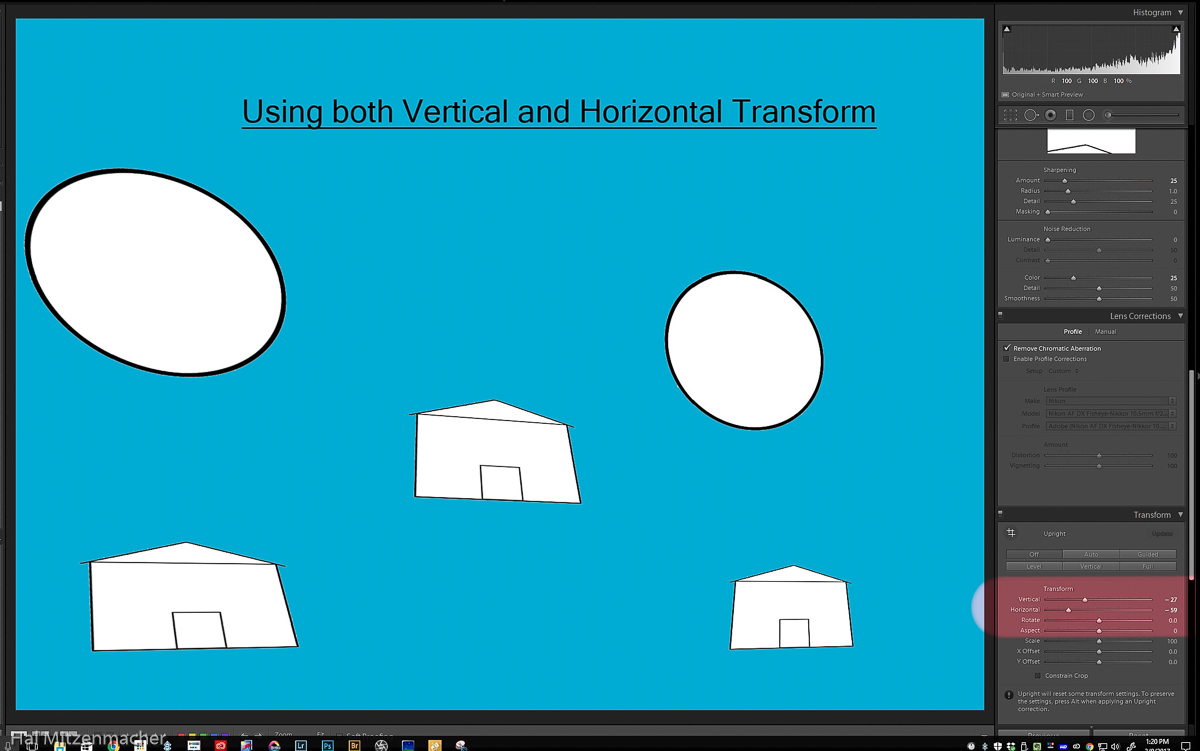
And if we were to go to the Transform Panel in Lightroom and adjust the Vertical Slider and Horizontal Sliders we will see distortion effects applied in a slightly different manner. Here, the house in the lower right appears near normal, while the other elements get warped.

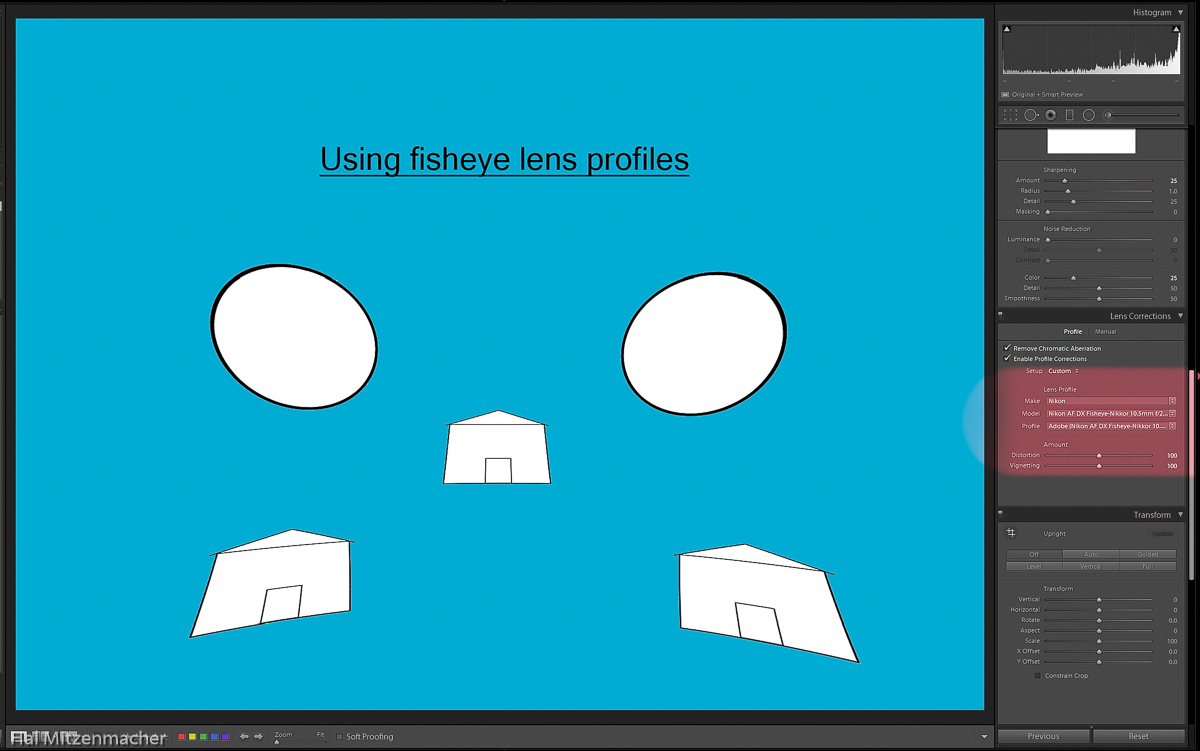
Similarly, if we go into the Lens Corrections Panel and try out different fisheye lens correction profiles we see that there are altogether different distortion correction patterns applied to the image, based on which lens profile is chosen. This is the method that was presented and used in the post Creating Elliptical Star Paths in Adobe Lightroom – Part 1.

By setting up the shot initially with induced subject distortion, and then using various combinations of the sliders in the Transform Panel or Lens Profiles in the Lens Correction Panel, we can create interesting elliptical star paths from within Lightroom while ending up with a reasonably undistorted subject. Some combinations work with some images and not others, but with practice, you will soon get a feel for what subjects work within the constraints of this technique.

Here is a high ISO test shot I took to set up the composition, gauge exposure and verify focus. I chose a 20mm lens, in order to get in close to the house, and set the camera low to the ground. Both of these choices created just the right amount of distortion in the house that I was looking for, knowing that correcting this distortion in post-processing would then morph my star circles into star ellipses.

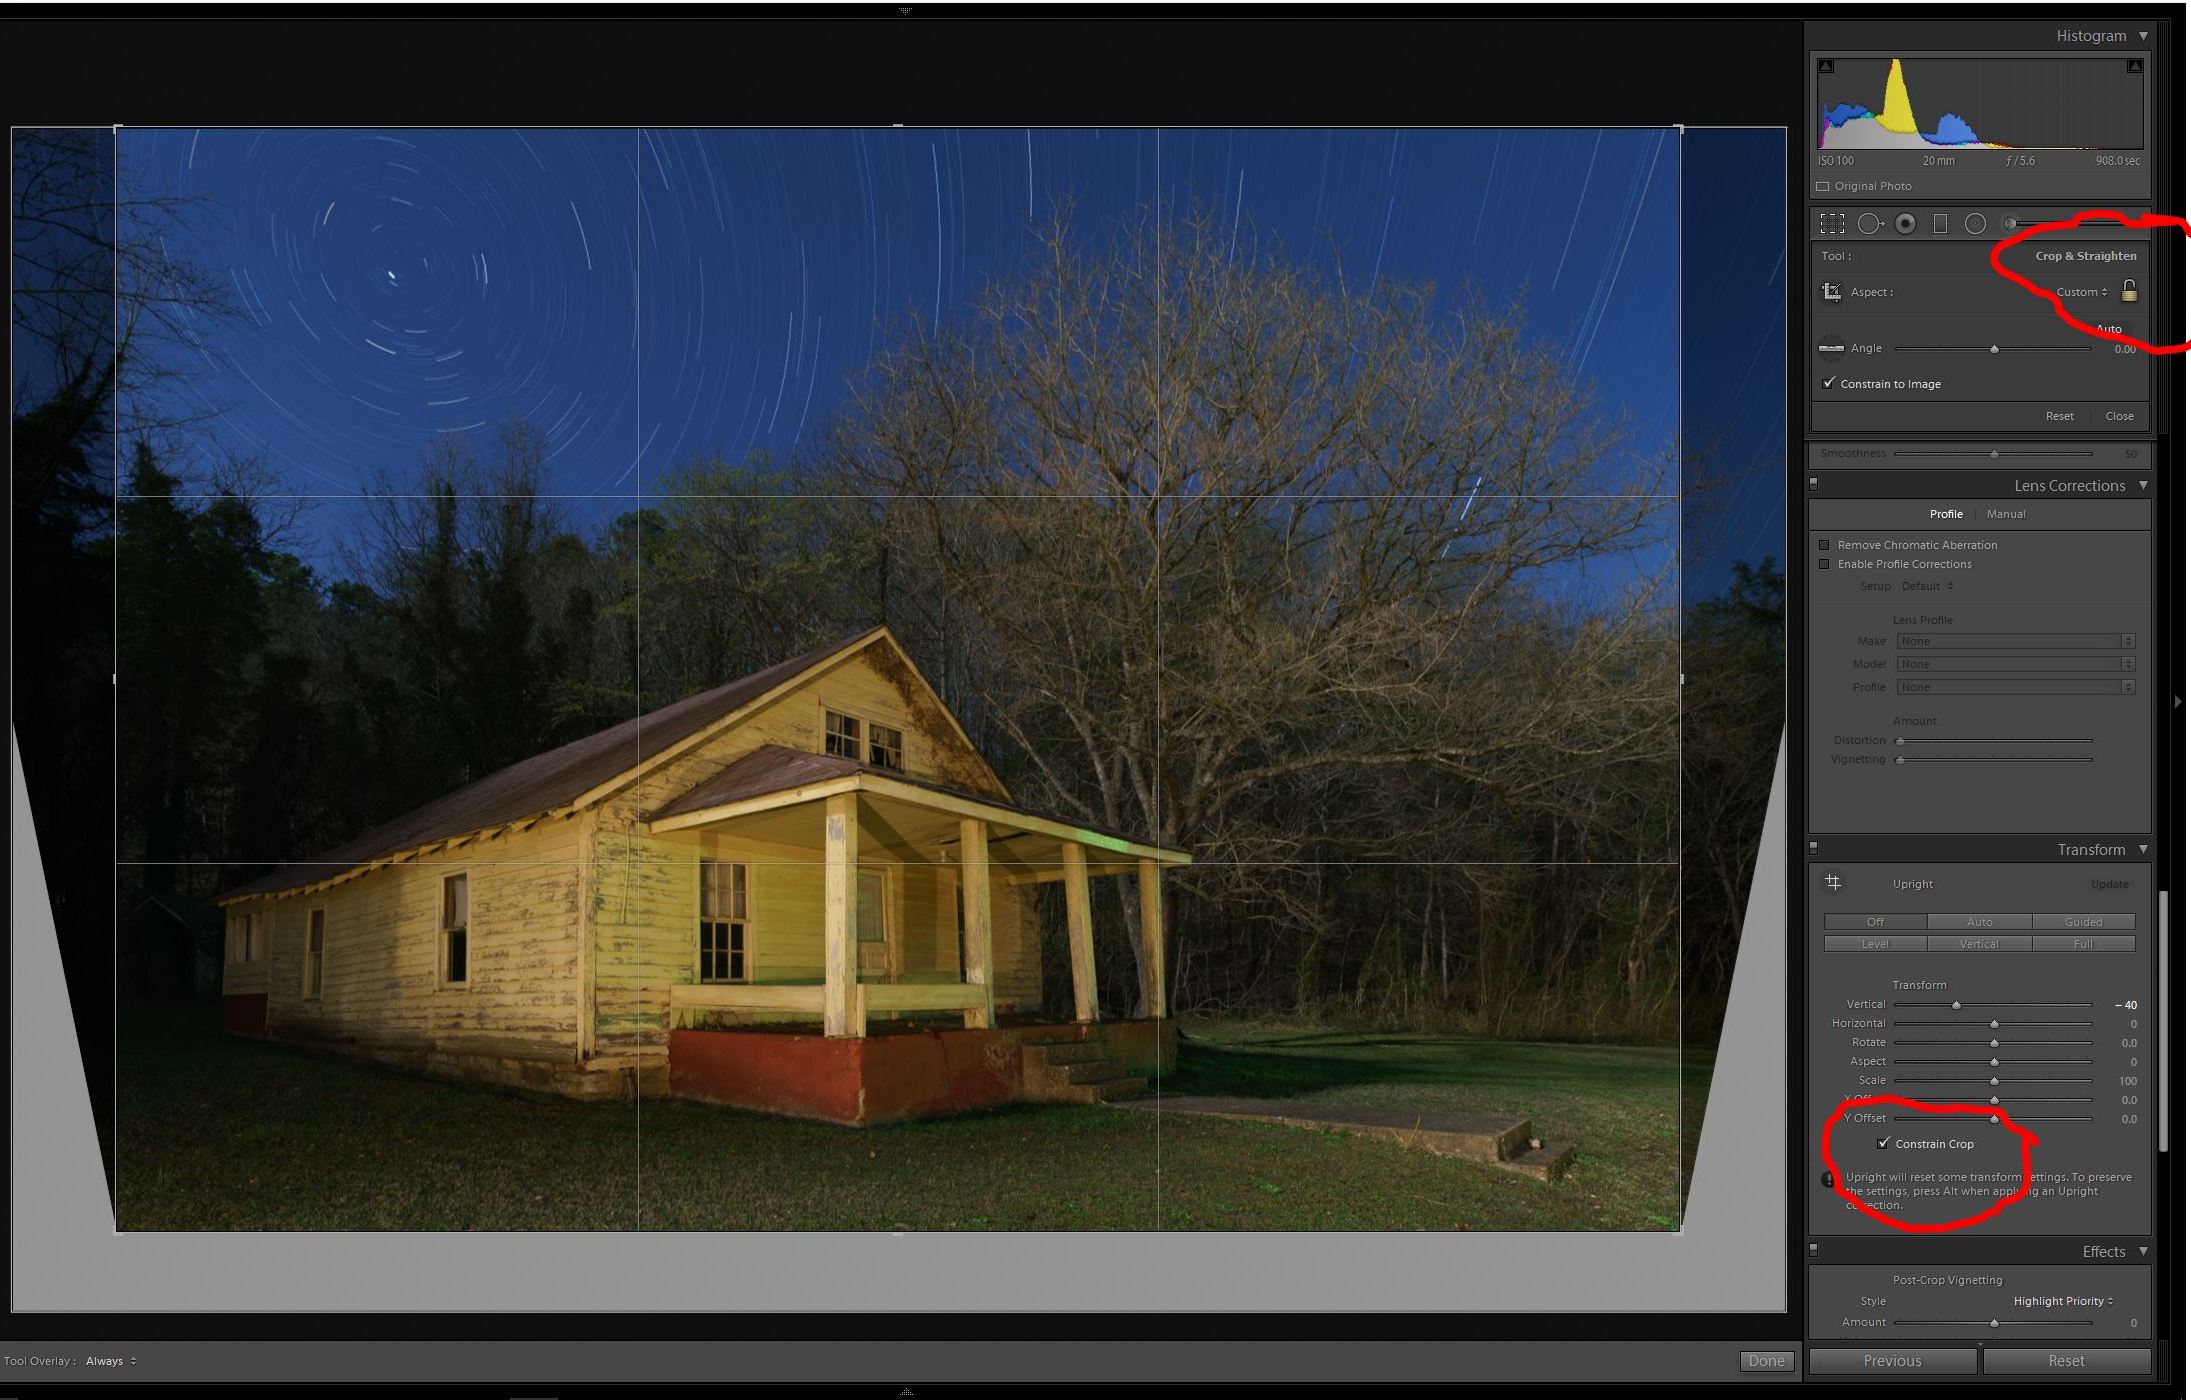
I shot five 15min@ISO100 exposures, stacked them in Photoshop to create the star circles, then returned to Lightroom (see note below). After experimenting with various settings in the Lightroom Transform Panel, I settled on -40 for the Vertical Slider, which seemed to yield the best results with this particular image. Notice that whenever using the Transform Panel, the resulting image will usually need cropping. I have found that it is good practice to overshoot the intended composition, in order to allow some breathing room for the inevitable crop. The cropping can automatically occur right within the Transform Panel if you check the Constrain Crop checkbox. If you then want to further adjust the crop to you liking, simply unlock the Padlock Icon in the Crop & Straighten dialog, as show above.

With a little additional touch up work to get rid of some color cast, the image was finished to my satisfaction. It turns out this is an interesting, simple and fun technique to add just a subtle difference to the usual star circle images one usually encounters.


Note regarding single vs. multiple exposures for creating star circles

This technique can also be applied without the necessity to stack multiple exposures in Photoshop by merely taking one exposure with a duration long enough to create the star trails of the length you desire. I prefer to use multiple exposures for a variety of reasons, but there are two reasons that I find most compelling. Both involve automobile lights, but in opposite ways.

First, there is the serious risk of an unusable exposure due to automobile headlights intruding into the scene. Suppose you are 57 minutes into a 60 minute exposure, and a car drives by and casts its headlights directly into the scene. Most likely you will have to retake the image. On the other hand, if you had decided to capture ten 6 minute exposures and stack them to create an hours worth of star trail length, you could easily mask out the spoiled portion of the relevant exposure, and all would be well. In fact, the more exposures you take, the better your odds of having a successful star circle image.

Second, you never know when incidental automobile headlights will be your friend. I often hear photographers grumble about passing motorists. Not me! Once I learned that it is not extremely difficult to mask out unwanted lights in one of a series of multiple exposures, I was free to embrace automobile headlights as a creative tool. In many instances, automobiles have accidentily provided just the right lighting touch on the subject in a way I could not have created on my own.

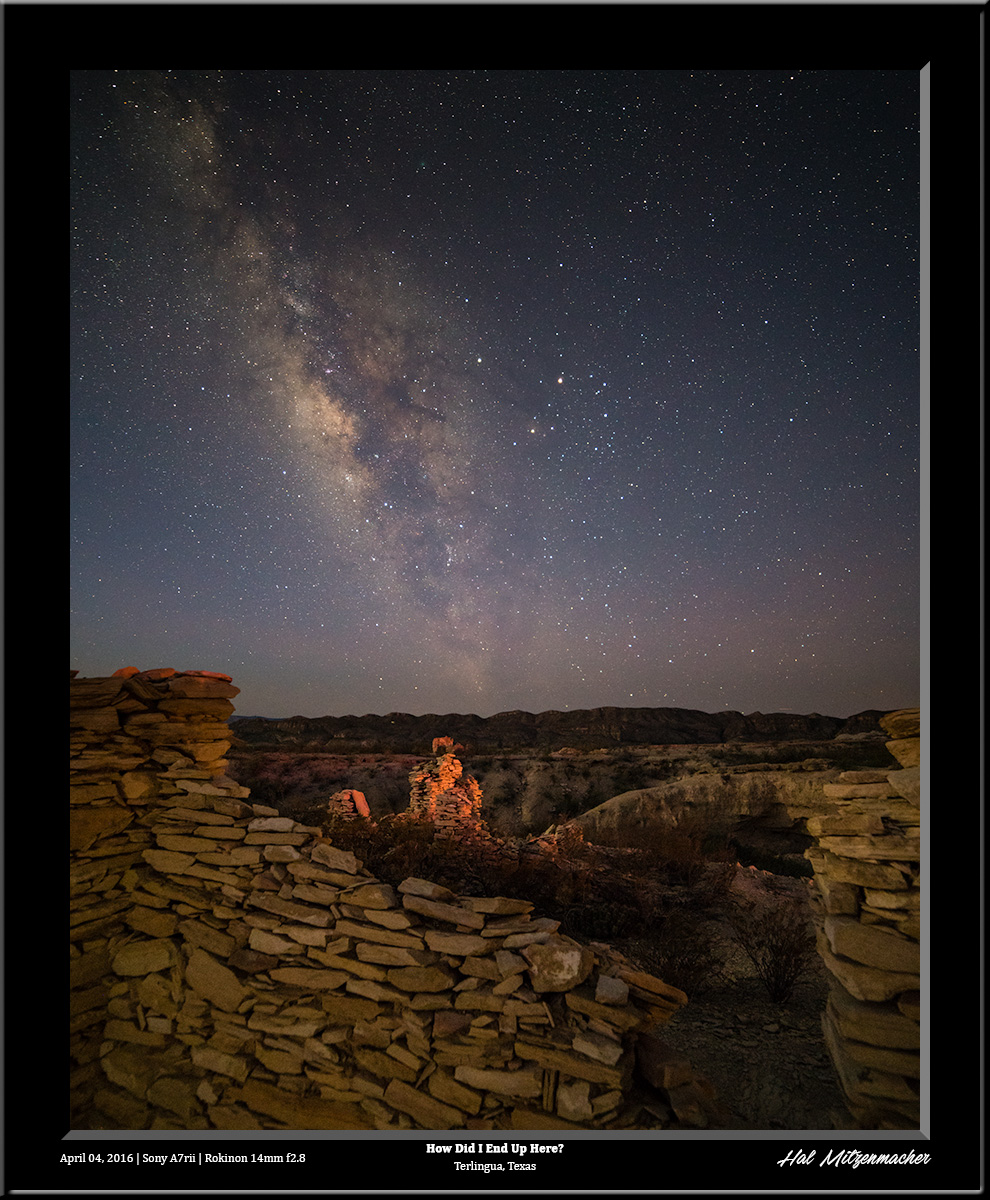
Here is an example of a “happy accident” where I was shooting multiple exposures of the Milky Way in order to stack for noise reduction purposes. A passing motorist supplied the perfect lighting for the rubble ruins in the mid-ground in a way I could not have duplicated, and all quite by accident.


Moonrise Over Bodie – ISO Invariance In Actual Use

I have been experimenting with various ways that I might benefit from the ISO invariant nature of the Sony A7Rii camera. For those unfamiliar with the concept, ISO invariance is discussed in the DPReview article Sony A7Rii: Real World ISO Invariance Study published in August of 2015, where they did some daytime testing of ISO invariance (the comments are arcane and technical, but contain valuable information).


Important Update

Since writing this post, two important and informative articles have been published that are must reads for anyone interested in the topic of ISO invariance.

The first article, by Ian Norman of Lonely Speck, is entitled How to Find the Best ISO for Astrophotography: Dynamic Range and Noise

The second article is by Spencer Cox, and is entitled ISO Invariance Explained

Both articles, while highly technical (especially the second), do a thorough job of explaining the nuances of ISO invariance, and are well worth the time required to digest their contents.


The concept of ISO invariance arises from two different camera architectures in common use to record RAW files today. The image sensor is an analog device. Its pixel output is measured in voltage levels.  In a traditional architecture, the electrical signal will pass through electronics that control the gain, or amplification of the signal depending on the ISO set in camera. This gain, both the signal and the noise, will be applied uniformly across all pixels, which then get sent to an ADC (analog to digital converter) and from there are baked into the RAW file.

The ISO invariant camera architecture differs in one respect. The analog pixel signals travel directly from the sensor to the ADC, and any “gain” applied via the ISO setting is actually accomplished in the camera software. At that point it is then baked into the RAW file.

The theory is that since the ISO setting is applied in software, why not postpone the software boost until post-processing, rather than in camera. That way one can selectively boost exposure only in those areas that need the boost, and leave the rest of the image alone.

Luminous Landscape wrote a brief post regarding ISO invariance, and the post ISO INVARIANCE: WHAT IT IS, AND WHICH CAMERAS ARE ISO-LESS appeared on the Improve Photography website, but neither provided any examples of ISO invariance in real-world use. The biggest critique I could find of using ISO invariance techniques appears to revolve around the idea that ISO invariance fails the test in Sony cameras because of the RAW lossy compression scheme originally implemented by Sony. Whether that is an issue or not is now moot, as Sony has updated firmware to allow uncompressed RAW files as an option. If that had been a problem in the past, it is now gone.

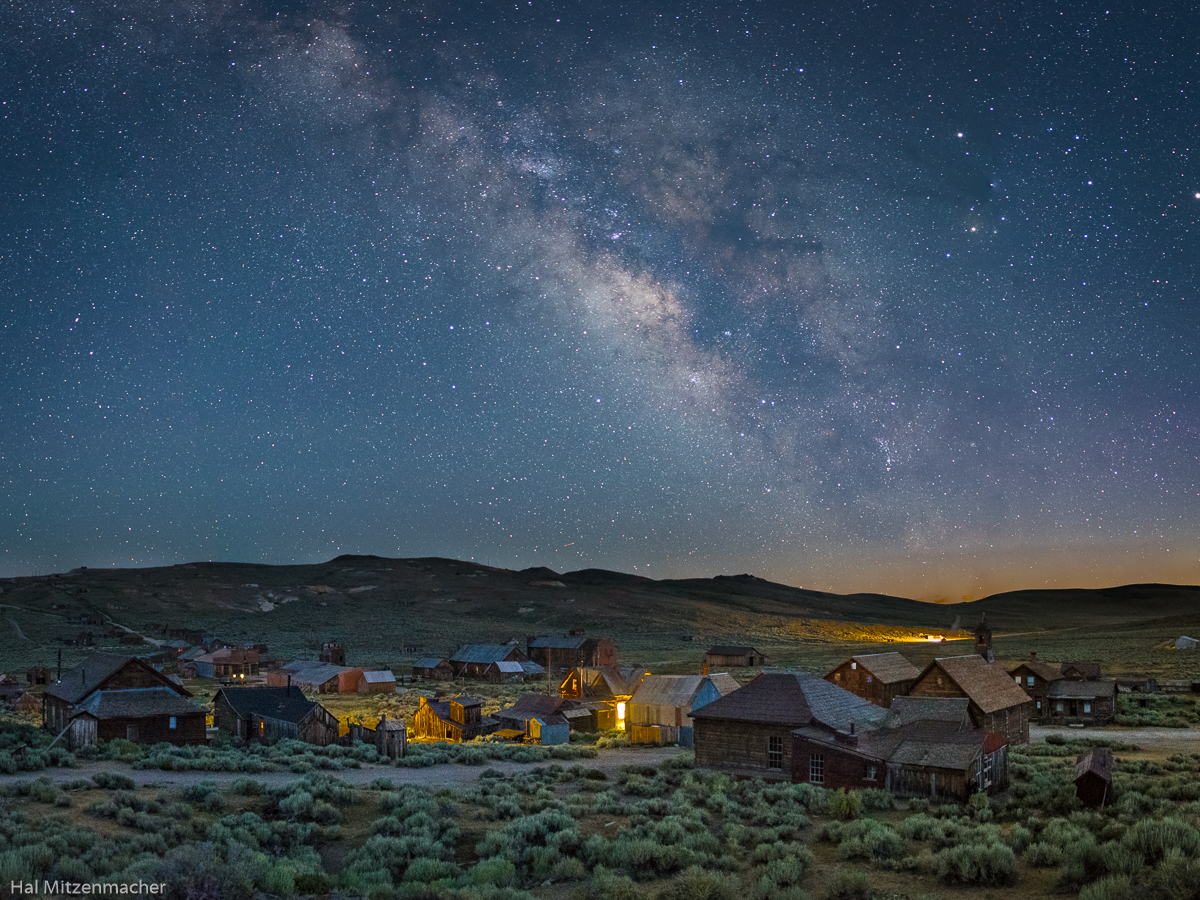
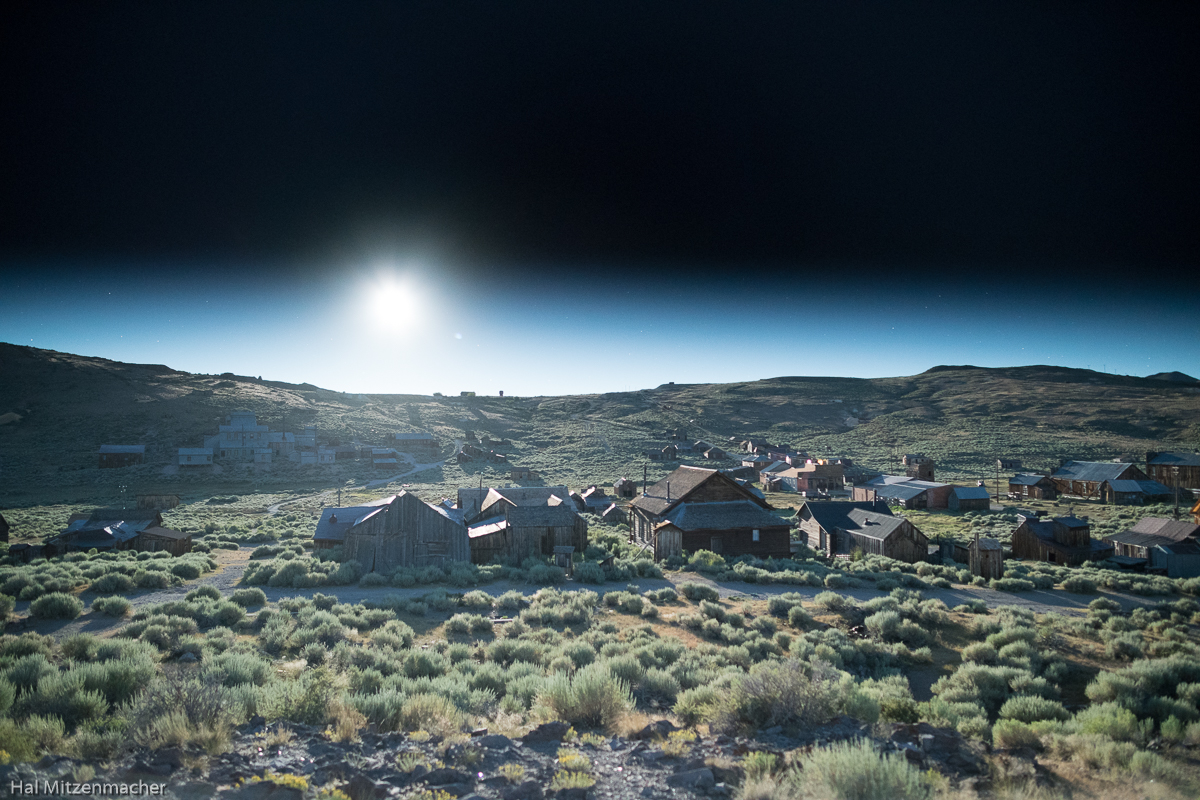
Over the past year, as opportunities presented themselves, I played around with the ideas behind ISO-less shooting in my night photography, with some successes and some failures. The photograph Moonrise Over Bodie at the top of this post is one of the successes, and shares a common trait with the other successful exposures I made with this technique – very high dynamic range, combined with sufficient ambiant light to allow the sensor to record useful information in the deep shadow areas. In other words, my moonrise and moonset shots. Beyond that, I am continuing to explore other situations where this might be a benefit, but for now, it is the tool I turn to for images such as the Moonrise Over Bodie. Here is a description of how I captured and processed this image from one single exposure and approximately 10 minutes in Lightroom.

So here is “backstory” number one. In July 2016 I participated in a Full Moon Night Photography Workshop presented by Lance Keimig in Bodie, California, While the focus of the workshop was light painting and night photography under full moon conditions, we were presented with a brief period during the last night where the Milky Way would be visible immediately prior to moonrise, which is when I took the shot above. As the moon began to rise, rather than head back into the ghost town, I decided to stay atop the knoll I was perched on and do some experiments involving the moon.

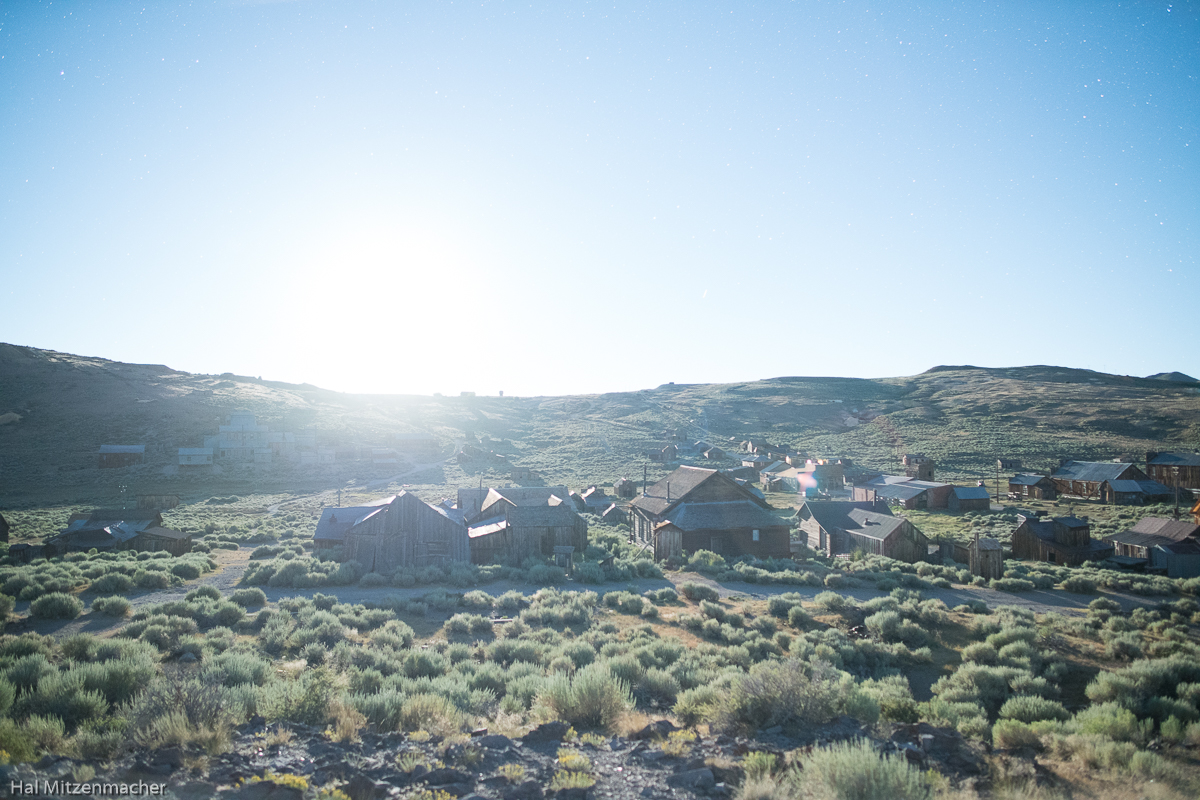
Here is my first exposure, taken at ISO 6400 for 13 seconds.The sensor was gathering sufficient data in the foreground region, but clearly the highlights were blown out in the sky with the full moon now above the horizon. While I expected the sky to be blown out, I was pleased to see that ISO 6400 allowed plenty of detail to be recorded in the foreground. But how to tame the moon?

In my usual workflow, I would take a series of bracketed exposures and either blend them manually in Photoshop or process them as an HDR image. Both methods can be difficult, time consuming, and prone to unnatural looking end results. I wanted to find out if there was a quick, easy way to capture the photograph I had envisioned in my head, and all with a single exposure.

This is where “backstory” number two comes in. While participating in a workshop conducted by Mike Berenson and Darren White in the Grand Tetons, Mike taught the group an in-camera dodge/burn method he calls the “Magic Cloth” technique. The photo above gives the general idea behind the technique – use a black cloth (or card) to cover a portion of the lens for part of the exposure, thereby simulating the use of a graduated neutral density filter.

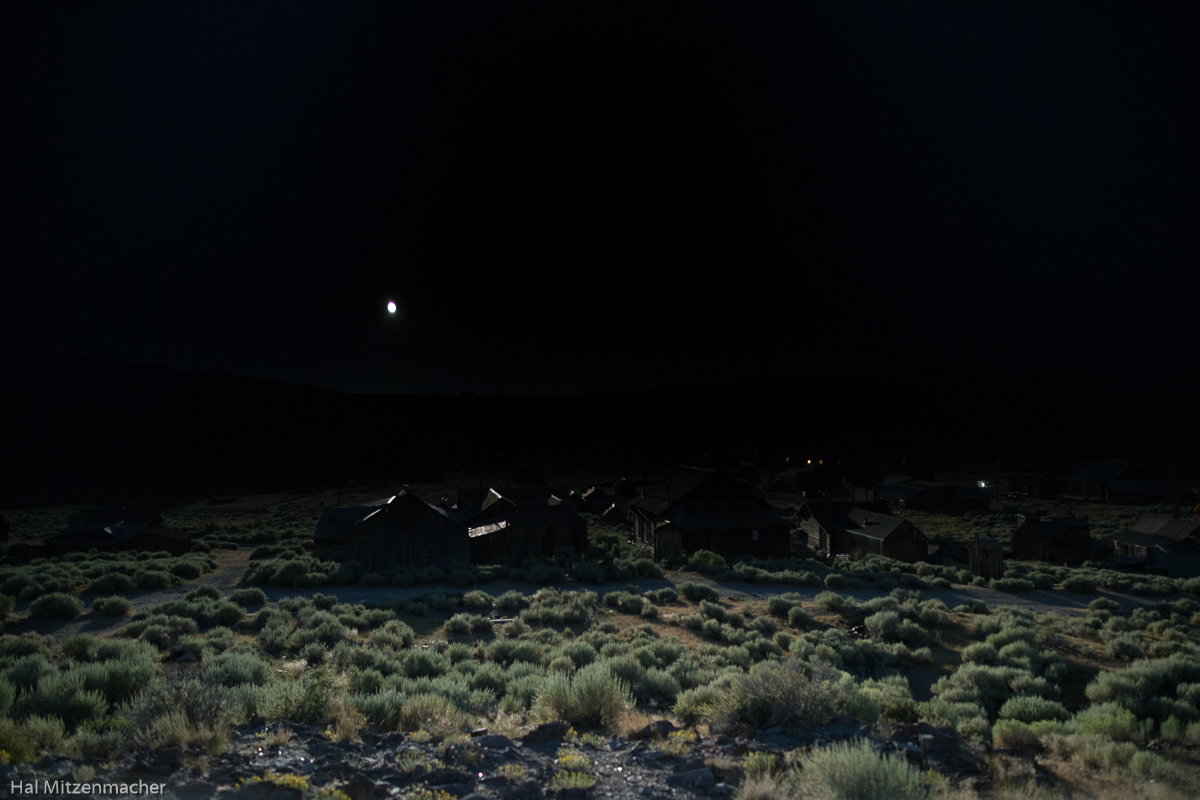
After several attempts with the magic cloth I captured this RAW file, which is the best of all my attempts, but probably nowhere as good as I could have achieved if I were to have devoted more time to the process. But time was growing short, and our group’s chaperon was there to ensure we all vacated Bodie by a designated time.

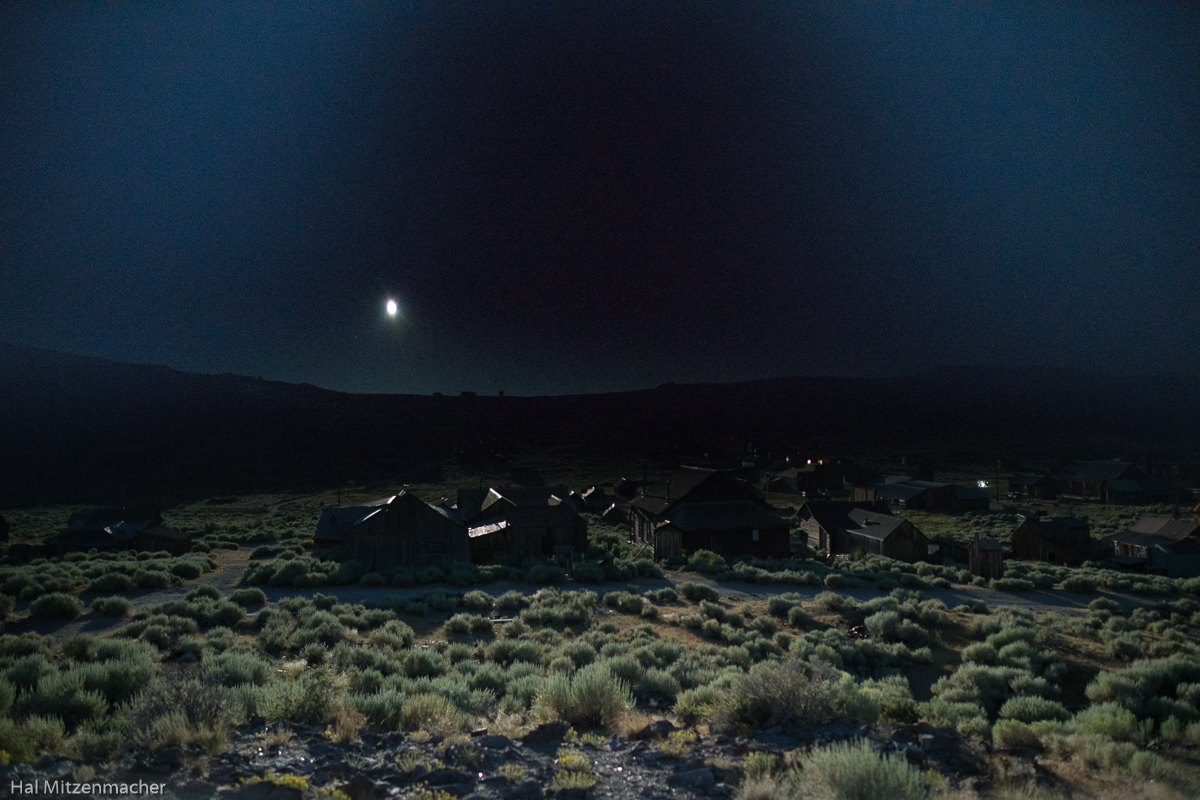
The best result I could get from the magic cloth technique is shown above. Clearly, my implementation of this technique failed. This is the result of pulling up the sky by just +3EV.  Not what I was hoping for, so on to the next test.

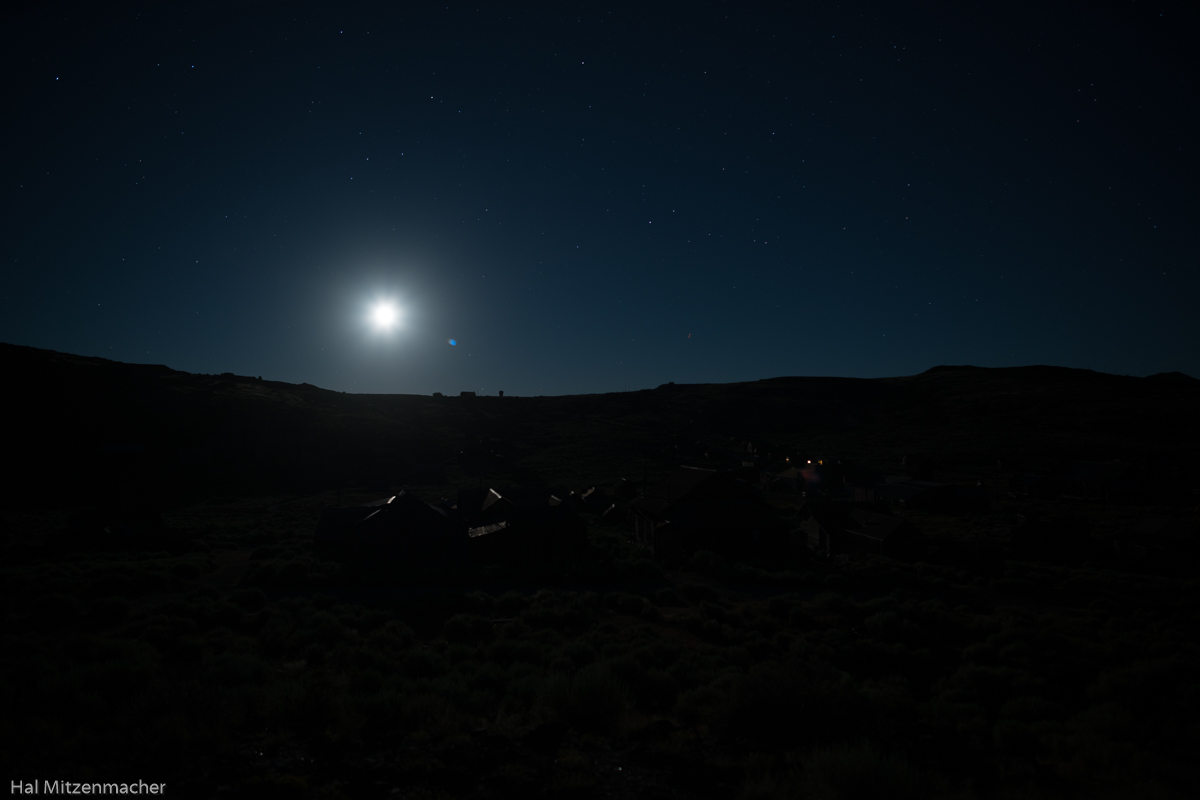
This is an exposure I took specifically for use with the ISO invariance of the Sony A7Rii in mind. It is a thirteen second exposure @ ISO 100. If the ISO invariance theories hold up, then I should be able to selectively boost the shadow areas by +6 EV and see noise results similar (and no worse) than if I had shot in-camera at ISO 6400. Well, there’s only one way to find out - by trying!

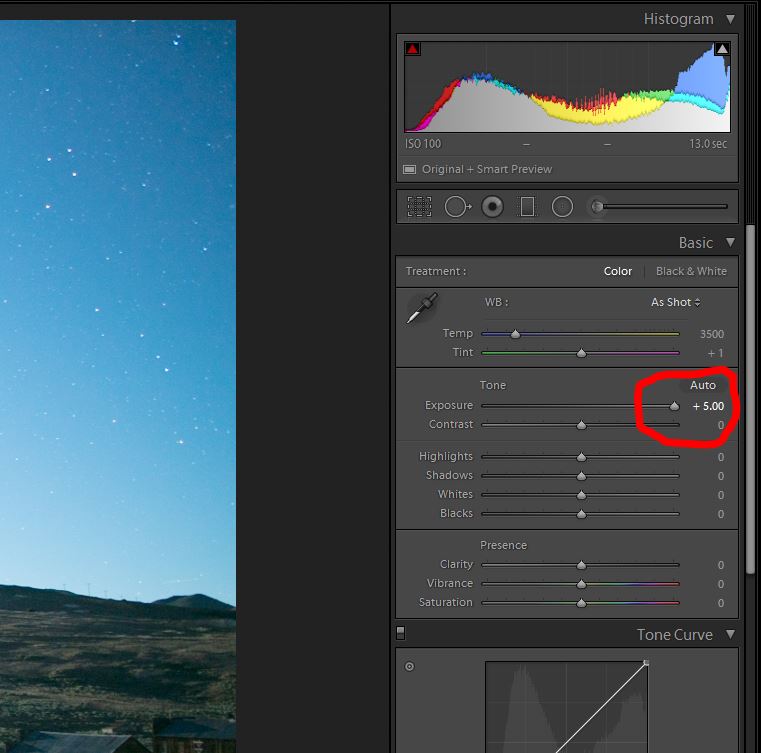
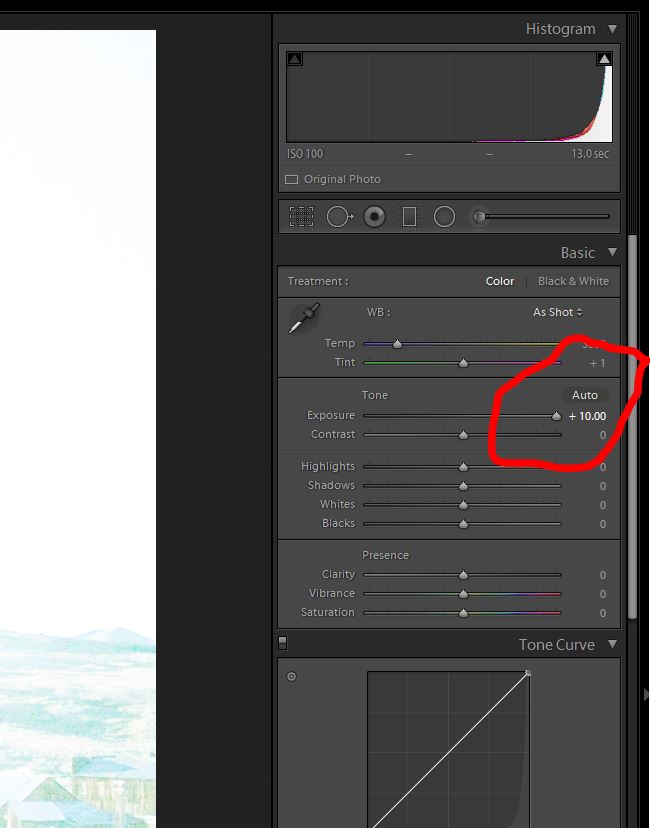
OOOPS!! Lightroom limits the exposure adjustment to +/-5 EV, but I needed to boost exposure +6 EV to make a comparison. There is a workaround, and one that actually forces us into a mode that benefits what I am trying to accomplish with this image. The trick is to create a virtual copy of the image file in Lightroom, then with the original and virtual copy selected, Merge to HDR. Leave the ghosting and toning options unchecked, and the resulting file that is returned is a file that has been converted internally from 16-bit to 32-bit floating point mode. Nothing else has changed in the file.

Notice that Lightroom now allows up to a +/-10 EV adjustment to the 32-bit image, which gives Lightroom some additional mathematical breathing room to do its bit-banging magic.

Now that Lightroom is using a 32-bit format, I can readily boost selected areas to my heart’s content, limited only by the noise that is produced by such actions. Notice that the sky has been tamed, there are pinpoint stars appearing along with the full moon, and the foreground is properly exposed. All from a quick, single exposure in the field and just a few moments in Lightroom. No composites, no blending, no bracketed exposures or HDR processing.

The noise that the RAW files exhibit can be compared in the screen capture above, both of which are 300% crops of the images. On the left is the image shot at ISO 100, merged to HDR to produce a 32-bit file, and boosted +6 EV in Lightroom.  On the right is a RAW file taken at ISO 6400 in camera with 0 EV boost. As far as my eye can tell, the results are identical, or so close as to be negligible. It seems that there just might be something to this ISO invariance concept, after all. I will be testing the concept for other scenarios in the future, but for now, I intend to ALWAYS take a low ISO exposure when I am out shooting high dynamic range images at night, if only because they may become the best RAW files to use for a particular shot, once back at the editing workstation.