
 One aspect of night photography that I really enjoy is the use of added light to achieve some desired outcome. One thing I have discovered is that if you get bitten by the night-lighting bug, the result is usually Gear Acquisition Syndrome, in which every type of light source becomes an object of desire. I will attempt to show you how it has affected me, in this round-the-kitchen-table style post regarding my light kit.
Utility Working Lights
Key Chain LED Light
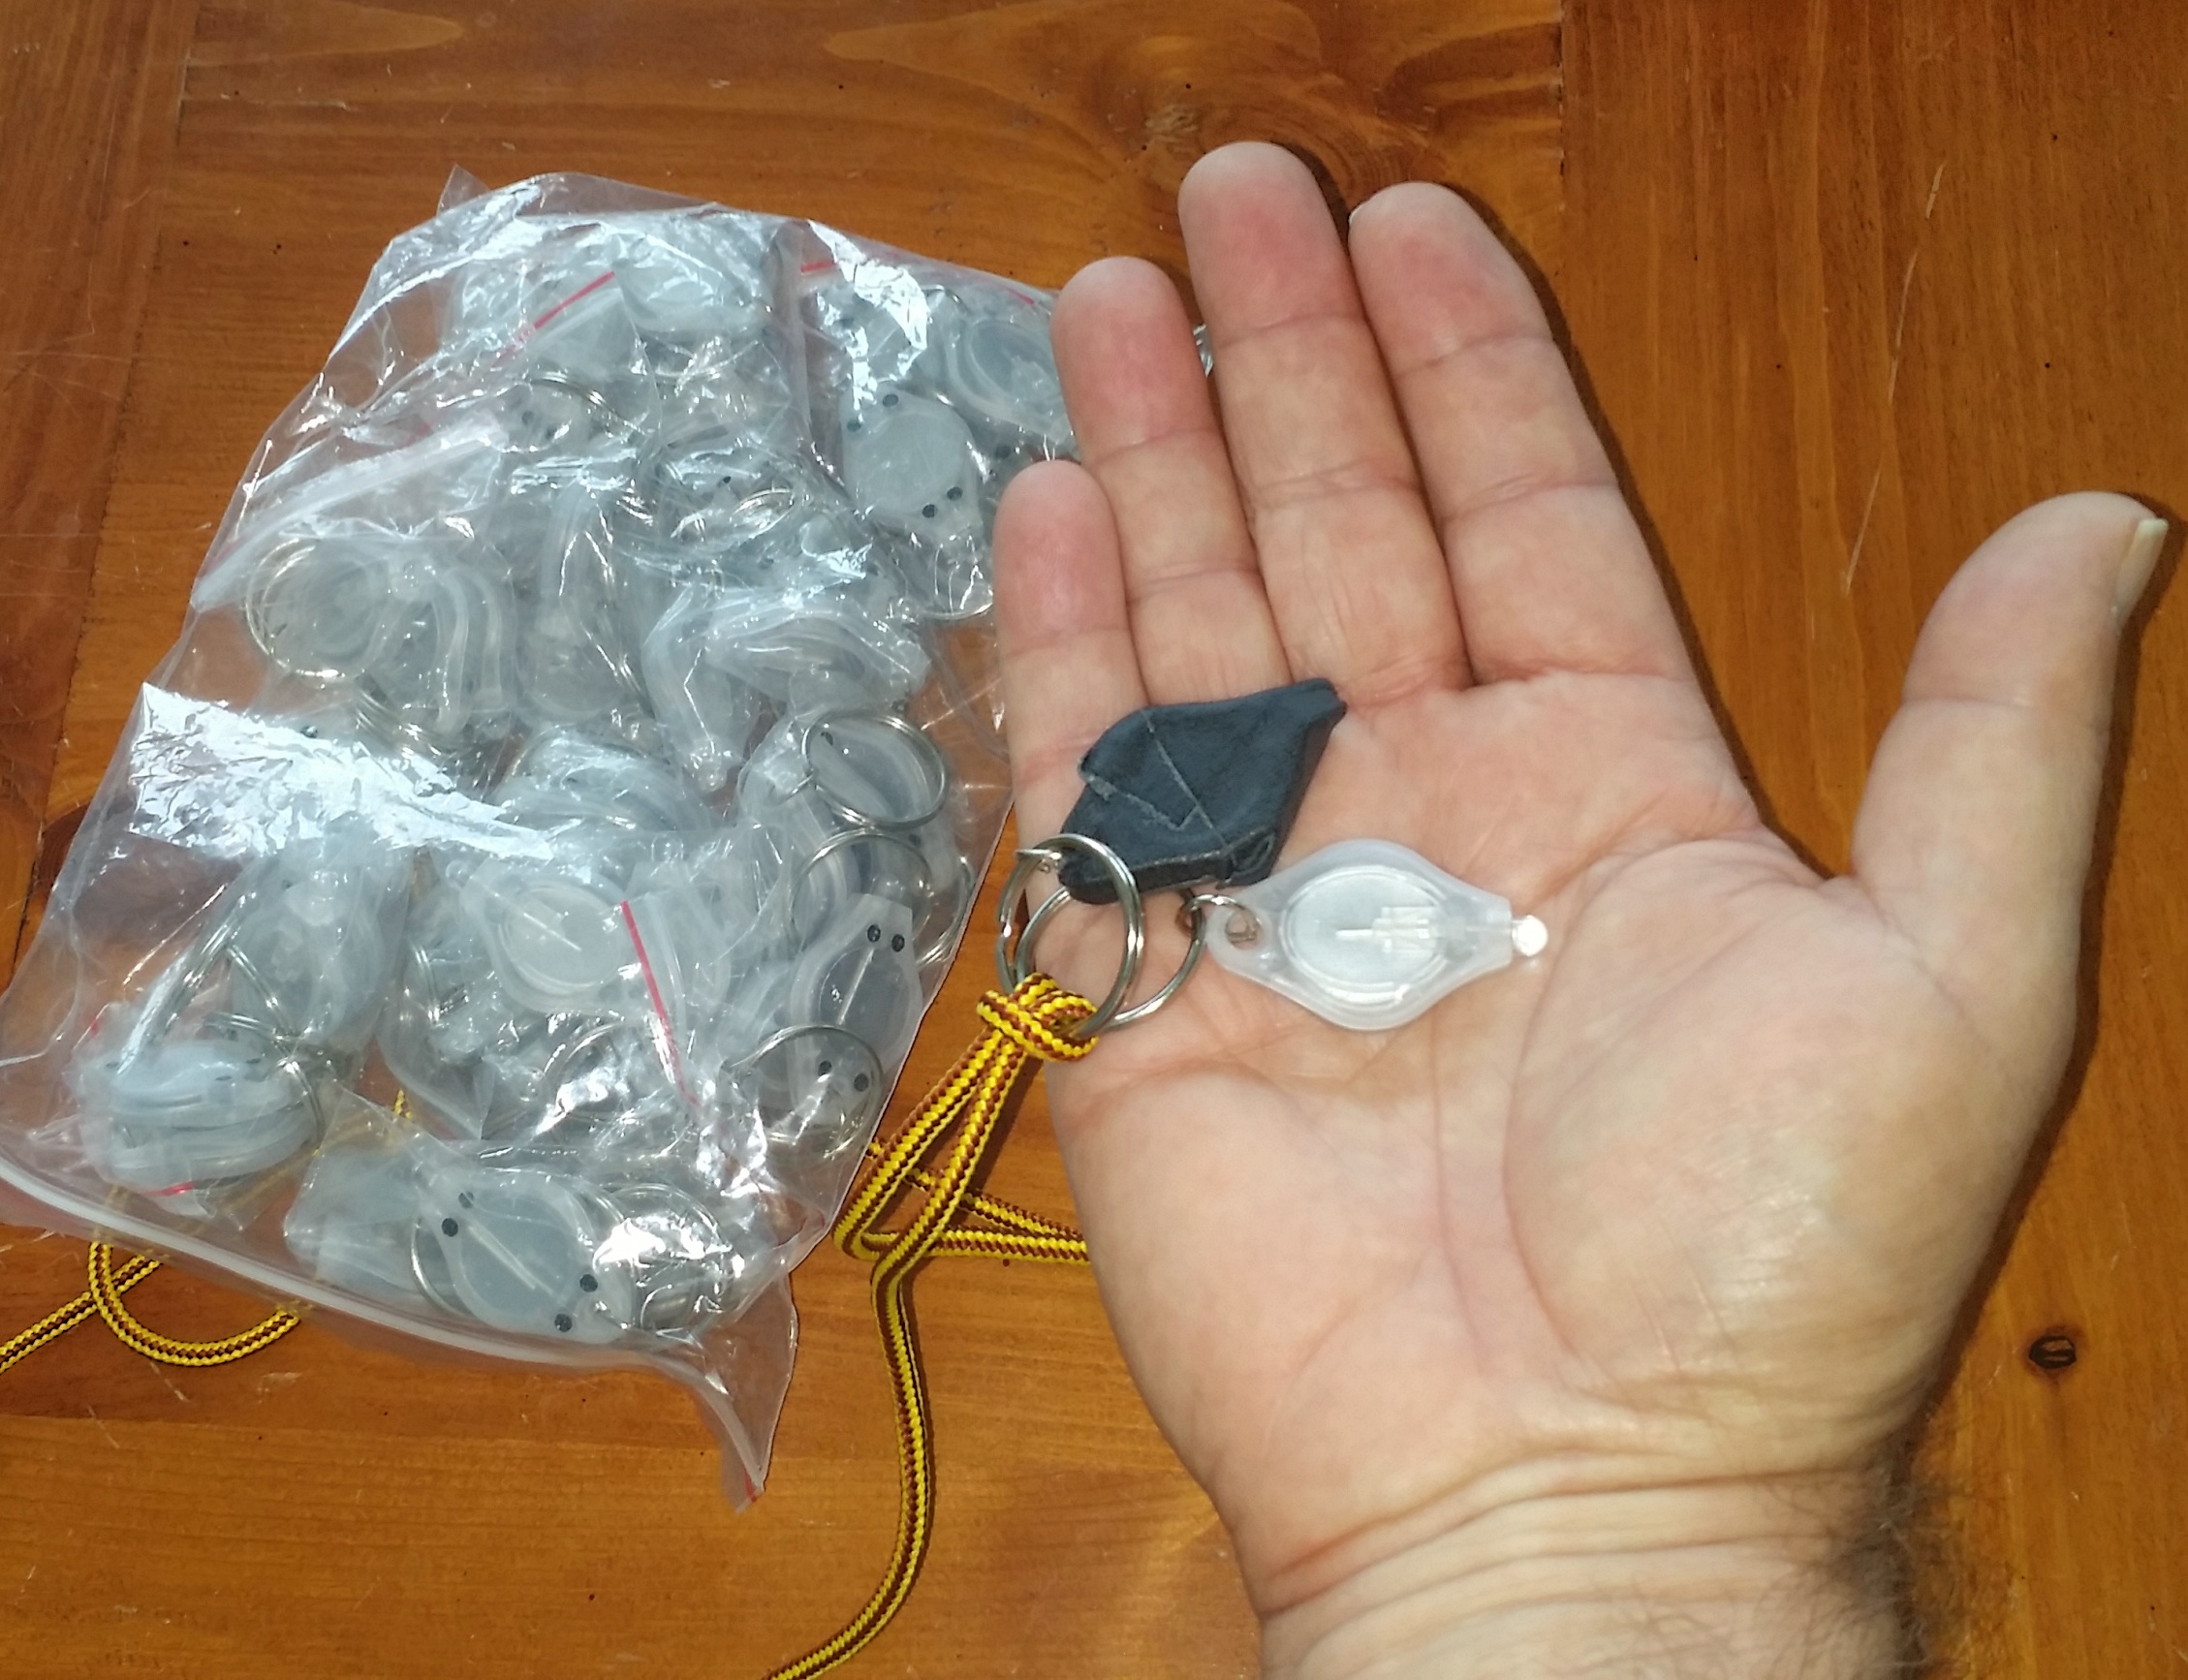
I’ll start with my most used and cherished light. That’s right, this tiny key chain light. You probably have one sitting in your kitchen junk drawer (everybody has a junk drawer, right?). And why is this my favorite light?
Well, my friends, I am about to tell you a hard truth, something your best friend might hesitate to tell you for fear of hurting your feelings. Do not be “that guy” (to my friends of the female persuasion, feel free to substitute “that gal”). You know who I’m talking about - “that guy” who approaches you with a question and has his headlamp shining right into your eyes, “that guy” who fishes a 2000 lumen flashlight from his bag and lights up the entire county in order to change a setting on his camera, “that guy” who has read an astronomy magazine article about how red light preserves night vision, so now all of your images have his red light bleeding into all of your images (see this article on the Night Photography Workshop blog about the evil of red lights). “That guy” never gets invited to go shooting with others again. So don’t be “that guy”.
I have two of these small, inexpensive key chain lights attached to a lanyard that goes around my neck as soon as I start setting up my gear for the night. One is wrapped with gaffers tape to dim the light to a small, focused beam. It is perfect for adjusting settings or looking at degree markings on a panoramic head. Just bright enough to read markings, but dim enough that it does not bother other photographers around you. The second, unwrapped and brighter LED key chain light, is great for looking through your camera bag or checking your surroundings, again, without bothering others.
It is amazing how little light you really need to accomplish your night photography tasks, once you become familiar with handling and adjusting your equipment in the dark.
These little lights are so cheap that I buy them in bulk, and pass them around freely whenever I am shooting at night with others. It saves a lot of hard feelings, as well as images. Hopefully, I will have prevented someone from inadvertently becoming “that guy”.
LED Head Lamp
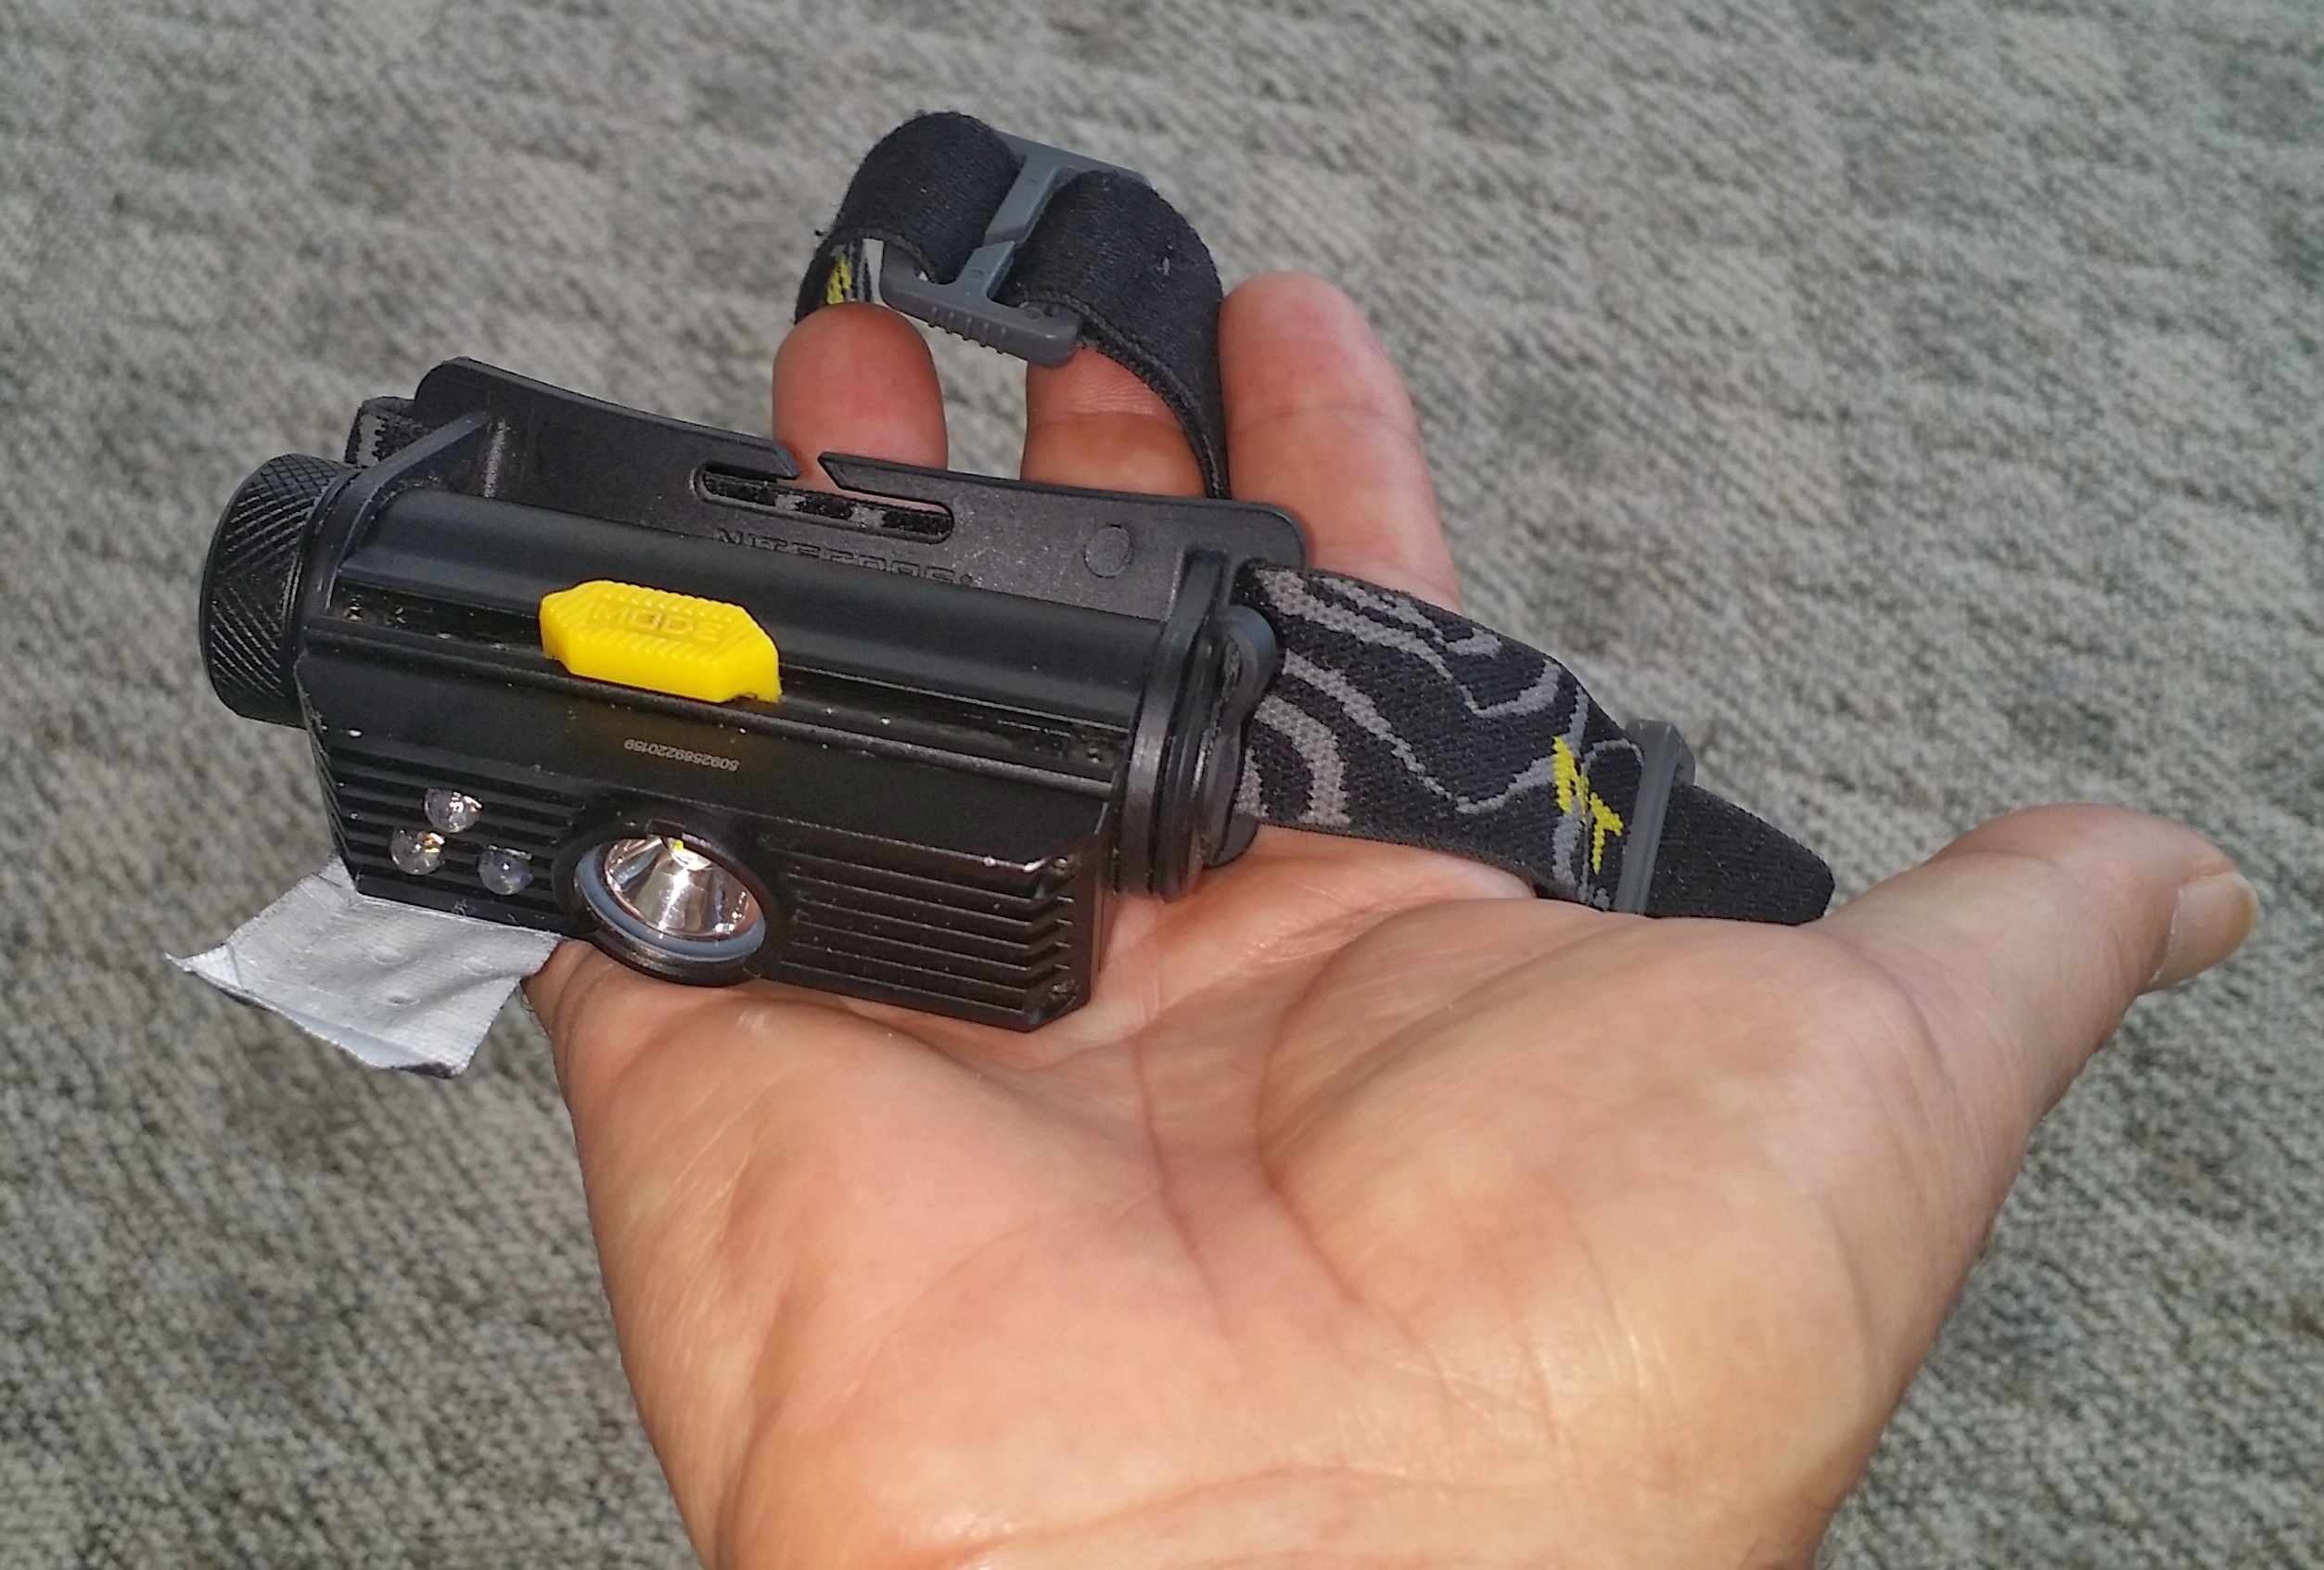
The next light that I always have with me on a night shoot is my headlamp. When I am shooting by myself I use my headlamp freely, however when shooting along with others, I rarely use my headlamp outside of hiking from my vehicle to the shooting locale and back.
I use the Nitecore HC90 headlamp shown above. This headlamp has many important features that I have grown accustomed to. It has a maximum brightness of 900 lumens, which can be very handy when negotiating trails at night, or other times when you absolutely must have a bright light at hand. But what I like the most about this headlamp is that it can be turned on to its least powerful setting, .2 lumens (that’s right, POINT 2 lumens) instantly and conveniently, so you can use this headlamp in a responsible manner, and not blind your shooting partners. The headlamp is rugged and heavily built, and operates with a single 18650 lithium battery. It is rechargeable either by removing the battery and placing it in a separate charger, or by plugging it directly into a USB charging source. In addition to the variable intensity white light, this headlamp includes red, blue, and green LEDs, which are activated by the sliding switch. I rarely have reason to use the RGB LEDs, so I generally cover the LED’s with gaffers tape so I don’t accidentally turn them on (and become “that guy”).
High Intensity White Lights For Light Painting
 Small 460 Lumen All Purpose LED Flashlight
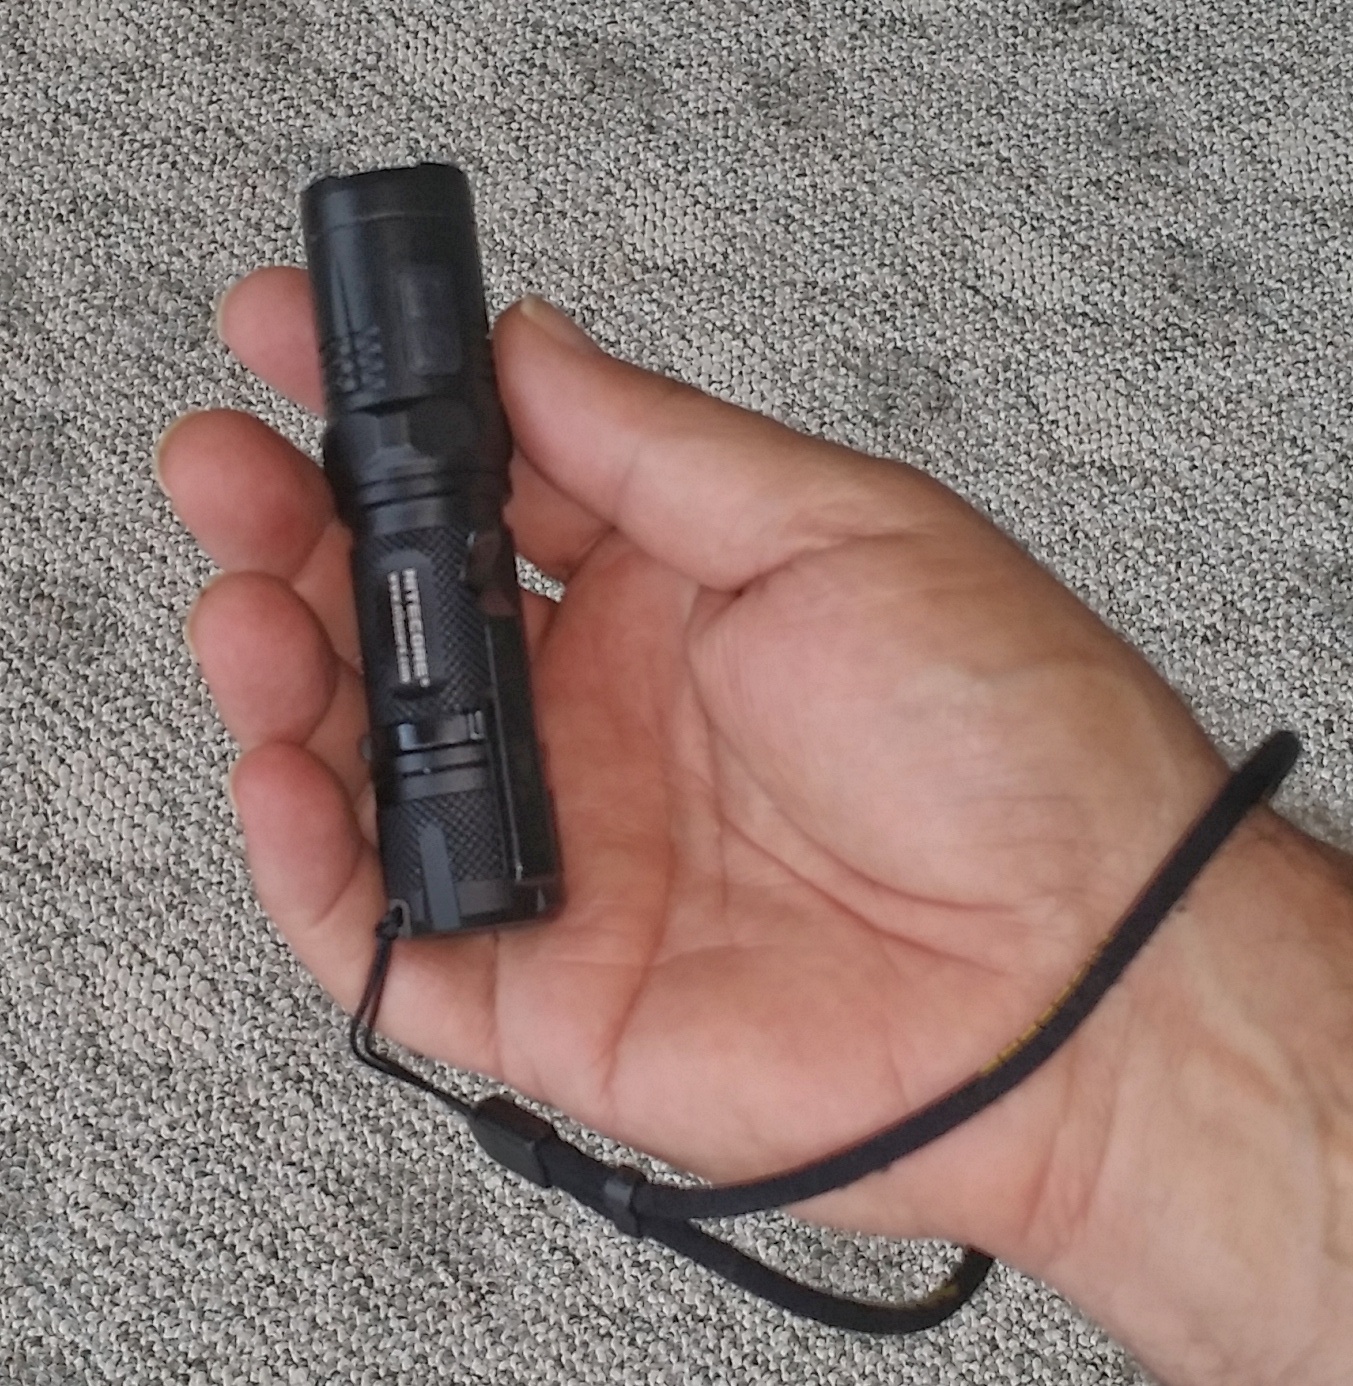
There are times when a key chain light or a headlamp will not provide the light you need for light painting a scene. For this you need other tools (although a headlamp can sometimes be used in a pinch). My smallest, least powerful hand-held flashlight is the Nitecore EC21 shown above. It has a maximum brightness of 460 lumens, but still dims to 1 lumen, and has a built-in red LED. It is powered by a single 18650 lithium battery. When the power is locked off, the flashlight indicates the remaining battery capacity. It is simple to turn the light on and off, but there is no momentary on, just a toggle for on/off. For some light painters, this is an issue. I have other flashlights with momentary on when I need that feature, so it is not important for me that this particular flashlight lacks this ability.
Mid-size 2000 Lumen Bright LED Flashlight
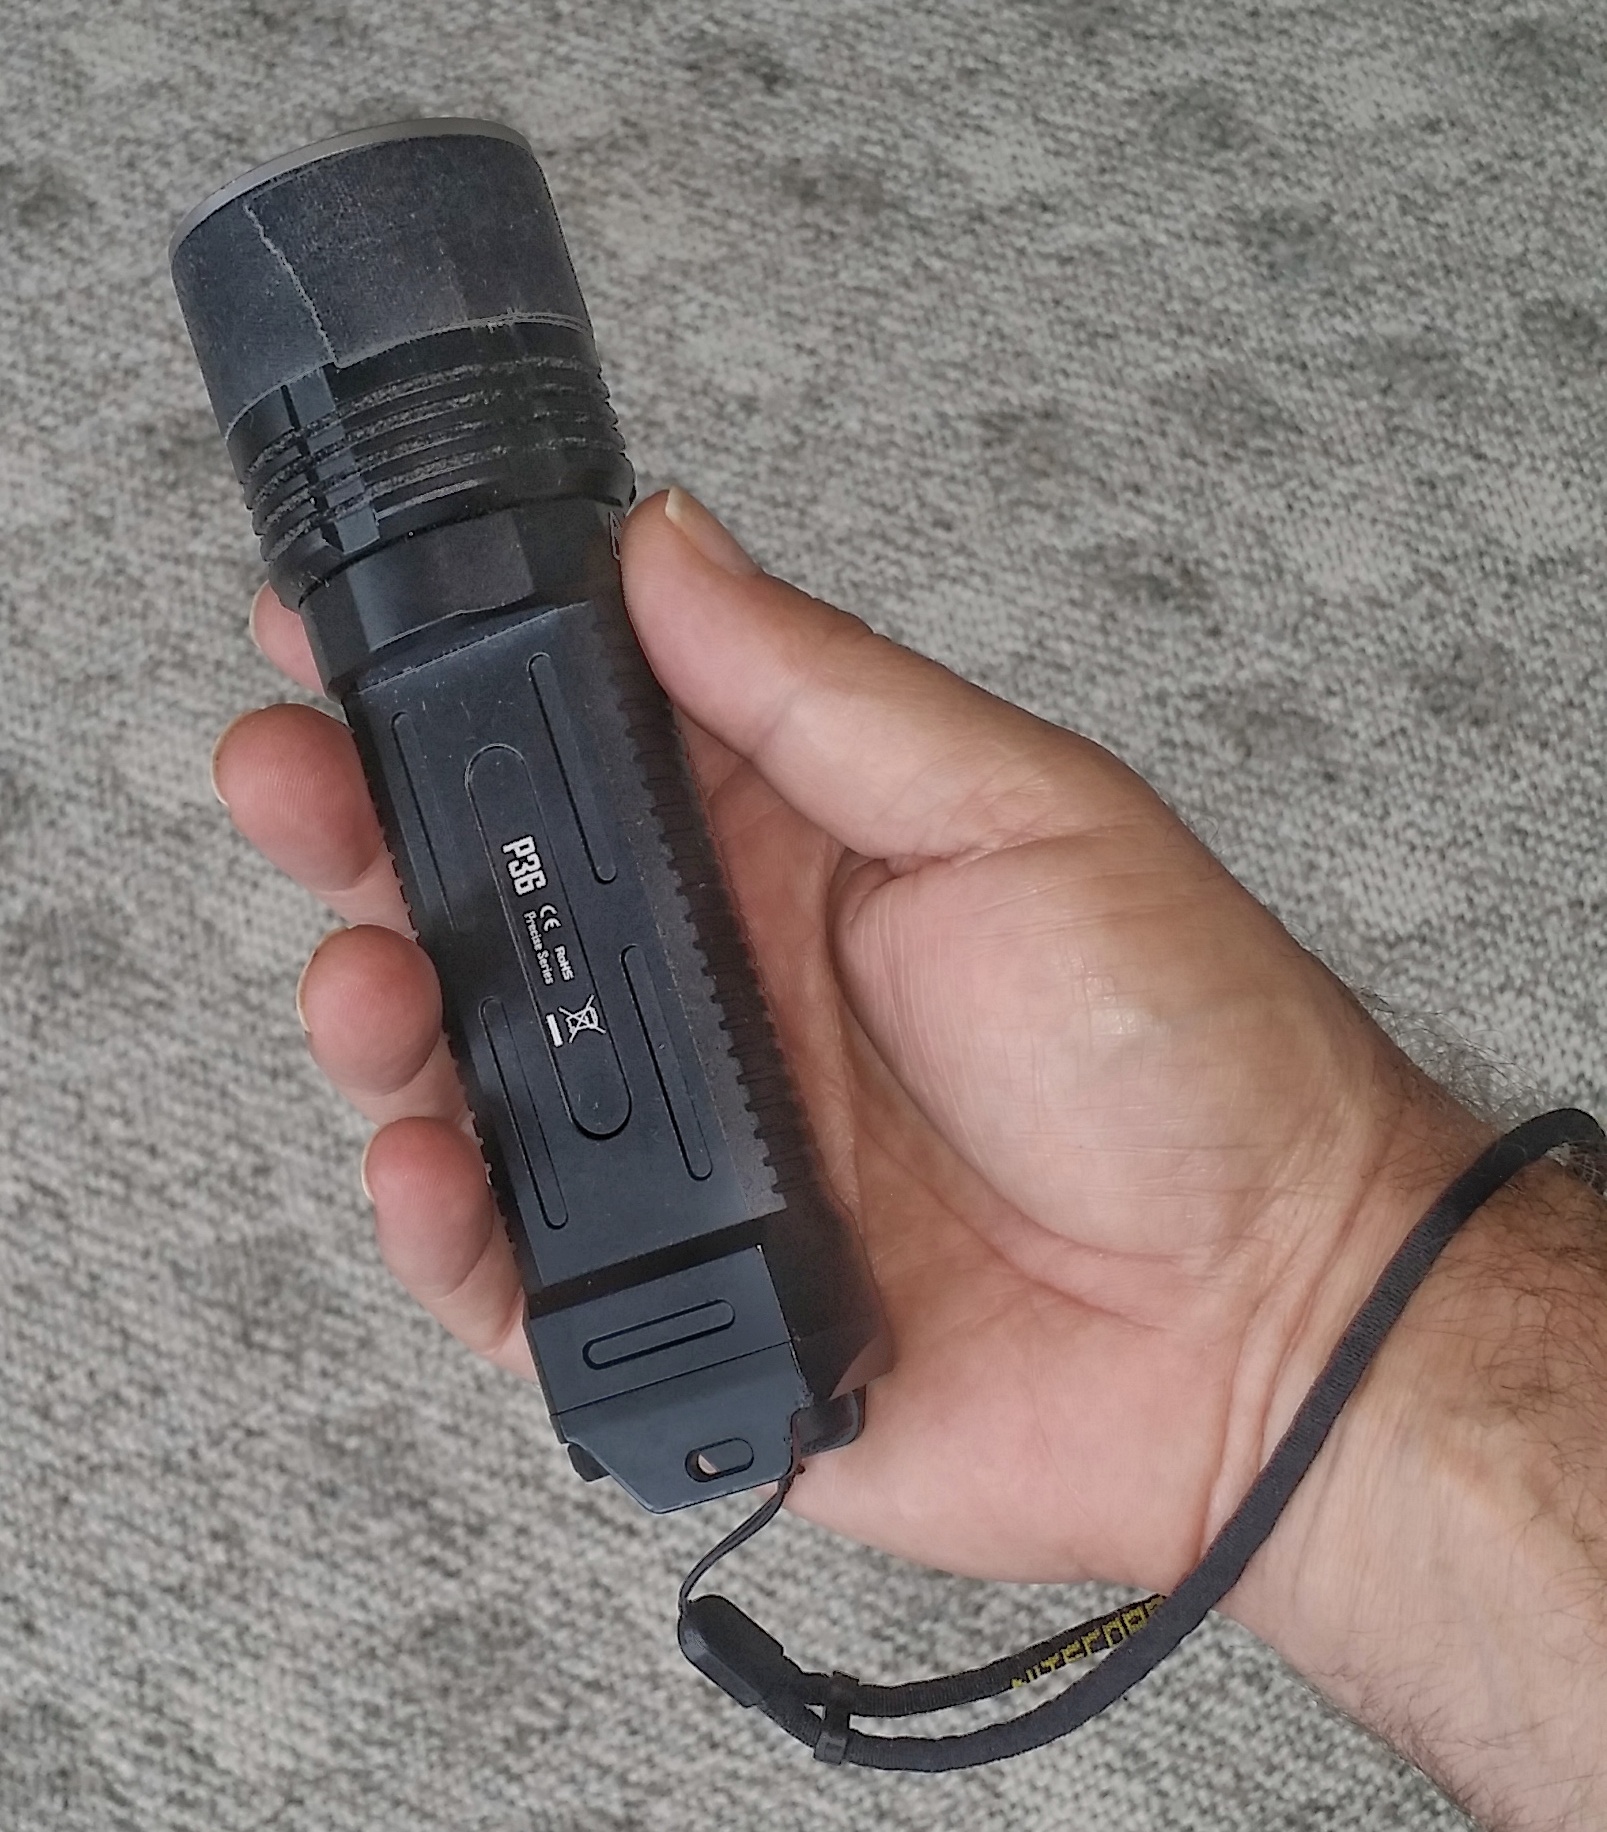
Next up is a hand-held flashlight that I love for various reasons. Pictured above is the Nitecore P36, a workhorse that is a tool I reach for often. It has a maximum brightness of a blinding 2000 lumens, very useful when you are deep in the woods some night and you are sure you just heard Bigfoot rustling in the nearby trees! And yet, with amazing speed and simplicity, it dims down to 2 lumens, with a total of 10 steps of adjustment. It is equipped with a dual on-off switch. It will toggle on and off, or function as a momentary on button. It is a simple and intuitive design. Because of the high power this light is capable of producing, it is important to pair it with sufficient energy. This flashlight is powered by 2 x 18650 lithium batteries, to provide ample power for many nights of photography without having to recharge.
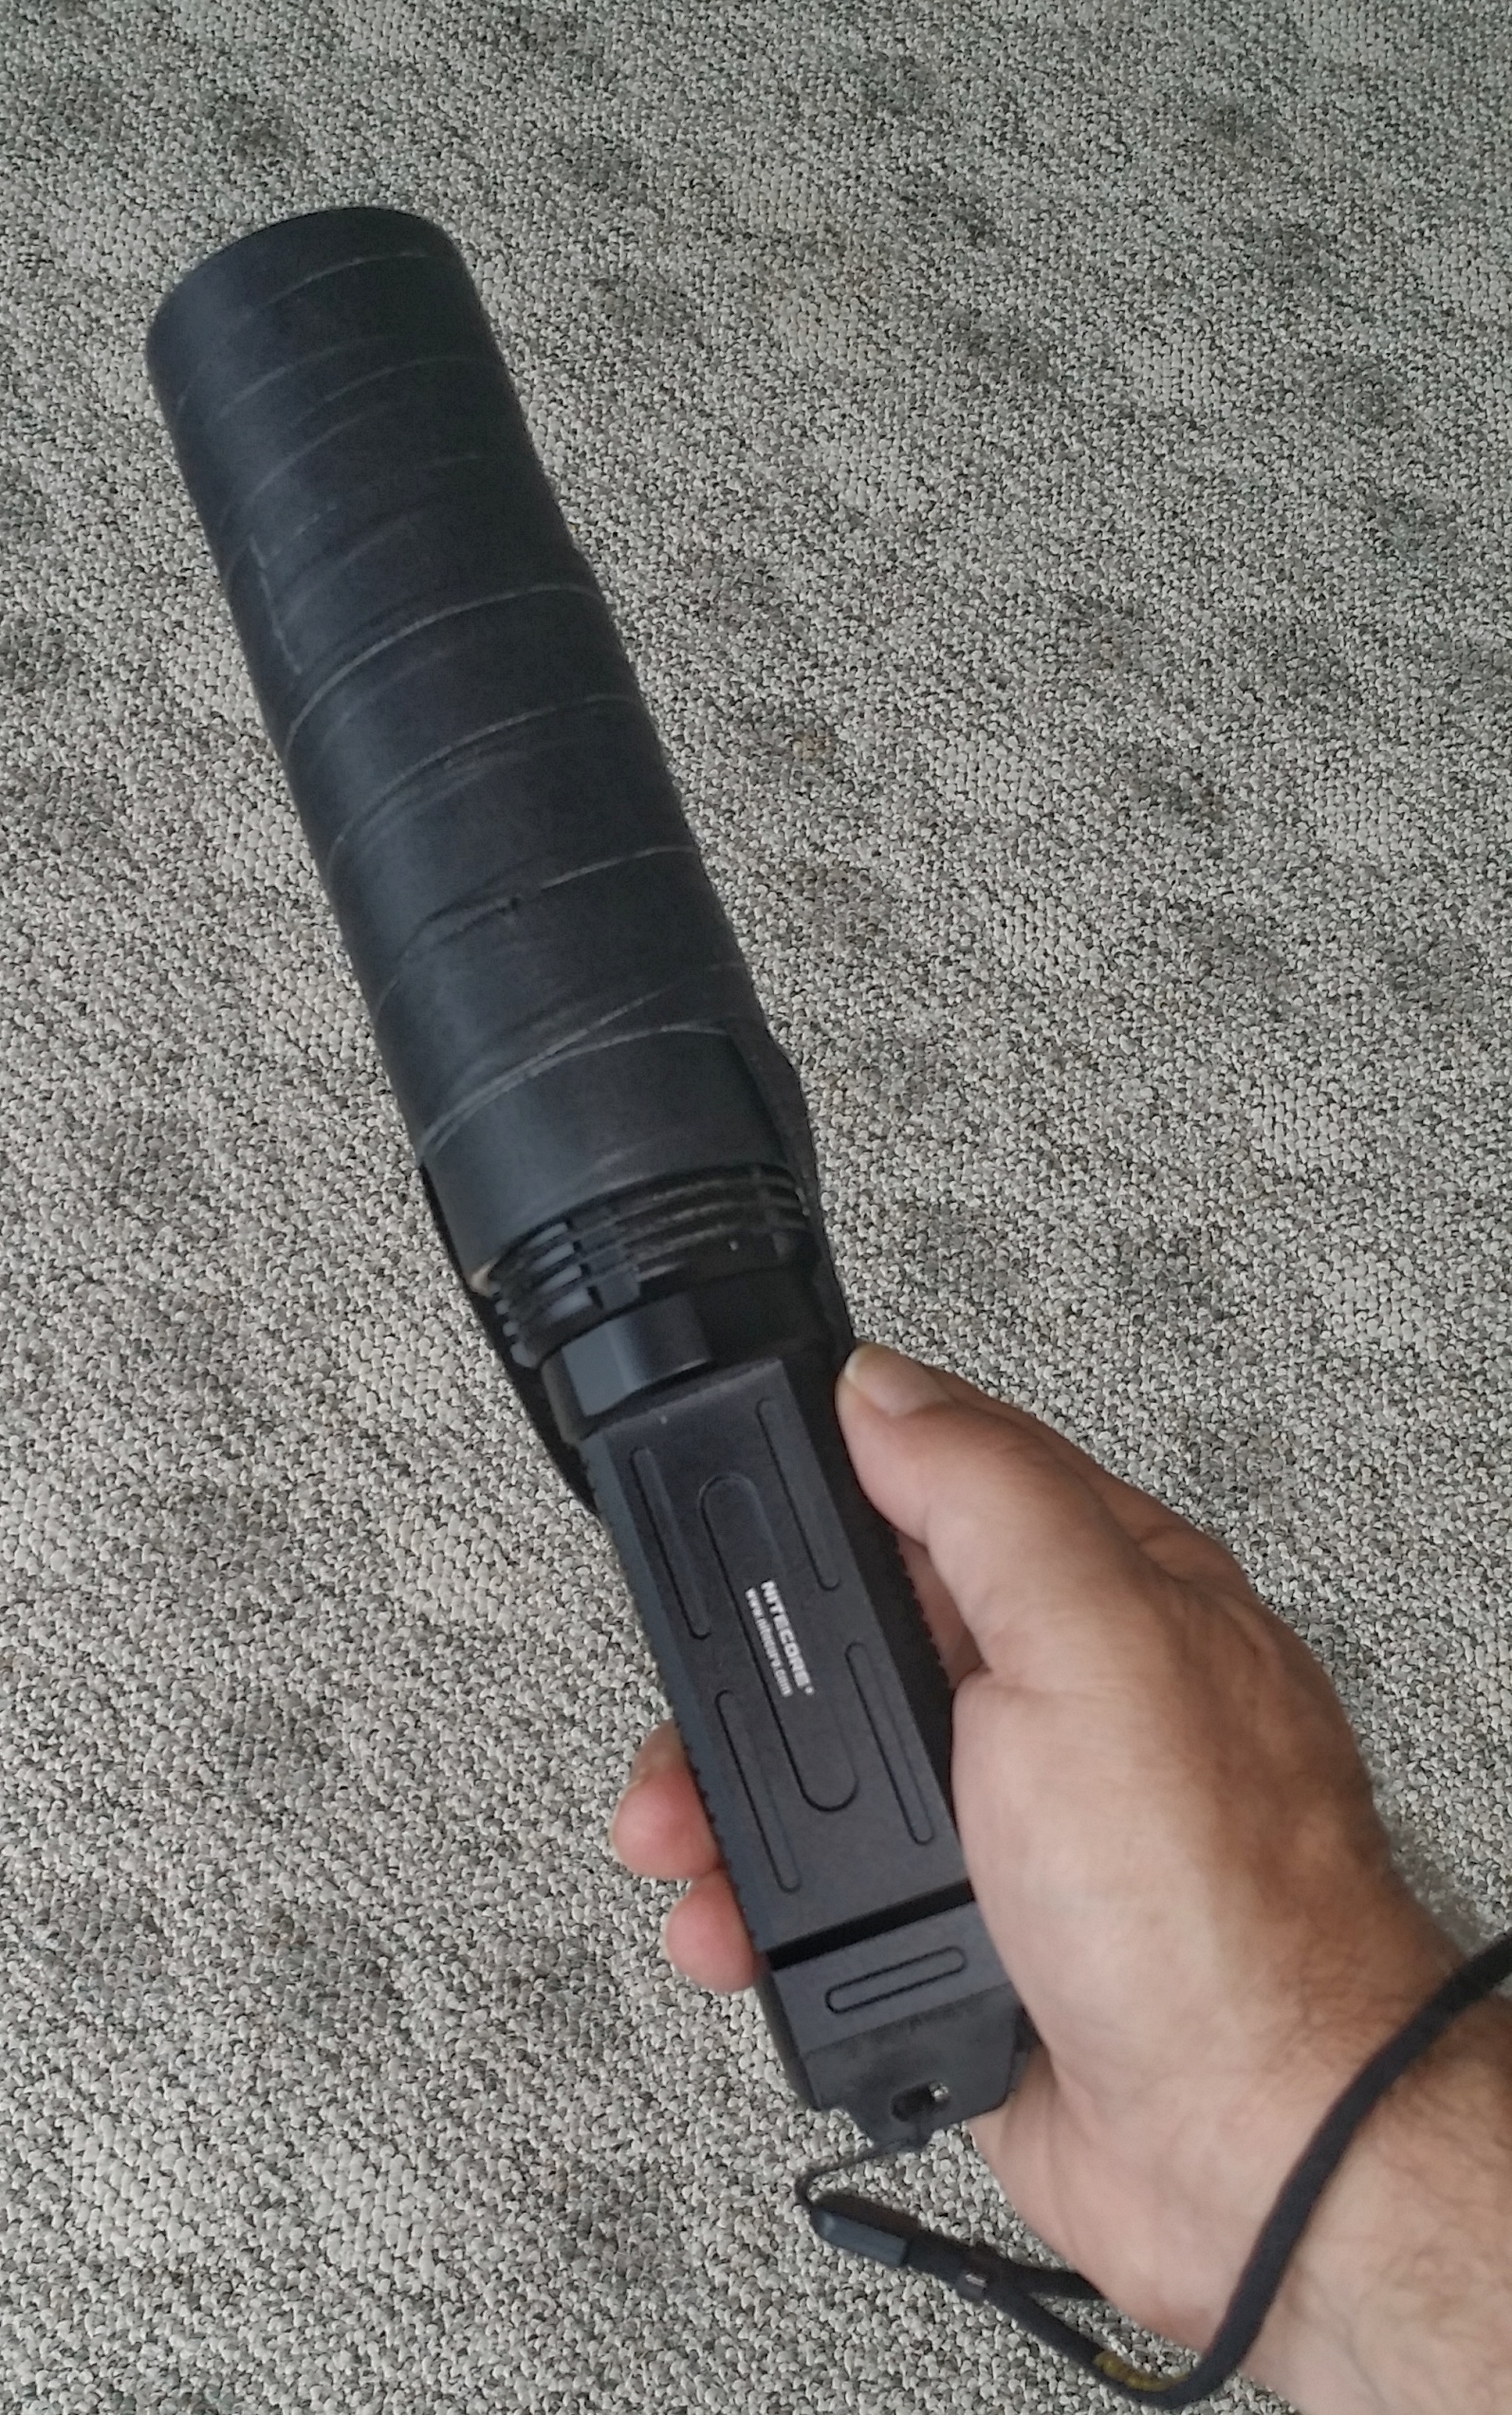
P36 LED Flashlight With Snoot
This is the same Nitecore P36, but fitted with a home-fashioned snoot. A snoot is useful to narrow the beam of a light source. I have made snoots of various lengths for each of my lights. and choose which to use based on the needs of each different scene.
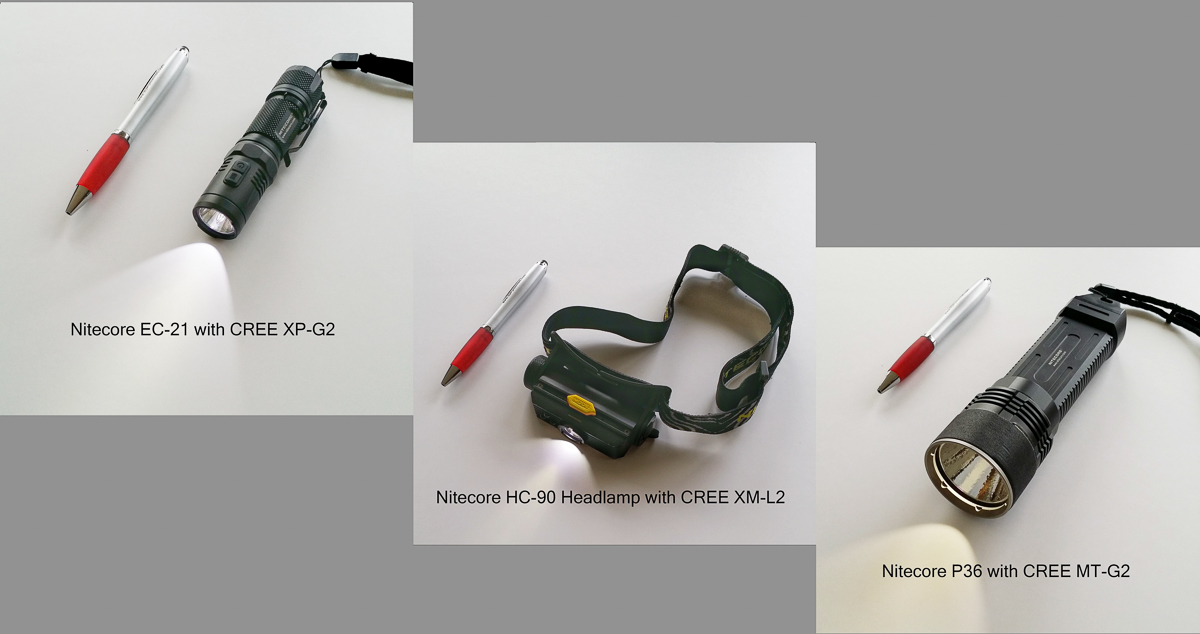
It is useful to bring up the issue of color temperature at this point. The three Nitecore lights I have shown you are each equipped with a different type of LED bulb, ranging from very cool to very warm.
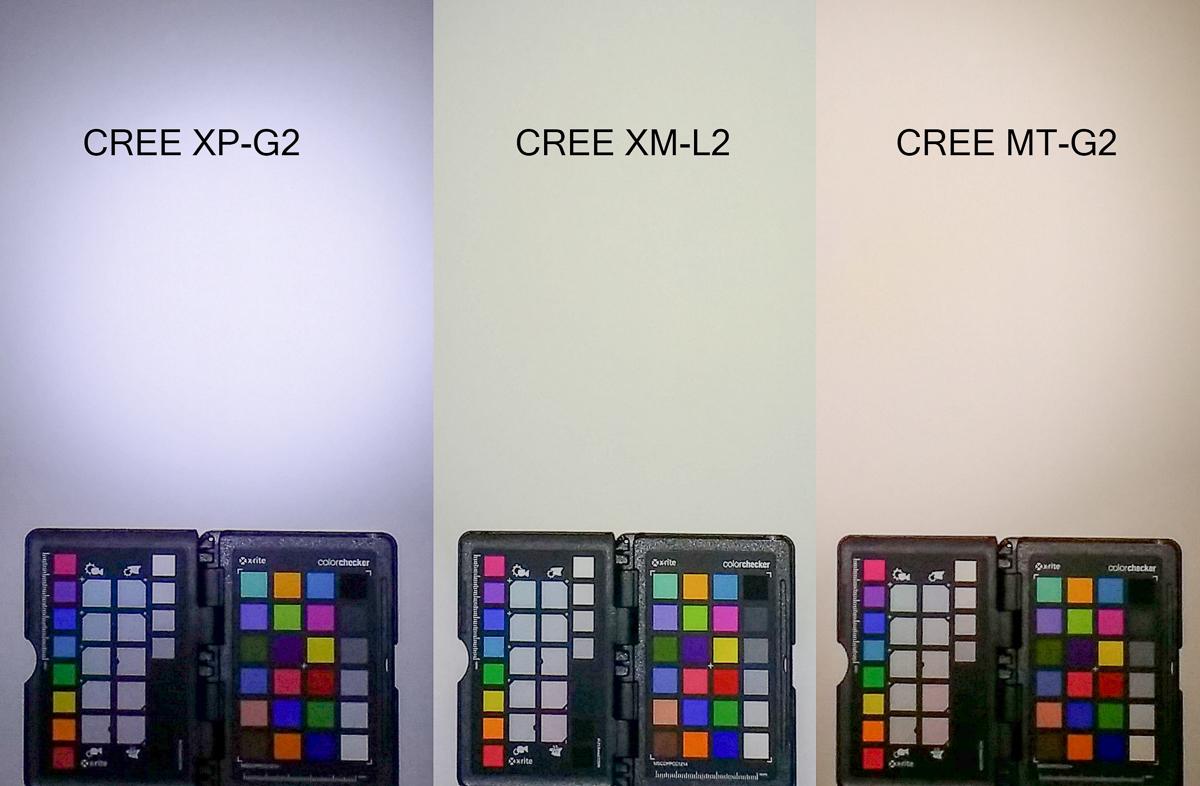
The image above clearly illustrates the color temperature difference between the various CREE LED bulbs. Notice that the Nitecore P36 flashlight, equipped with the warm CREE MT-G2 is my workhorse light for lightpainting. This is one reason why. For more on this topic, see my post entitled “All LED Bulbs Are NOT Created Equal”.
Here are some examples of images made using light painting techniques with these Nitecore lights:
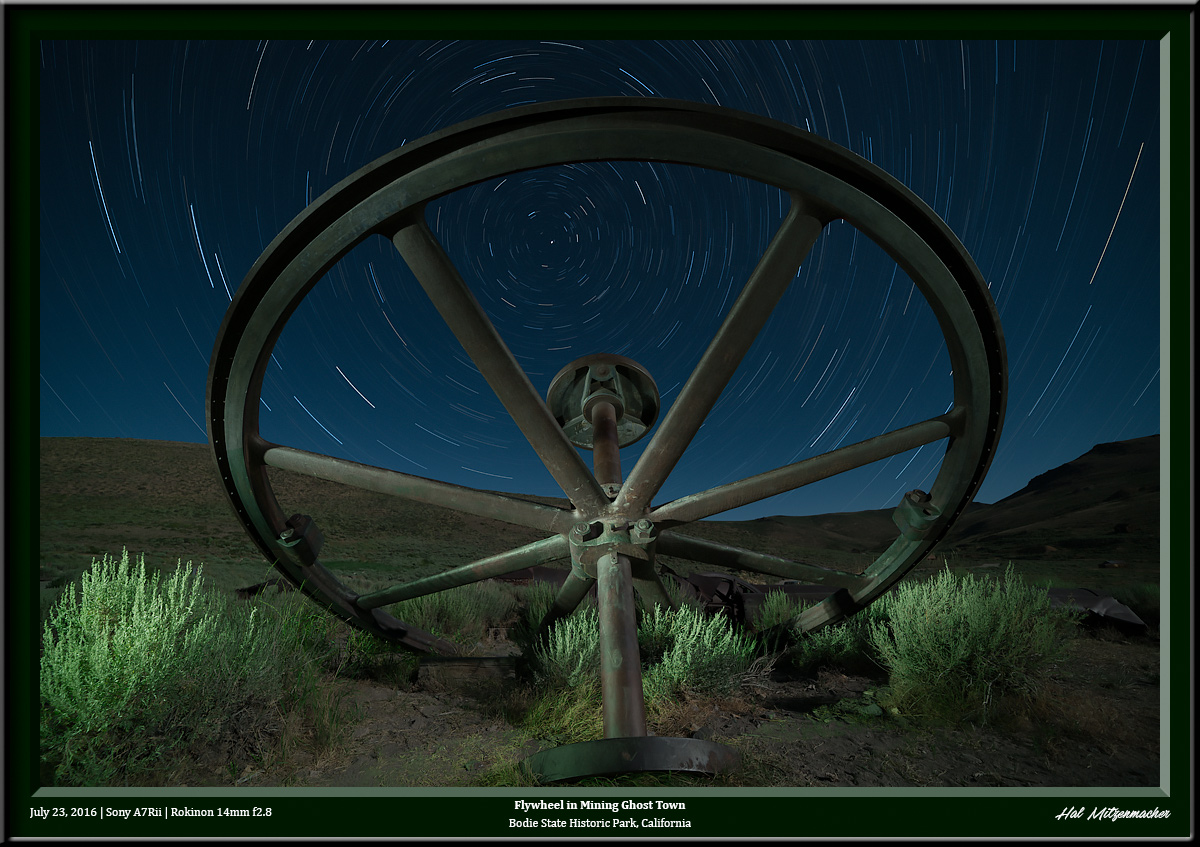
High Contrast Texture Added To Foreground
Here the exposure was set to capture star circles with the full moon illuminating the terrain, balanced with the P36 set to low brightness to illuminate the wheel, then quickly set to high brightness to provide high contrast lighting to the sagebrush. So there are actually three light sources here – the moon, the P36 at low intensity, and the P36 at high intensity. All in a single exposure.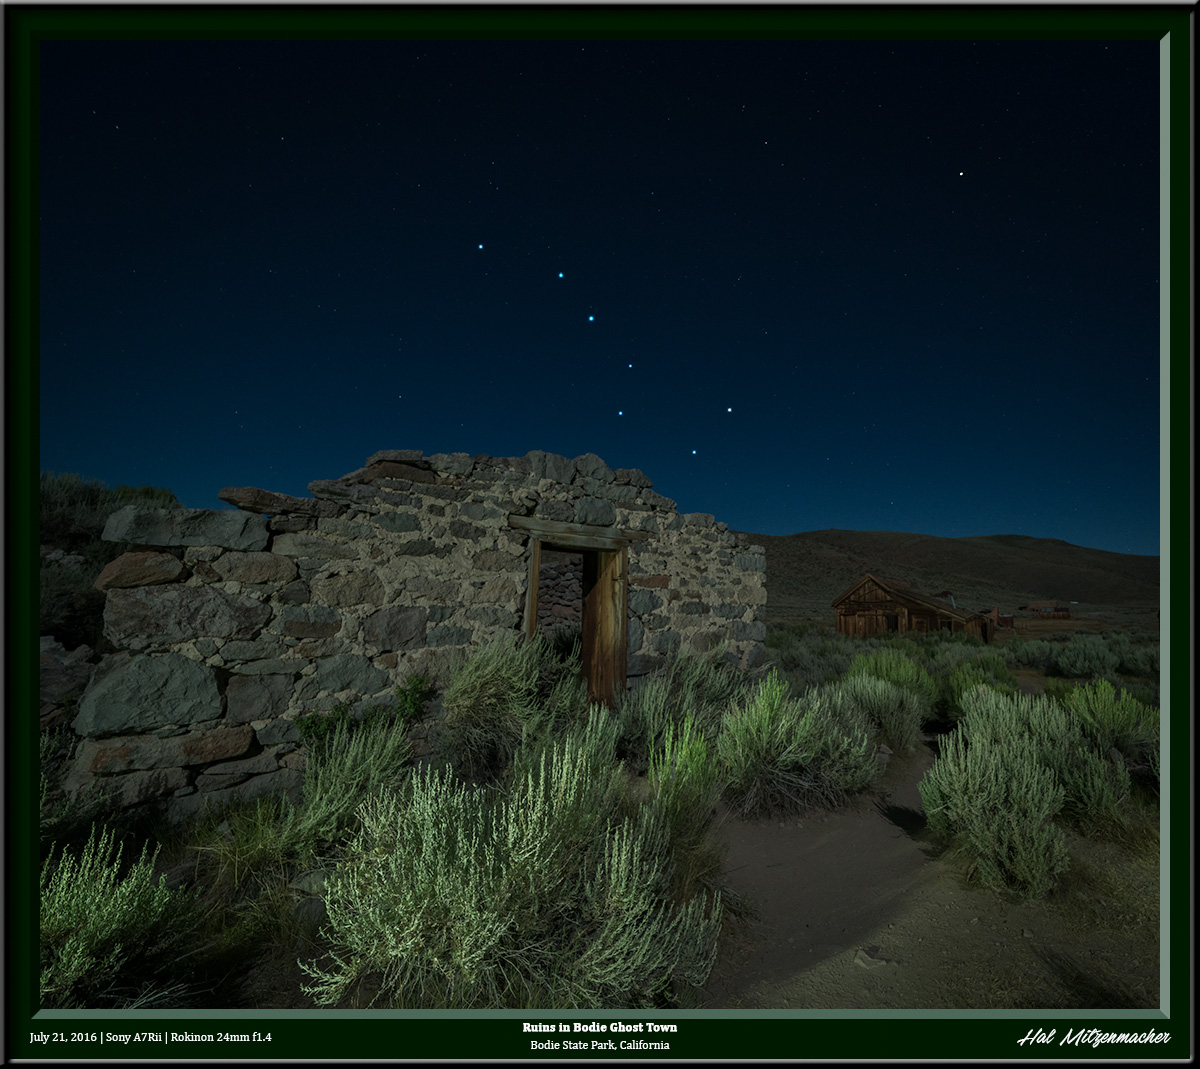
High Contrast Texture Added To Foreground
The Nitecore P36 was used in this image in a similar way. This is a single exposure, with the P36 used at first in its lowest setting to paint the stone wall, and then quickly switched to high brightness to accentuate the sagebrush. The length of the exposure was limited by the desire to create pinpoint stars.
High Intensity Colored LED Flashlight For Light Painting
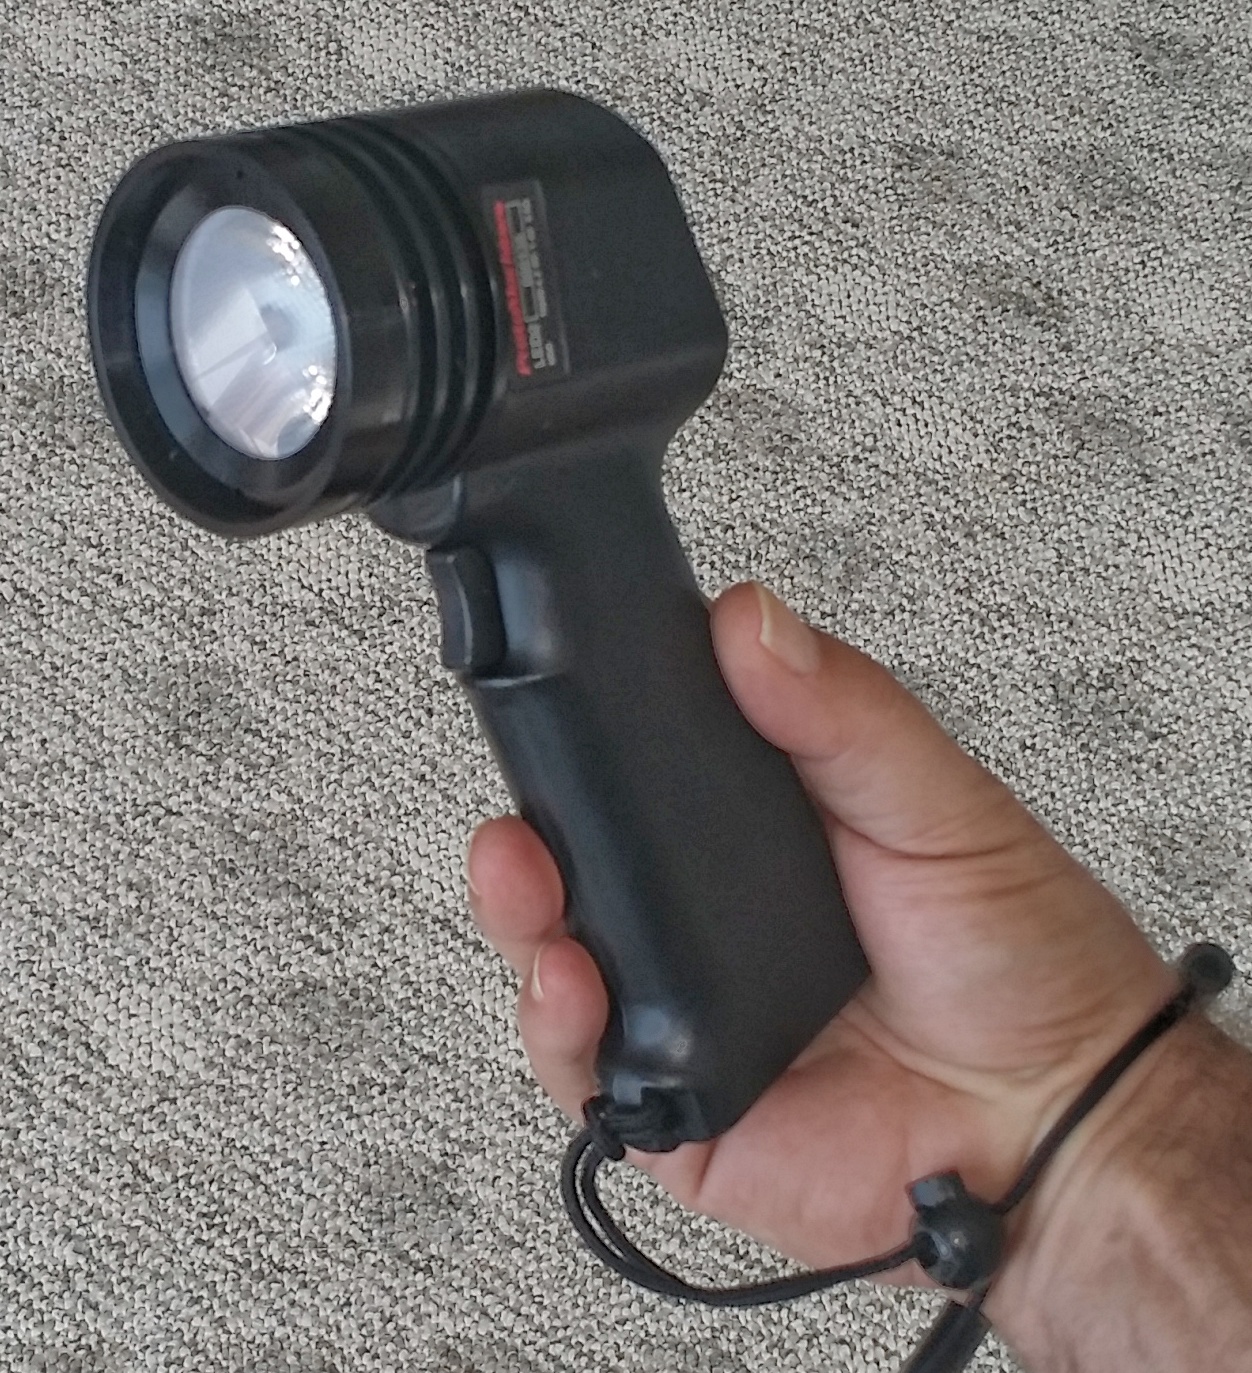
ProtoMachine LED2
This is the ProtoMachine LED2. It is a tool developed specifically for the purpose of light painting. It is being marketed in its current configuration as the ProtoMachine LED8, similar in most functionality, but with a few updated controls. This light can be set to produce the entire HSL light wheel, and allows for eight user customizable presets, so you can quickly recall pre-selected colors at will.
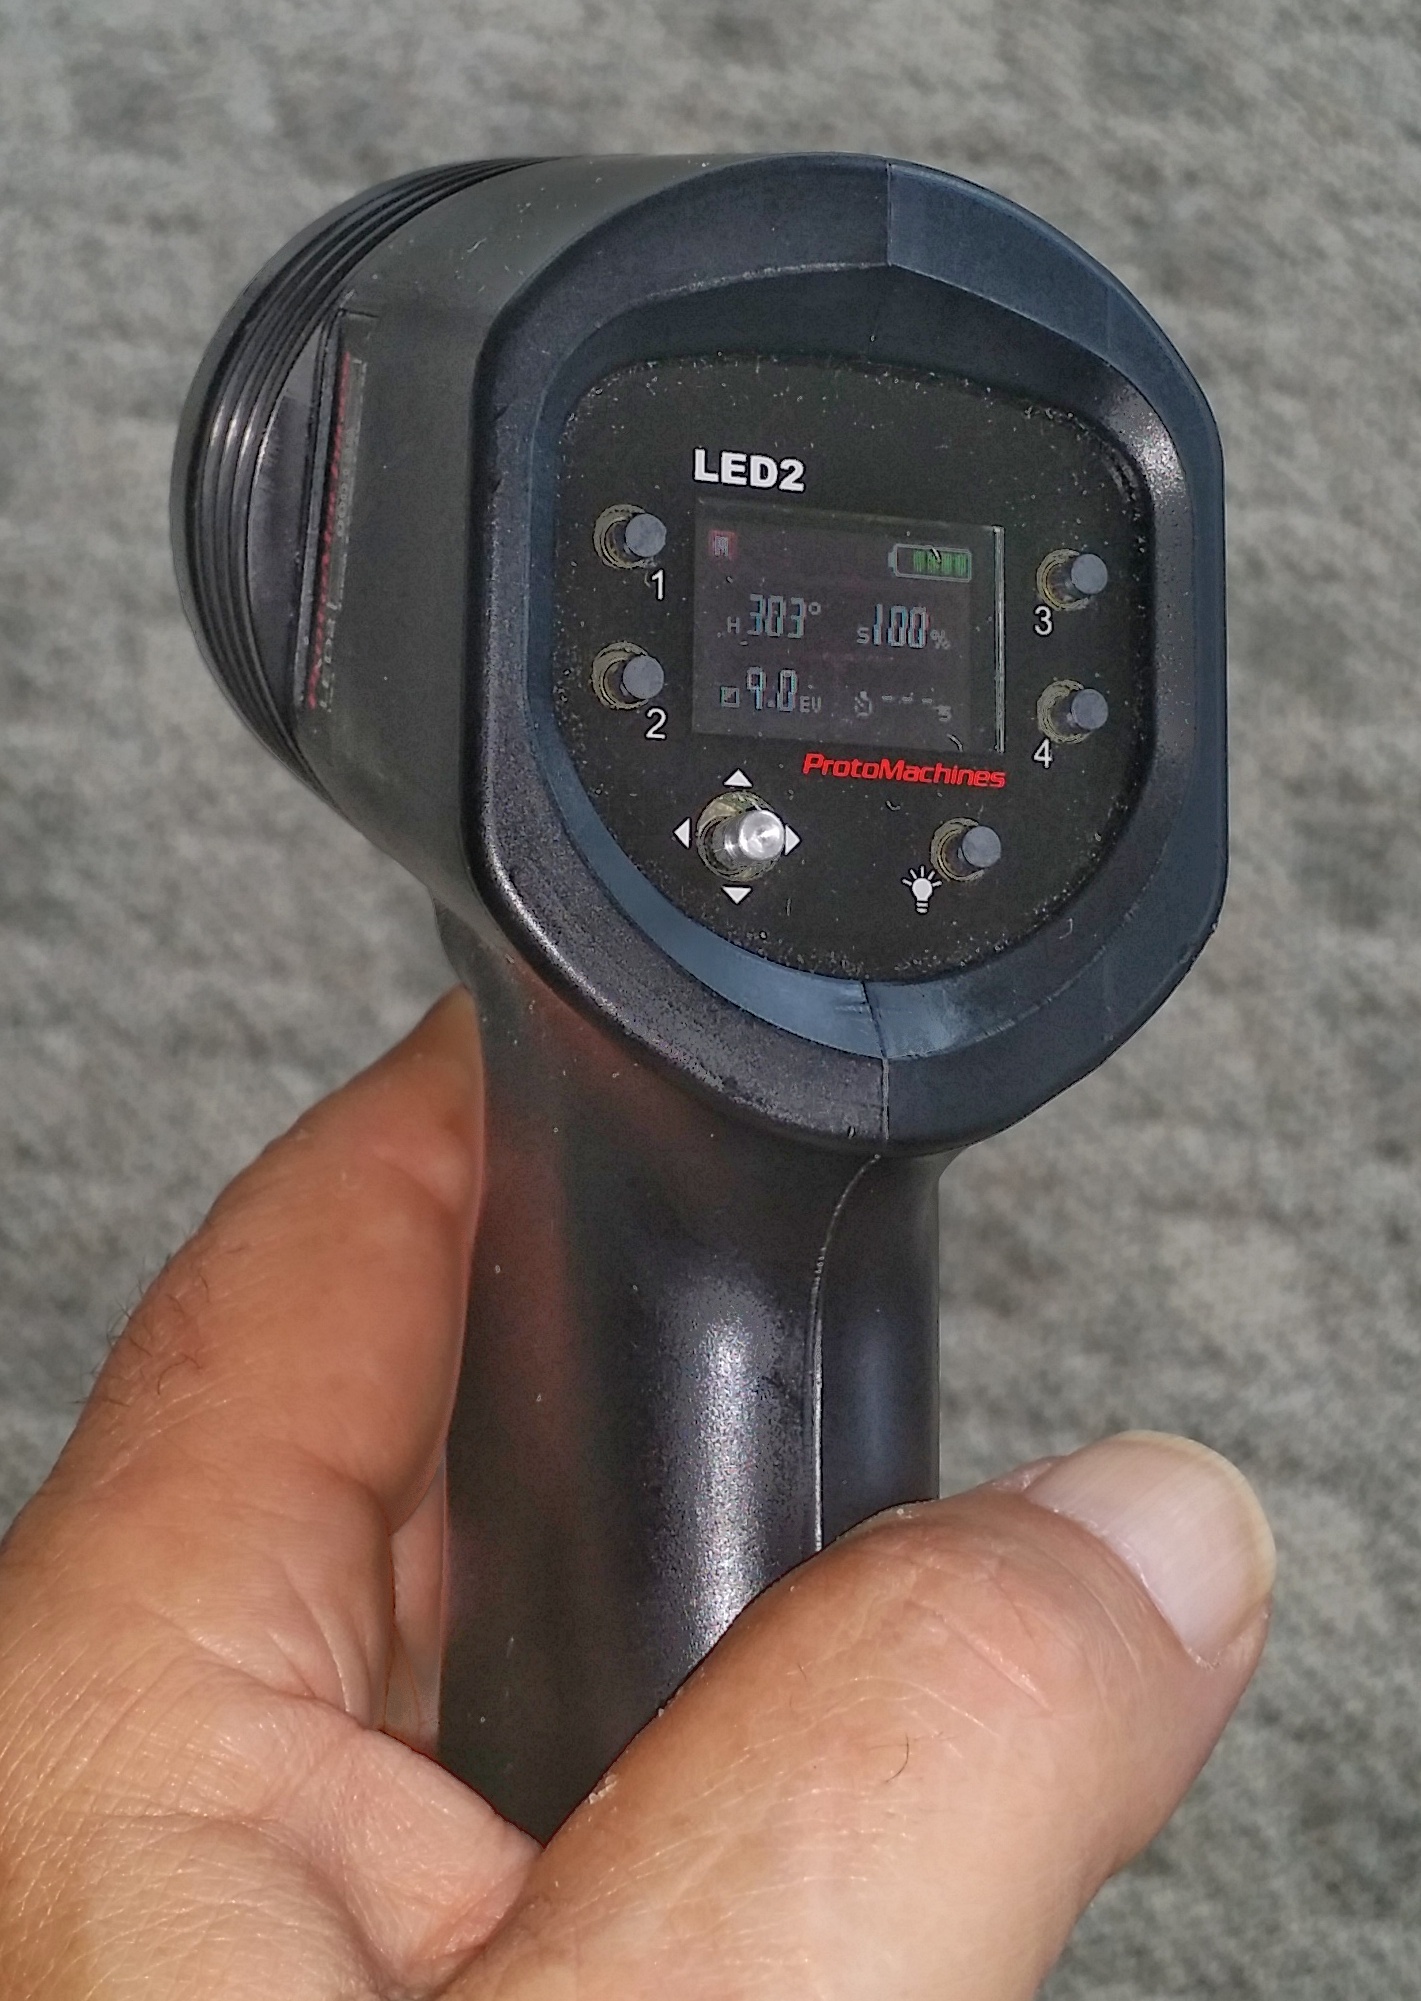 ProtoMachine LED2 Control Panel
The control panel on the back of the ProtoMachine LED2 light, showing the buttons and joystick used to set the desired lighting.

ProtoMachine LED2 With Snoot
The ProtoMachine LED2 fitted with one of my home brewed snoots. I have created snoots of various lengths for all of my lights, and use the length necessary for the task at hand with each shoot.
Here are some examples using the ProtoMachine LED2 to add color to an image:
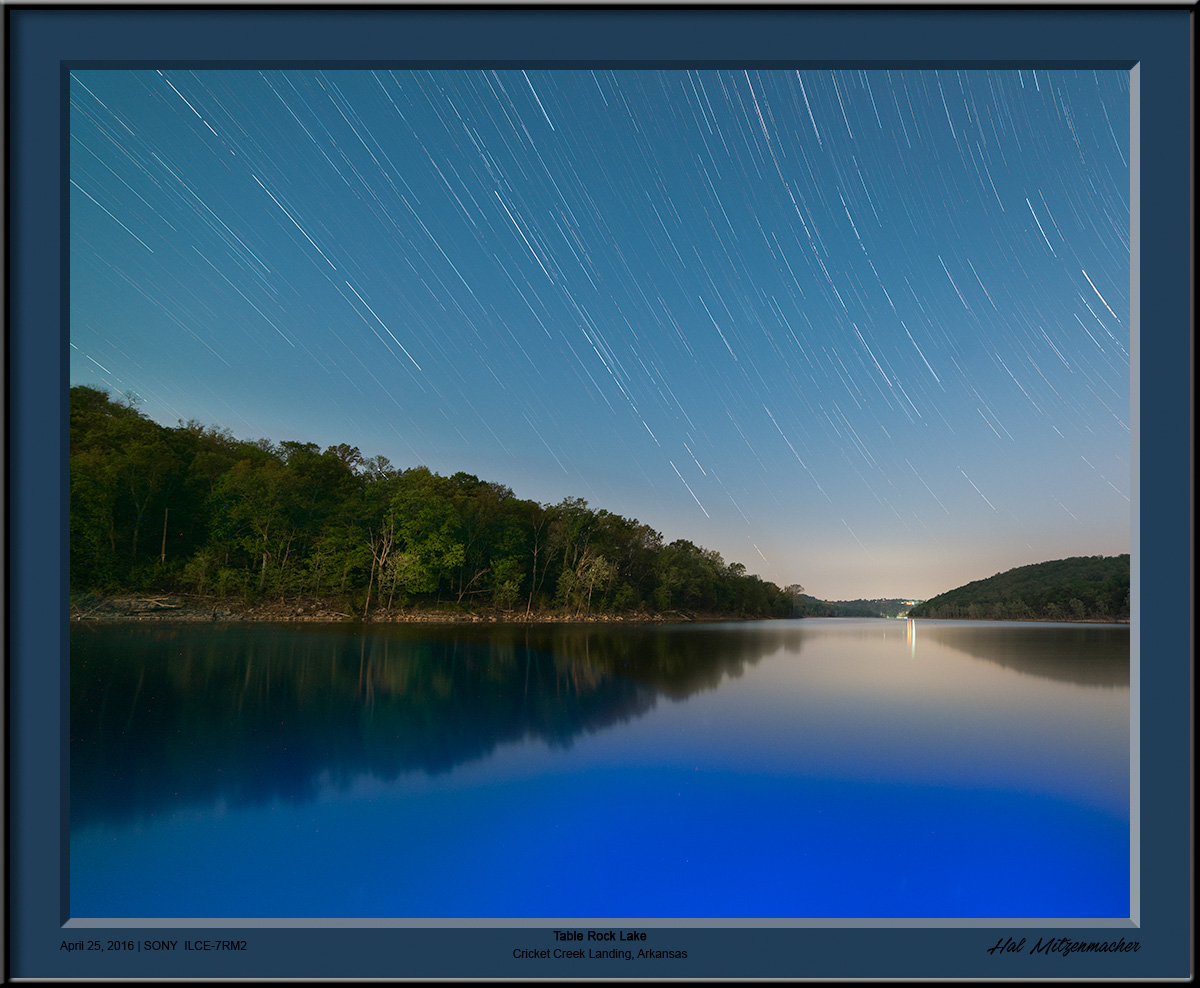
Lake Painted Blue with ProtoMachine LED2
I was quite surprised to see that the color of Table Rock Lake turned a brilliant shade of blue by illuminating the water with the ProtoMachine LED2 set to a nice shade of blue for about 2 minutes.
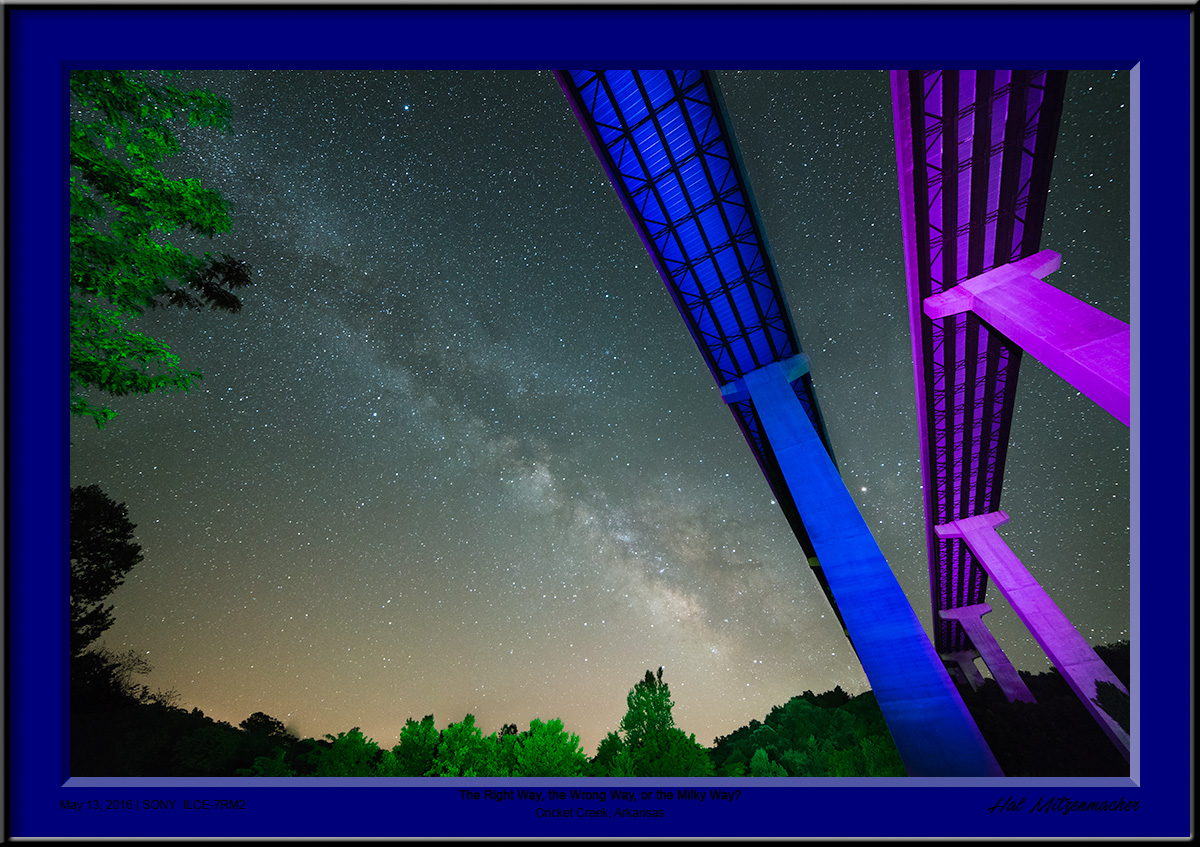
Big Bridge Over Cricket Creek
This is a good example to show the distance the ProtoMachine LED2 will throw a beam of light. The underside of these Highway 65 bridge spans were painted with the LED2 set to about 70% output
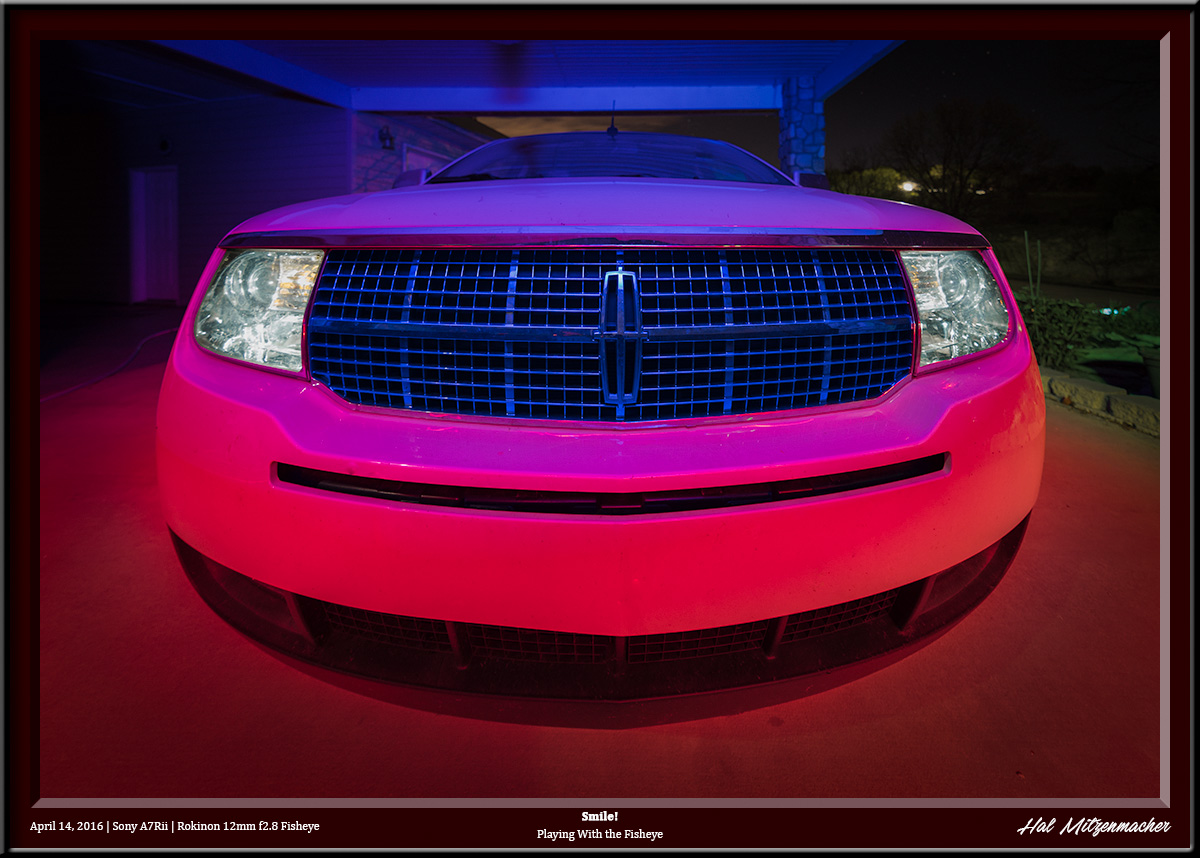
Painting Color On A White Automobile
.An image showing the addition of color from painting a white SUV with various shades of reds and blues from the ProtoMachine LED2.
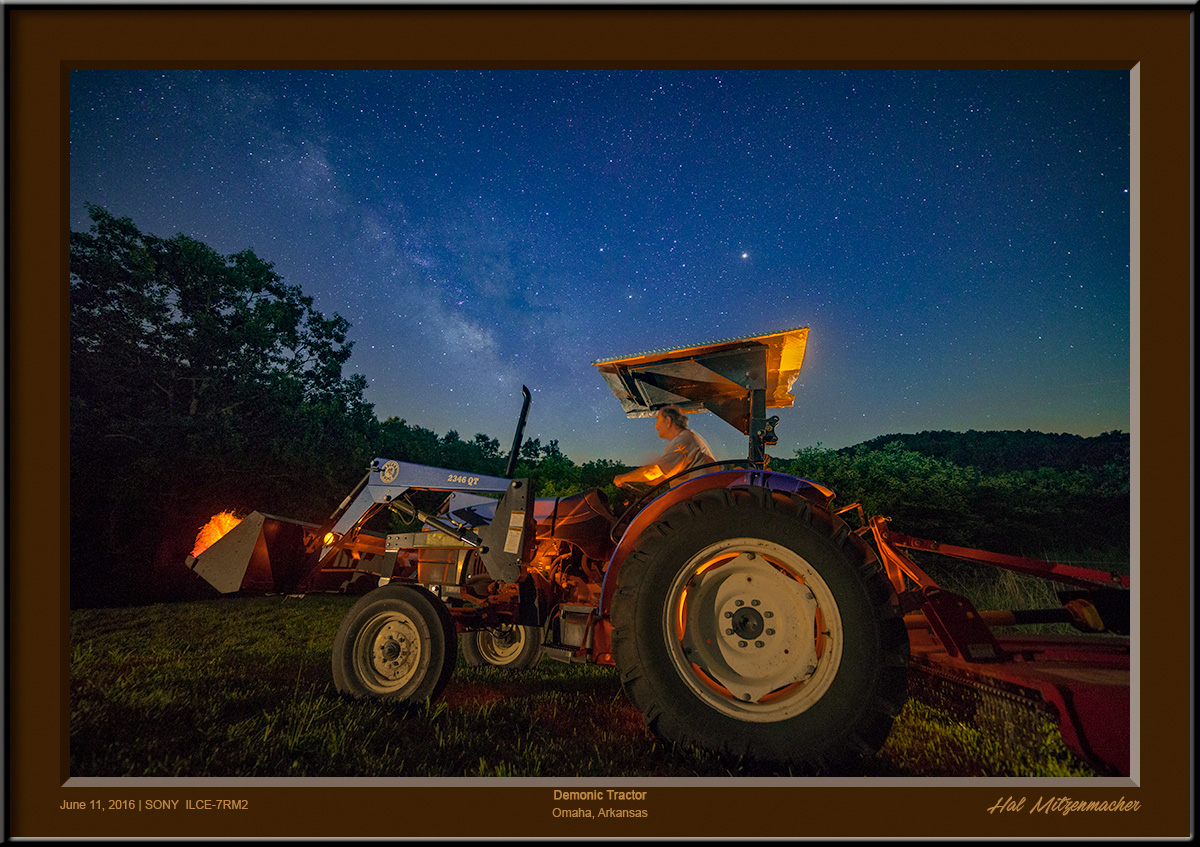
The Tractor From Hades
I wanted to achieve a “tractor from Hell” look to this image, so I used various shades of orange from the ProtoMachine LED2 to light paint the tractor.
Low Level Lighting
Low-Level Lighting (LLL), sometimes referred to as Low-Level Landscape Lighting (LLLL) is a method of lighting the foreground elements of an image through the use of a very dim light source kept on for the duration of the exposure. The light level is adjusted to the same intensity level as the stars or Milky Way, thus ensuring that an exposure that works for the sky will also work for the foreground. Once the lighting levels have been properly balanced, the low-level lights can remain on without further adjustment for the duration of the shoot. It makes simple work of ensuring consistent lighting in exposures for work requiring multiple captures to produce the final image.
I should note that Low Level Lighting also includes moonlight! The moon is the most wonderful tool available to the night photographer. It is such an important aspect to night photography generally, and astro-landscape photography in particular, that I shall offer my thoughts in a separate post. For now, I’ll just talk about artificial light sources. 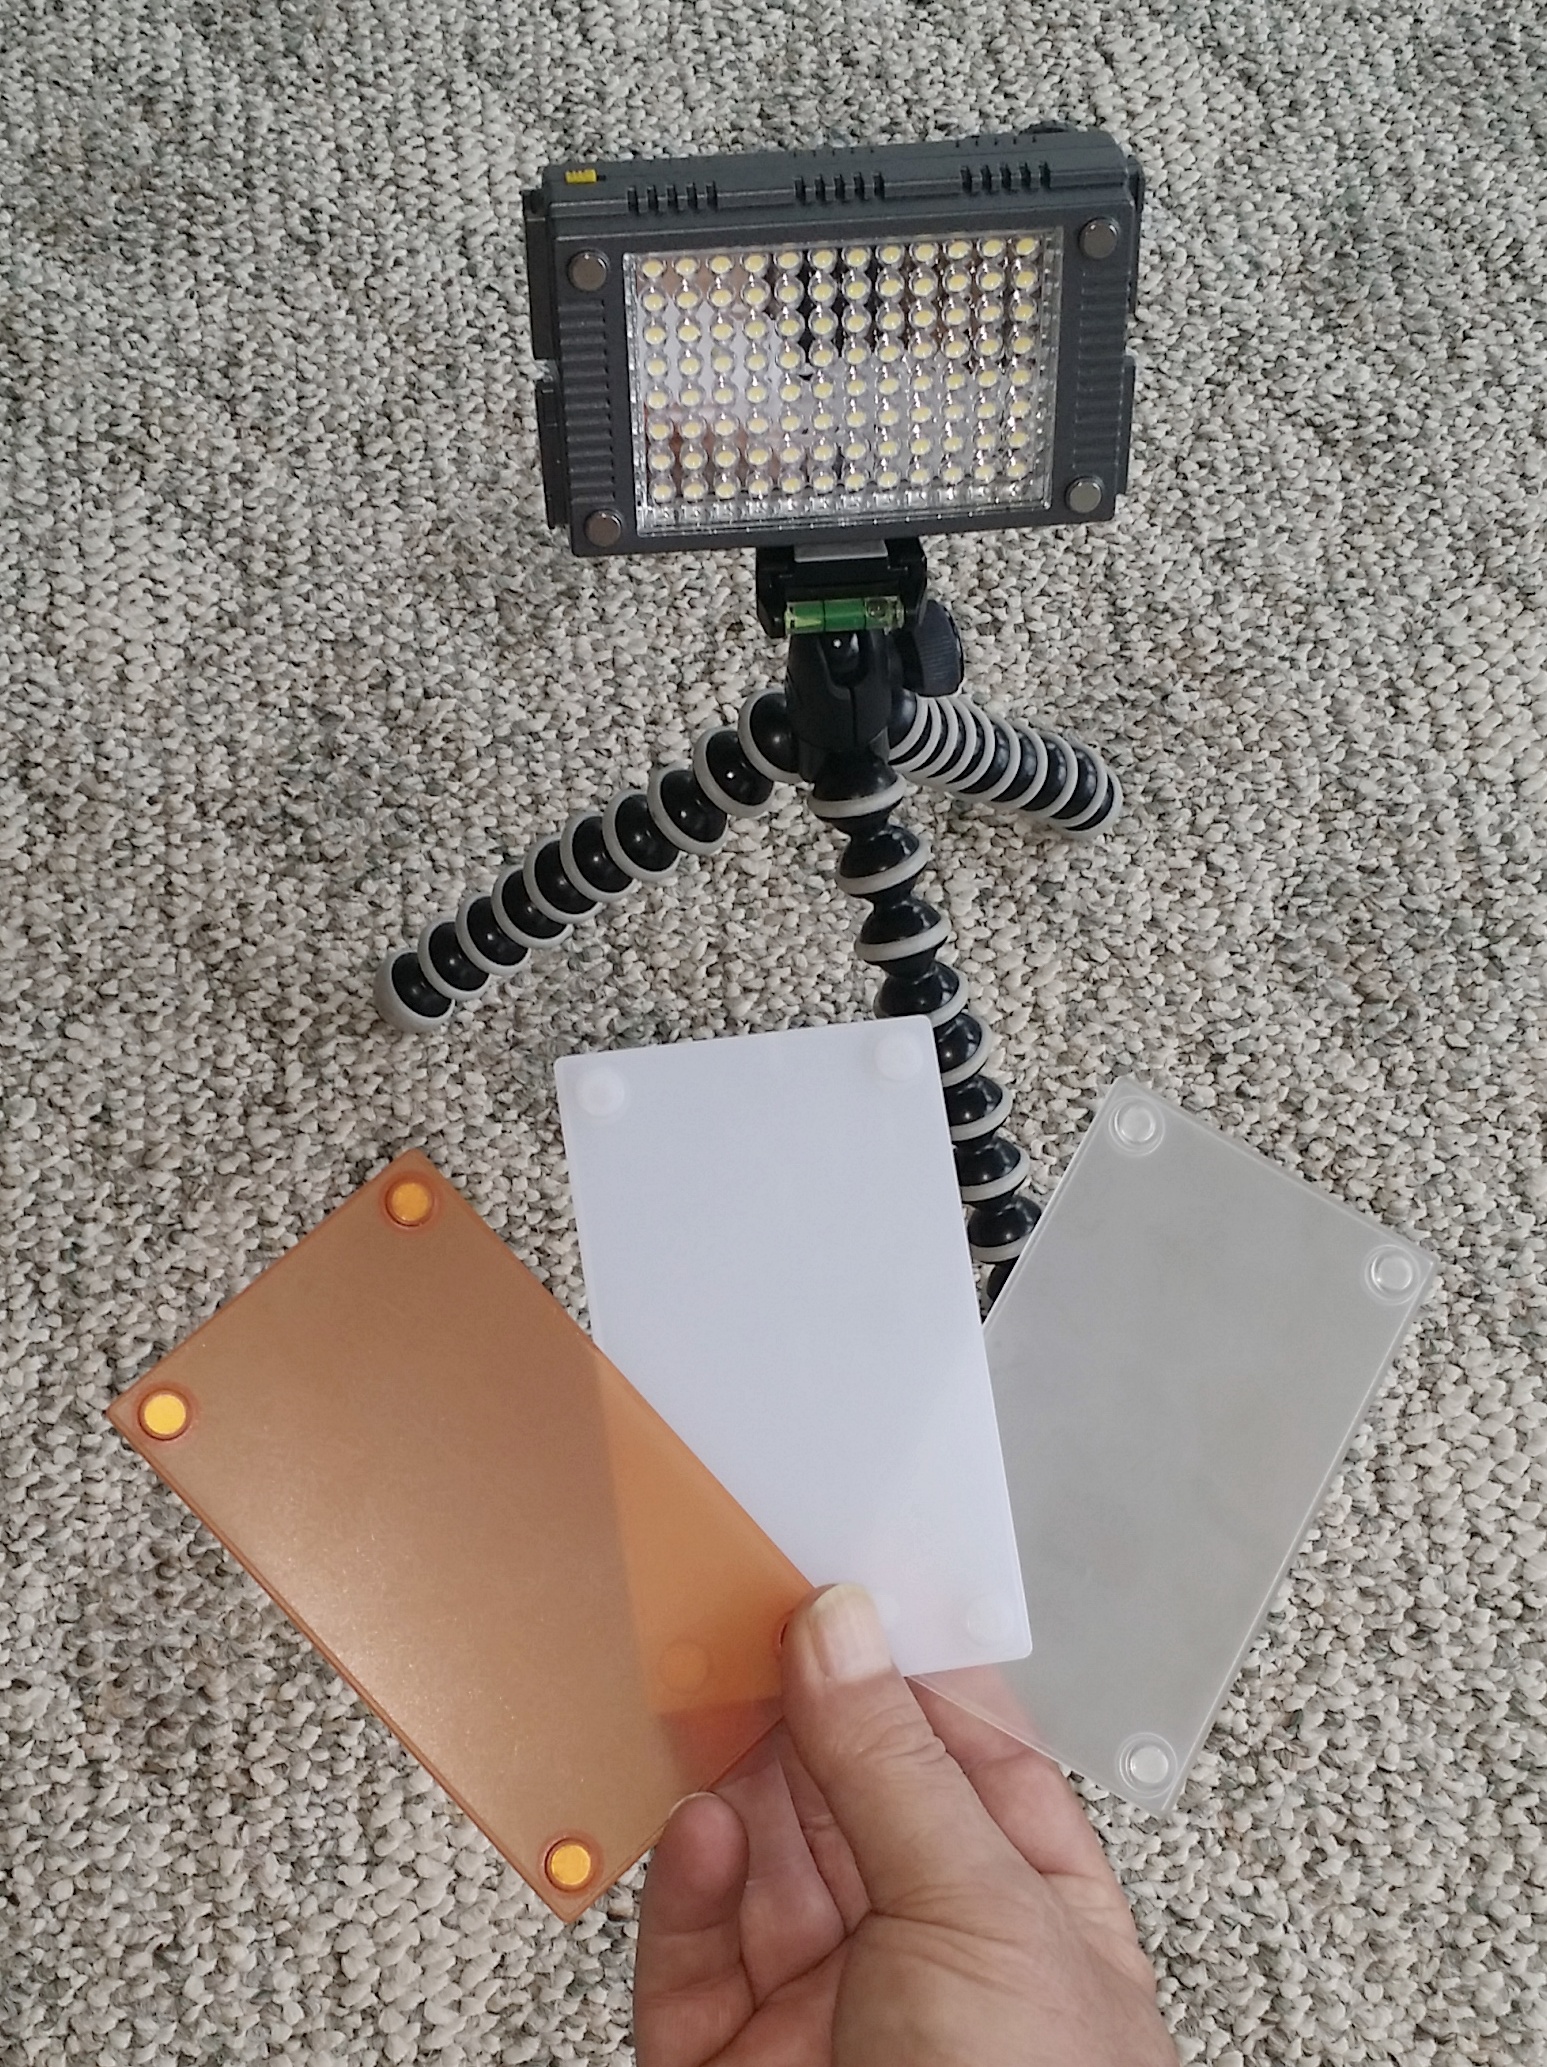
F&V Z96 Warming, Milk White, and Diffusion Filters
I have been using three of these F&V Z96 Light Panels for about 2 years, and find myself using them regularly. This LED light panel consists of 96 LED bulbs that allow for brightness adjustment via a dial on the rear of the body.
The light comes with 2 filters – a warming filter and a diffusing filter. I have found a third filter, the F&V Milk White Diffusion Filter on Amazon. I have found that I rarely have to turn the light intensity up beyond the absolute minimum in order to get properly balanced lighting. In fact, I usually have to dim the light further, and find the Milk White filter reduces the light output considerably. This can be a real convenience when it is difficult to move the lights further from the subject, and they are already turned down to their dimmest setting.
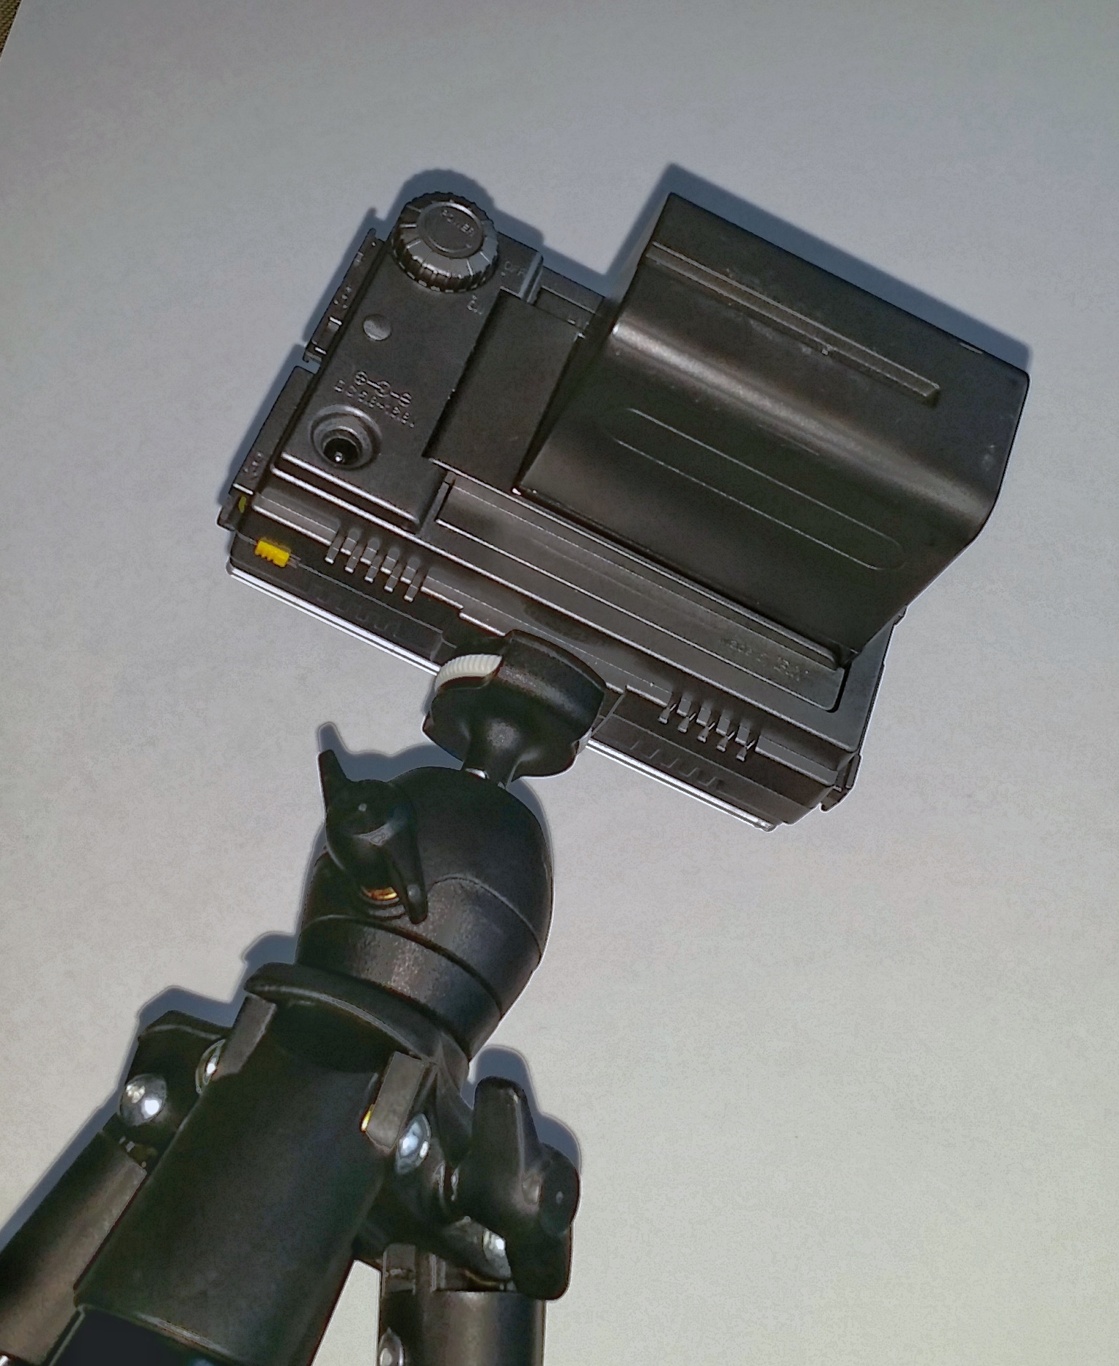
F&V Z96 powered by NP-F970 Li-ion battery
There are three ways to power this light. I use a NP-F970 Li-ion battery, which will last for several nights without needing to be recharged. The downside is the size and weight of the battery. Alternatively, the light can be operated with AA alkaline batteries instead.
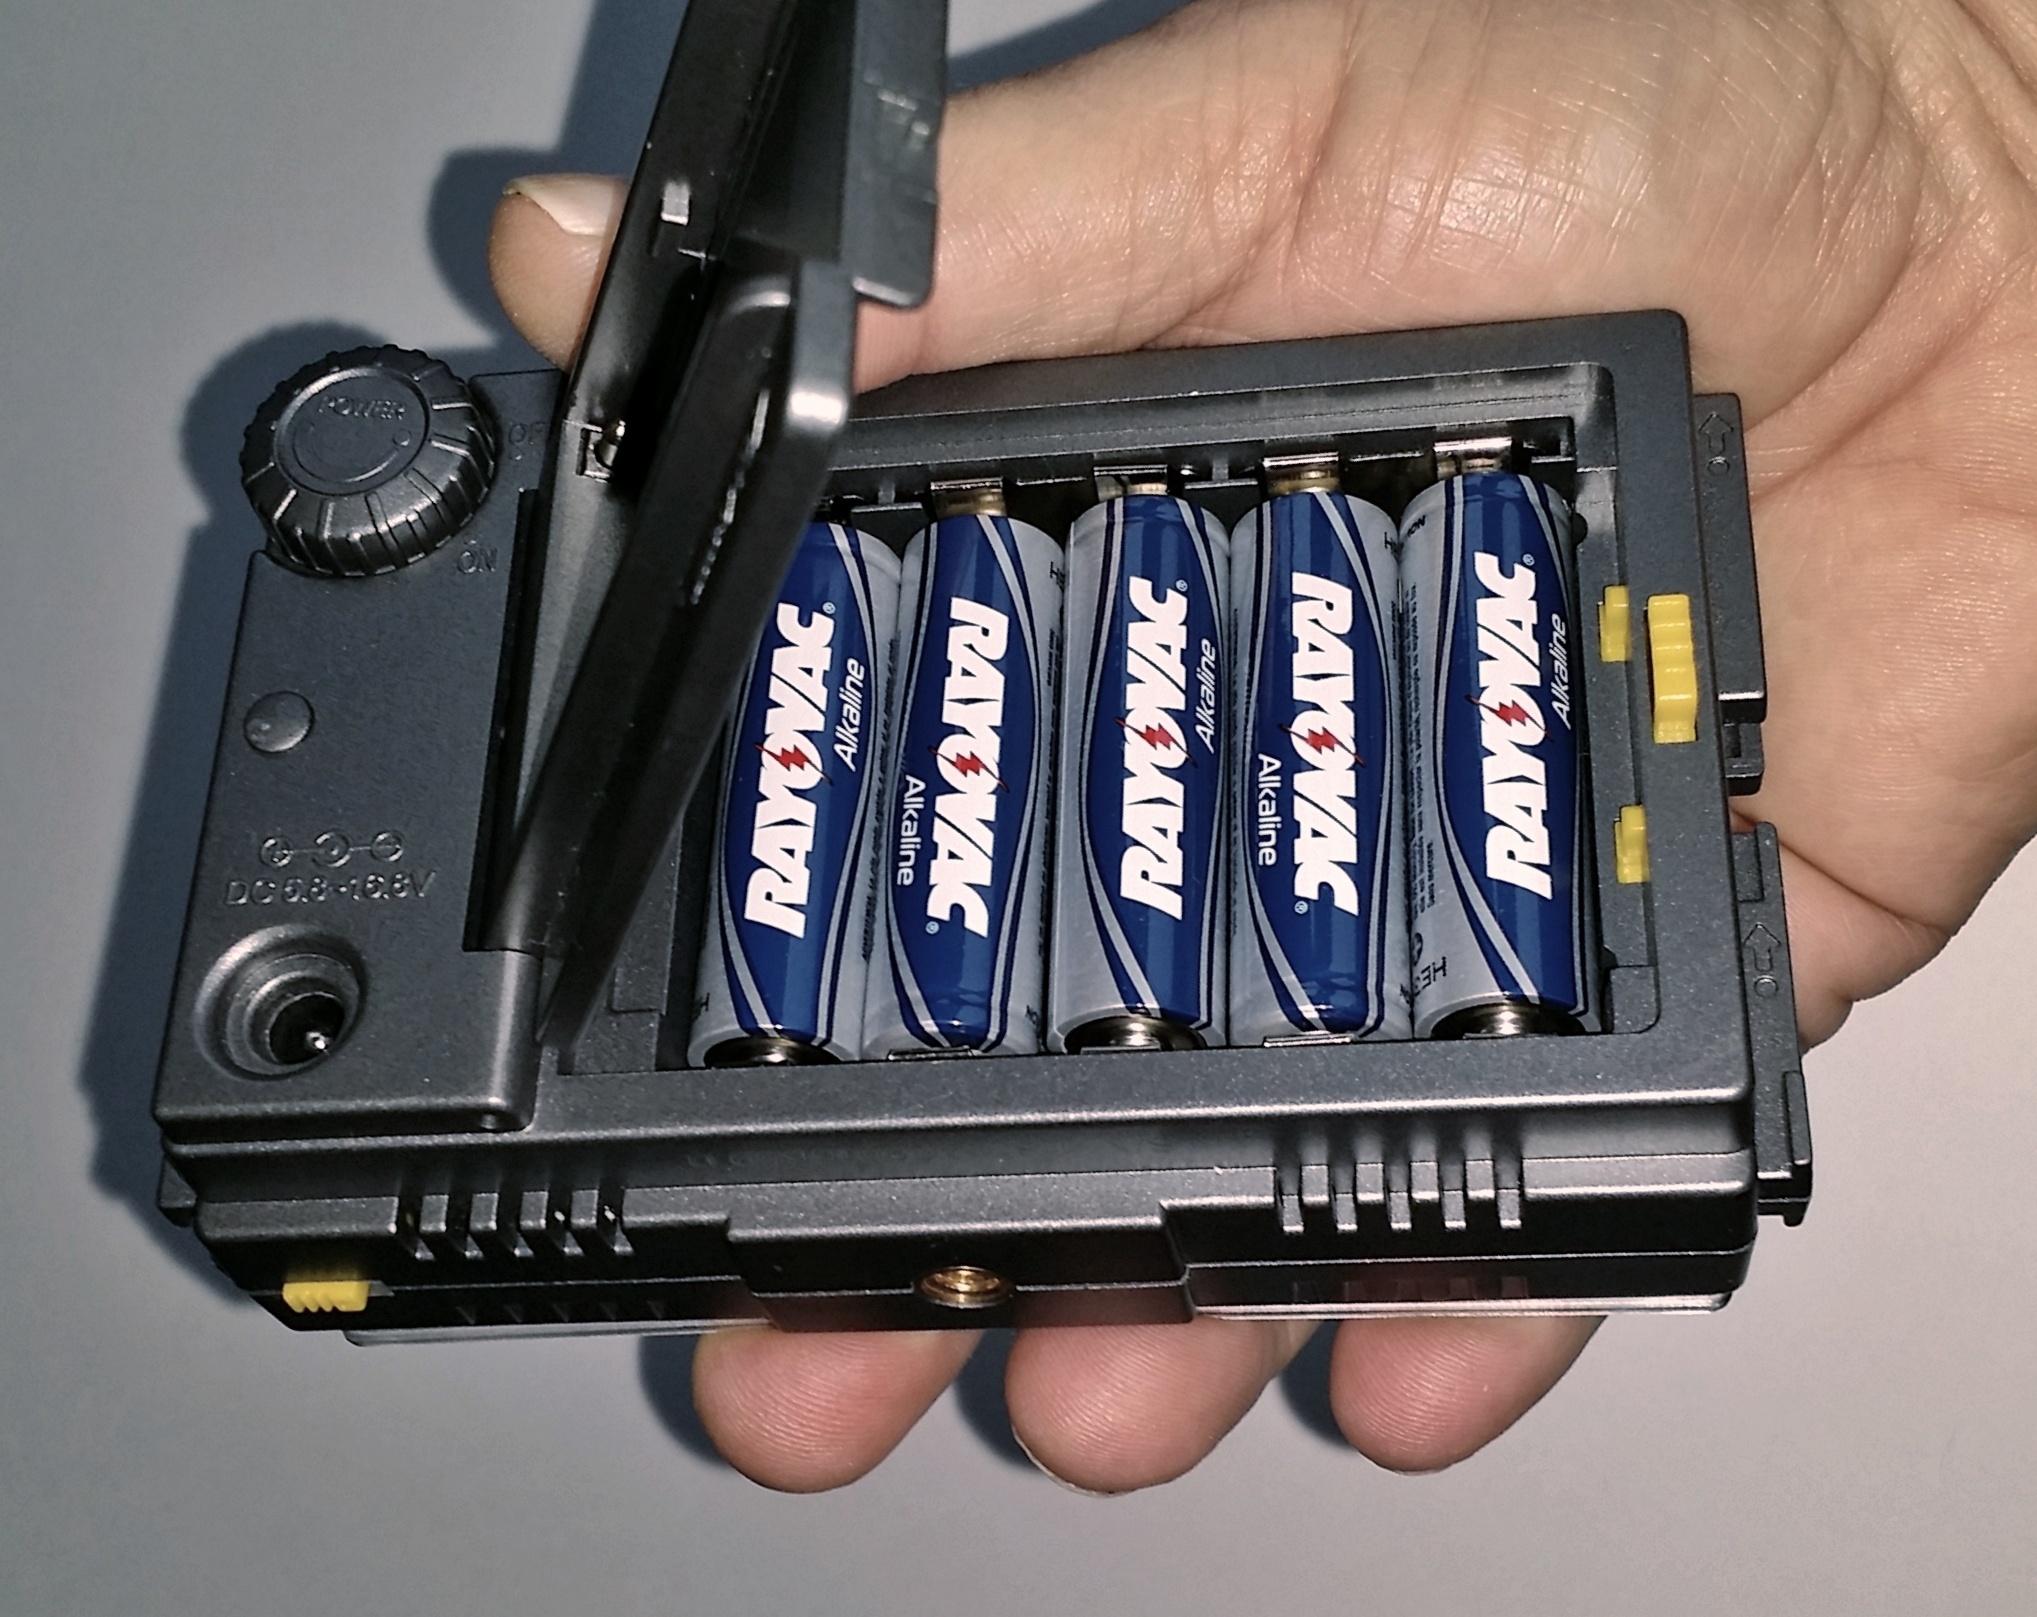
F&V Z96 powered by (5) AA alkaline batteries
There is also a receptacle for a 12v power supply, which I never use.
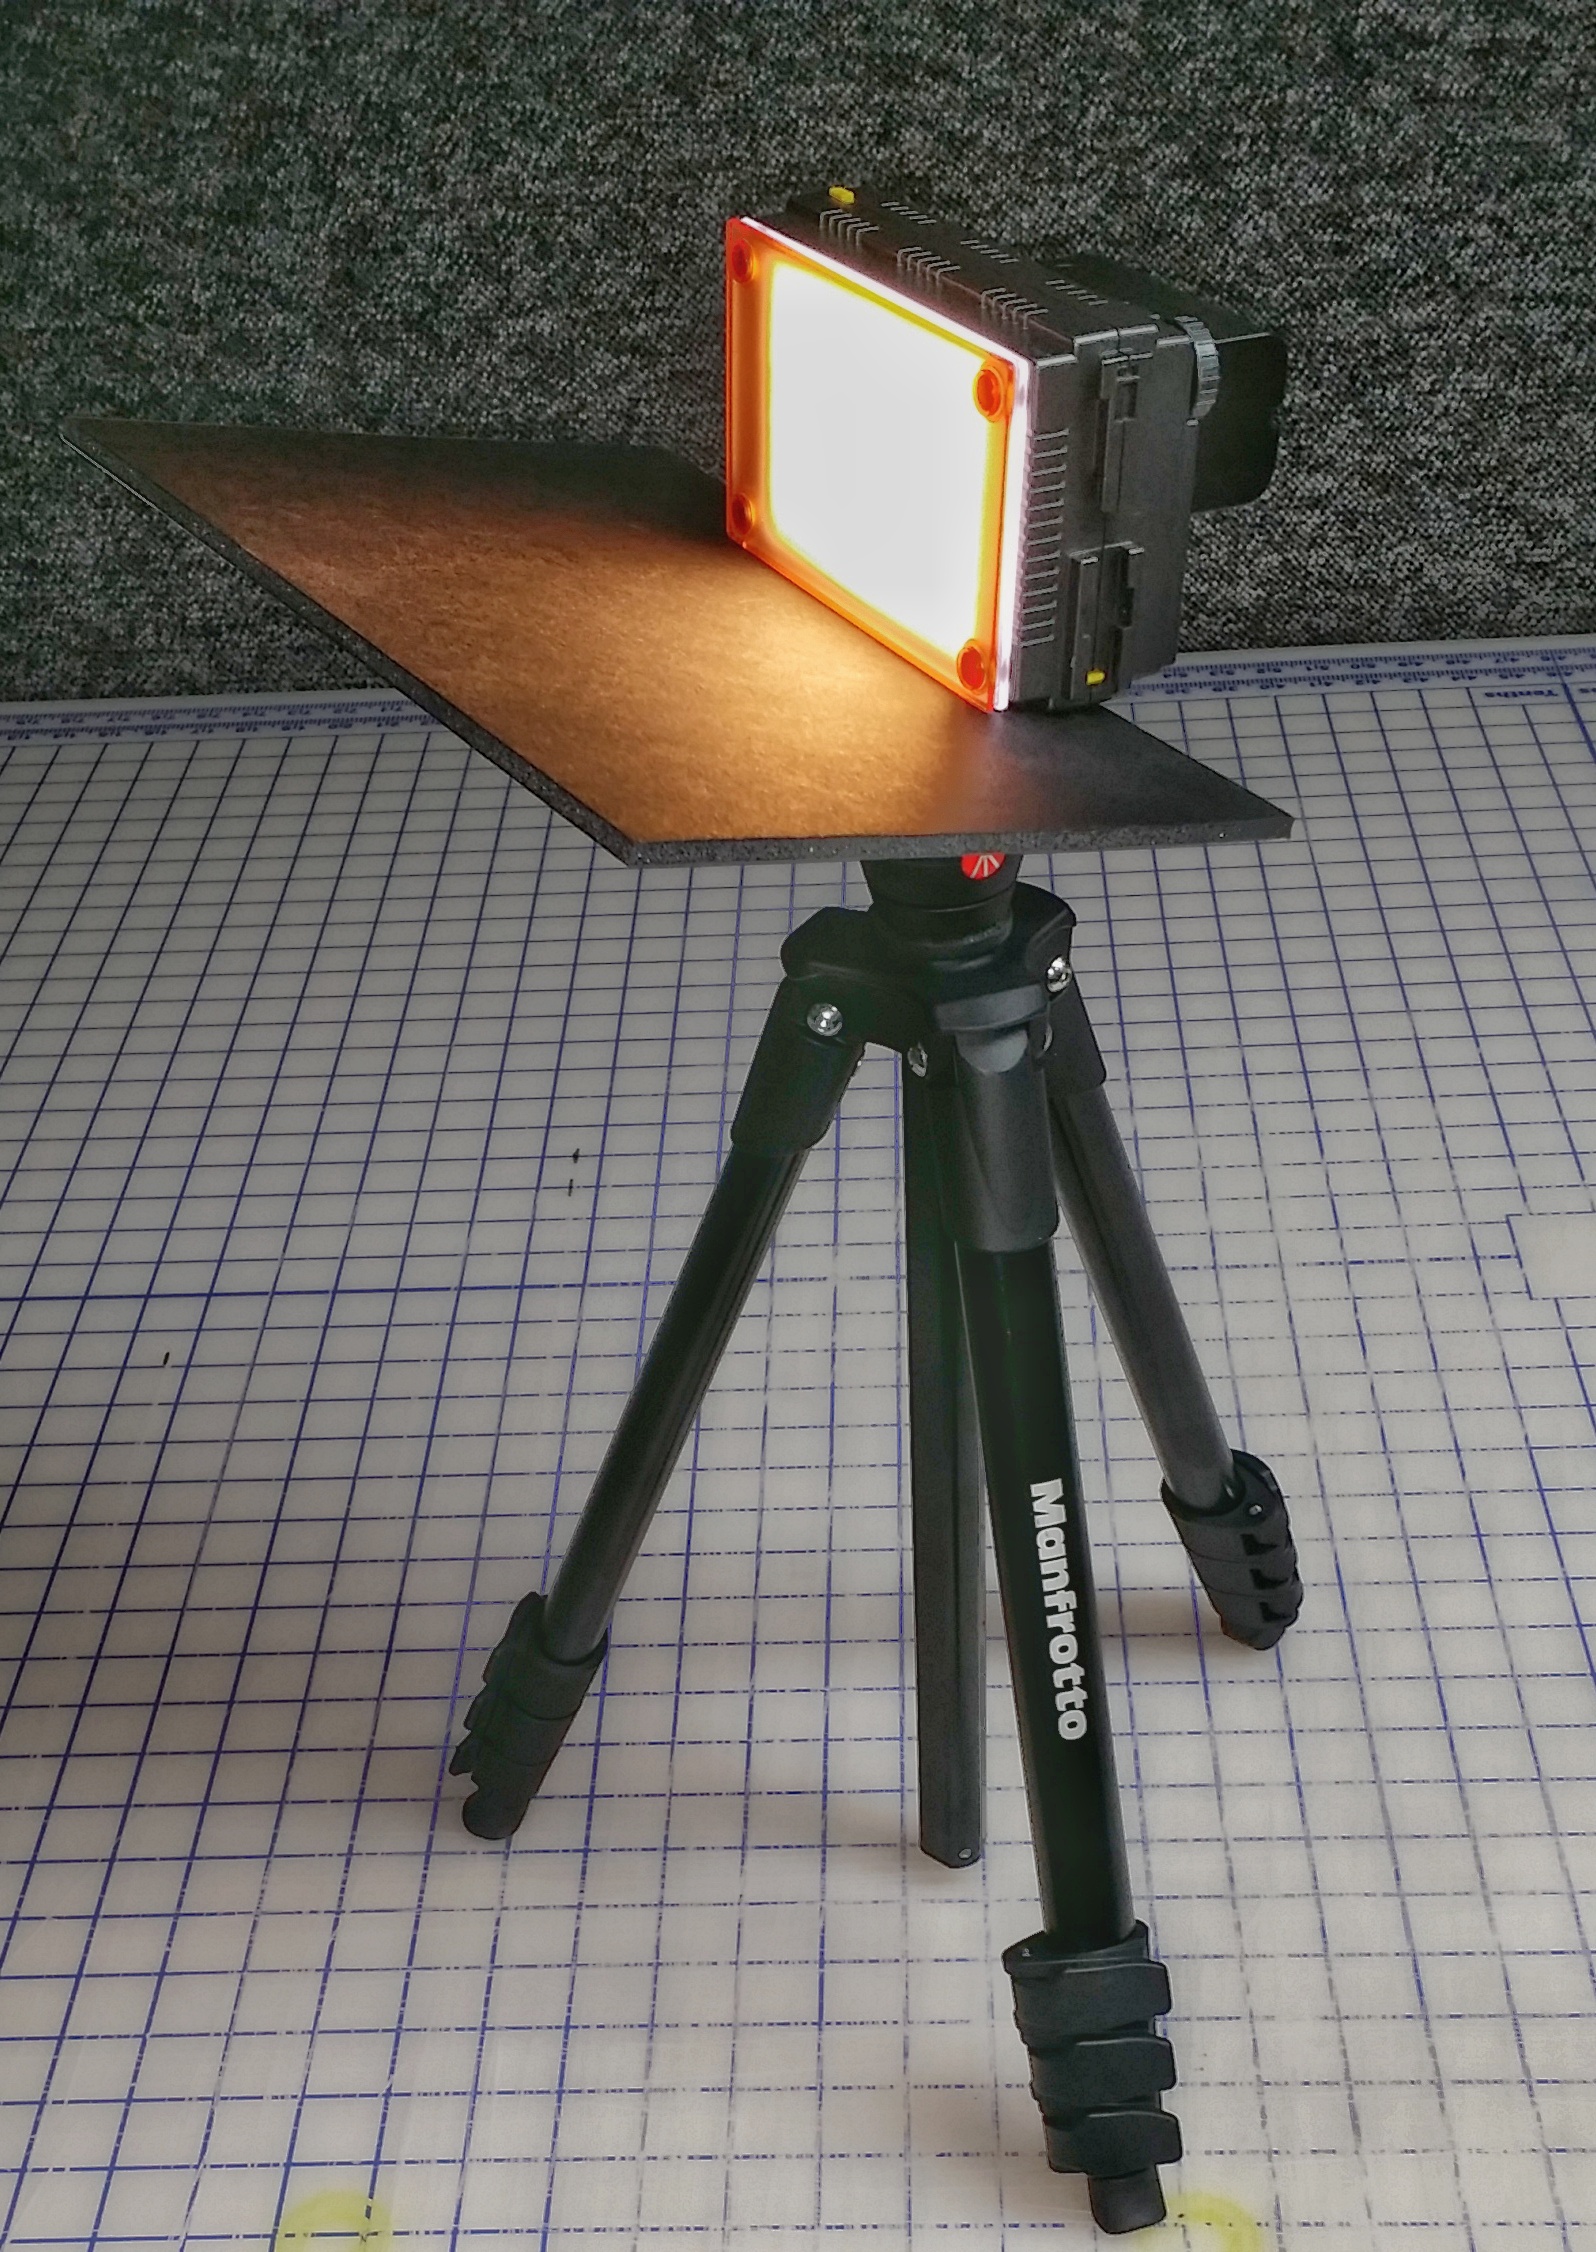
F&V Z96 rigged with a lower barn door shade
The F&V Z96 LED light panels tend to spill a lot of light downward, which may sometimes interfere with the intended shot. I this case, I have found that improvising a barn-door shade that fits between the LED Panel body and tripod/light stand works wonders. It is light, easy to fabricate, and packs easily.

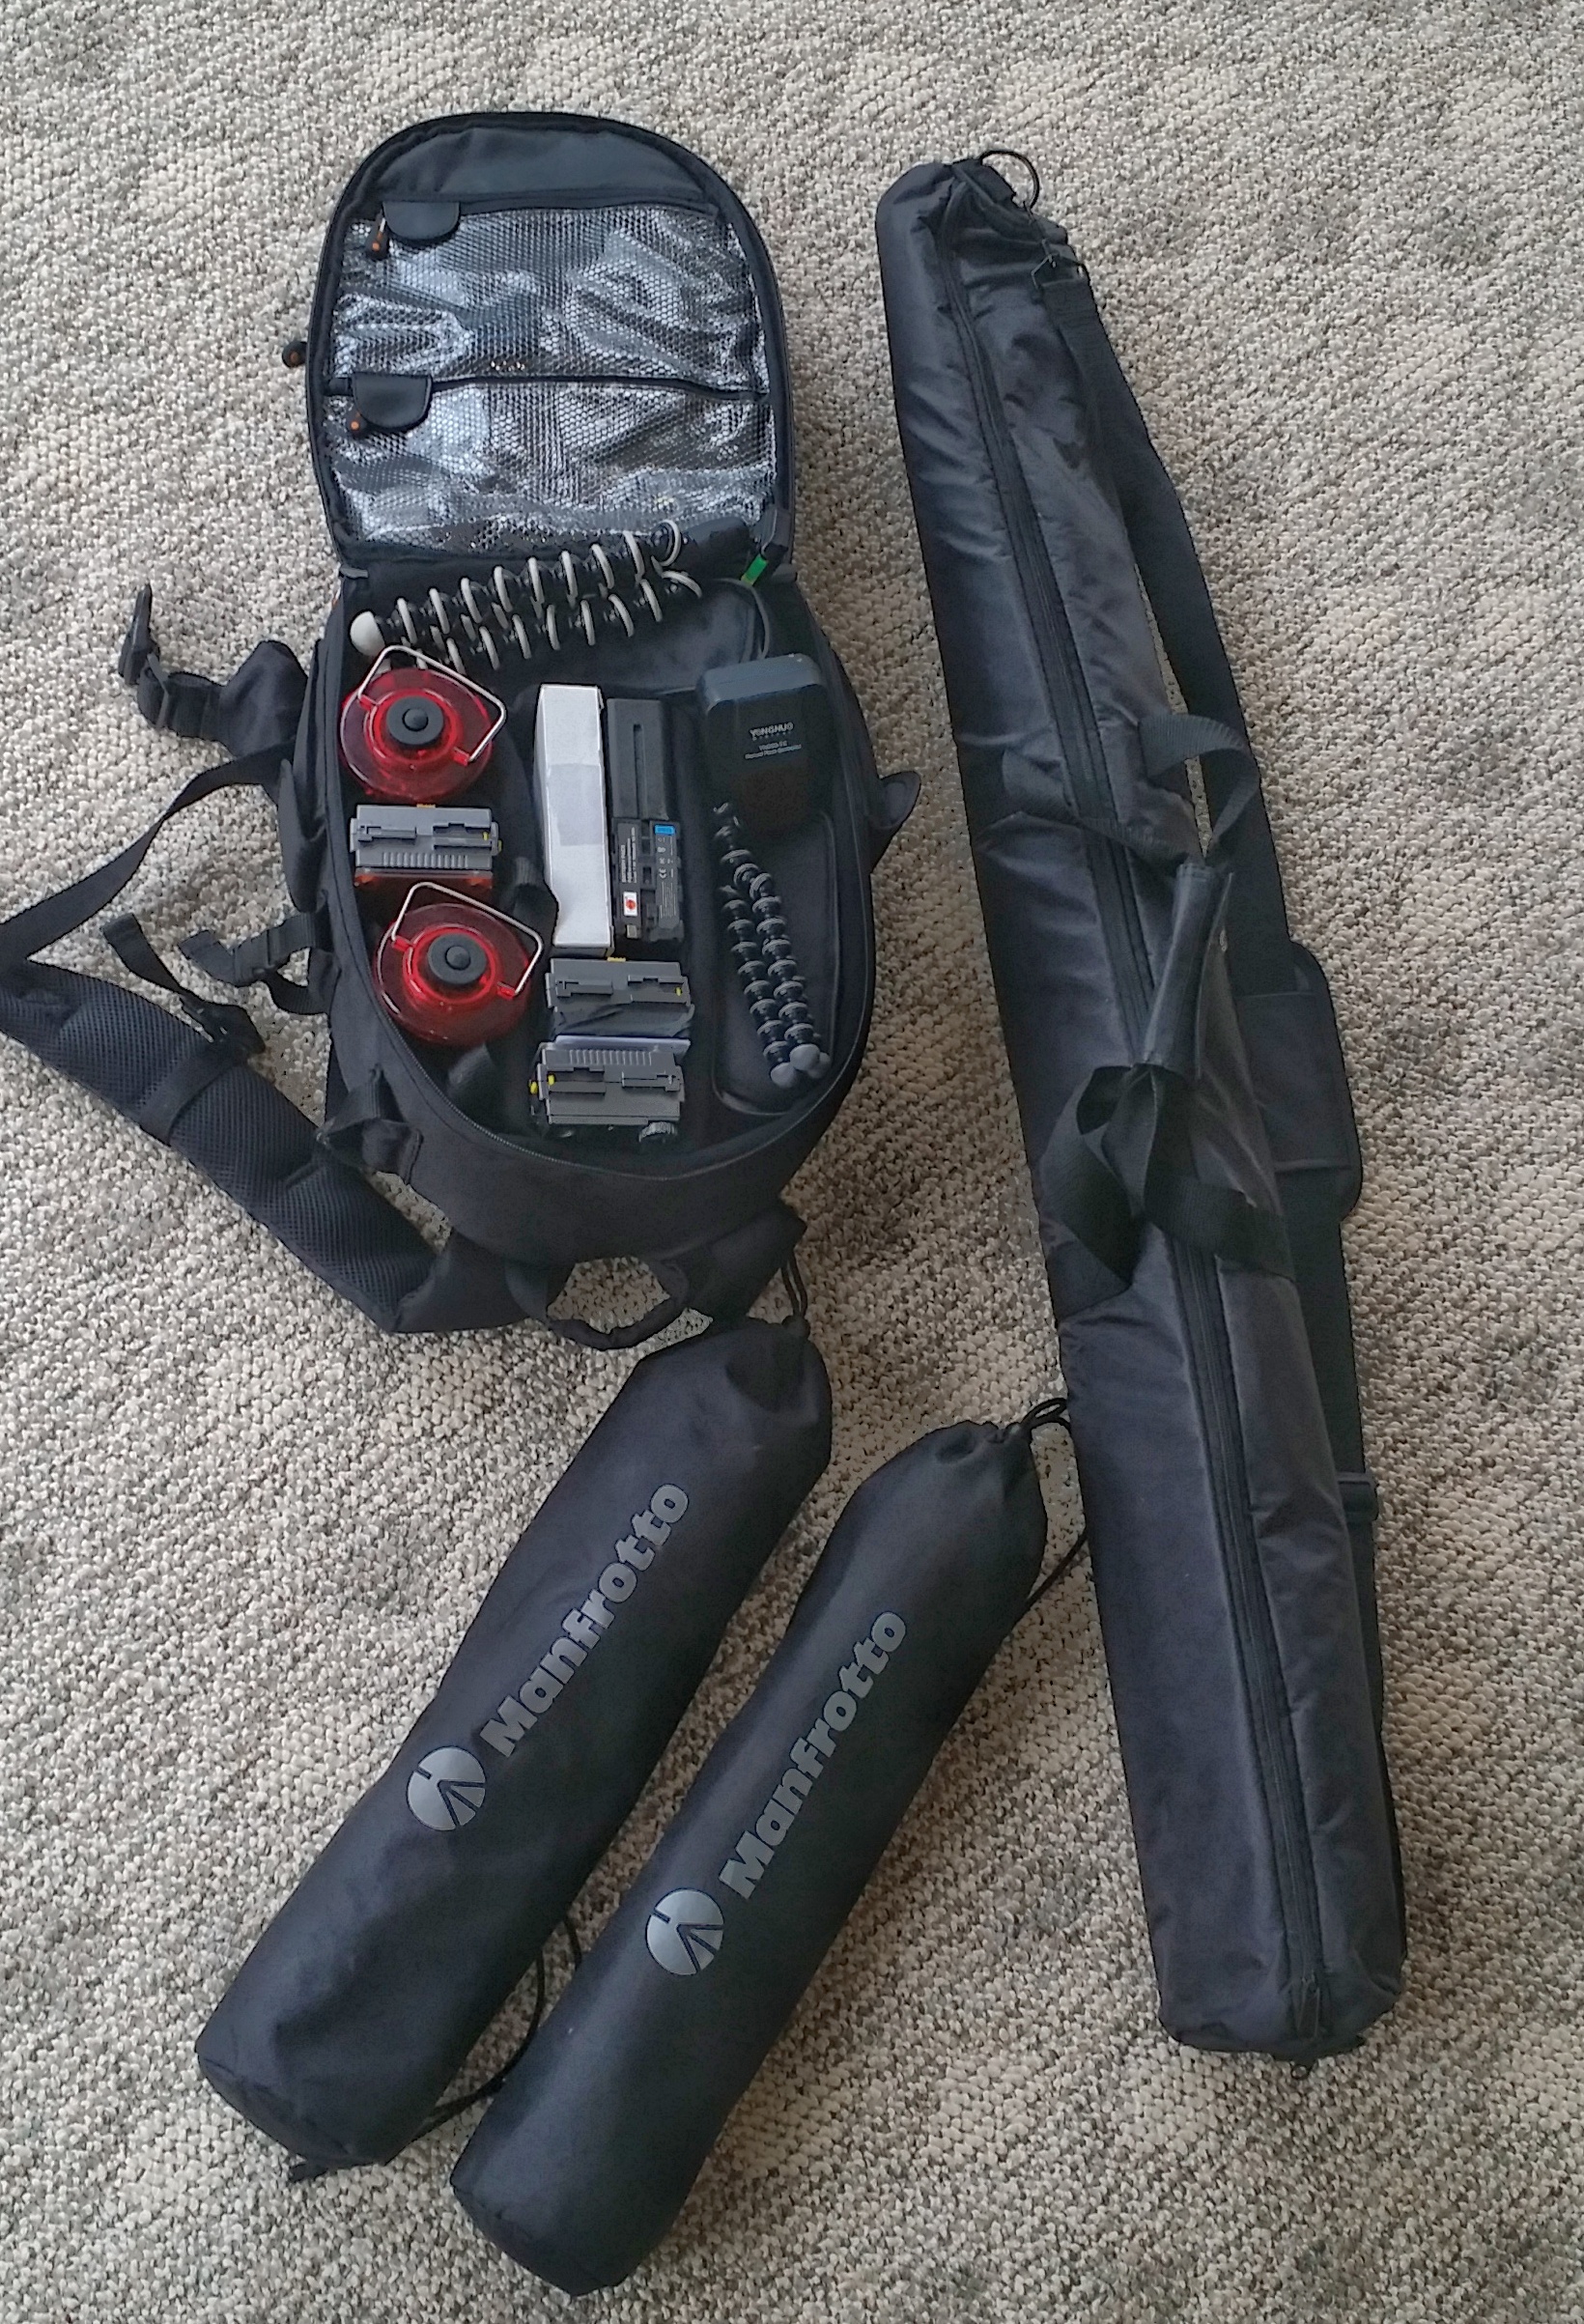
Manfrotto Tripods and Joby GorillaPods
I use Joby GorillaPods and Manfrotto compact tripods as light stands for my LED light panels, as well as my Yongnuo Electronic Flash units (more on these later in this post). I have been asked why I carry three LED light panels, as well as light stands around. Do I really need all three? Here are some examples where three lights came in handy.
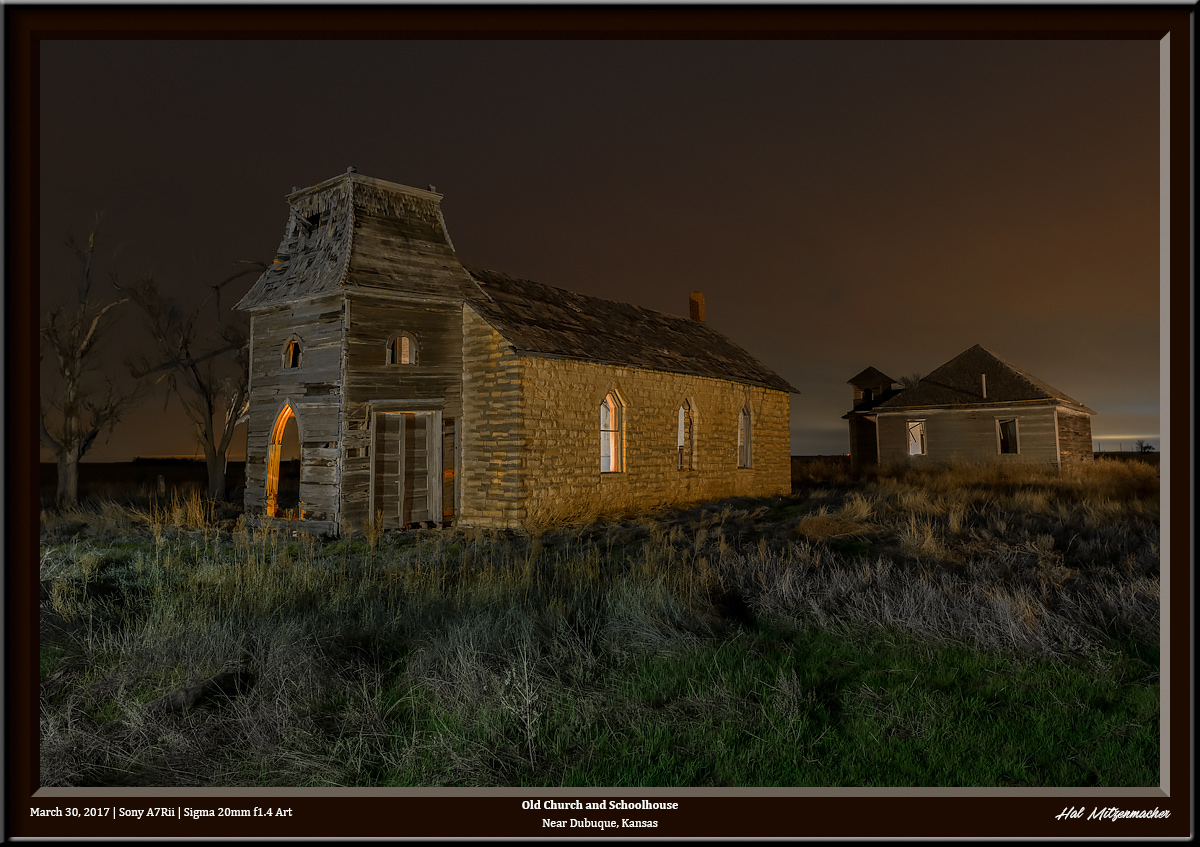
One panel for left-front, one for right-side, and one for second structure
Here is a shot that required three exterior lights. One was set up to illuminate the left hand side of the church, including the doorway. A second panel was set up to illuminate the side of the church, while a third light was set up to illuminate the schoolhouse structure in the background.
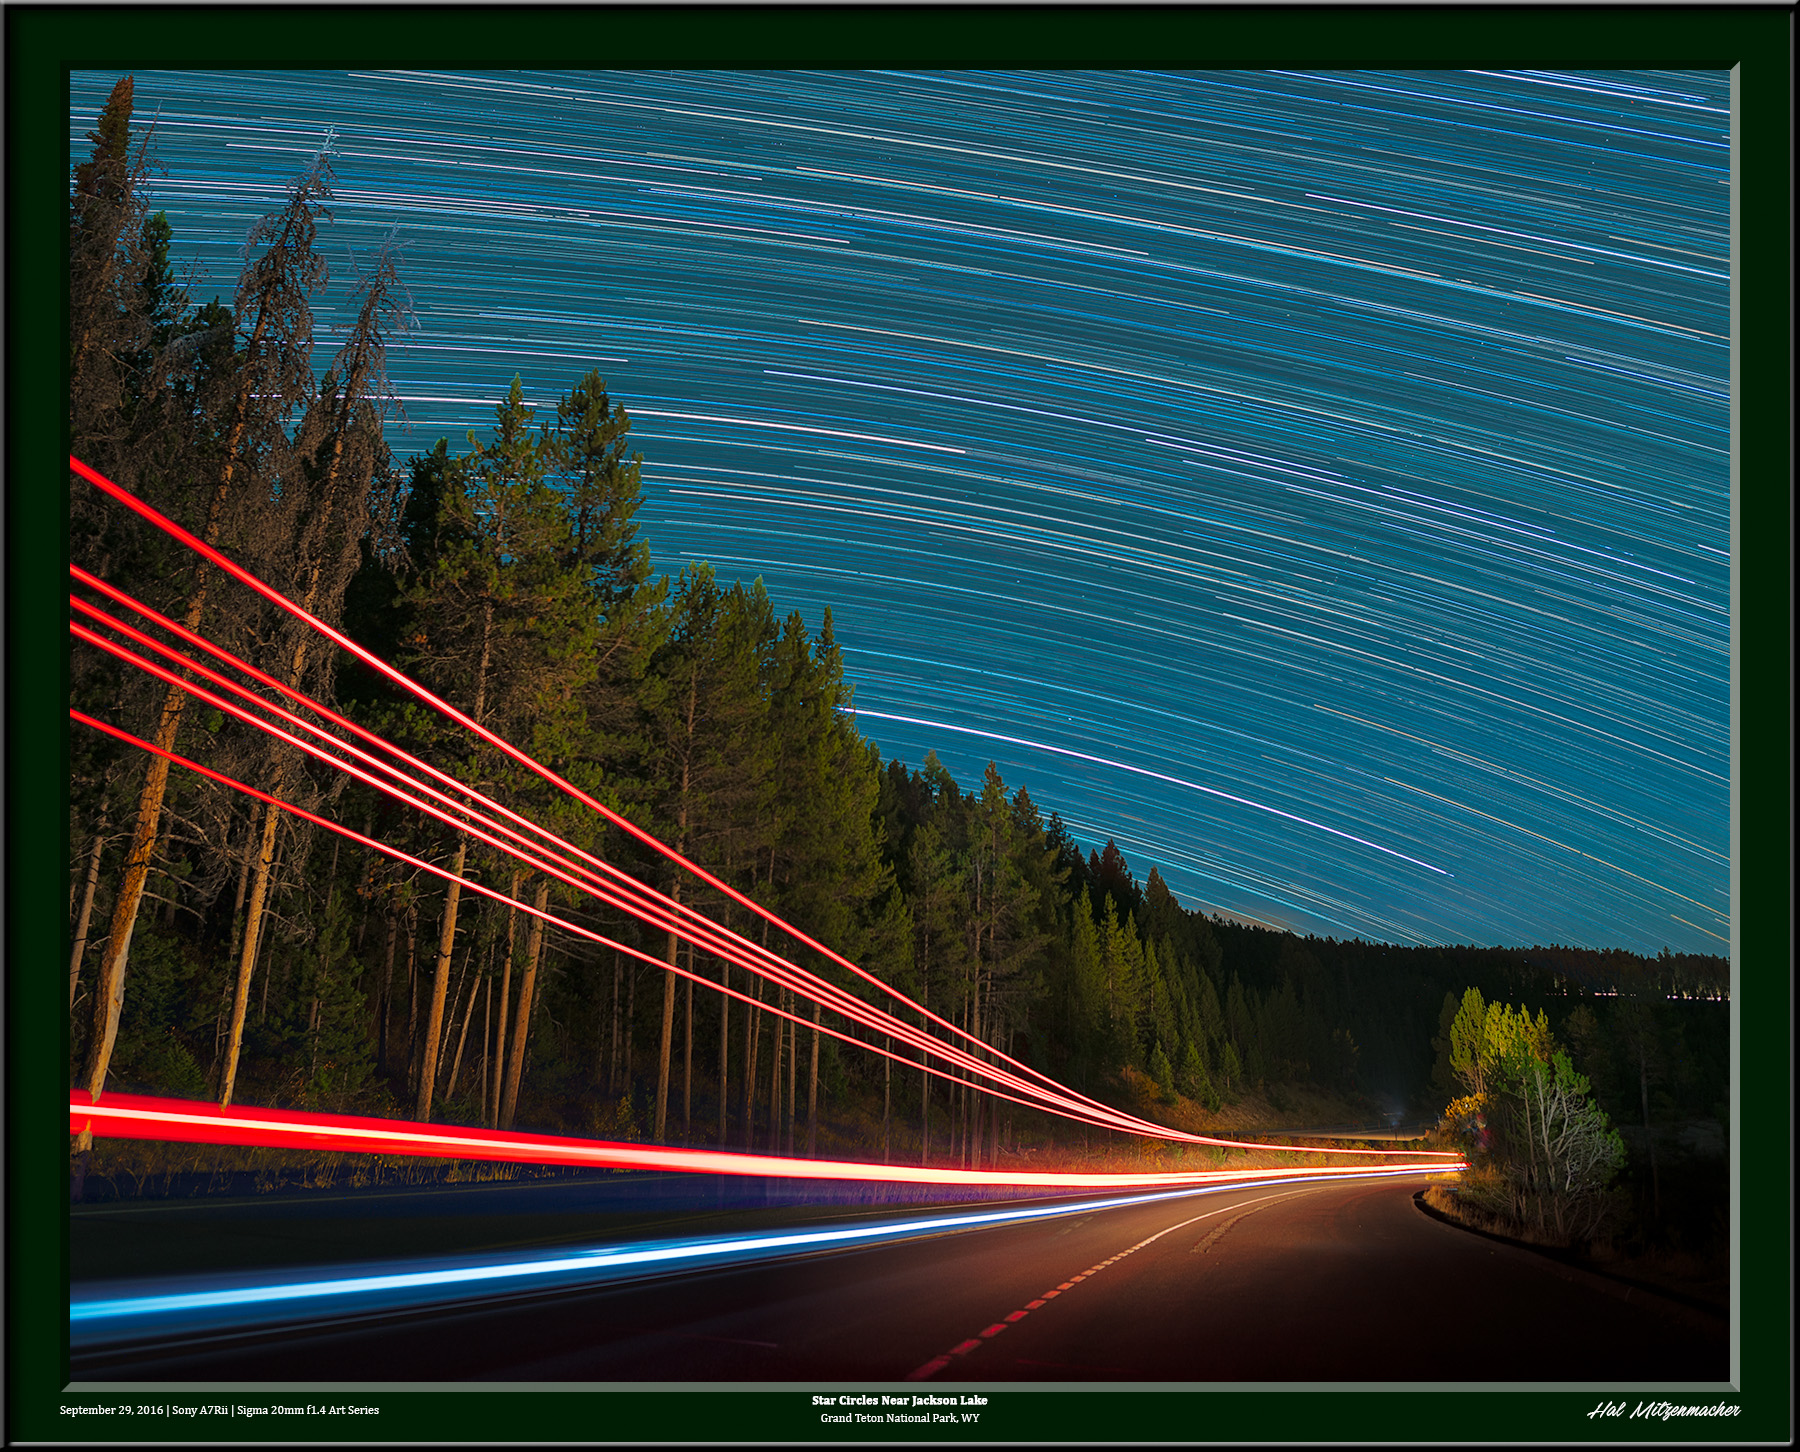 Three Z96 LED panels spread out to illuminate the tree line
In this image there would have been no easy way to illuminate the entire line of trees down the length of this highway without the help of three LED light panels (I know that one could take a single LED panel and walk up and down the roadway shining the LED panel up at the trees, and do this repeatedly for a long time, hoping to not get run over in the process, but PLEASE – I’m an old(ish) man!!
I could include other examples, but the point is, more light panels mean more opportunities. And while not absolutely necessary, they can be helpful when contemplating a night composition.
Other Fun Lighting Gear
![]()
The Pixelstick
The Pixelstick is a digital light painting tool that has several modes of operation, and allows the photographer to express their artistic sensibilities in various ways. I have only owned a Pixelstick for a short time, so I do not have a great amount of experience with it, other than the basics that I have experimented with to date. At first glance, however, I can see that this is going to be a lot of fun, as well as challenging my creativity.
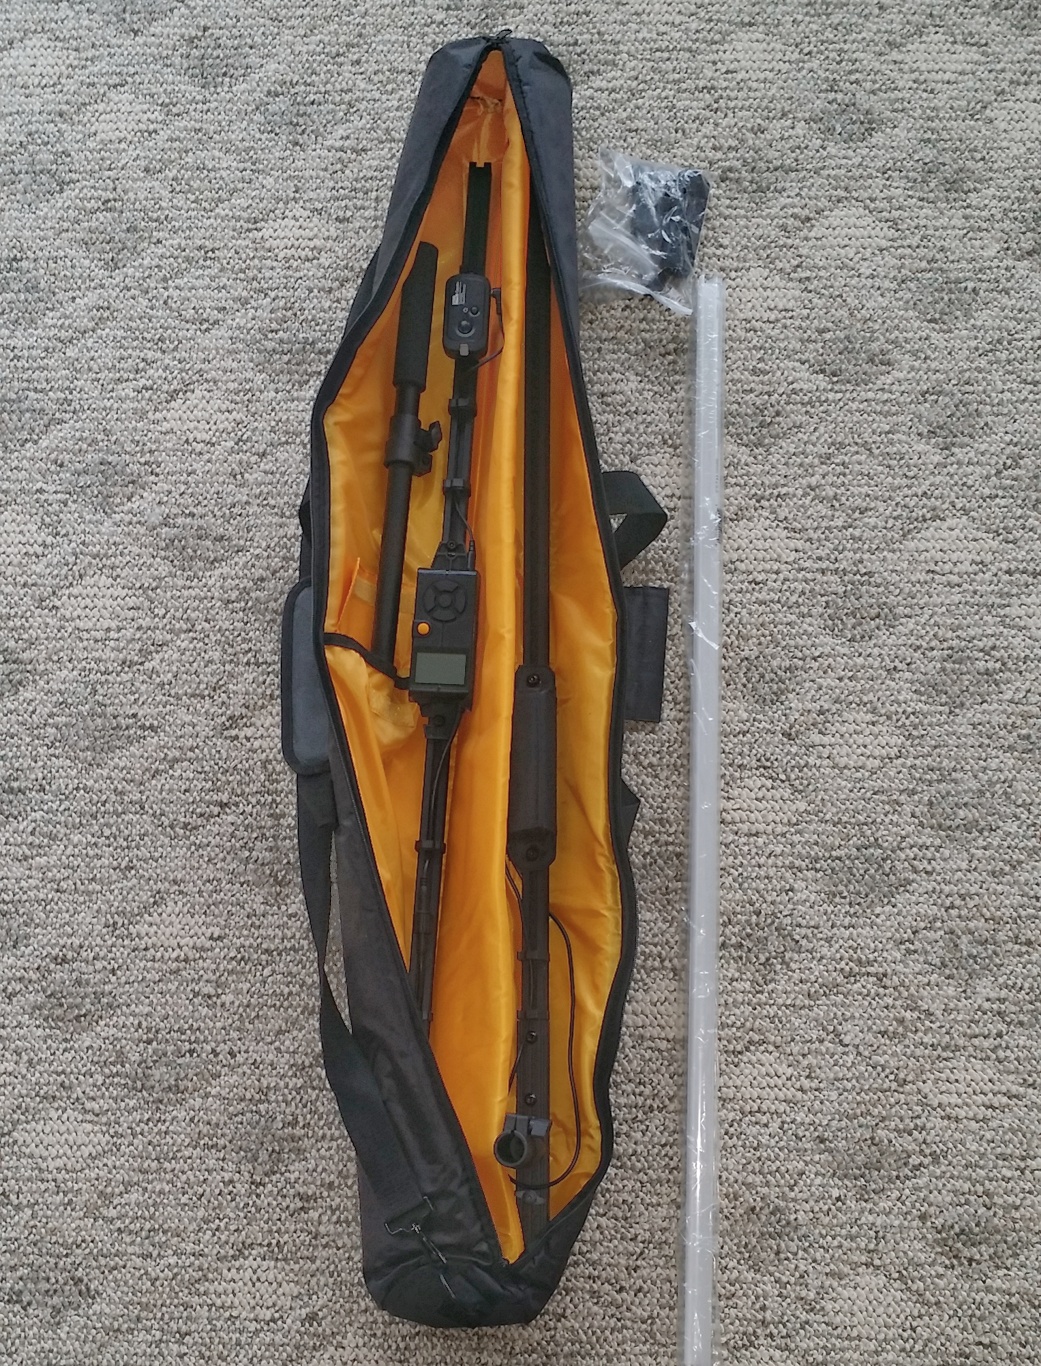
Pixelstick in storage case (shown broken down for transport)
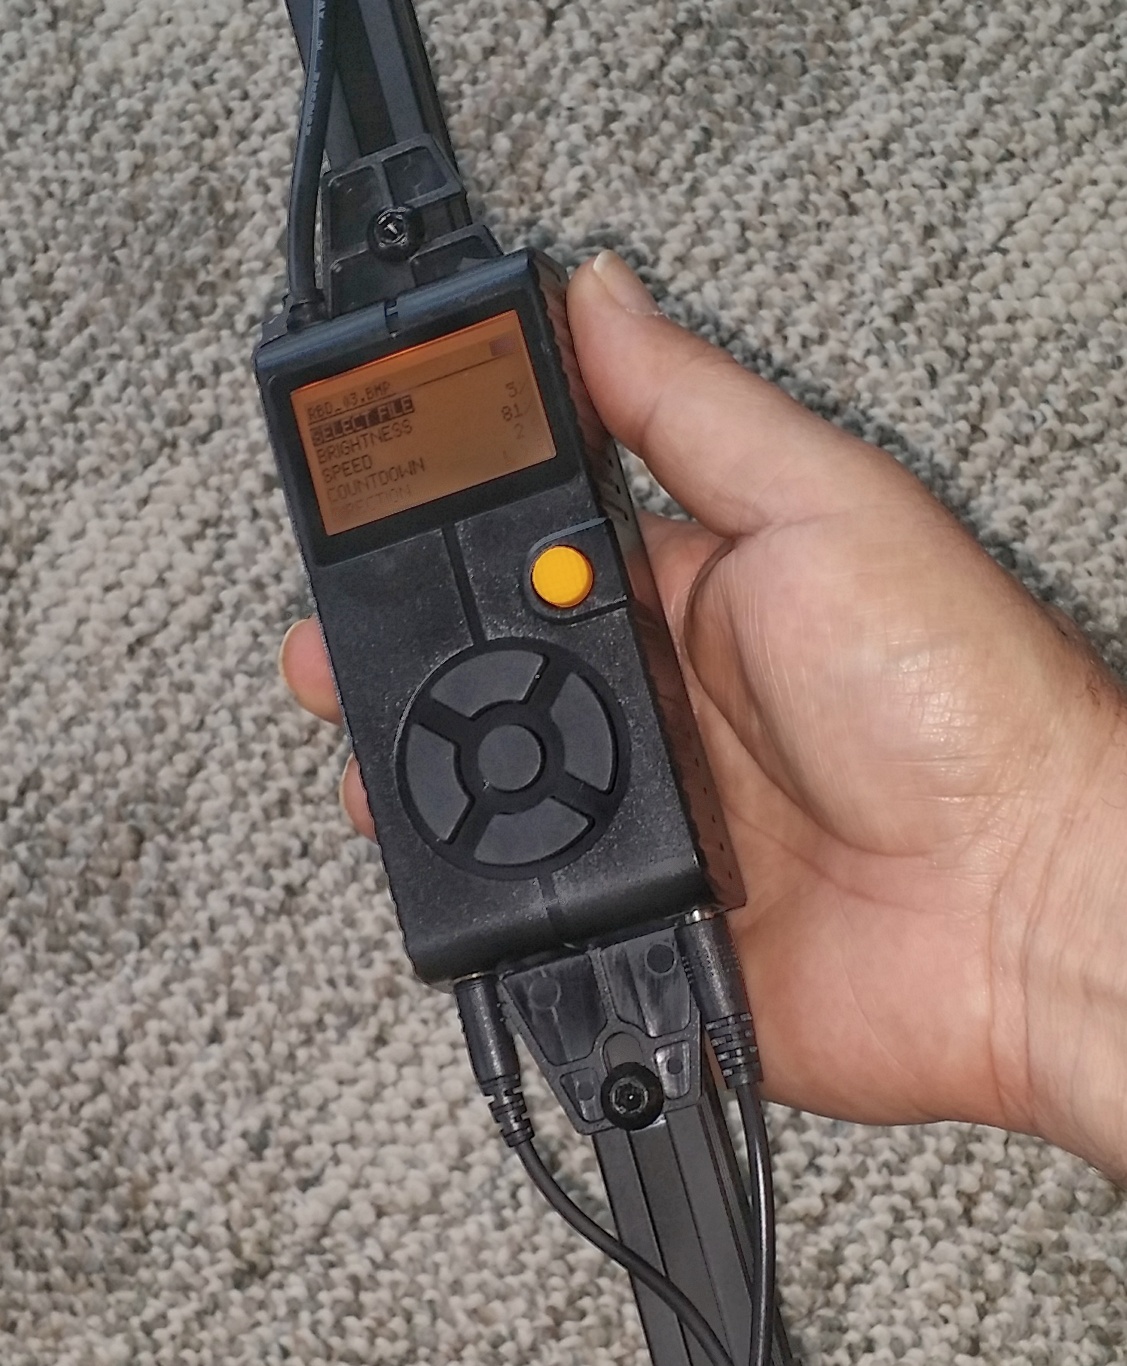
Pixelstick Controller Module
The controller assemble of the Pixelstick is the brains behind this device. It accepts SD cards to store bit mapped image files, which it then projects on its integral LED bulbs. The menu system built into firmware allows the parameters of the current project to be programmed and stored.
The Pixelstick is taller than I am when it is completely assembled. It is a light painting tool that consists of 200 LED bulbs, with each bulb independently addressable and capable of producing the color spectrum at a variety of intensities. It can effectively project an image consisting of vertical pixels, that when transported across the field of view, creates an image. Although I have not used the Pixelstick extensively, I have a few examples to show what a few of its capabilities are.
![]()
Front lawn on fire
In this image, I used a stock bit map image of flames to create this scene. I set the Repeat mode on and proceeded to walk around my yard and up and down the road in front of the house to create an illusion of flames. This was all done while the camera shutter was open for a long exposure.
![]()
South Moulton Barn in the Ozarks
In this image, I took a photograph of the South Moulton Barn, which is located in Grand Teton National Park in Wyoming, and uploaded it as a bit map image to my Pixelstick. By walking across my front lawn while projecting this barn image from the Pixelstick, I was able to create the illusion of the barn being in the Ozarks. The waviness exhibited in the barn is due to my lack of practice in developing a smooth, gliding gait while carrying the Pixelstick. Practice should remedy this shortcoming in the future.

And finally, here is my attempt to place an armadillo in my campsite while on a trip to Kansas. All in all, I am looking forward to seeing what I can come up with using the Pixelstick over the next year or so. I fear the capabilities of the Pixelstick will greatly surpass my creative imagination. We’ll see.
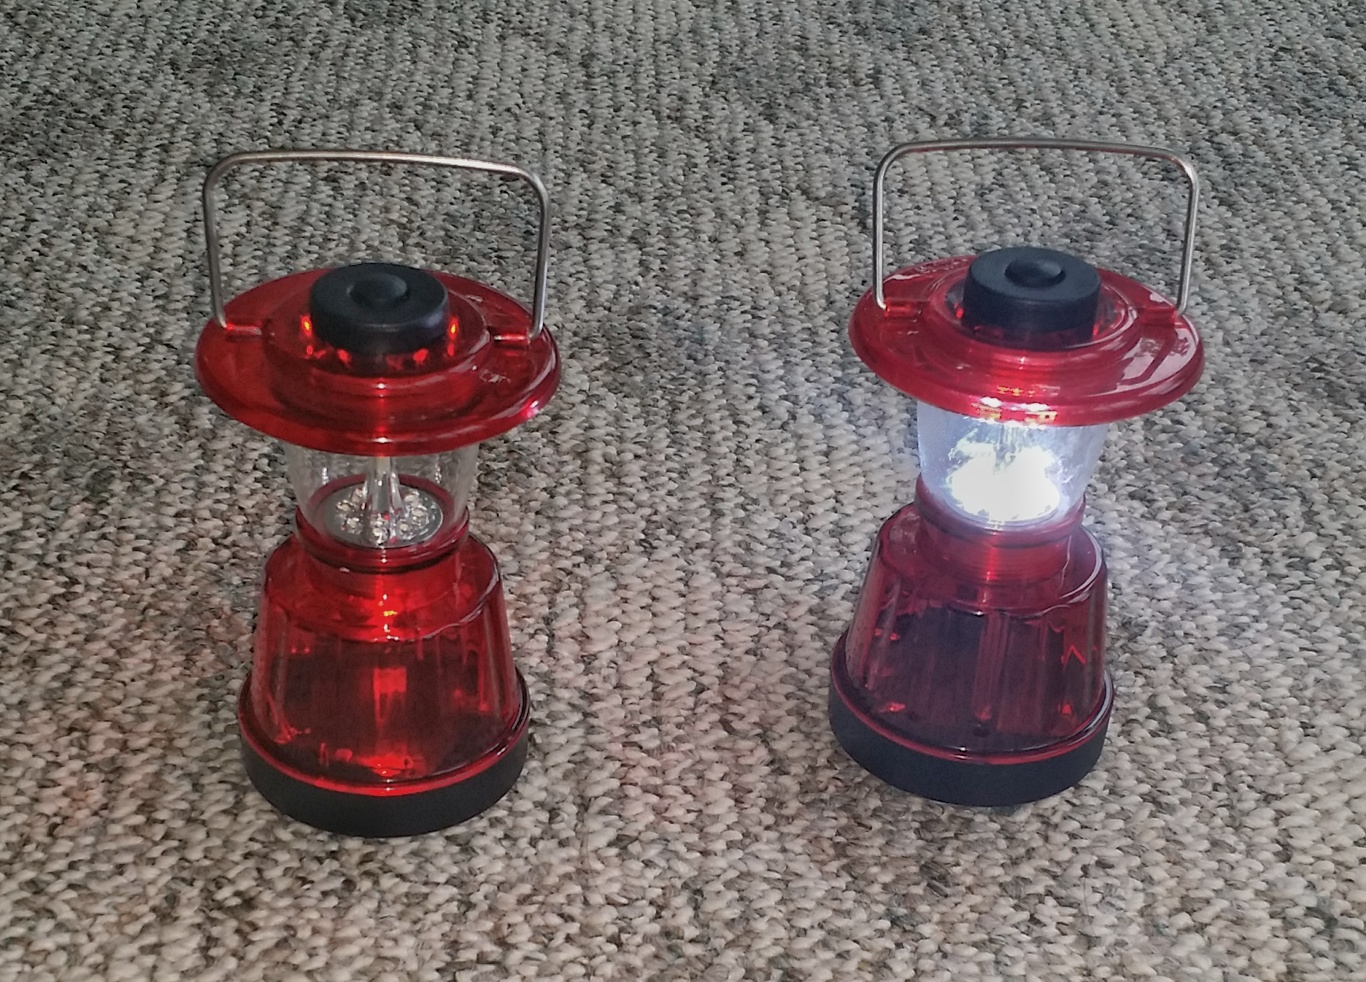
Multi-function mini lanterns
These inexpensive mini lanterns have proven to be very useful in many situations. They are small, readily available, and cheap. Here are a couple of examples of the mini lanterns in use:
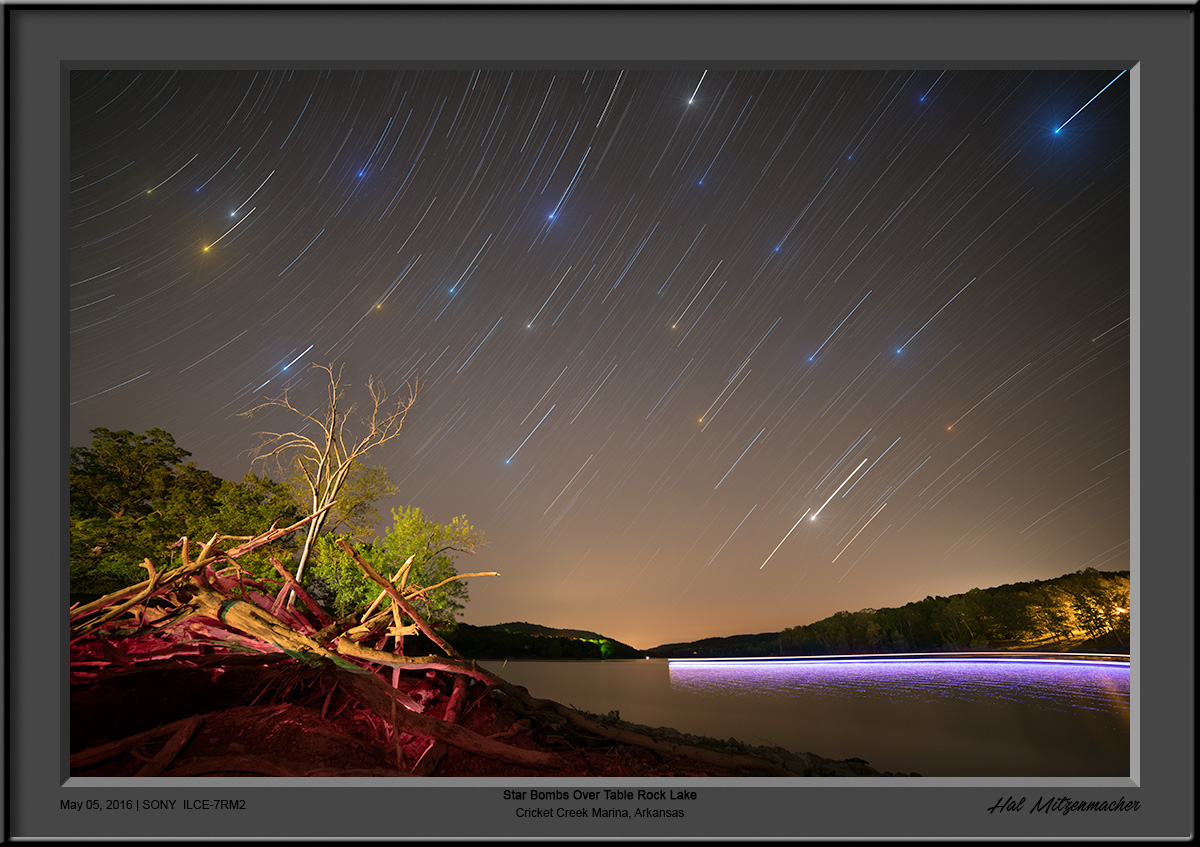
Mini lanterns simulate glowing embers
When I went to the Cricket Creek Public Use Area last year to shoot some night sky photographs, the Army Corp of Engineers had bulldozed some driftwood into a big pile on the beach right where I planned to set up my tripod. Rather than fret, I set up three of my mini-lanterns in the pile of driftwood, and turned them on to the red mode. It simulated the look of embers glowing from a fire, and created some interest in the foreground that otherwise would have been plain and barren.
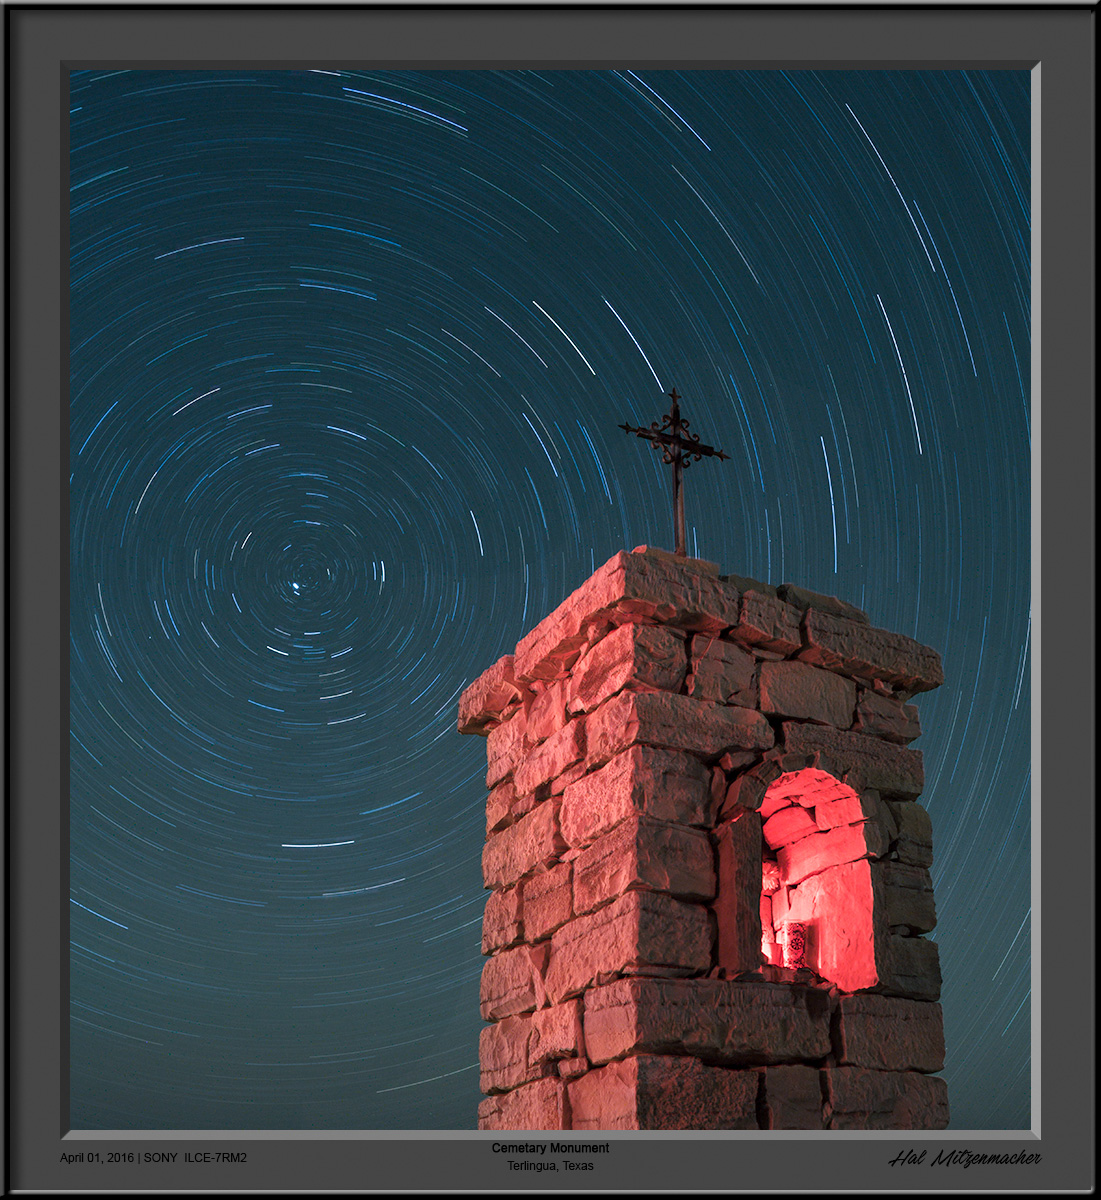
Mini lantern illuminating cemetery monument recess
A single mini lantern was used to illuminate the recess in the cemetery monument located at the entrance to the Terlingua Cemetery in Texas.
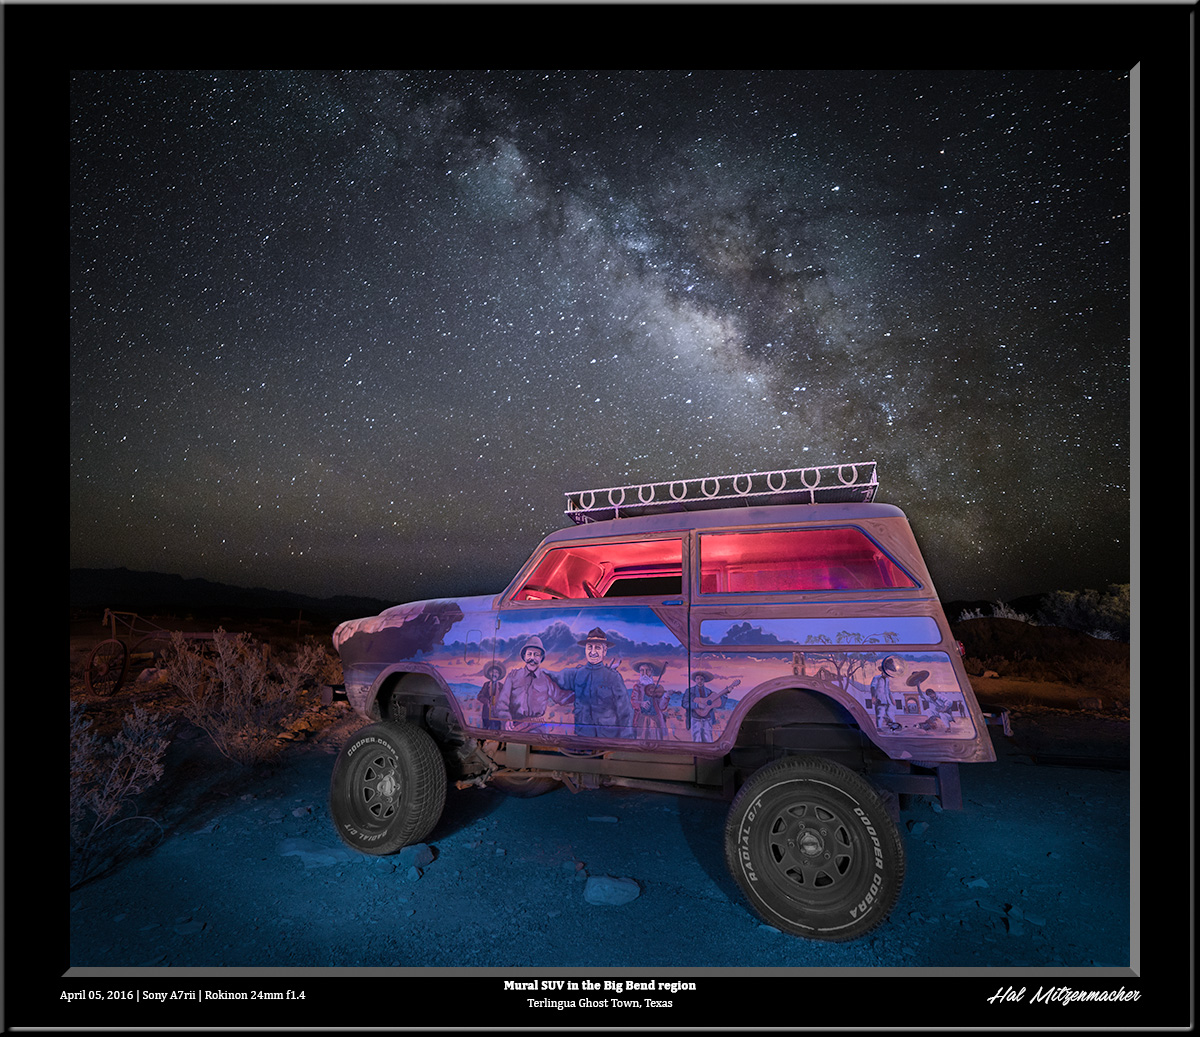 Mini lanterns illuminating the interior of this SUV
Also in Terlingua, Texas, two mini lanterns were used to light up the interior of this SUV, which adds a nice contrast to the mural painted on the side of the vehicle.
Various Tea Lamps
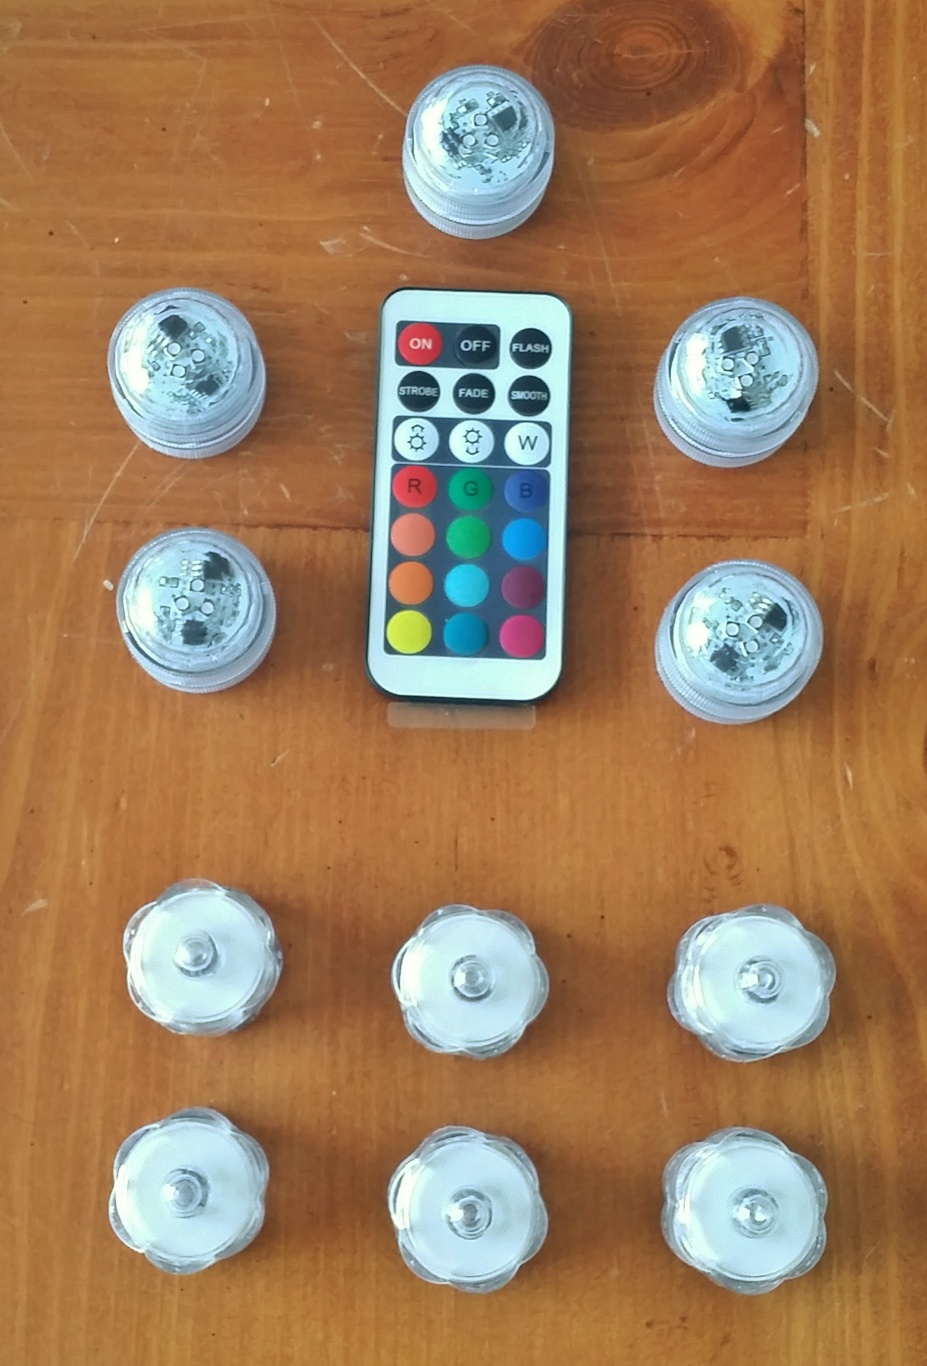
Tea lamps are small, low intensity, inexpensive lights that are useful for illuminating tents, windows, and other items in a night scene. I always keep a few in my gear bag, as you never know when they will come in handy. I have two kinds, as seen above.
The lights in the top of the photo are multi-colored and multi-intensity, Flameless LED Tea Lights. They are remote controlled, so that the intensity can be adjusted from a distance. This is useful if setting the lamps up in an enclosed space, such as a tent or automobile. It allows the light intensity to be easily balanced with the ambient light conditions.
The lights in the bottom of the photo are Floral Submersible Tea Lights, which are cheap, small and useful in a variety of situations.
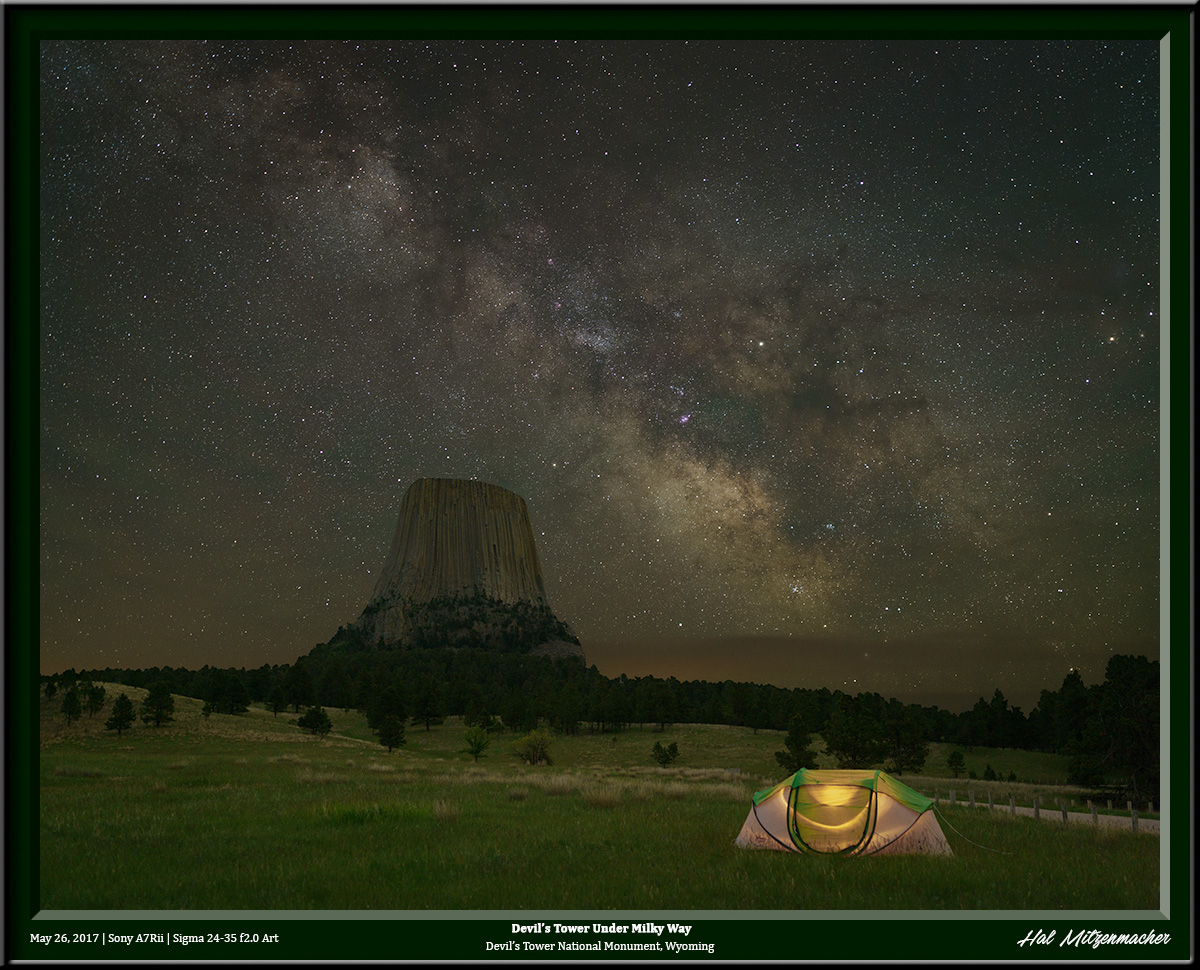
Tea lights illuminate interior of tent
Tea lights can be used to illuminate a variety of subjects, and are often used to illuminate the interior of a foreground element, such as this tent.
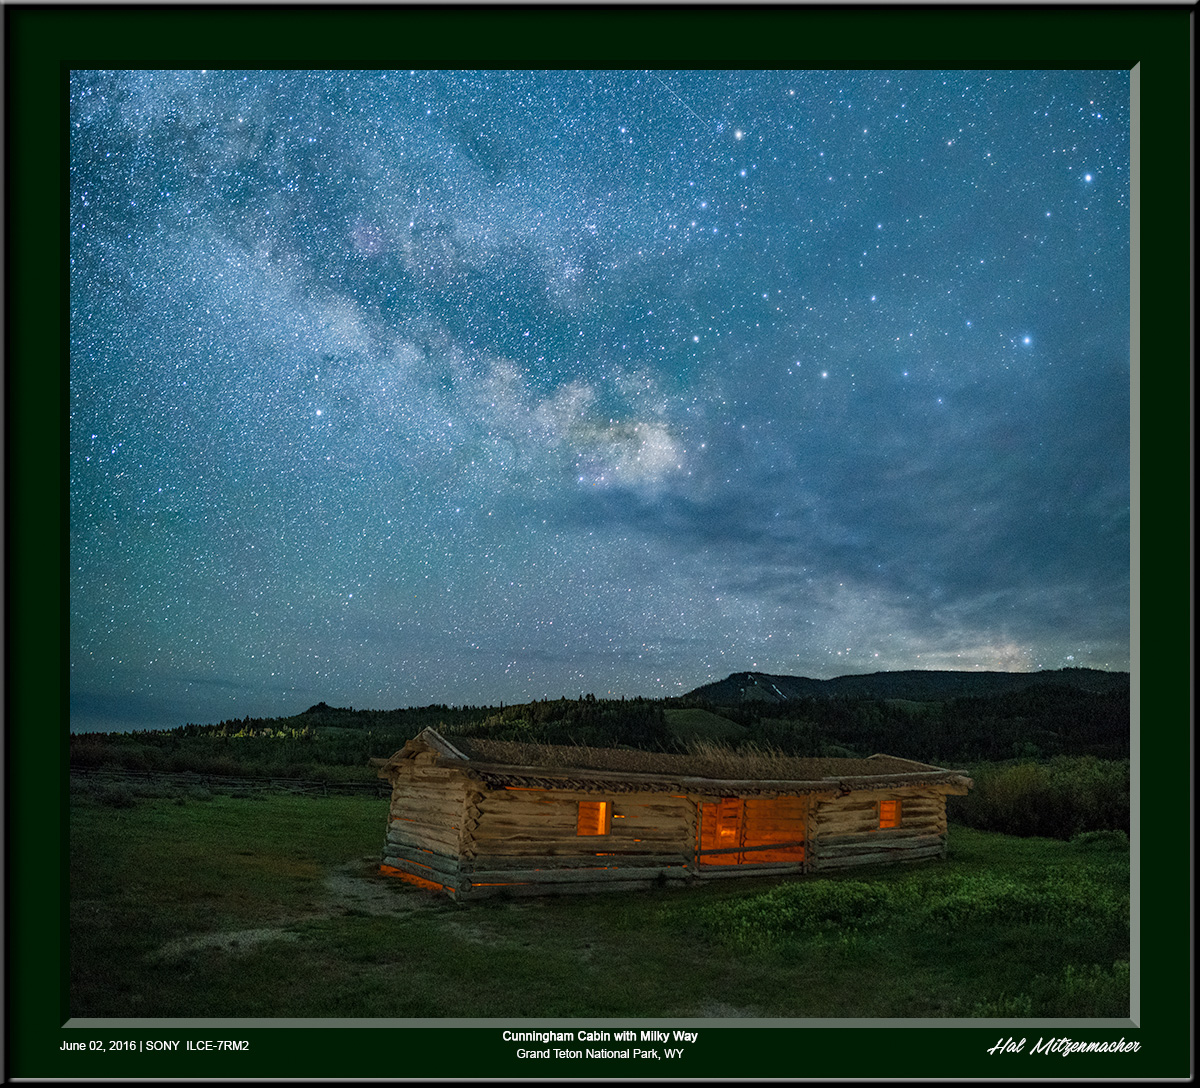
Tea lights illuminate interior of Cunningham Cabin
Tea lights are very useful to illuminate the interior of buildings and cabins that are the subject in a photograph. The additional lighting effect adds interest to the foreground and sets it apart from the sky.
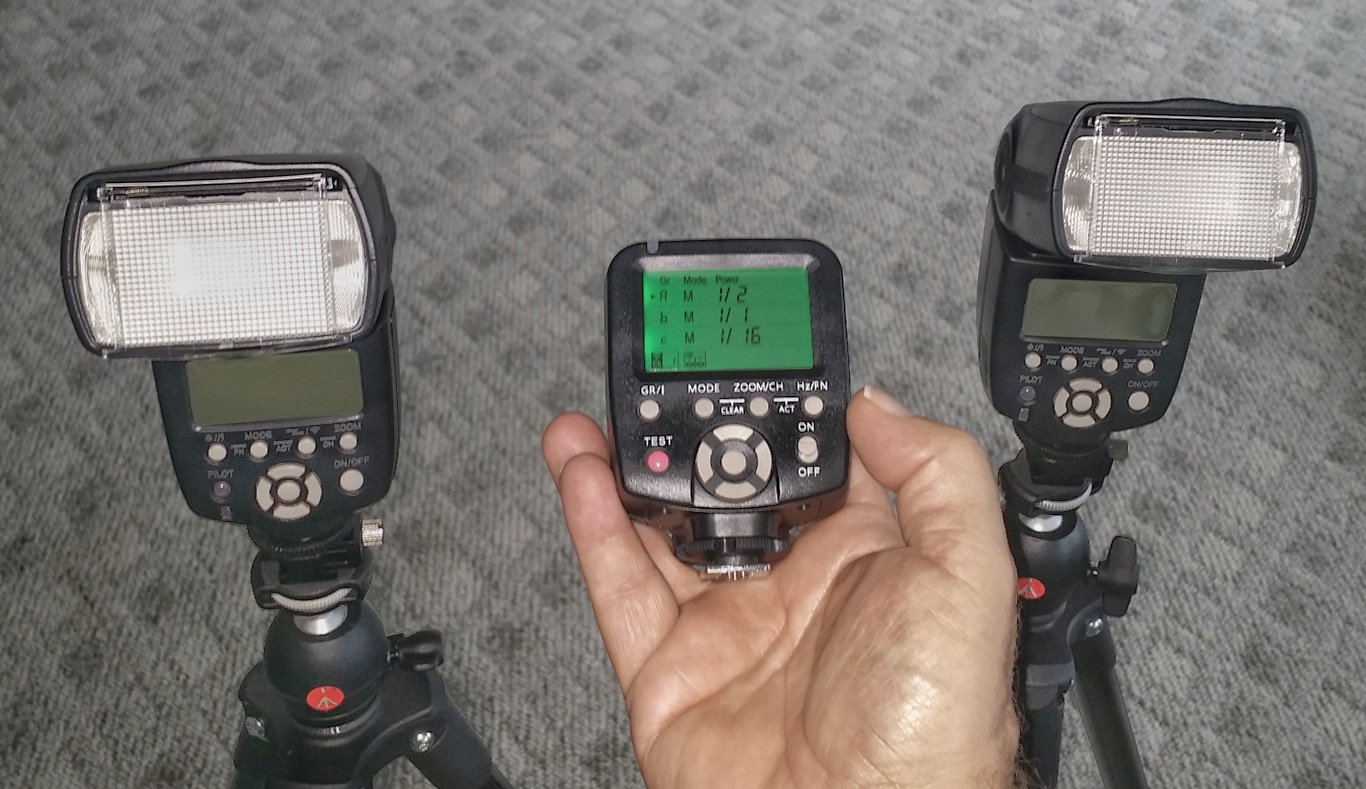
Yongnuo YN-560IV with remote trigger
The Yongnuo YN-560IV Wireless Flash Speedlites with LCD Flash Trigger Remote are inexpensive flash units that can easily be transported in ones lighting bag for use in night portraiture, or whenever the photographer want to freeze motion in an image. The remote controller allows easy adjustment of the speedlite output without having to move to each flash position for adjusting. All adjustments are made right from the control unit, which can be mounted on the camera or carried in hand.
Here are two examples of images made using the Yongnuo speedlites for a selfie type portrait taken during a long exposure.
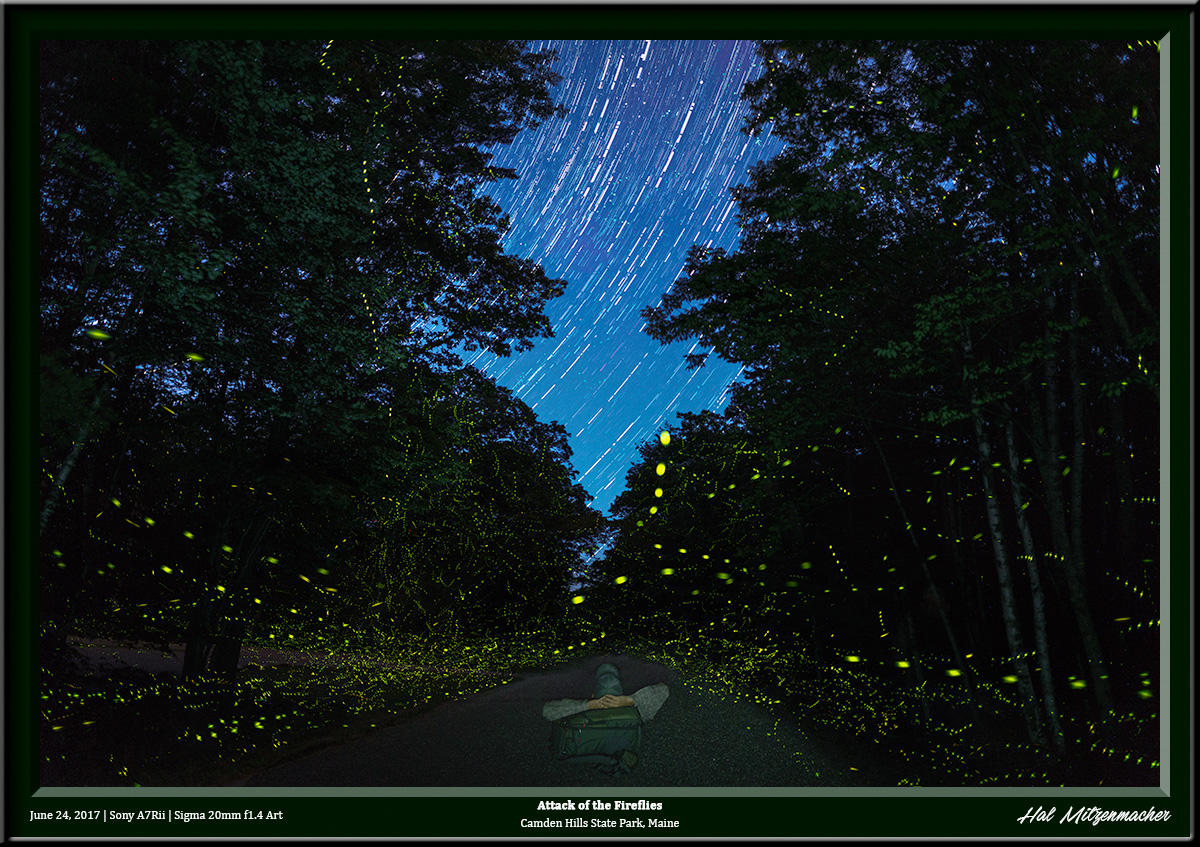
Pondering the Fireflies in Maine
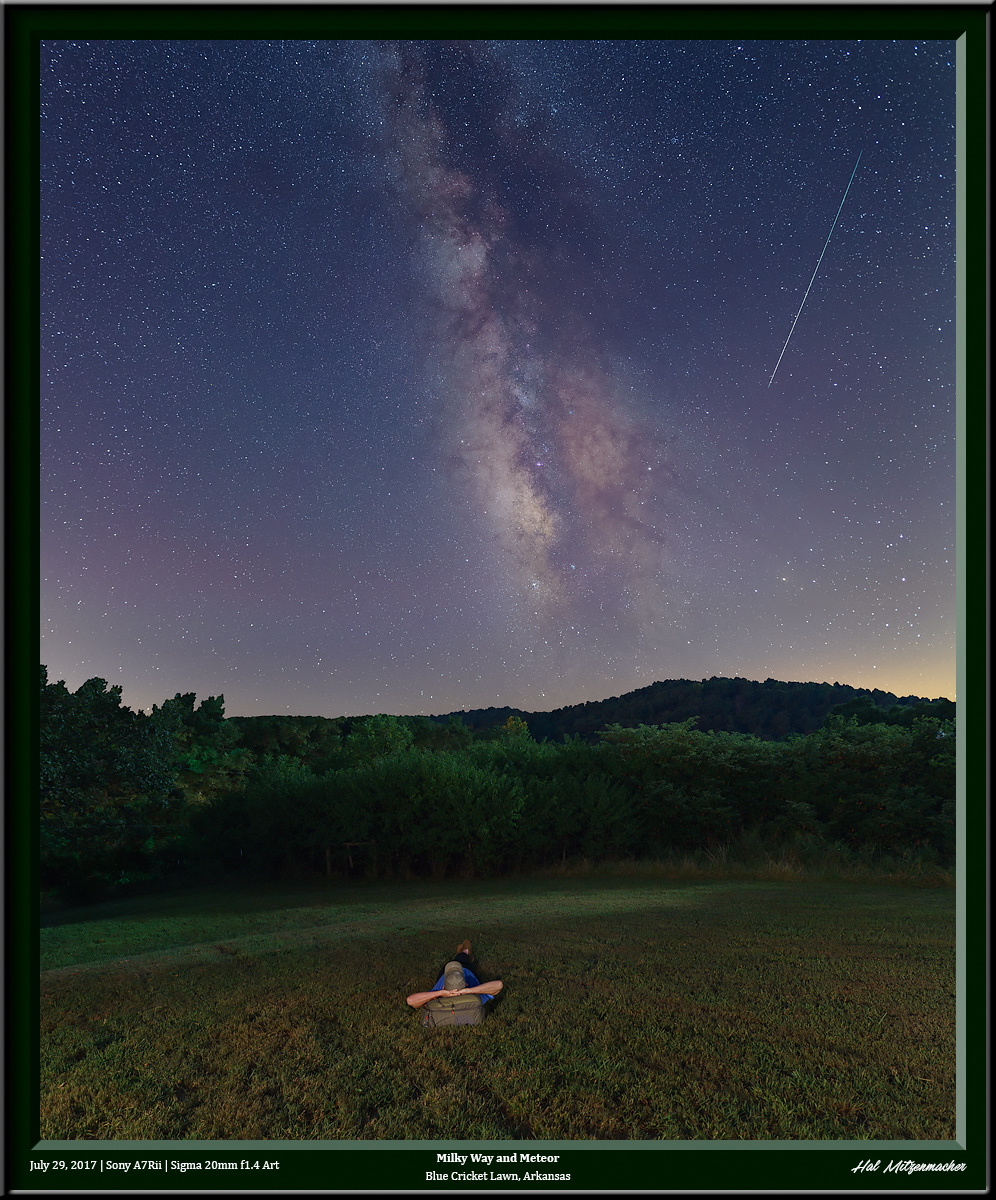
Pondering the heavens in Arkansas
Both of the photographs above include yours truly in the image. I used the Yongnuo speedlites to ensure a motion free selfie, which I blended into the long-exposure foreground to add a little interest to an otherwise ordinary photograph.
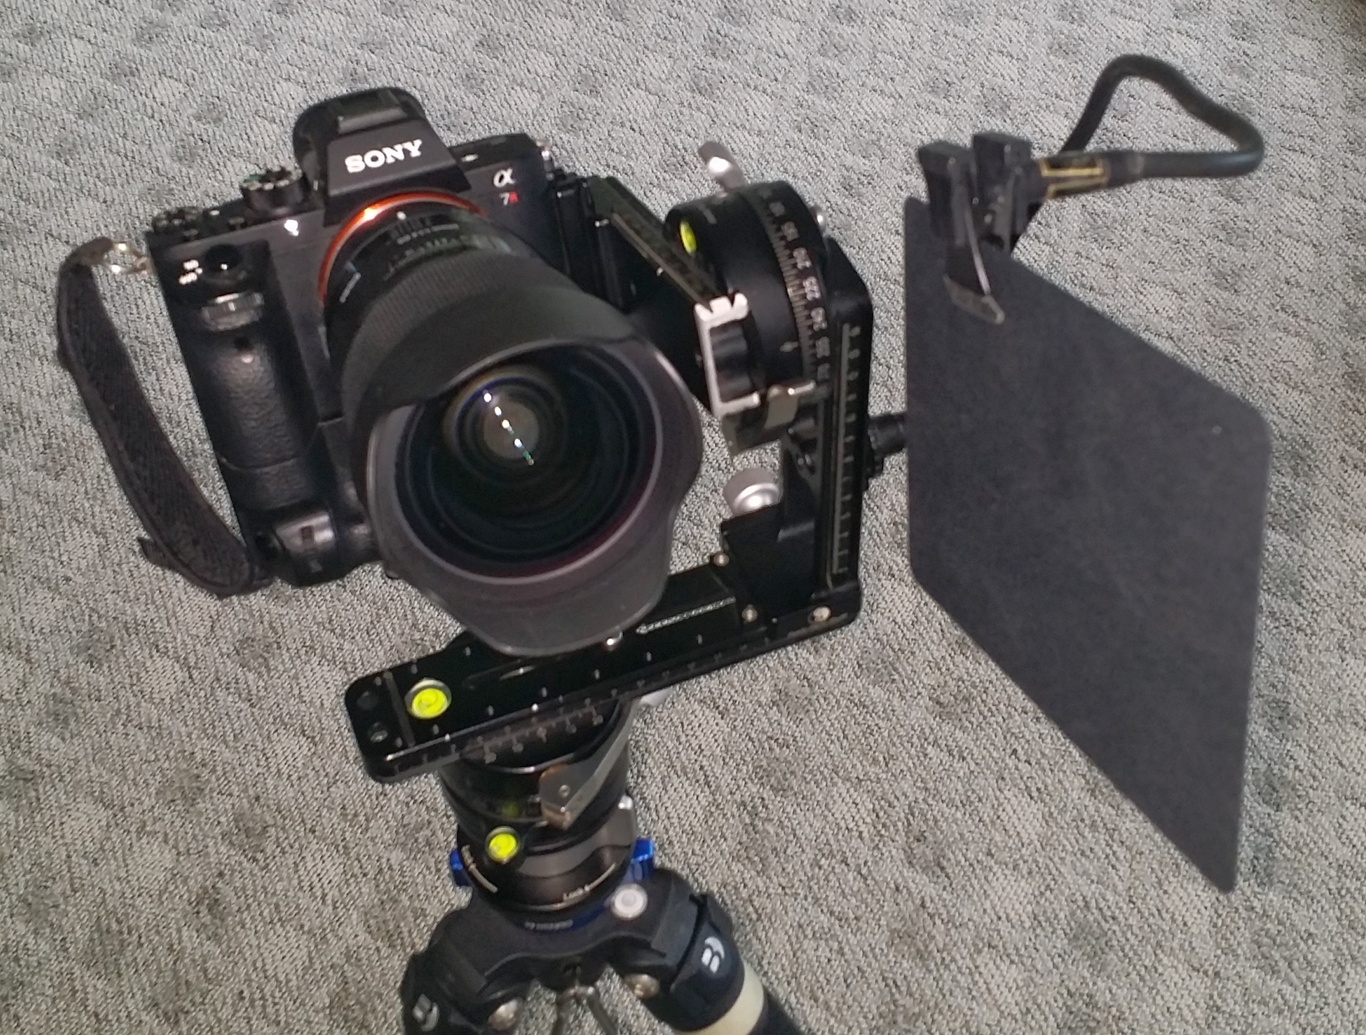
Flare Buster mounted to tripod
Lastly, I will present this device called a Flare Buster. It is actually more of an ANTI-LIGHTING device than a light per se, but I am including it here because it is an offshoot of the lighting decisions we make as night photographers. After reading about devices similar to this in Lance Keimig’s fine book, Night Photography and Light Painting, Second Edition, I searched far and wide for a device like this. I finally found it at B&H Photo, and it is called the Extra Long Flare Buster Kit.
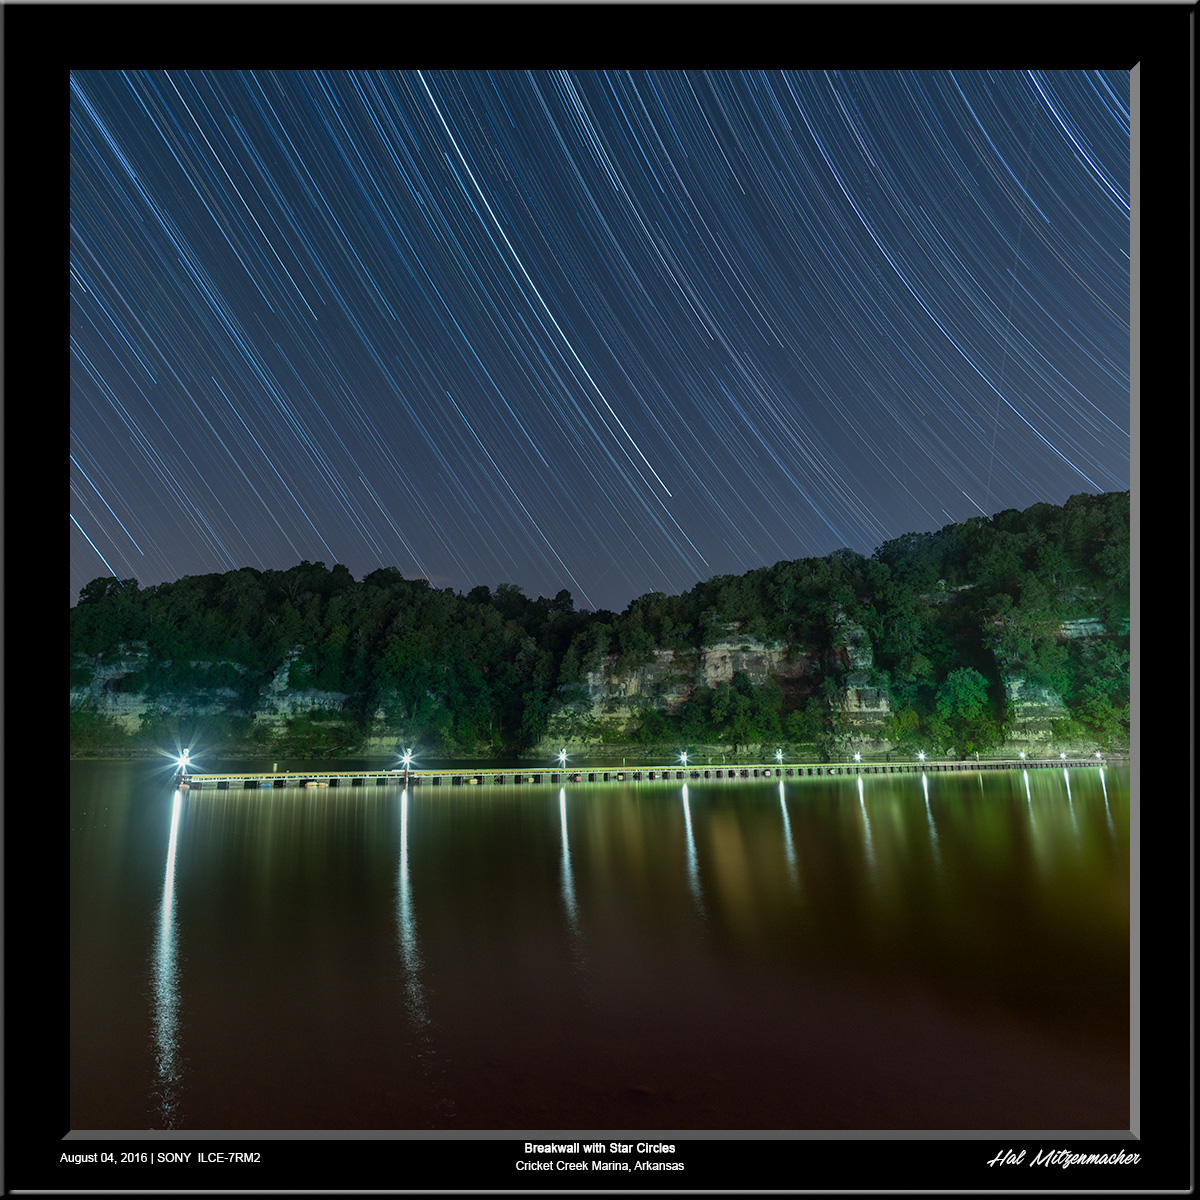
Image made possible with use of the Flare Buster kit
This is an image I tried making before owning the Flare Buster. In my previous attempt, the image was rendered unusable due to a giant distracting flare that was created by the glare from the marina lights, just outside the frame on the right of the image. On my next outing to capture this scene, I was prepared with the Flare Buster Kit, and it did the trick. I was rewarded with this shot.
Conclusion
There are many types of lights that can be used in the pursuit of night images. Some are general purpose tools, used frequently by night photographers, and some are more specialized, coming out of the gear bag only occasionally. Whichever methods and devices you use to create your night images are limited only by your imagination, and the lighting equipment you have at hand. In any case, added lighting is a fun dimension to add to your night photography repertoire.

