A Simple Way to Display Your Photographs

From the moment that I picked up my first camera and started taking pictures, I have always desired the ability to easily and quickly create and display a print of my work, and to do so in an inexpensive manner.  But in the film medium, the steps involved in film processing into negatives (or slides), darkroom enlargement onto photographic paper, and the subsequent chemical baths and processes needed to bring the print to fruition are neither quick nor easy.  And the cost of the enlarging equipment and processing supplies, as well as the need for a dedicated and specially equipped darkroom makes the endeavor anything but inexpensive.

Because of the costs and difficulties involved, I had opted to sit it out on the sidelines, with an occasional trip to the local camera store (or film counter) to take care of my photographic print needs.  But all things eventually change, and so it has with the entire film experience.  We are now in a digital world, and the equipment and processes have changed, along with the associated technologies utilized to produce a fine photographic print.

For the photographic hobbyist such as myself, there is a type of digital photo printer that has reduced the skill and effort required to produce an astoundingly high quality print to simply pushing a button.  The type of printer I am referring to is a dye-sublimation printer, such as the Olympus P440 unit shown below, the various Kodak dye-sub printers, and those produced by many other manufacturers as well.  The cost of this type of printer has dropped dramatically in recent years, to the point that some now cost no more than one decent enlarger lens alone!
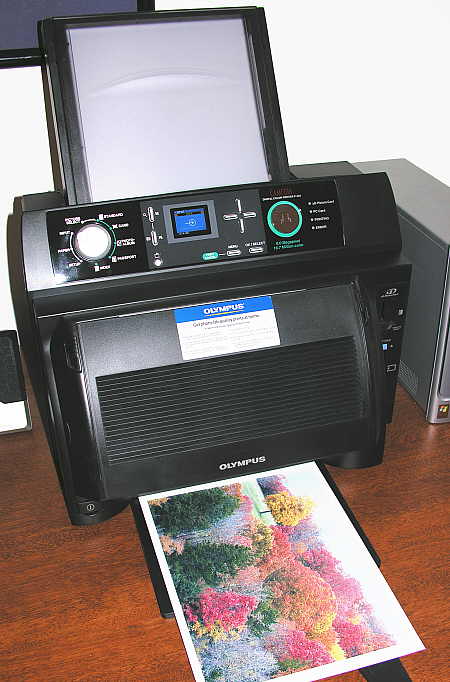
Olympus P440 Dye-Sub Printer

Using this type of printer is simple.  Either pop the camera’s memory card into the printer’s memory card-reader slot and print directly from the card, or connect the printer to your computer (via USB) and print from within any imaging application.

The results are indistinguishable from an 8″x10″ enlargement ordered from a photo lab, since they are using the same types of printer technologies to produce the prints that you order.  The cost for an 8″x10″ print (using the P440) is $1.60/print, factoring in the ribbon cartridge and the special dye-sub paper that is required.  Printing an 8″x10″ is quickly accomplished in a four-pass printing process, which leaves a clear protective coating on the finished print.
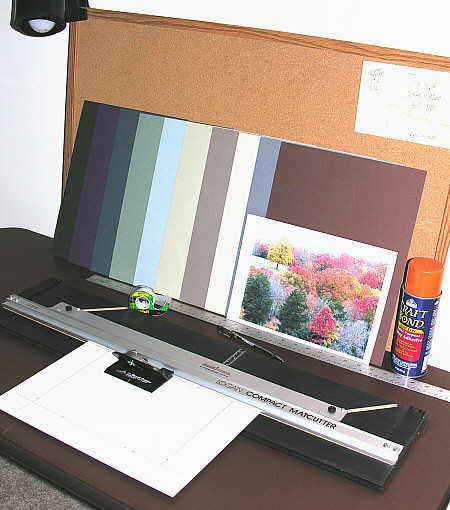
Simple matting tools

Here you can see the few simple tools and materials needed to mount, mat and frame your finished 8″x10″ photograph.  First, mat board in a color that compliments your picture and frame is necessary.  I purchase 11″x14″ mat board from Internet art supply storefronts, where an assortment of various colored boards can be purchased at a steep discount from normal prices.  By buying the mats this way, I can buy them for about 40 cents each, and I can usually find an appropriate color to fit my needs..  A mat cutter is essential to be able to produce a fine, bevel-cut mat edge, in whatever custom size and style you choose to use.  A straight edge/ruler for measuring mat opening layouts is necessary, and spray adhesive is used to cement the photograph to a backing board so that it does not warp and curl beneath the mat.
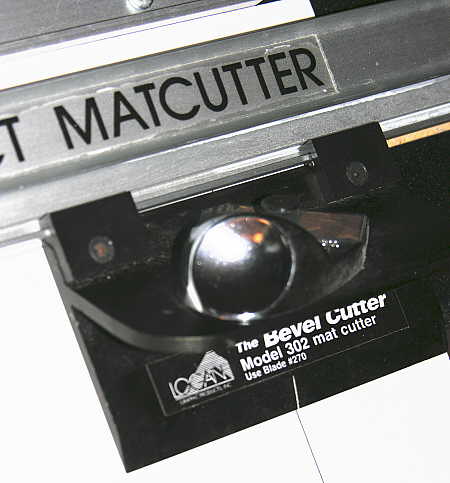
Mat Cutter

The mat cutter is composed of a few simple parts, one being the cutter assembly shown above.  The cutter rides along a track that keeps it moving straight and true, and the 45 degree slant to the blade produces a nice beveled cut.  Once the photo is attached to the backing board, the pre-cut mat is placed over the photo, and the entire unit is placed within the frame of your choosing.  Now, all you need to do is find an empty space on the wall to hang the mounted, matted and framed photograph on.
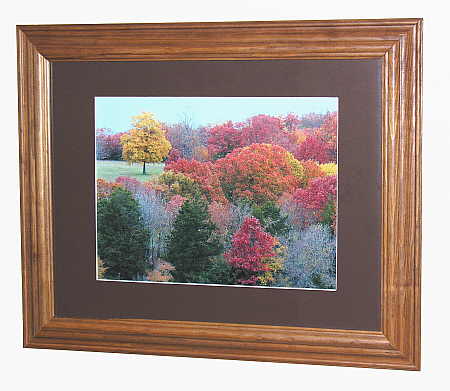
Finished product

The total cost for the print shown above?

8″x10″ photo paper and cartridge cost, per print = $1.60

11″x14″ mat board (2), per print = $0.80

11″x14″ Frame (Walmart special) =$5.00

Grand total = $7.40 for framed, mounted and matted print.

There you go – it’s as simply as that!

Photo Collages

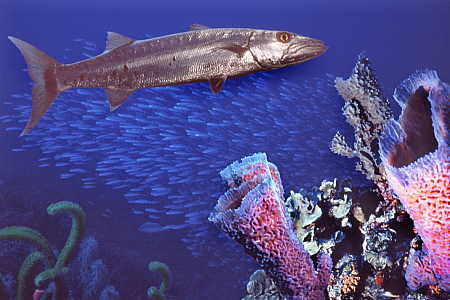
Collage of sponges and barracuda

FloridaCracker, the author of the informative and always interesting Pure Florida blog, inquired in a comment yesterday about two photographs that are to be found hanging on the wall in the background, as I hang precariously suspended, upside-down in Retta’s inversion chair.  The two photographs depict fish that I shot with a Nikonos underwater camera while scuba diving some 16 years ago.  Or should I say, the two photo-illustrations, because those prints on the wall are digital collages that I created back in the early days of my experimenting with scanned slides and Adobe Photoshop.

Before I show you how I created these collages, I would like to point out what was involved in creating these simple works some 16 years ago.  First, the hardware that was in use back then was abysmally slow by comparison to today’s standards.  Second, the shear size of the digital files required to generate a decent result from a film recorder (which was used to create the working negative of the finished product) overwhelmed the amount of RAM that standard operating systems and PC hardware could provide.  The trials and tribulations of such endeavors are outlined in a previous post, Bridging The Generation Gap, but for the purposes of this post, I’ll just say that it used to take my computer 7 minutes just to open up 1 image file.  The creation of just one of these collages usually involved at least a month of manipulation on my part, whereas today, with the tools and hardware that are available, the same result could be achieved in a matter of hours, if not minutes.  So now that I have apologized, sort of, for the amateurish results of my labors, here’s how it was accomplished.

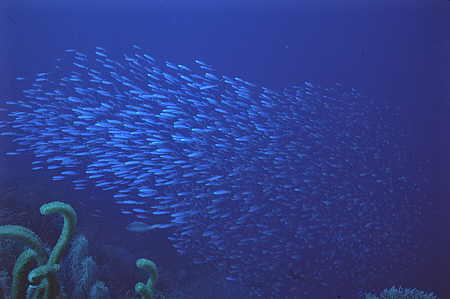
Background image

The first step in creating the collage is to find an interesting background.  It is absolutely amazing to see how much the background of a photo affects the quality of the overall composition.  The slide of the bait fish school above, taken off the island of Bonaire, is not a particularly compelling photograph.  While it is technically adequate, it seems to lack a central subject.  But as I studied it, I realized that it might make an interesting background for a future project, so I filed it away with the many other background slides that I was accumulating.  After deciding to use the slide as a background for the project which resulted in the slide that begins this post, I decided to add other visual elements.

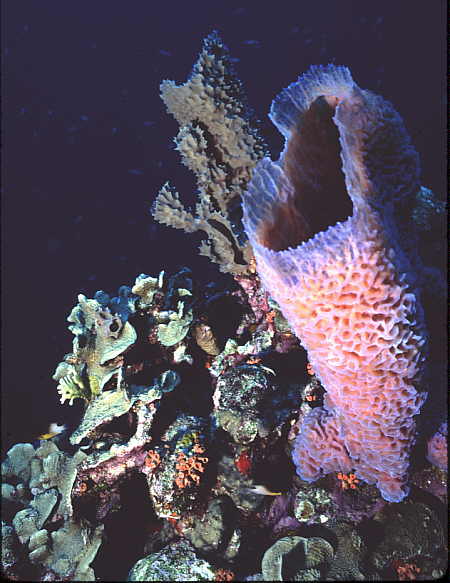
Purple sponge

This slide of coral and a purple sponge was taken off the island of Cozumel, and it also is a technically adequate photo, but with no pizazz.  Maybe this would work in my collage.

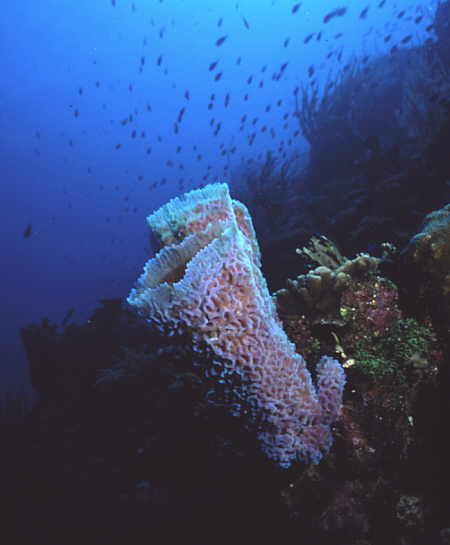
Purple sponge

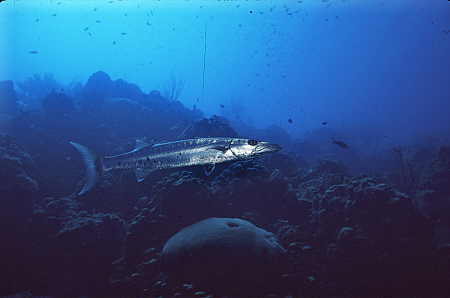
If one purple sponge is a good thing, then why not two?  So off I went to find another slide of sponges, this one again from Cozumel, but taken a year later than the first.  So now I had everything in place, except for a main subject.  Searching through my slides, I came across the following mediocre picture of a barracuda.

Barracuda

Without going into a detailed critique of this slide, I’ll just point out the obvious – it cries out for a better background.  Since I had all of the other element already in place, I added the barracuda to my composition, adjusted the various layers to my satisfaction, and created the photo-illustration that begins this post.  It is not the greatest composition in the world, to be sure, but it does manage to take some otherwise bland photographs, and blend them into a picture that is pleasant to view.

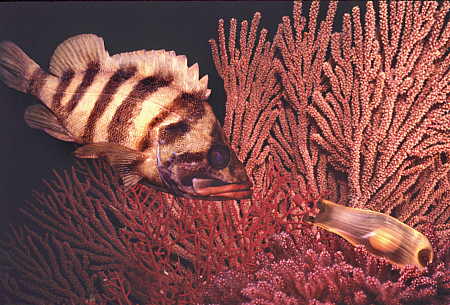
The second photo-illustration hanging on the wall is a collage that was assembled from various undersea life in the waters of the Pacific off the coast of California.

Treefish

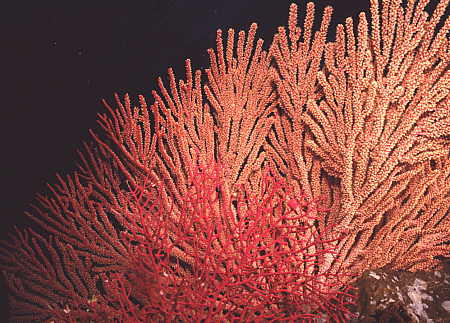
Again, I started with a slide taken from my collection of possible backgrounds, which in this case are some sea fans found at Anacapa Island.

Sea fans

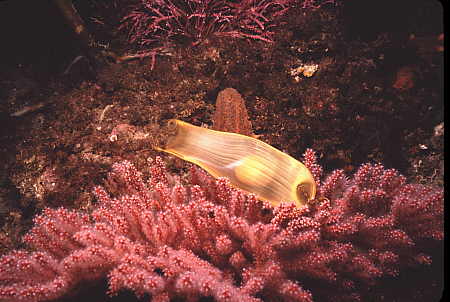
The next element that I chose to add to the composition was an egg sack from a swell shark, which is a common small shark that inhabits the sandy tracts near shore.

Nurse shark egg sack

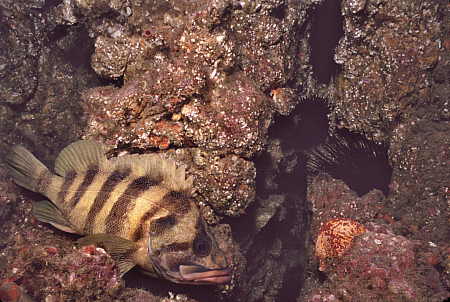
The final element in the arrangement was the main subject, a treefish, which is a type of rockfish that was once common around the Channel Islands of California.

Treefish

Let me take this opportunity to stress one thing.  These photo-illustrations are quite crude by today’s standards.  Never the less, the point to be made is that a photograph you might decide to toss just might be a “keeper” when you view it again in the context of a photo-illustration.  Maybe it lacks a central subject, but would make a good background.  Maybe it is a technically adequate photograph of a subject, with a terrible background.  Don’t throw it away!  If it is properly exposed, and if it is in sharp focus, put it away, and maybe some day in the future it will become an element in one of your prize-winning photo-illustrations.

NOTE: This would be a good spot to post my Photoshop policy – any photographs that you see on this blog are undoctored photographs (photos which have only undergone minor cropping, exposure and sharpening procedures, similar to what normally occurs in the darkroom process), unless I indicate otherwise with the term photo-illustration.  If I call an image a photo-illustration, then it is understood that anything goes!

Can You Stand It?

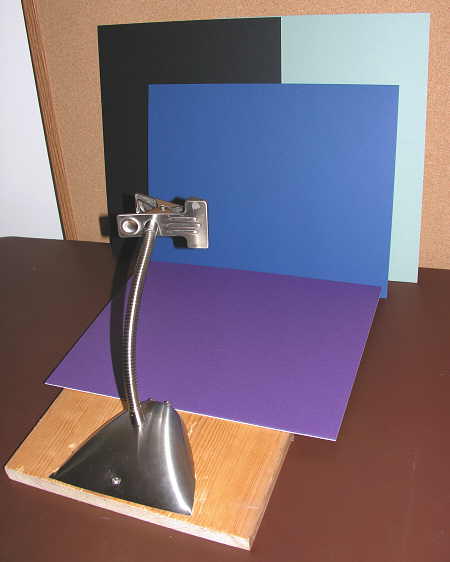
I can, with my new (but as of yet, unimproved) super-duper home-built photographic macro stand (SDHBPMS).  Past gentle readers of this blog might recall the “super-duper, multi-purpose, portable cartographic data collection machine”  (SDMPPCDCM) that I invented in order to do some digital mapping at our ranch in the post “If They Can Do It, So Can I.”  Well, I had a little free time on my hands today, so I set off to invent something to aid in my photographic hobbyist pursuits.  And every hobbyist with a camera capable of macro focusing should really have a macro stand.  “Why?” you may ask.  Because it’s a fun way to take macro shots of all kinds of interesting things.  Just use your imagination – you’ll think of some worthy subjects, I’m sure.  Here is my SDHBPMS, assembled with odds and ends that I found around the house.

super-duper home-built photographic macro stand (SDHBPMS)

I had an old flexible goose-neck clamp-on table lamp sitting unused in a closet, so I took my trusty tin-snips to the shade side of the lamp, cutting it in half.  I proceeded to flatten out the remaining part of the shade, creating a base which I attached to a piece of 1×12 board.  Now, I had a sturdy clamp at the end of a long flexible arm, all secured to a base capable of supporting many items suitable for macro photography.  Finding an old folding table and cork bulletin board in my “photolab” office closet, I created the setup you see above.  The cork board in the rear will allow me to pin up any background that I desire.  Shown in the picture are several different colored pieces of matte board.  Since I cut my own mats, I have a large choice in background colors to choose from.  The purpose for all the colors, as you will see, is to create a background that is substantially different from the subject matter that you are photographing.

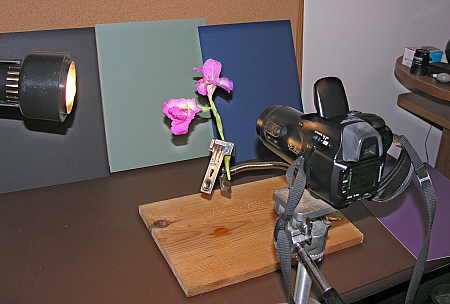
Macro stand in use

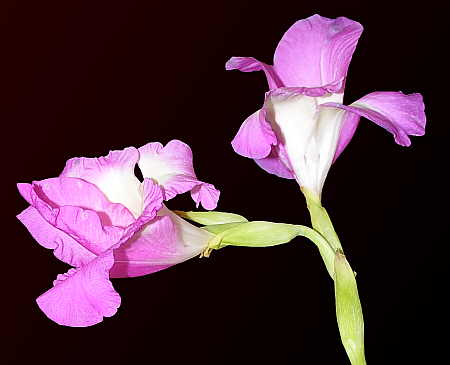
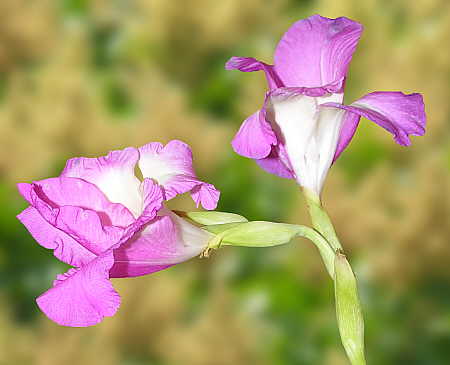
To test out the new SDHBPMS, I grabbed a gladiola from the flower vase in the kitchen, and popped it into the stand.  I selected the black matte board to use as the background, and set my camera up on a tripod and composed the picture in the camera’s monitor.  My technique was to set the camera self-timer to 10 seconds, press the shutter to allow the camera to precalculate exposure and focus, and then use a simple hand held lamp to paint the subject with side lighting.  This resulted in the following photo, which is what the macro stand setup was intended to achieve.

Gladiola against black background

The goal of the contrasting background is to allow the magic wand tool of your photo editing software to easily and quickly isolate the subject.  The technique is simple.  Using the magic wand, select the background color.  Keep adding to the selection with the magic wand tool if necessary, until all the background is selected.  Now simply invert the selection.  There you have it – a simple method of isolating a subject.  If you have chosen a good contrasting background color when you shoot the photo, this process will be quick and accurate.

Once you have isolated the subject from the background, you can easily change the background to transparent.  Now you will have an image of the gladiola, for example, that is surrounded by transparency.  This is great!  With this image you can do many things, simply and easily.  How about adding a different background to it, as I did below? 

Gladiola with sumac background

This background is from a photo in a previous post entitled Landscaping, My Way, in which there was a picture of dwarf sumac flowering in the summer.  This background is just some of those sumac blossoms, blurred with the Gaussian blur function of my software, and pasted behind the gladiola that I just photographed on my macro stand.

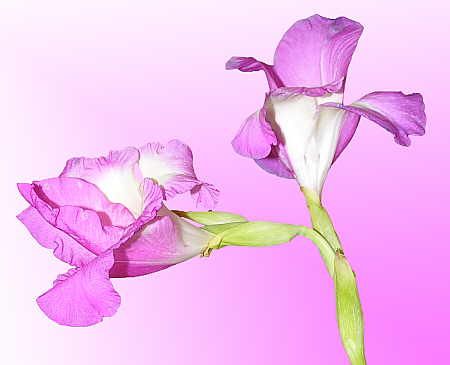
Perhaps you are an artistic sort of person, and would like to create your own background?  Anything is possible once you have isolated the subject.  I am not particularly artistic, so I usually just rely on simple gradients for these type of backgrounds, as shown in the following photo-illustration-

Gladiola with simple gradient background

The point is, if you are the type of person who enjoys tinkering, and also likes the hobby of photography, you might want to consider constructing your own home-brewed macro photography stand, as I have done.  In the meanwhile, I’ll let you ponder the size of the macro stand that I built to create the following photo-illustration-

How did he do that?

Â